Table of Contents
Advertisement
Quick Links
Advertisement
Table of Contents

Related Manuals for Samsung DW60K8550 Series


Summary of Contents for Samsung DW60K8550 Series
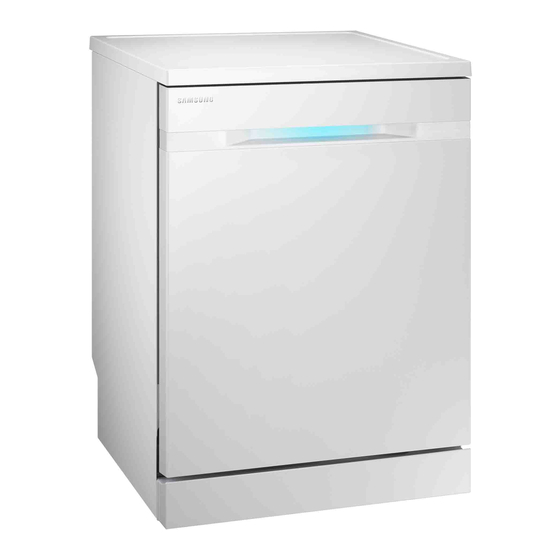
- Page 1 DW60H9970 Series DW60H9950 Series DW60K8550 Series Dishwasher user manual imagine the possibilities Thank you for purchasing this Samsung product. FS_DW9000H-00158A-08_EN.indd 1 FS_DW9000H-00158A-08_EN.indd 1 2016-08-12 2016-08-12 5:20:16 5:20:16...
-
Page 2: Table Of Contents
Contents SAFETY INSTRUCTIONS TROUBLESHOOTING AND INFORMATION CODES Check these points if your dishwasher... SETTING UP YOUR DISHWASHER Information codes PROGRAMME CHART Checking the parts and control panel Cycle selector Progress displays Meeting the installation requirements Programme chart Installing your dishwasher (only for installing under the sink) APPENDIX BEFORE USING THE PRODUCT... - Page 3 Safety instructions Congratulations on your new Samsung dishwasher. This manual contains important information on the installation, use and care of your appliance. Please take time to read this manual to take full advantage of your dishwasher’s many benefi ts and features.
- Page 4 This appliance must be positioned to be accessible to the power plug after installation, the water supply tabs and the drain pipes. For information on Samsung’s environmental commitments and product specifi c regulatory obligations e.g. REACH visit: samsung.com/uk/aboutsamsung/samsungelectronics/corporatecitizenship/data_corner.html INSTRUCTION ABOUT THE WEEE MARK Correct Disposal of This Product (Waste Electrical &...
- Page 5 To reduce the risk of fi re, electric shock, or injury to persons when using your appliance, follow basic precautions, including the following: WARNING This appliance is not to be used by persons (including children) with reduced physical, sensory or mental capabilities, or lack of experience and knowledge, unless they have been given supervision or instruction concerning use of the appliance by a person responsible for their safety.
- Page 6 Safety instructions The door should not be left in the open position since this could present a tripping hazard. WARNING: Knives and other utensils with sharp points must be loaded in the basket with their points down or placed in a horizontal position. This appliance is intended to be used in household and similar applications such as: •...
- Page 7 Inadvertently fi lling the salt reservoir with powder or liquid dishwasher detergent will damage the water softener. Make sure you have picked up the correct packet of dishwasher salt before fi lling the salt CAUTION reservoir. Please only use special coarse grained dishwasher salt for reactivation, as other salts may contain insoluble additives which can impair the functioning of the softener.
- Page 8 Safety instructions INSTRUCTIONS FOR INSTALLING YOUR DISHWASHER Before setting up the appliance, check it for any externally visible damage. Under no circumstances should you use a damaged appliance. A damaged appliance could be dangerous. WARNING The dishwasher must only be plugged into the electricity supply via a suitable switched socket. The electrical socket must be easily accessible after the dishwasher is installed so that it can be CAUTION disconnected from the electricity supply at any time.
- Page 9 Faulty components must only be replaced by original spare parts. Only when these parts are fi tted can the safety of the appliance can be guaranteed. Always disconnect the dishwasher from the electrical supply for maintenance work (switch off at the wall socket and remove the plug).
-
Page 10: Setting Up Your Dishwasher
When your dishwasher has been unpacked, make sure that you’ve received all the parts shown below. If your dishwasher was damaged during shipping, or if you do not have all the parts, contact Samsung Customer Service or your Samsung dealer. - Page 11 DW60H9970** Series Power Button Sanitize Button Cycle Selection Buttons Dry+ Button (Auto, ECO, Intensive, Delicate, Quick) Self Clean Button Control Lock Upper Button Display Lower (Zone Booster) Selection Buttons Delay Start Button Speed Booster Button Start (Reset) Button DW60H9950** / DW60K8550** Series Power Button Dry+ Button Cycle Selection Buttons...
- Page 12 Setting up your dishwasher When the cycle you selected has fi nished, all other indicator lights are turned Power off and the “0” light is illuminated for some minutes. Then, the Power turns off automatically. Select the appropriate wash cycle depending on the soil level of your dishes. After you select a cycle, the Cycle On light for that cycle lights.
- Page 13 Use this option when you want to dry your dishes more completely. The Dry+ option features a longer drying phase and higher temperatures in the last rinse cycle, resulting in improved drying performance with slightly higher power consumption. *Control Lock : This option allows you to lock the buttons on the control panel - except the Power button - so children cannot accidently start the dishwasher by pressing the buttons on the panel.
- Page 14 Setting up your dishwasher Delay a cycle for up to 24 hours in one-hour increments. To increase the delay start time, press or hold the Delay Start button. The hour displayed indicates the time at which the wash will be started. After setting the delay time, press the Start button, and then close the Delay Start door to start the cycle.
-
Page 15: Cycle Selector
CYCLE SELECTOR Light to heavily soiled daily used items, automatic detection of the Auto amount of soils. Normally soiled daily used items, with reduced energy and water consumption. * The Speed Booster option will reduce the cycle time. Intensive Heavily soiled items include pots and pans. Lightly soiled delicate items. -
Page 16: Meeting The Installation Requirements
Setting up your dishwasher MEETING THE INSTALLATION REQUIREMENTS Power supply and grounding Do not use an extension cord. Only use the power cord that came with the dishwasher. WARNING When preparing for the installation, ensure that your power supply off ers: •... - Page 17 Do not twist or bend the water supply hose connected to the Aqua-Stop. If the Aqua-Stop has been damaged, shut off the water taps and pull out the power plug right away. Once these steps have been taken, contact Samsung Customer Service or a qualifi ed technician. CAUTION...
-
Page 18: Installing Your Dishwasher (Only For Installing Under The Sink)
Setting up your dishwasher INSTALLING YOUR DISHWASHER (ONLY FOR INSTALLING UNDER THE SINK) SAMSUNG Electronics is not responsible for any product failure or damage that is caused by installing FREE STANDING MODEL under the sink. CAUTION STEP1. Removing the work top 1. - Page 19 STEP2. Product and enclosure dimensions This dishwasher is designed to be enclosed on the top and on both sides by a standard residential kitchen cabinet unit. The installation enclosure must be clean and free of any obstructions. The enclosure must be at least 600 mm wide, 575 mm deep, and 820 mm high. For the front door of the dishwasher to be fl...
- Page 20 Setting up your dishwasher STEP3. Leveling the dishwasher 1. You can adjust the height of the product by turning the legs. Slightly lift up the front and back of the product and turn the legs to adjust the height. You can adjust the height up to 40 mm. 2.
- Page 21 STEP4. Connecting the hoses and powering Max. 80 cm Min. 30 cm 1. Remove the hose holder which is attached to the product and cut off part of the holder as shown in the fi gure. 2. Fix it to the wall by fastening the 2 screws. 3.
-
Page 22: Before Using The Product For The First Time
Before using the product for the fi rst time SETTING MODE Turn on the dishwasher, and hold down both the Sanitize and Delay Start buttons for 3 seconds to enter Settings mode. Pressing the Sanitize button changes the mode in this sequence: Sound settings mode ... - Page 23 Better washing results require the use of soft water. Hard water contains impurities that can hinder the washing performance. You will need to soften the water if the water supply is harder than 1.0 mmol/ℓ (6 °d – German scale). To do this, you need: •...
-
Page 24: Using Dishwasher Salt
Before using the product for the fi rst time USING DISHWASHER SALT Filling the salt reservoir In order to use soft water, you need to fi ll the salt reservoir with dishwasher salt. Use dishwasher salt only. Do not use any other type of salt or solvent. This may damage the salt reservoir and the water CAUTION softening system. -
Page 25: Loading Your Dishwasher
Loading your dishwasher DISHWASHING GUIDELINES Follow these simple guidelines to get the best results and save energy. Before loading dishes Remove food remains such as bones, fruit seeds, etc. and waste such as toothpicks, paper napkins, etc. from your dishes. Food remains and waste can damage your dishes, make noise and even result CAUTION in a product malfunction. -
Page 26: Adjusting The Height Of The Upper Rack
ADJUSTING THE HEIGHT OF THE UPPER RACK You can adjust the height of the upper rack in your Samsung dishwasher so that the lower rack can accommodate larger sized dishes. Depending on where you set the upper rack height, the lower rack can accommodate plates up to 12 in. -
Page 27: Loading The Lower Rack
LOADING THE LOWER RACK Load cookware (pots, pans, etc.), up to 12 in. (30 cm) in diameter into the lower rack. The lower rack has been especially designed for dinner dishes, soup bowls, plates, pots, lids, and casserole dishes. We recommend loading cups, stemware, and small plates into the upper rack. -
Page 28: Loading The Upper Rack
Loading your dishwasher LOADING THE UPPER RACK The upper rack has been designed for small plates, mugs, glasses, and plastic items marked “dishwasher safe”. Turn over those plates when loading on the upper rack. This is to prevent water collection inside the plates. -
Page 29: Using The 3 Rd (Cutlery) Rack
USING THE 3 (CUTLERY) RACK Loading the cutlery rack In addition to the standard cutlery basket in the lower rack, some models come with a cutlery rack. The cutlery rack is best suited for fl atware and cooking or serving utensils. -
Page 30: Using Detergent
Loading your dishwasher USING DETERGENT All dishwasher cycles require detergent in the detergent compartment. Add the correct amount of detergent for the selected cycle to ensure the best performance. Use dishwasher detergent only. Regular detergent produces too much foam, which may decrease the dishwasher’s performance or cause it to malfunction. -
Page 31: Using Rinse Aid
USING RINSE AID Filling the rinse aid reservoir When the Rinse Refi ll indicator lights up on the control panel, refi ll with rinse aid. Your dishwasher has been designed to use liquid rinse aid only. Using a powdered rinse aid will clog the reservoir opening and cause the dishwasher to malfunction. Rinse aid improves the drying performance of the dishwasher. -
Page 32: Cleaning And Maintaining Your Dishwasher
Cleaning and maintaining your dishwasher Keeping your dishwasher clean improves its performance, reduces unnecessary repairs, and prolongs its life. CLEANING THE EXTERIOR It’s best to clean spills on the exterior of your dishwasher as they occur. Use a soft, damp piece of cloth to gently wipe away spills and dust from the control panel. Do not use benzene, wax, thinner, chlorine bleach, or alcohol. -
Page 33: Cleaning The Filters
CLEANING THE FILTERS 1. Turn off the dishwasher. 2. Rotate the fi lter insert counterclockwise to unfasten and then detach the fi lter insert. 3. Remove the fi ne fi lter (fl at rectangular). 4. Disassemble the coarse fi lter and micro fi lter. 5. -
Page 34: Cleaning The Nozzles
Cleaning and maintaining your dishwasher CLEANING THE NOZZLES If your dishwasher does not seem to be cleaning adequately or the nozzles seem clogged, you can clean each of the nozzles. When removing the nozzles, take care as they may break. Upper nozzle 1. -
Page 35: Storing Your Dishwasher
STORING YOUR DISHWASHER If you need to store your dishwasher for an extended period of time, fi rst drain the unit fully and then disconnect the water hose. Your dishwasher can become damaged if water is left in the hoses and internal components before storing it. -
Page 36: Check These Points If Your Dishwasher
Troubleshooting and information codes CHECK THESE POINTS IF YOUR DISHWASHER... PROBLEM POSSIBLE CAUSE SOLUTION Check if the door is latched and closed completely. Check whether the Upper Rack is properly joined with Duct Nozzle. Also, Check imbalance assembly of the Upper Rack. - Page 37 PROBLEM POSSIBLE CAUSE SOLUTION An inappropriate programme Select a programme according to the soil level was been selected. of the dishes as directed in this manual. The fi lter is contaminated or not Clean the fi lter and make sure the fi lters are correctly fasten.
- Page 38 Functional check. Turn off the dishwasher and start it again. If the problem continues, contact an authorized Samsung service centre. For any codes not listed above, refer to the back of this manual and contact your Samsung Customer Service centre.
-
Page 39: Programme Chart
Programme chart PROGRAMME CHART Auto Intensive Delicate Quick Very light to Amount of food remains Normal Heavy Light Light Heavy Prewash Prewash Prewash Prewash Mainwash Mainwash Mainwash Mainwash Mainwash Rinse Rinse ... -
Page 40: Appendix
Appendix DISPOSING THE DISHWASHER AND HELPING THE ENVIRONMENT Your dishwasher is manufactured from recyclable materials. If you decide to dispose of it, please observe your local waste disposal regulations. Cut off the power cord so that the appliance cannot be connected to a power source. - Page 41 For standard test The diagrams below show the proper way to load the baskets based on the European Standards (EN50242). • Washing capacity: 14 place settings • Test standard: EN50242/IEC60436 • Position of upper basket: Low • Programme: ECO • Additional options: Upper only + Lower only (Default) •...
- Page 42 Product fi che REGULATION (EU) No 1059/2010 “ * ” Asterisk(s) means variant model and can be varied (0-9) or (A-Z). Supplier SAMSUNG DW60H9950F* Model name DW60H9970U* DW60H9950U* DW60H9970F* DW60K8550F* Rated Capacity (place setting) Energy effi ciency class Eco label...
- Page 43 Note FS_DW9000H-00158A-08_EN.indd 43 FS_DW9000H-00158A-08_EN.indd 43 2016-08-12 2016-08-12 5:20:41 5:20:41...
- Page 44 QUESTIONS OR COMMENTS? COUNTRY CALL OR VISIT US ONLINE AT 0330 SAMSUNG (7267864) www.samsung.com/uk/support EIRE 0818 717100 www.samsung.com/ie/support DD68-00158A-08 FS_DW9000H-00158A-08_EN.indd 44 FS_DW9000H-00158A-08_EN.indd 44 2016-08-12 2016-08-12 5:20:41 5:20:41...