
Related Manuals for Arista 7280R3 Series


Summary of Contents for Arista 7280R3 Series
- Page 1 Quick Start Guide 7280R3 and 7280R3A Series Data Center Switches AristaNetworks www.arista.com DOC-06039-01...
- Page 2 © Copyright 2023 Arista Networks, Inc. The information contained herein is subject to change without notice. Arista Networks and the Arista logo are trademarks of Arista Networks, Inc in the United States and other countries. Other product or service names may be trademarks or service marks of others.
-
Page 3: Table Of Contents
Contents Chapter 1: Overview................1 1.1 Scope..........................1 1.2 Receiving and Inspecting the Equipment................2 1.3 Installation Process......................2 1.4 Safety Information.......................3 1.5 Obtaining Technical Assistance..................3 1.6 Specifications........................3 Chapter 2: Preparation................. 9 2.1 Site Selection........................9 2.2 Tools and Parts Required for Installation................. 11 2.3 Electrostatic Discharge (ESD) Precautions.............. - Page 4 Contents A.1.2 Port Indicators....................40 A.2 Rear Status Indicators......................41 Appendix B: Parts List...............45 B.1 Accessory Kits........................45 B.2 Cables..........................50 B.3 Ground Extender Kit (Optional)..................50 Appendix C: Front Panel..............51 Appendix D: Rear Panel..............55 Appendix E: Maintenance and Field Replacement......57 E.1 Considerations........................57 E.2 Power Supplies.........................57 E.2.1 Removing a Power Supply.................
-
Page 5: Chapter 1: Overview
Chapter 1 Overview This guide is intended for properly trained service personnel and technicians who need to install selected Arista Networks Data Center Switches. The following topics are covered in this section: • Scope • Receiving and Inspecting the Equipment •... -
Page 6: Receiving And Inspecting The Equipment
Receiving and Inspecting the Equipment Upon receiving the switch, inspect the shipping boxes and record any external damage. Retain packing materials if you suspect that part of the shipment is damaged; the carrier may need to inspect them. If the boxes were not damaged in transit, unpack them carefully. Ensure that you do not discard any accessories that may be packaged in the same box as the main unit. -
Page 7: Safety Information
No user serviceable parts inside. Refer all servicing to qualified service personnel. Aucune pièce réparable par l'utilisateur à l'intérieur. Confiez toute réparation à un technicien qualifié. Specifications List of specifications of Arista data center modular switches and components covered by this guide. - Page 8 Table 1: Switch Specifications (Dimensions and Weights) Switch Size (W x H x D) Weight DCS-7280R3 Series switches (1RU) DCS-7280PR3-24 48.3 x 4.4 x 58.2 cm (19 x 1.75 12.7 kg (28.0 lbs.) x 23.6 inches) DCS-7280PR3K-24 48.3 x 4.4 x 58.2 cm (19 x 1.75 12.7 kg (28.0 lbs.)
- Page 9 Overview 48.3 x 8.8 x 76.1 cm (19 x 3.50 23.6 kg (52.0 lbs.) DCS-7280CR3-96 x 30.0 inches) DCS-7280CR3K-96 48.3 x 8.8 x 76.1 cm (19 x 3.50 23.6 kg (52.0 lbs.) x 30.0 inches) DCS-7280R3A Series switches (1RU) DCS-7280CR3A-24D12 48.3 x 4.4 x 59.2 cm (19 x 1.75 14.8 kg (32.6 lbs.) x 23.3 inches)
- Page 10 PSU shipped and supported by your switch. Note: Use only the PSU models supported by the switch. Some switches described in this guide could use power supplies that may no longer be available. Contact your local Arista representative for more information.
- Page 11 Overview Table 4: Switch Specifications (Power Draw) Switch Power Draw (Typical / Supported Power Supply Maximum) DCS-7280R3 Series switches (1RU) DCS-7280PR3-24 650 W / 1100 W PWR-1511-AC, PWR-1511-DC DCS-7280PR3K-24 650 W / 1100 W PWR-1511-AC, PWR-1511-DC DCS-7280DR3-24 560 W / 1110 W...
- Page 12 DCS-7280DR3AM-36 643 W / 1283 W PWR-2411-AC, PWR-2411-DC DCS-7280DR3AK-36 643 W / 1283 W PWR-2411-AC, PWR-2411-DC DCS-7280CR3A-48D6 PWR-1511-AC, PWR-1511-DC DCS-7280CR3AM-48D6 PWR-1511-AC, PWR-1511-DC DCS-7280CR3AK-48D6 PWR-1511-AC, PWR-1511-DC DCS-7280CR3A-72 PWR-1511-AC, PWR-1511-DC DCS-7280CR3AM-72 PWR-1511-AC, PWR-1511-DC DCS-7280CR3AK-72 PWR-1511-AC, PWR-1511-DC...
-
Page 13: Chapter 2: Preparation
Airflow Orientation: The fans and PSUs determine the airflow direction through the switch. The color of the visible handles or labels indicate the airflow direction. Note: The figures shown use representative Arista switches to illustrate airflow directions. Refer to Rear Panel to determine the airflow for your switch. - Page 14 • Red Handle: Air Exit module. The following figure shows the airflow through the switch with air exit modules: Figure 2: Air Exit Module Orient the switch such that the airflow through the switch is from the cooler to the hotter aisle. If the airflow direction is not compatible with the installation site, reorient the fan modules to circulate air in the opposite direction.
-
Page 15: Tools And Parts Required For Installation
Preparation • Clearance areas to the front and rear panels allow for unrestricted cabling. • All front and rear panel indicators can be easily read. • Power cords can reach from the power outlet to the connector on the rear panel. Important: All power connections must be removed to de-energize the unit. -
Page 17: Chapter 3: Rack Mounting The Switch
Chapter 3 Rack Mounting the Switch Rack Mounting the Switch (1RU) The following topics are covered in this section: • Two-Post Rack Mount (1RU) Note: Use the rack-mount parts included with your switch for mounting. For heavier switches, only a four-post mount is supported. •... -
Page 18: Attaching Mounting Brackets To The Chassis (Two-Post)
Note: Deep and heavy devices could droop and cause damage to the equipment rack if front or rear mounted. Arista recommends only center mounting for switches covered in this guide when two-post mounting is required, and the switch accessory kit includes two-post mounting ears. -
Page 19: Inserting The Switch Into The Rack (Two-Post)
Rack Mounting the Switch The following figures show the correct bracket attachment for a center mount. Figure 5: Attaching the Mounting Brackets to the Switch Chassis To remove the mounting bracket from the chassis, lift the front edge of the mounting bracket clip with a flathead screwdriver and slide the bracket away from the front flange (opposite from the installation direction). - Page 20 • 2 rail-rods • 2 rail-slides The rail-rods and rail-slides assemble into two identical slide-rails. Note: For longer chassis, there are two additional pieces to help the switch engage with the rails earlier. Each chassis side has attachment pins that align with bracket holes. Pin orientation is symmetric and equidistant, supporting bracket placements where the flange is flush with the front switch panel, flush with the rear panel, or not flush with either panel.
-
Page 21: Attaching Mounting Brackets To The Chassis (Four-Post)
Rack Mounting the Switch 3.2.1 Attaching Mounting Brackets to the Chassis (Four-Post) The following figure displays the front bracket alignment for mounting the switch into a four-post rack. Figure 9: Attaching the Mounting Brackets to the Switch Chassis (KIT-7101 shown) Figure 10: Attaching the Mounting Brackets to the Switch Chassis (with Deep Chassis Adapters) This procedure attaches mounting brackets to the switch chassis as depicted by the preceding... -
Page 22: Assembling The Rails Onto The Equipment Rack
2. Place the bracket flush on the chassis with attachment pins protruding through key-openings. 3. Slide the bracket toward the front flange until the bracket clip locks with an audible click. 4. Attach the deep chassis adapters as needed. To remove the mounting bracket from the chassis, lift the front edge of the mounting bracket clip with a flathead screwdriver and slide the bracket away from the front flange (opposite from the installation direction). -
Page 23: Attaching The Switch To The Rack
Rack Mounting the Switch 1 Rail-slide 4 Rail (assembled) 2 Rail-rod 3 Rack plugs 2. Attach rail to the right rear rack post by inserting rod-end rack plugs into post slots (Figure 13: Attaching the Rails). The slide assembly must be inside the right posts, relative to the left rack posts. -
Page 24: Rack Mounting The Switch (2Ru)
1. Lift the switch into the rack and insert the mounting brackets into the slide rails. Figure 14: Inserting the Switch onto the Rails 2. Slide the switch on the rails, toward the rear posts, until the mounting bracket flanges are flush with the rail flanges attached to the rack posts. -
Page 25: Two-Post Rack Mount (2Ru)
Two-Post Rack Mount (2RU) The 2RU switches covered in this guide do not support two-post rack mounting. The accessory kit contains only the four-post RMK components. Contact your local Arista Networks representative for further information if you require two-post rack mounting. - Page 26 pieces before mounting the switch into a four-post rack. The two assemblies supplied with the switch are identical. Figure 16: Accessory Kit Components 1 Rail bracket (front) 4 Locking clip 7 Switch mounting ear 2 Rail bracket (rear) 5 Rail mounting ear 3 Switch bracket (for attaching 6 Thumb screw to switch)
-
Page 27: Attaching Mounting Brackets To The Chassis
Rack Mounting the Switch 3.5.2 Attaching Mounting Brackets to the Chassis The following figure displays the switch bracket alignment for mounting the switch into a four-post rack. Figure 17: Front Bracket Alignment 1 Switch bracket 3 Matching attachment hole 2 Attach point This procedure attaches mounting brackets to the switch chassis as depicted by the following figure. -
Page 28: Expanding The Rails
3.5.3 Expanding the Rails The rail is a two-piece mechanism. The rail length is adjusted by sliding the rail-rod inside the rail- slide. The rail clip prevent extension of the rail beyond the maximum supported distance between front and rear rack posts. When the rail is contracted, the rail clip is closest to the slide end. The rail is initially contracted and must be expanded to attach onto the rack. -
Page 29: Attaching The Switch To The Rack
Rack Mounting the Switch 3.5.5 Attaching the Switch to the Rack After the rails are installed, the switch slides on the rails into the rack. Each bracket includes a thumb screw that attaches the switch to the rail. Note: Illustrations shown could be different based on your accessory kit. 1. -
Page 31: Chapter 4: Cabling The Switch
DC Power Supplies • Connecting Serial and Management Cables Note: Arista fixed switches take approximately 5 to 10 minutes to boot completely. Grounding the Switch After mounting the switch into the rack, connect the switch to the data center ground. - Page 32 As shown in the following example, the attachment point is on the bottom of the chassis for the switches that support the KIT-GND-EXT-1RU grounding kit. Table 5: Grounding Kit Adapter Support Switch Grounding Kit Adapter DCS-7280R3 Series switches DCS-7280PR3-24 KIT-GND-EXT-1RU DCS-7280PR3K-24 KIT-GND-EXT-1RU...
-
Page 33: Grounding Adapter Assembly (2Ru)
Cabling the Switch Earth Grounding Adapter Assembly for DCS-7280CR3-32P4 shows the exploded and assembled views of using the KIT-GND-EXT-1RU grounding kit. Figure 23: Earth Grounding Adapter Assembly for DCS-7280CR3-32P4 1. Identify all the components to be assembled: Note: The chassis is shown upside down in the figure above. •... - Page 34 Table 6: Grounding Kit Adapter Support (2RU) Switch Grounding Kit Adapter DCS-7280R3 Series switches DCS-7280CR3-96 Attach directly - right angle lug recommended DCS-7280CR3K-96 Attach directly - right angle lug recommended DCS-7280R3A Series switches DCS-7280DR3A-54 KIT-GND-EXT-2RU DCS-7280DR3AM-54 KIT-GND-EXT-2RU DCS-7280DR3AK-54 KIT-GND-EXT-2RU DCS-7280DR3A-36...
-
Page 35: Connecting Power Cables
Connecting Power Cables You must use an approved power cord compliant with local and national electrical codes or order one from Arista for use with the switch. Some power cords are shipped with each switch as part of the accessory kit. -
Page 36: Dc Power Supplies
Note: Several PSUs support both forward and reverse airflow directions. Figure 25: AC Power Supply Example The accessory kit provides power cables for some switches. 4.4.2 DC Power Supplies The following DC power supplies are supported. Note: Several PSUs support both forward and reverse airflow directions. PWR-500-DC PWR-1511-DC PWR-3001-DC... - Page 37 Cabling the Switch Le calibre du fil doit être conforme aux exigences locales et nationales et les codes électriques. Utiliser du fil de cuivre. Important: Apply ground connection to the switch first during installation and remove last when removing power. Appliquer connexion à...
-
Page 38: Connecting Serial And Management Cables
7. Shrink the tubing with a heat gun. Figure 27: Lug Preparation 1 Insulated wire 3 Lug B 1/2” 2 Heat-shrink tubing A 1/4” C 5/8” Note: Dimension B is the width of the lug (not visible on the right angle lug). 4.4.2.2 Connecting a DC Power Supply to Power Source Figure 28: DC PSU Connection Example... - Page 39 Cabling the Switch • RJ-45 to DB-9 serial adapter cable. • RJ-45 Ethernet cable. Table 8: RJ-45 to DB-9 Connections lists the pin connections of the RJ-45 to DB-9 adapter cable. Table 8: RJ-45 to DB-9 Connections RJ-45 DB-9 RJ-45 DB-9 Note: RJ-45 to DB-9 connections: For models with a console management port on the rear panel, RJ-45 pin 1 (RTS) is connected to RJ-45 pin 8 (CTS);...
- Page 40 1 USB port 3 Console serial port 2 Ethernet management port Figure 30: Rear Panel Ports 1 System status LED 3 Activity status LED 5 USB port 2 Ethernet management port 4 Console serial port 6 Link status LED Connect the front or rear panel ports as follows: •...
-
Page 41: Chapter 5: Configuring The Switch
Chapter 5 Configuring the Switch Arista switches ship from the factory in Zero Touch Provisioning (ZTP) mode. ZTP configures the switch without user intervention by downloading a startup configuration file or a boot script from a location specified by a DHCP server. - Page 42 11. When the management port IP address is configured, use this command to access the switch from a host, using the address configured in step 9. ssh admin@192.0.2.8 Refer to the Arista Networks User Manual for complete switch configuration information.
-
Page 43: Appendix A: Status Indicators
Appendix A Status Indicators The following topics are covered in this section: • Front Indicators • Switch Indicators • Port Indicators • Rear Status Indicators Front Indicators Reviews the Switch and Port Indicators of the device. A.1.1 Switch Indicators Front panel LEDs are located on the right side of the chassis and display system, fan, and power supply status. -
Page 44: Port Indicators
Table 9: Switch Indicators LED States (Front) LED Name LED State Device Status System Status LED Blinking Green System is powering up. Green Normal operations. Due to power supply and fan redundancy, this LED will remain green if a single fan or power supply is missing or in a failed state. -
Page 45: Rear Status Indicators
Status Indicators Table 10: Port LED States (Front) LED State Status Port link is down. Green Port link is up. Yellow Port is software disabled. Flashing Yellow Port failed diagnostics. Rear Status Indicators Fan and power supply modules are accessed from the rear panel. Each fan and power supply module contains an LED that reports the module status. - Page 46 The AC Power Supply Status LEDs are on the power supply modules, as displayed in Figure 35: AC Power Supply Status LED. Figure 35: AC Power Supply Status LED 1 Power supply status LED Table 12: AC Power Supply Status LED States (Rear) provides status conditions that correspond to the AC power supply status LED states.
- Page 47 Note: You can narrow down the error condition by logging in to the switch to view the specific device state. Refer to the Arista User Manual’s Switch Environment Control chapter, under the topic Viewing Environment Status, for further information on the show...
-
Page 49: Appendix B: Parts List
Appendix B Parts List This appendix lists the installation parts contained in the switch accessory kit. Each switch provides an accessory kit that contains parts that are required to install the switch. Four-post rack mount is recommended for all switches. Use the rack-mount parts included with your switch for mounting. - Page 50 Assembly Part Number Description Quantity ASY-00921 Two-post brackets IEC-320/C13-C14, 13 A, 250 V, 2 meter RJ45 Patch Panel Cable, 2 meter RJ45 to DB9 Adapter Cable, 2 meter Identity tag ASY-01098-05 Rack ear with captive thumb screw ASY-00905-0X Front rack rail with guide block ASY-00916-0X Rear sliding rack rail with guide block Figure 37: Two-Post Rack Mounting Brackets...
- Page 51 Parts List Assembly Part Number Description Quantity ASY-01098 Four-post brackets KIT-7002 The kit supports rack depths of twenty two to thirty two inches for four-post rack mounting of 2RU switches. The kit includes two-post rack mount parts. If needed, only center mount is recommended for two-post mounting.
- Page 52 Assembly Part Number Description Quantity IEC-320/C13-C14, 13 A, 250 V, 2 meter RJ45 Patch Panel Cable, 2 meter RJ45 to DB9 Adapter Cable, 2 meter Identity tag ASY-05581 Rack ear with captive thumb screw ASY-05578 Front rack rail with guide block ASY-00916 Rear sliding rack rail with guide block ASY-05576...
- Page 53 Parts List Assembly Part Number Description Quantity IEC-320/C19-C20, 16 A, 250 V, 2 meter RJ45 Patch Panel Cable, 2 meter RJ45 to DB9 Adapter Cable, 2 meter Identity tag ASY-05581 Rack ear with captive thumb screw ASY-05578 Front rack rail with guide block ASY-00916 Rear sliding rack rail with guide block Deep chassis adapter...
-
Page 54: Cables
Power cables: IEC-320/C19-C20, 16 A, 250 V, 2 m RJ-45 Patch Panel Cable RJ-45 to DB9 Adapter Cable Warning: All provided power cables are for use only with Arista products. Ground Extender Kit (Optional) Lists the cables required for installation of the device. -
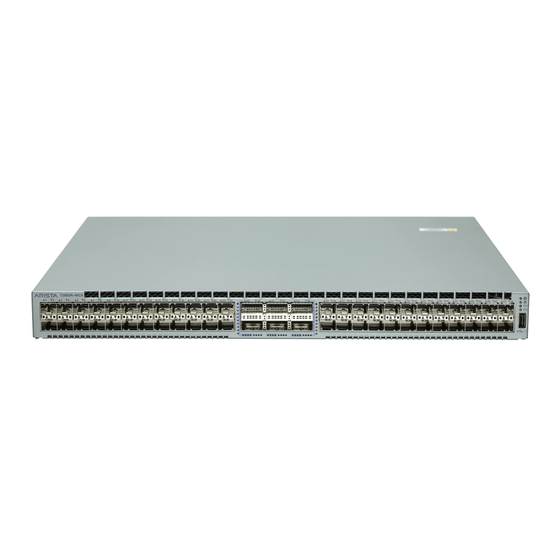
Page 55: Appendix C: Front Panel
Appendix C Front Panel This appendix displays the front panel of all switches covered by this guide. Note: All devices are designed to fit into a 19” rack. The appearance may be different than those shown based on PSU and fan modules used. The port speed groups support breakout configurations which could be EOS version dependent. - Page 56 1 System status LED 3 Power supply 1 status LED 5 Port numbers 2 Fan status LED 4 Power supply 2 status LED 6 Port-speed group Figure 43: DCS-7280CR3-32D4, 7280CR3K-32D4 and DCS-7280CR3K-32D4A 1 System status LED 3 Power supply 1 status LED 5 Port numbers 2 Fan status LED 4 Power supply 2 status LED...
- Page 57 Front Panel 1 Port speed groups 4 Power supply 1 status LED 7 USB port 2 System status LED 5 Power supply 2 status LED 8 Ethernet Management port 3 Fan status LED 6 Console port (serial) 9 Port numbers Figure 46: DCS-7280SR3-48YC8, DCS-7280SR3K-48YC8 and DCS-7280SR3K-48YC8A 1 Port numbers 3 Fan status LED...
- Page 58 1 ToD Connector 5 Console port (serial) 9 Power supply 2 status LED 2 E-Sync clock connectors 6 System status LED 10 Line system ports (OSFP) 3 Ethernet management 7 Fan status LED 11 Port numbers port 4 USB port 8 Power supply 1 status LED Figure 49: DCS-7280DR3A-36, DCS-7280DR3AK-36 and DCS-7280DR3AM-36 1 Line system port (OSFP)
-
Page 59: Appendix D: Rear Panel
Appendix D Rear Panel All switches covered by this guide use one of the rear panels shown below. Depending on the installed power supply module, the appearance could be different from those shown. Some of the PSUs have a velcro strap for cable management. Note: All devices are designed to fit into a 19”... - Page 60 Figure 52: Rear Panel with Ground Attach Point (2RU) 1 Fan module 1 4 Fan module 4 7 Earth grounding pad 2 Fan module 2 5 Power supply module 1 3 Fan module 3 6 Power supply module 2 Figure 53: Rear Panel with Separation Between Fans 1 and 2 (no ground) 1 Fan Module 1 5 Fan Module 3 9 Release...
-
Page 61: Appendix E: Maintenance And Field Replacement
All slots must be filled or covered with a blank for operation (even though power supply or fans may not be functional). • Before you begin, refer to the Arista Networks document Safety Information and Translated Safety Warnings available at: https://www.arista.com/en/support/product-documentation. Note: Descriptions for the removal and replacement of power supplies and fans are for a representative power supply or fan. -
Page 62: Installing A Power Supply
3. Push the power supply release lever and remove the power supply Figure 54: Removing and Installing Power Supply. Figure 54: Removing and Installing Power Supply 1 Release lever 2 Remove PSU E.2.2 Installing a Power Supply You must make space for installing the power supply by removing an existing one Removing a Power Supply. -
Page 63: Installing A Fan Module
Maintenance and Field Replacement 2. Push the fan module release lever and slide the fan module out of the switch. Figure 55: Removing Fan Module 1 Release lever E.3.2 Installing a Fan Module You must make space for installing the fan module by removing an existing one. 1. -
Page 65: Appendix F: Regulatory Model Numbers
Appendix F Regulatory Model Numbers This appendix lists the Regulatory Model Numbers (RMNs), where applicable, for the product models for the switches described in this document. Table 14: Regulatory Model Numbers and Product Numbers Regulatory Model Number (RMN) Product Number(s) AN1708 DCS-7280PR3-24, DCS-7280PR3K-24 AN1730... -
Page 67: Appendix G: Taiwan Rohs Information
Appendix G Taiwan RoHS Information This appendix provides Taiwan RoHS information for switches covered by this guide. For Taiwan BSMI RoHS Table, go to https://www.arista.com/assets/data/pdf/AristaBSMIRoHS.pdf.
Need help?
Do you have a question about the 7280R3 Series and is the answer not in the manual?
Questions and answers