Table of Contents
Advertisement
Quick Links
Advertisement
Table of Contents

Related Manuals for HP 1660C Series


Summary of Contents for HP 1660C Series
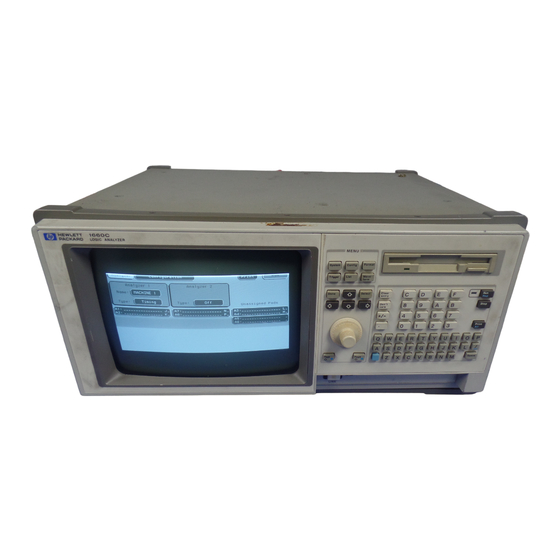
- Page 1 Service Guide Publication number 01660-97026 First edition, November 1997 For Safety information, Warranties, and Regulatory information, see the pages at the end of the book. © Copyright Hewlett-Packard Company 1987–1997 All Rights Reserved. HP 1660C/CS/CP-Series Logic Analyzers...
- Page 2 HP 1660CP-Series Logic Analyzers The HP 1660C-Series are 100-MHz State/500 MHz Timing Logic Analyzers. The HP 1660CS-Series includes all the features of the HP 1660C-Series, as well as a 2-channel, 1 GSa/s oscilloscope. The HP 1660CP-Series includes all the features of the HP 1660C-Series, as well as a 32-channel pattern generator.
- Page 3 • Lightweight miniprobes Options The HP 1660C-Series, HP 1660CP-Series, and HP 1660CS-Series Logic Analyzers can be ordered with the optional Thinlan and Ethertwist LAN ports. Service Strategy The service strategy for this instrument is the replacement of defective assemblies.
- Page 4 In This Book This book is the service guide for the HP 1660C/CS/CP-Series Logic Analyzers and is divided into eight chapters. Chapter 1 contains information about the logic analyzer and includes accessories, specifications and characteristics, and equipment required for servicing.
-
Page 5: Table Of Contents
Table of Contents 1 General Information Accessories 1–2 Specifications (logic analyzer) 1–3 Specifications (oscilloscope) 1–4 Specifications (pattern generator) 1–4 Characteristics (logic analyzer) 1–5 Characteristics (oscilloscope) 1–5 Characteristics (pattern generator) 1–6 Supplemental Characteristics (logic analyzer) 1–7 Supplemental Characteristics (oscilloscope) 1–10 Recommended test equipment (logic analyzer) 1–14 Recommended test equipment (oscilloscope) 1–15 Recommended test equipment (pattern generator) 1–16 2 Preparing for Use... - Page 6 Contents To test the single-clock, single-edge, state acquisition (logic analyzer) 3–24 Set up the equipment 3–24 Set up the logic analyzer 3–25 Connect the logic analyzer 3–27 Verify the test signal 3–29 Check the setup/hold combination 3–31 Test the next channels 3–36 To test the multiple-clock, multiple-edge, state acquisition (logic analyzer) 3–37 Set up the equipment 3–37 Set up the logic analyzer 3–38...
- Page 7 Contents To test the voltage measurement accuracy (oscilloscope) 3–73 Set up the equipment 3–73 Set up the logic analyzer 3–74 Connect the logic analyzer 3–75 Acquire the data 3–76 To test the offset accuracy (oscilloscope) 3–77 Set up the equipment 3–77 Set up the logic analyzer 3–78 Connect the logic analyzer 3–79 Acquire the zero input data 3–80...
- Page 8 To remove and replace the HP 1660C-series acquisition board 6–11 To remove and replace the HP 1660CS-series oscilloscope board 6–12 To remove and replace the HP 1660CP-series pattern generator board 6–13 To remove and replace the front panel and keyboard 6–14 To remove and replace the intensity adjustment 6–14...
- Page 9 Exploded View 7–4 Power Cables and Plug Configurations 7–8 8 Theory of Operation Block-Level Theory 8–3 The HP 1660C/CS/CP Series Logic Analyzer 8–3 The Logic Acquisition Board 8–7 The Oscilloscope Board 8–10 The Pattern Generator Board 8–13 Self-Tests Description 8–15 Power-up Self-Tests 8–15...
-
Page 11: General Information
Accessories 1–2 Specifications (logic analyzer) 1–3 Specifications (oscilloscope) 1–4 Specifications (pattern generator) 1–4 Characteristics (logic analyzer) 1–5 Characteristics (oscilloscope) 1–5 Characteristics (pattern generator) 1–6 Supplemental Characteristics (logic analyzer) 1–7 Supplemental Characteristics (oscilloscope) 1–10 Recommended test equipment (logic analyzer) 1–14 Recommended test equipment (oscilloscope) 1–15 Recommended test equipment (pattern generator) 1–16 General Information... -
Page 12: Accessories
01660-84501 RS-232-C Loopback Connector 01650-63202 PS2 Mouse A2839B * The HP 1660CS and HP 1660CP have their own User’s Guide. For those products, the HP 1660C User’s Guide is not shipped. Note 1 Quantities: 8 - 1660C.CS Note 2 Quantities: 4 - 1660C.CS... -
Page 13: Specifications (Logic Analyzer)
General Information Specifications (logic analyzer) Specifications (logic analyzer) The specifications are the performance standards against which the product is tested. Maximum State Speed 100 MHz Minimum State Clock Pulse Width 3.5 ns Minimum Master to Master Clock Time 10.0 ns Minimum Glitch Width* 3.5 ns ±... -
Page 14: Specifications (Oscilloscope)
= 1.4 x sample interval). Sample interval is defined as sample rate # bits in ADC 3. Digitizing level = (#vertical divisions)( ), where LSB=2 Specifications (pattern generator) There are no specifications for the pattern generator portion of the HP 1660CP-Series Logic Analyzers. 1–4... -
Page 15: Characteristics (Logic Analyzer)
HP 1660C,CP,CS HP 1661C,CP, CS HP 1662C,CP,CS HP 1663C,CP,CS * For all modes except glitch. Characteristics (oscilloscope) The HP 1660CS Logic Analyzers also include the following characteristics: Maximum Sample Rate 1 Gigasample per second Number of Channels Rise Time 1.4 ns... -
Page 16: Characteristics (Pattern Generator)
General Information Characteristics (pattern generator) Characteristics (pattern generator) The HP 1660CP Logic Analyzers also include the following characteristics: Output channels 16 channels at 200 MHz clock; 32 channels at 100 MHz clock Memory depth 258,048 vectors Logic levels (data pods) TTL, 3-state TTL/3.3v, 3-state TTL/CMOS,... -
Page 17: Supplemental Characteristics (Logic Analyzer)
Timing Sequence Levels Maximum Occurrence Counter Value 1,048,575 Pattern Recognizers Maximum Pattern Width 136 channels in HP 1660C,CP,CS, 102 channels in HP 1661C,CP,CS, 68 channels in HP 1662C,CP,CS, 34 channels in HP 1663C,CP,CS Range Recognizers Range Width 32 bits each... - Page 18 Waveforms can be time-correlated on the same displays. Timing Waveform Pattern readout of timing waveforms at X or O marker. Bases Binary, Octal, Decimal, Hexadecimal, ASCII (display only), Two’s Complement, and User-defined symbols. Symbols 1,000 maximum. Symbols can be downloaded over RS-232 or HP-IB. 1–8...
- Page 19 General Information Supplemental Characteristics (logic analyzer) Marker Functions Time Interval The X and O markers measure the time interval between a point on a timing waveform and the trigger, two points on the same timing waveform, two points on different waveforms, or two states (time tagging on). Delta States (state analyzer only) The X and O markers measure the number of tagged states between one state and trigger or between two states.
-
Page 20: Supplemental Characteristics (Oscilloscope)
General Information Supplemental Characteristics (oscilloscope) Product Regulations Safety IEC 1010-1:1990+A1 / EN 61010-1:1993 UL3111 CSA-C22.2 No. 1010.1:1993 This product meets the requirement of the European Communities (EC) EMC Directive 89/336/EEC. Emissions EN55011/CSIPR 11 (ISM, Group1,Class A equipment) IEC 555-2 and IEC 555-3 Immunity EN50082-1 Code... - Page 21 General Information Supplemental Characteristics (oscilloscope) Timebase Range 1 ns/div to 5 s/div Resolution 20 ps Delay Pre-trigger Range Time/div Setting Available Delay 1 µs to 5 s/div -8 x (s/div) -4 µs 1 ns to 500 ns/div Delay Post-trigger Range Time/div Setting Available Delay 100 ms to 5 s/div...
- Page 22 General Information Supplemental Characteristics (oscilloscope) Digitizer Resolution 8 bits (1 part in 256) Digitizing Rate Up to 1 Gigasample per second Digitizing Technique Real-time digitizing; each 8000 samples are acquired on a single acquisition Acquisition Memory Size 8000 samples per channel Waveform Display Displayed Waveforms Eight waveform windows maximum, with scrolling across 96...
- Page 23 General Information Supplemental Characteristics (oscilloscope) Measurement and Display Functions Time Markers Two vertical markers, X and O, are provided for measurements of time and voltage. Capabilities are: measure voltage at point where X and O markers cross each analog waveform; measure time from trigger to X, trigger to O, and X to O; automatic marker placement by specifying percentage of edge, edge number, and rising or falling edge type;...
-
Page 24: Recommended Test Equipment (Logic Analyzer)
Equipment Critical Specifications Recommended Model/Part Pulse Generator 100 MHz, 3.5 ns pulse width, HP 8133A Option 003 < 600 ps rise time ≥ 6 GHz bandwidth, < 58 ps rise time Digitizing Oscilloscope HP 54750A, with HP 54751A plugin −6 Accuracy ≤... -
Page 25: Recommended Test Equipment (Oscilloscope)
Recommended Use* Model/Part Signal Generator Frequency: 1 - 250 MHz at approx. HP 8656B Option 001 170 mV RMS Output Accuracy: ± 1 dB 1 MHz time base accuracy 0.25 ppm Range: −35.000 to +35.000 Vdc, ±1 mV DC Power Supply... -
Page 26: Recommended Test Equipment (Pattern Generator)
Recommended test equipment (pattern generator) Recommended test equipment (pattern generator) Equipment Required Equipment Critical Specifications Recommended Use* Model/Part ≥ 500 MHz Bandwidth Oscilloscope HP 54522A Probe 500 MHz Bandwidth HP 10441A Output Data Pod no substitute 10460A - series * T = Troubleshooting 1–16... -
Page 27: Preparing For Use
To inspect the logic analyzer 2–2 To apply power 2–3 To operate the user interface 2–3 To set the line voltage 2–3 To degauss the display 2–4 To clean the logic analyzer 2–4 To test the logic analyzer 2–4 Preparing for Use... -
Page 28: To Inspect The Logic Analyzer
Preparing For Use This chapter gives you instructions for preparing the logic analyzer for use. Power Requirements The logic analyzer power source requirements are either 115 V ac or 230 V ac, –22 % to +10 %, single phase, 48 to 66 Hz, 200 Watts maximum power. Operating Environment The operating environment is listed in chapter 1. -
Page 29: To Apply Power
Logic Analyzer User’s Guide. To set the line voltage When shipped from HP, the line voltage selector is set and an appropriate fuse is installed for operating the instrument in the country of destination. To operate the instrument from a power source other than the one set, perform the following steps. -
Page 30: To Degauss The Display
Preparing for Use To degauss the display Reinsert the fuse module with the arrow for the appropriate line voltage aligned with the arrow on the line filter assembly switch. Reconnect the power cord. Turn on the instrument by setting the power switch to the On position. -
Page 31: Testing Performance
To perform the self-tests 3–3 To make the test connectors (logic analyzer) 3–7 To test the threshold accuracy (logic analyzer) 3–9 To test the glitch capture (logic analyzer) 3–18 To test the single-clock, single-edge, state acquisition (logic analyzer) 3–24 To test the multiple-clock, multiple-edge, state acquisition (logic analyzer) 3–37 To test the single-clock, multiple-edge, state acquisition (logic analyzer) 3–49 To test the time interval accuracy (logic analyzer) 3–60 To test the CAL OUTPUT ports (oscilloscope) 3–65... - Page 32 For an individual test, follow the procedure in the test. The examples in this chapter were performed using an HP 1660CS. Other analyzers in the series will have appropriate pods showing on the screen.
-
Page 33: To Perform The Self-Tests
The performance verification (PV) self-tests consist of system PV tests, analyzer PV tests, and oscilloscope PV tests (HP 1660CS series only). These procedures assume the files on the PV disk have been copied to the /SYSTEM subdirectory on the hard disk drive. - Page 34 Testing Performance To perform the self-tests Install a formatted disk that is not write-protected into the disk drive. Connect an RS-232-C loopback connector onto the RS-232-C port. Select All System Tests. You can run all tests at one time, except for the Front Panel Test and Display Test, by running All System Tests.
- Page 35 Record the results of the tests on the performance test record at the end of this chapter. For the HP 1660CP-series Logic Analyzers, Select Analy PV, then select Patt Gen in the pop-up menu. In the Patt Gen menu select All Tests.
- Page 36 Testing Performance To perform the self-tests For the HP 1660CS-series Logic Analyzers, Select Analy PV, then select Scope PV in the pop-up menu. In the Scope PV menu, select Functional Tests then select All Tests. You can run all tests at one time, except for the Data Input Inspection, by running All Tests.
-
Page 37: To Make The Test Connectors (Logic Analyzer)
The test connectors connect the logic analyzer to the test equipment. The following materials are required to make the test connectors. Materials Required Description Recommended Part BNC (f) Connector HP 1250-1032 100 Ω 1% resistor HP 0698-7212 Berg Strip, 17-by-2 Berg Strip, 6-by-2 20:1 Probe... - Page 38 Testing Performance To make the test connectors (logic analyzer) Build one test connector using a BNC connector and a 17-by-2 section of Berg strip. a Solder a jumper wire to all pins on one side of the Berg strip. b Solder a jumper wire to all pins on the other side of the Berg strip. c Solder the center of the BNC connector to the center pin of one row on the Berg strip.
-
Page 39: To Test The Threshold Accuracy (Logic Analyzer)
Recommended Model/Part Digital Multimeter 0.1 mV resolution, 0.005% accuracy HP 3458A −6 Accuracy ≤ (5)(10 ) × frequency, Function Generator HP 3325B Option 002 DC offset voltage ±6.3 V BNC-Banana Cable HP 11001-60001 BNC Tee HP 1250-0781 BNC Cable HP 10503A... -
Page 40: Set Up The Logic Analyzer
Testing Performance To test the threshold accuracy (logic analyzer) Set up the logic analyzer Press the Config key. Unassign Pods 3 and 4, Pods 5 and 6, and Pods 7 and 8. To unassign the pods, select the pod field. In the pop-up menu, select Unassigned. Connect the logic analyzer Using the 17-by-2 test connector, BNC cable, and probe tip assembly, connect the data and clock channels of pod 1 to one side of the BNC Tee. -
Page 41: Test The Ttl Threshold
Testing Performance To test the threshold accuracy (logic analyzer) Test the TTL threshold Press the Format key. Select the field to the right of Pod A1, then select TTL in the pop-up menu. On the function generator front panel, enter 1.750 V ±1 mV DC offset. Use the multimeter to verify the voltage. - Page 42 Testing Performance To test the threshold accuracy (logic analyzer) Using the Modify up arrow on the function generator, increase offset voltage in 1-mV increments until all activity indicators for pod 1 show the channels at a logic high. Record the function generator voltage in the performance test record. 3–12...
-
Page 43: Test The Ecl Threshold
Testing Performance To test the threshold accuracy (logic analyzer) Test the ECL threshold Select the field to the right of Pod A1, then select ECL in the pop-up menu. On the function generator front panel, enter −1.160 V ±1 mV DC offset. Use the multimeter to verify the voltage. -
Page 44: Test The − User Threshold
Testing Performance To test the threshold accuracy (logic analyzer) Test the − User threshold Move the cursor to the field to the right of Pod A1. Type –6.00, then use the left and right cursor control keys to highlight V. Press the Select key. On the function generator front panel, enter −5.718 V ±1 mV DC offset. - Page 45 Testing Performance To test the threshold accuracy (logic analyzer) Test the + User threshold Move the cursor to the field to the right of Pod A1. Type +6.00, then use the left and right cursor control keys to highlight V. Press the Select key. On the function generator front panel, enter +6.282 V ±1 mV DC offset.
-
Page 46: Test The 0 V User Threshold
Testing Performance To test the threshold accuracy (logic analyzer) Test the 0 V User threshold Move the cursor to the field to the right of Pod A1. Type 0, then press the Select key. On the function generator front panel, enter +0.102 V ±1 mV DC offset. Use the multimeter to verify the voltage. -
Page 47: Test The Next Pod
Testing Performance To test the threshold accuracy (logic analyzer) Test the next pod Using the 17-by-2 test connector and probe tip assembly, connect the data and clock channels of the next pod to the output of the function generator until all pods have been tested. -
Page 48: To Test The Glitch Capture (Logic Analyzer)
100 MHz 3.5 ns pulse width, < 600 ps rise time HP 8133A Option 003 Digitizing Oscilloscope ≥ 6 GHz bandwidth , < 58 ps rise time HP 54750A, with HP 54751A plugin SMA Coax 18 GHz bandwidth HP 8120-4948... -
Page 49: Set Up The Logic Analyzer
Testing Performance To test the glitch capture (logic analyzer) Set up the oscilloscope. Oscilloscope Setup Time Base Display Delta V Delta T Time/Div: 1.00 ns/div mode: avg V markers on T markers on delay: 17.7000 ns # of avg: 16 marker 1 position: Chan 1 start on: Pos Edge 1 screens: dual... - Page 50 • HP 1660C/CS/CP – pods 1 through 8 • HP 1661C/CS/CP – pods 1 and 2, pods 3 and 4, and pods 5 and 6 • HP 1662C/CS/CP – pods 1 and 2, and pods 3 and 4 •...
-
Page 51: Test The Glitch Capture On The Connected Channels
Testing Performance To test the glitch capture (logic analyzer) Test the glitch capture on the connected channels Set up the Format menu. a Press the Format key. b Select the field to the right of each pod, then select ECL in the pop-up menu. Use the knob to access pods not shown on the screen (to activate the knob for pods, use the cursor to select the Pods field and push Select). - Page 52 Testing Performance To test the glitch capture (logic analyzer) Set up the Trigger menu. a Press the Trigger key. b Select Modify Trigger, then select Clear Trigger, then select All. Using the [Shift] + width: channel 1 and [Shift] + width: channel 2 of the oscilloscope, verify that the pulse widths of the pulse generator channels 1 and 2 are 3.450 ns, +50 ps or −100 ps.
-
Page 53: Test The Next Channels
Testing Performance To test the glitch capture (logic analyzer) On the logic analyzer, press the Run key. The display should be similar to the figure below. On the pulse generator, enable Channel 1 and Channel 2 COMP (with the LED on). On the logic analyzer, press the Run key. -
Page 54: To Test The Single-Clock, Single-Edge, State Acquisition (Logic Analyzer)
Pulse Generator 100 MHz 3.5 ns pulse width, < 600 ps rise time HP 8133A option 003 ≥ 6 GHz bandwidth, < 58 ps rise time Digitizing Oscilloscope HP 54750A, with HP 54751A plugin Adapter SMA(m)-BNC(f) HP 1250-1200 SMA Coax Cable (Qty 3) -
Page 55: Set Up The Logic Analyzer
Testing Performance To test the single-clock, single-edge, state acquisition (logic analyzer) Set up the oscilloscope. If the oscilloscope was not configured for the previous test, then do the following steps. a Select Setup, then select Default Setup. b Configure the oscilloscope according to the following table. Oscilloscope Setup Acquisition Display... - Page 56 "anystate," then select "no state." Select Done to exit the State Sequence Levels menu. d Select the field next to "a," under the label Lab1. Type the following for your logic analyzer, then press the Select key. HP 1660C/CS – "00AA" HP 1662C/CS – "00AA" HP 1661C/CS – "002A"...
-
Page 57: Connect The Logic Analyzer
Using the 6-by-2 test connectors, connect the first combination of logic analyzer clock and data channels listed in one of the following tables to the pulse generator. If you are testing an HP 1660C or HP 1661C, you will repeat this test for the second combination. - Page 58 Testing Performance To test the single-clock, single-edge, state acquisition (logic analyzer) Connect the HP 1662C or HP 1663C Logic Analyzer to the Pulse Generator Testing Connect to Connect to Connect to Combination HP 8133A HP 8133A Channel HP 8133A Channel...
-
Page 59: Verify The Test Signal
Testing Performance To test the single-clock, single-edge, state acquisition (logic analyzer) Verify the test signal Check the clock pulse width. Using the oscilloscope, verify that the clock pulse width is 3.500 ns, +0 ps or −100 ps. a Enable the pulse generator channel 1, channel 2, and trigger outputs (LED off). b In the oscilloscope Timebase menu, select Scale: 1.000 ns/div. - Page 60 Testing Performance To test the single-clock, single-edge, state acquisition (logic analyzer) Check the data pulse width. Using the oscilloscope, verify that the data pulse width is 3.500 ns, +0 ps or −100 ps. a On the Oscilloscope, select [Define meas] Define ∆ Time - Stop edge: rising. b In the oscilloscope timebase menu, select Position.
-
Page 61: Check The Setup/Hold Combination
Testing Performance To test the single-clock, single-edge, state acquisition (logic analyzer) Check the setup/hold combination Select the logic analyzer setup/hold time. a In the logic analyzer Format menu, select Master Clock. b Select the Setup/Hold field, then select the setup/hold combination to be tested for all pods. - Page 62 Testing Performance To test the single-clock, single-edge, state acquisition (logic analyzer) Disable the pulse generator channel 1 COMP (with the LED off). Using the Delay mode of the pulse generator channel 1, position the pulses according to the setup time of the setup/hold combination selected, +0.0 ps or −100 a On the Oscilloscope, select [Define meas] Define ∆...
- Page 63 Testing Performance To test the single-clock, single-edge, state acquisition (logic analyzer) Select the clock to be tested. a In the Master Clock menu, select the clock field to be tested, then select the clock edge as indicated in the table. The first time through this test, use the top clock and edge in the following table.
- Page 64 Testing Performance To test the single-clock, single-edge, state acquisition (logic analyzer) Note: This step is only done the first time through the test, to create a Compare file. For subsequent runs, go to step 6. Use the following to create a Compare file: a Press Run.
- Page 65 Testing Performance To test the single-clock, single-edge, state acquisition (logic analyzer) Using the Delay mode of the pulse generator channel 1, position the pulses according to the setup/hold combination selected, +0.0 ps or −100 ps. a On the Oscilloscope, select [Define meas] Define ∆ Time - Stop edge: falling. b On the oscilloscope, select [Shift] - width: channel 2, then select [Enter] to verify the clock signal pulse width (- width(2)).
-
Page 66: Test The Next Channels
Testing Performance To test the single-clock, single-edge, state acquisition (logic analyzer) Press the blue shift key, then press the Run key. If two to four acquisitions are obtained without the "Stop Condition Satisfied" message appearing, then the test passes. Press Stop to halt the acquisition. Record the Pass or Fail results in the performance test record. -
Page 67: To Test The Multiple-Clock, Multiple-Edge, State Acquisition (Logic Analyzer)
Pulse Generator 100 MHz 3.5 ns pulse width, < 600 ps rise time HP 8133A option 003 ≥ 6 GHz bandwidth, < 58 ps rise time Digitizing Oscilloscope HP 54750A, with HP 54751A plugin Adapter SMA(m)-BNC(f) HP 1250-1200 SMA Coax Cable (Qty 3) -
Page 68: Set Up The Logic Analyzer
Testing Performance To test the multiple-clock, multiple-edge, state acquisition (logic analyzer) Set up the oscilloscope. If the oscilloscope was not configured for the previous test, then do the following steps. a Select Setup, then select Default Setup. b Configure the oscilloscope according to the following table. Oscilloscope Setup [Shift] ∆... - Page 69 "anystate", then select "no state." Select Done to exit the State Sequence Levels menu. d Select the field next to the pattern recognizer "a," under the label Lab1. Type the following for your logic analyzer, then press Select. HP 1660C/CS/CP – "00AA" HP 1662C/CS/CP – "00AA" HP 1661C/CS/CP – "002A"...
-
Page 70: Connect The Logic Analyzer
Using the 6-by-2 test connectors, connect the first combination of logic analyzer clock and data channels listed in one of the following tables to the pulse generator. If you are testing an HP 1660C or HP 1661C, you will repeat this test for the second combination. - Page 71 Testing Performance To test the multiple-clock, multiple-edge, state acquisition (logic analyzer) Connect the HP 1662C/CS/CP or HP 1663C/CS/CP Logic Analyzer to the Pulse Generator Testing Combination Connect to Connect to Connect to HP 8133A HP 8133A Channel 2 HP 8133A Channel 1...
-
Page 72: Verify The Test Signal
Testing Performance To test the multiple-clock, multiple-edge, state acquisition (logic analyzer) Verify the test signal Check the clock pulse width. Using the oscilloscope, verify that the clock pulse width is 3.500 ns, +0 ps or −100 ps. a Enable the pulse generator channel 1, channel 2, and trigger outputs (LED off). b In the oscilloscope Timebase menu, select Scale: 1.000 ns/div. - Page 73 Testing Performance To test the multiple-clock, multiple-edge, state acquisition (logic analyzer) Check the data pulse width. Using the oscilloscope verify that the data pulse width is 4.500 ns, +0 ps or −100 ps. a In the oscilloscope Timebase menu, select Scale: 1.000 ns/div. b In the oscilloscope Timebase menu, select Position.
-
Page 74: Check The Setup/Hold With Single Clock Edges, Multiple Clocks
Testing Performance To test the multiple-clock, multiple-edge, state acquisition (logic analyzer) Check the setup/hold with single clock edges, multiple clocks Select the logic analyzer setup/hold time. a In the logic analyzer Format menu, select Master Clock. b Select and activate any two clock edges. c Select the Setup/Hold field and select the setup/hold to be tested for all pods. - Page 75 Select the clock field to be tested and then select the clock edges as indicated in the table. The first time through this test, use the top clocks and edges (HP 1660C/CS/CP and HP 1661C/CS/CP). Note that the clocks used depends on which logic analyzer you have.
- Page 76 Testing Performance To test the multiple-clock, multiple-edge, state acquisition (logic analyzer) If you have not already created a Compare file for the previous test (single-clock, single-edge state acquisition, page 32), use the following steps to create one. For subsequent passes through this test, skip this step and go to step 6. a Press Run.
- Page 77 Select the clocks to be tested. a Select the clock field to be tested, then select the clock edges as indicated in the table. The first time through this test, use the top clocks and edges (HP 1660C/CS/CP and HP 1661C/CS/CP).
-
Page 78: Test The Next Channels
Testing Performance To test the multiple-clock, multiple-edge, state acquisition (logic analyzer) Press the blue shift key, then press the Run key. If 2 - 4 acquisitions are obtained without the "Stop Condition Satisfied" message appearing, then the test passes. Press Stop to halt the acquisition. Record the Pass or Fail results in the performance test record. -
Page 79: To Test The Single-Clock, Multiple-Edge, State Acquisition (Logic Analyzer)
Pulse Generator 100 MHz 3.5 ns pulse width, < 600 ps rise time HP 8133A option 003 ≥ 6 GHz bandwidth, < 58 ps rise time Digitizing Oscilloscope HP 54750A, with HP 54751A plugin Adapter SMA(m)-BNC(f) HP 1250-1200 SMA Coax Cable (Qty 3) -
Page 80: Set Up The Logic Analyzer
Testing Performance To test the single-clock, multiple-edge, state acquisition (logic analyzer) Set up the oscilloscope. If the oscilloscope was not configured for the previous test, then do the following steps. a Select Setup, then select Default Setup. b Configure the oscilloscope according to the following table. Oscilloscope Setup [Shift] ∆... - Page 81 "anystate," then select "no state." Select Done to exit the State Sequence Levels menu. d Select the field next to "a," under the label Lab1. Type the following for your logic analyzer, then press the Select key. HP 1660C/CS/CP – "00AA" HP 1662C/CS/CP – "00AA" HP 1661C/CS/CP – "002A"...
-
Page 82: Connect The Logic Analyzer
Using the 6-by-2 test connectors, connect the first combination of logic analyzer clock and data channels listed in one of the following tables to the pulse generator. If you are testing an HP 1660C or HP 1661C, you will repeat this test for the second combination. - Page 83 Testing Performance To test the single-clock, multiple-edge, state acquisition (logic analyzer) Connect the HP 1662C/CS/CP or HP 1663C/CS/CP Logic Analyzer to the Pulse Generator Testing Connect to Connect to Connect to Combination HP 8133A HP 8133A Channel HP 8133A Channel...
-
Page 84: Verify The Test Signal
Testing Performance To test the single-clock, multiple-edge, state acquisition (logic analyzer) Verify the test signal Check the clock period. Using the oscilloscope, verify that the master-to-master clock time is 10.000 ns, +0 ps or -250 ps. a Enable the pulse generator channel 1, channel 2, and trigger outputs (LED off). b In the oscilloscope Timebase menu, select Scale: 2.500 ns/div. - Page 85 Testing Performance To test the single-clock, multiple-edge, state acquisition (logic analyzer) Check the data pulse width. Using the oscilloscope, verify that the data pulse width is 4.000 ns, +0 ps or −100 ps. a In the oscilloscope Timebase menu, select Scale: 1.000 ns/div. b In the oscilloscope Timebase menu, select Position.
-
Page 86: Check The Setup/Hold With Single Clock, Multiple Clock Edges
Testing Performance To test the single-clock, multiple-edge, state acquisition (logic analyzer) Check the setup/hold with single clock, multiple clock edges Select the logic analyzer setup/hold time. a In the logic analyzer Format menu, select Master Clock. b Select and activate any multiple clock edge. c Select the Setup/Hold field, then select the setup/hold to be tested for all pods. - Page 87 Testing Performance To test the single-clock, multiple-edge, state acquisition (logic analyzer) d Adjust the pulse generator channel 2 Delay until the pulses are aligned according the the setup time of the setup/hold combination selected, +0.0 ps or -100 ps. Select the clock to be tested. a Select the clock field to be tested, then select the clock as indicated in the table.
- Page 88 Testing Performance To test the single-clock, multiple-edge, state acquisition (logic analyzer) If you have not already created a Compare file for the previous test (single-clock, single-edge state acquisition, page 32), use the following steps to create one. For subsequent passes through this test, skip this step and go to step 5. a Press Run.
-
Page 89: Test The Next Channels
Testing Performance To test the single-clock, multiple-edge, state acquisition (logic analyzer) Test the next setup/hold combination. a In the logic analyzer Format menu, select Master Clock. b Turn off and disconnect the clock just tested. c Repeat steps 1 through 6 for the next setup/hold combination listed in step 1 on page 3–54, until all listed setup/hold combinations have been tested. - Page 90 Equipment Required Equipment Critical Specifications Recommended Model/Part Pulse Generator 100 MHz 3.5 ns pulse width, < 600 ps rise time HP 8133A option 003 −6 Accuracy ≤ (5)(10 ) × frequency Function Generator HP 3325B Option 002 SMA Cable HP 8120-4948...
-
Page 91: To Test The Time Interval Accuracy (Logic Analyzer)
Testing Performance To test the time interval accuracy (logic analyzer) Set up the function generator according to the following table. Function Generator Setup Freq: 40.000 00 MHz Amptd: 1.00 V Modulation: Off Set up the logic analyzer Set up the Configuration menu. a Press the Config key. - Page 92 Testing Performance To test the time interval accuracy (logic analyzer) Set up the Format menu. a Press the Format key. Select Timing Acquisition Mode, then select Conditional Halt Channel 500 MHz. b Select the field to the right of the Pod 1 field, then select ECL. c Select the field showing the channel assignments for Pod 1.
- Page 93 Testing Performance To test the time interval accuracy (logic analyzer) Set up the Waveform menu. a Press the Waveform key. b Move the cursor to the sec/Div field, then use the RPG knob to dial in 100 ns. c Select the Markers Off field, then select Pattern. d Select the Specify Patterns field.
-
Page 94: Connect The Logic Analyzer
Testing Performance To test the time interval accuracy (logic analyzer) Connect the logic analyzer Using a 6-by-2 test connector, connect channel 0 of Pod 1 to the pulse generator channel 1 output. Using the SMA cable and the BNC adapter, connect the External Input of the pulse generator to the Main Signal of the function generator. -
Page 95: To Test The Cal Output Ports (Oscilloscope)
Equipment Required Equipment Critical Specifications Recommended Model/Part Digital Multimeter 0.1 mV resolution, better than 0.005% accuracy HP 3458A Cable BNC (m)(m) 48-inch HP 10503A Adapter BNC (f) to Dual Banana Plug HP 1251-2277 Set up the equipment Turn on the equipment required and the logic analyzer. -
Page 96: Set Up The Logic Analyzer
Testing Performance To test the CAL OUTPUT ports (oscilloscope) Set up the logic analyzer Set up the Calibration menu. a Press the Waveform key. b Press the Waveform key again. At the pop up, select Scope Calibration. c Select the Mode field, then select Service Cal. d Select the Procedure field, then select DC Cal BNC. -
Page 97: Verify The Dc Cal Output Port
Testing Performance To test the CAL OUTPUT ports (oscilloscope) Verify the DC CAL OUTPUT port Using the BNC-to-banana adapter, connect the BNC cable between the multimeter and the oscilloscope DC CAL OUTPUT connector. The digital voltmeter should read close to 0.0000 V. Record the reading to four decimal places. -
Page 98: Set Up The Logic Analyzer
Testing Performance To test the CAL OUTPUT ports (oscilloscope) Set up the logic analyzer Set up the Calibration menu. a Select the Procedure field, then select Osc Out. b Select the Signal field, then select Probe Comp. Set up the Channel menu. a Press the Chan key. -
Page 99: To Test The Input Resistance (Oscilloscope)
This test checks the input resistance at the 50 Ω and 1 MΩ settings in the Coupling field. Equipment Required Equipment Critical Specifications Recommended Model/Part Digital Multimeter Measure resistance (4-wire) better than 0.25% HP 3458A accuracy Cables (2) BNC (m)(m) 48-inch HP 10503A Adapter BNC Tee (m)(f)(f) HP 1250-0781 Adapters (2) -
Page 100: Set Up The Logic Analyzer
Testing Performance To test the input resistance (oscilloscope) Set up the logic analyzer Set up the Channel menu. a Press the Config key. b At the pop up menu, select Scope Channel. c Select the Input field, then select C1. d Move the cursor to the Probe field, then use the RPG knob to dial in 1:1. -
Page 101: Connect The Logic Analyzer
Testing Performance To test the input resistance (oscilloscope) Connect the logic analyzer Using the BNC-to-banana adapters, connect one end of each BNC cable to the 4-wire resistance connections on the multimeter, and connect the free ends of the cables to the BNC Tee. -
Page 102: Acquire The Data
Testing Performance Perform an operational accuracy calibration Acquire the data Press the RUN key. The clicking of attenuator relays should be audible. Verify resistance readings on the digital multimeter of 50 Ω ± 0.5 Ω (49.5 to 50.5 Ω). Record the reading in the performance test record. -
Page 103: To Test The Voltage Measurement Accuracy (Oscilloscope)
Equipment Required Equipment Critical Specifications Recommended Model/Part DC Power Supply –14 Vdc to +14 Vdc, 0.1 mV resolution HP 6114A Digital Multimeter Better than 0.1% accuracy HP 3458A Cable BNC (m)(m) 48-inch HP 10503A Adapter (cable to... -
Page 104: Set Up The Logic Analyzer
Testing Performance To test the voltage measurement accuracy (oscilloscope) Set up the logic analyzer Set up the Channel menu. a Press the Config key. In the pop up menu, select Scope Channel. b Select the Input field, then select C1. c Move the cursor to the Probe field, then use the RPG knob to dial in 1:1. -
Page 105: Connect The Logic Analyzer
Testing Performance To test the voltage measurement accuracy (oscilloscope) Set up the Marker menu. a Press the Marker key. b Move the cursor to the V Markers field and press Select. The voltage markers should now be On. c Select Va on C1. d Select Vb on C1. -
Page 106: Acquire The Data
Testing Performance To test the voltage measurement accuracy (oscilloscope) Acquire the data Use the following table for steps 1 through 5. Oscilloscope Settings Voltage Readings V/Div Offset Supply Upper Limit Lower Limit 4 V/Div -7.0 V -14.0 V -13.7 V -14.3 V 1 V/Div -1.75 V... -
Page 107: To Test The Offset Accuracy (Oscilloscope)
Offset accuracy Equipment Required Equipment Critical Specifications Recommended Model/Part −35.000 to +35.000 Vdc, ± 1 mV resolution DC Power Supply HP 6114A Digital Multimeter Better than 0.1% accuracy HP 3458A Cable BNC (m)(m) 48-inch HP 10503A Adapter (cable to BNC (f) to Dual Banana Plug... -
Page 108: Set Up The Logic Analyzer
Testing Performance To test the offset accuracy (oscilloscope) Set up the logic analyzer Set up the Configuration menu. a Press the Config key. At the pop up menu, select Scope Channel. b Select the Input field, then select C1. c Move the cursor to the Probe field, then use the RPG knob to dial in 1:1. d Move the cursor to the V/Div field, then use the PRG knob to dial in 4.00 V. -
Page 109: Connect The Logic Analyzer
Testing Performance To test the offset accuracy (oscilloscope) Set up the Trigger menu. a Press the Trigger key. b Select the Mode/Arm field, then select Immediate. Set up the Marker menu. a Press the Marker key. b Move the cursor to the T Markers field. Press Select, and then press On. c If the V markers are On, turn the V markers Off by moving the cursor to the V markers field and pressing Select. -
Page 110: Acquire The Zero Input Data
Testing Performance To test the offset accuracy (oscilloscope) Acquire the zero input data Disconnect the power supply from the channel input. Press the Chan key. Move the cursor to the V/Div field and press the Select key. Press the blue shift key, then press the Run key. After approximately 15 seconds (averaging complete), press the Stop key. -
Page 111: Acquire The Dc Input Data
Testing Performance To test the offset accuracy (oscilloscope) Acquire the DC input data Use the following table for steps 1 through 5. Multimeter Settings Scope Settings Power Supply Scope Readings Settings V/Div Offset Supply Minimum Maximum −35.00 V −35.00 V −35.4 V −34.6 V 1 V/Div... -
Page 112: To Test The Bandwidth (Oscilloscope)
Equipment Required Equipment Critical Specifications Recommended Model/Part Signal Generator 1 - 250 MHz at approximately 170 mV rms HP 8656B 1 - 250 MHz ± 3% accuracy Power Meter/Sensor HP 436/8482A Power Splitter Outputs differ by <0.15 dB HP 11667B... -
Page 113: Set Up The Logic Analyzer
Testing Performance To test the bandwidth (oscilloscope) Set up the logic analyzer Set up the Configuration menu. a Press the Config key. At the pop up menu, select Scope Channel. b Select the Input field, then select C1. c Move the cursor to the Probe field, then use the RPG knob to dial in 1:1. d Move the cursor to the V/Div field. - Page 114 Testing Performance To test the bandwidth (oscilloscope) Set up the Trigger menu. a Press the Trigger key. b Select the Mode/Arm field, then select Edge. c Select the Source field, then select C1. d Move the cursor to the Level field. Set the trigger level to 0 by typing 0 in the front-panel keyboard, then pressing Select.
-
Page 115: Connect The Logic Analyzer
Testing Performance To test the bandwidth (oscilloscope) Connect the logic analyzer Using the N cable, connect the signal generator to the power splitter input. Connect the power sensor to one output of the power splitter. Using the N-to-BNC adapter and the BNC cable, connect the other power splitter output to the channel 1 input of the oscilloscope. -
Page 116: Acquire The Data
Testing Performance To test the bandwidth (oscilloscope) Acquire the data Obtain the 1 MHz response. a Set the signal generator for 1 MHz at −2.4 dBm. b Press the blue shift key, then press the Run key. The signal on the screen should be two cycles at three divisions amplitude. -
Page 117: To Test The Time Measurement Accuracy (Oscilloscope)
Equipment Required Equipment Critical Specifications Recommended Model/Part Signal Generator 200 MHz, timebase accuracy 0.25 ppm HP 8656B Opt. 001 Cable BNC (m)(m) 48-inch HP 10503A Adapter Type N (m) to BNC (f) HP 1250-0780 Set up the equipment Turn on the equipment required and the logic analyzer. Let them warm up for 30 minutes if you have not already done so. -
Page 118: Set Up The Logic Analyzer
Testing Performance To test the time measurement accuracy (oscilloscope) Set up the logic analyzer Set up the Configuration menu. a Press the Config key. At the pop up menu, select Scope Channel. b Select the Input field, then select C1. c Move the cursor to the Probe field, then use the RPG knob to dial in 1:1. - Page 119 Testing Performance To test the time measurement accuracy (oscilloscope) Set up the Trigger menu. a Press the Trigger key. b Select the Mode/Arm field, then select Edge. c Select the Source field and set it to C1. d Move the cursor to the Level field. Set the trigger level to 0 by typing 0 in the front-panel keyboard, then pressing Select.
-
Page 120: Connect The Logic Analyzer
Testing Performance To test the time measurement accuracy (oscilloscope) Connect the logic analyzer Using the N-to-BNC adapter and the BNC cable, connect the signal generator output to the channel 1 input of the oscilloscope. Acquire the data Determine short time period accuracy. a Press the blue shift key, then press Run. -
Page 121: To Test The Trigger Sensitivity (Oscilloscope)
Equipment Required Equipment Critical Specifications Recommended Model/Part Signal Generator 50 MHz and 225 MHz, 30 - 80 mV RMS output HP 8656B Opt. 001 Cable BNC 48-inch HP 10503B Adapter Type N (m) to BNC (f) HP 1250-0780 Set up the equipment Turn on the equipment required and the logic analyzer. -
Page 122: Set Up The Logic Analyzer
Testing Performance To test the trigger sensitivity (oscilloscope) Set up the logic analyzer Set up the Configuration menu. a Press the Config key. At the pop up menu, select Scope Channel. b Select the Input field, then select C1. c Move the cursor to the Probe field, then use the RPG knob to dial in 1:1. d Move the cursor to the V/Div field, then use the PRG knob to dial in 400 mV. - Page 123 Testing Performance To test the trigger sensitivity (oscilloscope) Set up the Trigger menu. a Press the Trigger key. b Select the Mode/Arm field, then select Edge. c Select the Source field and set it to C1. d Move the cursor to the Level field. Set the trigger level to 0 by typing 0 in the front-panel keyboard, then pressing Select.
-
Page 124: Connect The Logic Analyzer
Testing Performance To test the trigger sensitivity (oscilloscope) Connect the logic analyzer Using the N-to-BNC adapter and the BNC cable, connect the signal generator output to the channel 1 input of the oscilloscope. Acquire the data Test the upper bandwidth trigger sensitivity. a Set the signal generator to provide a 225 MHz signal with 70 mV rms amplitude. -
Page 125: Performance Test Record (Logic Analyzer)
Performance Test Record (logic analyzer) Performance Test Record (logic analyzer) HP 1660C/CS/CP-Series Logic Analyzer_______ Serial No.______________________ Work Order No.___________________ Recommended Test Interval - 2 Year/4000 hours Date___________________ Recommended next testing___________________ Temperature___________________ Test Settings Results Pass/Fail ________ Self-Tests ± (100 mV + 3% of threshold setting) - Page 126 Testing Performance Performance Test Record (logic analyzer) Performance Test Record (continued) Test Settings Results Limits Measured Threshold Accuracy (cont) TTL, ±145 mV Pod 4 TTL VL +1.355 V ________ TTL VH +1.645 V ________ ECL, ±139 mV ECL VL -1.439 V ________ ECL VH -1.161 V...
- Page 127 Testing Performance Performance Test Record (logic analyzer) Performance Test Record (continued) Test Settings Results Minimum Detectable Pass/Fail Glitch Capture Glitch 3.5 ns Pod 1 ________ Pod 2 ________ Pod 3 ________ Pod 4 ________ Pod 5 ________ Pod 6 ________ Pod 7 ________ Pod 8...
- Page 128 Testing Performance Performance Test Record (logic analyzer) Performance Test Record (continued) Test Settings Results Pass/Fail Pass/Fail Single-Clock, Single-Edge Acquisition All Pods, Channel 3 Setup/Hold Time 3.5/0.0 ns J↑ ________ J↓ ________ K↑ ________ K↓ _________ L↑ ________ L↓ ________ M↑ ________ M↓...
- Page 129 Testing Performance Performance Test Record (logic analyzer) Performance Test Record (continued) Test Settings Results Enable pulse generator, channel 2 Disable pulse generator, channel 2 Multiple-Clock, COMP (LED on) COMP (LED off) Multiple-Edge Acquisition Pass/Fail Pass/Fail All Pods, Channel 3 Setup/Hold Time 4.5/0.0 ns J↑...
- Page 130 Testing Performance Performance Test Record (logic analyzer) Performance Test Record (continued) Test Settings Results Disable pulse generator, channel 1 COMP (LED off) Single-Clock, Multiple-Edge Pass/Fail Acquisition All Pods, Channel 3 Setup/Hold Time 4.0/0.0 ns _______ _______ _______ _______ _______ _______ Setup/Hold Time 0.0/4.0 ns _______...
-
Page 131: Performance Test Record (Oscilloscope)
Performance Test Record (oscilloscope) Performance Test Record (oscilloscope) Test Settings Results Pass/Fail ________ Self-Tests 5.000 Vdc ±10 mV Limits Measured DC CAL Output 4.990 Vdc ________ 5.010 Vdc 0.8 Vp_p ±10% 0.72 Vp_p ________ AC CAL Output 1.000 KHz ±10% 0.88 Vp_p 900 Hz ________... - Page 132 Testing Performance Performance Test Record (oscilloscope) Performance Test Record (oscilloscope) Test Settings Results Limits Measured Voltage Measurement Accuracy Zero Input -13.7 V to -14.3 V ________ Channel 1 -3.43 V to -3.57 V ________ -1.37 V to -1.43 V ________ -137.0 mV to -143.0 mV ________ 143.0 mV to 137.0 mV...
- Page 133 Testing Performance Performance Test Record (oscilloscope) Performance Test Record (oscilloscope) Test Settings Results Limit Measured Bandwidth ≤− 3.0 dB ________ Channel 1 ≤− 3.0 dB ________ Channel 2 ± 5.500 ns 150 ps MEAN X-O ________ Time MIN X-O ________ Measurement MEAN X-O - MIN X-O ________...
-
Page 134: Performance Test Record (Pattern Generator)
Performance Test Record (pattern generator) Performance Test Record (pattern generator) Test Settings Results Pass/Fail ________ Self-Tests 3–104... - Page 135 Logic analyzer calibration 4–2 To calibrate the oscilloscope 4–3 Set up the equipment 4–3 Load the Default Calibration Factors 4–4 Self Cal menu calibrations 4–5 To adjust the CRT monitor alignment 4–6 To adjust the CRT intensity 4–8 Calibrating and Adjusting...
-
Page 136: Calibrating And Adjusting
10° C from the temperature at full calibration • to optimize measurement accuracy To test the oscilloscope circuitry against specifications (full calibration), refer to chapter 3, Testing Performance. The pattern generator circuitry in the HP 1660CP-series Logic Analyzers does not require an operational accuracy calibration. 4–2... -
Page 137: To Calibrate The Oscilloscope
To calibrate the oscilloscope Equipment Required Equipment Critical Specification Recommended Model/Part Cable (2) BNC, 9-inch (equal length) HP 10502A Cable HP 10503A Adapter BNC tee (m)(f)(f) HP 1250-0781 Adapter BNC (f)(f) (ug-914/u) HP 1250-0080 Set up the equipment Turn on the logic analyzer. Let it warm up for 30 minutes if you have not already done so. -
Page 138: Load The Default Calibration Factors
Calibrating and Adjusting To calibrate the oscilloscope Load the Default Calibration Factors Note that once the default calibration factors are loaded, all calibrations must be done. This includes all of the calibrations in the Self Cal menu. The calibration must be performed in the exact sequence listed below. -
Page 139: Self Cal Menu Calibrations
Calibrating and Adjusting To calibrate the oscilloscope Self Cal menu calibrations Messages will be displayed as each calibration routine is completed to indicate calibration has passed or failed. The resulting calibration factors are automatically stored to nonvolatile RAM at the conclusion of each calibration routine. The Self Cal menu lets you optimize vertical sensitivity (Vert Cal) for channels 1 and 2 individually or both channels on a board simultaneously. -
Page 140: To Adjust The Crt Monitor Alignment
To adjust the CRT monitor alignment This procedure must be performed by trained personnel. Adjustments are made with the cover removed and power applied. Do not touch the CRT monitor sweep board. High voltages exist on the sweep board that can W A R N I N G cause personal injury. - Page 141 Calibrating and Adjusting To adjust the CRT monitor alignment Enter the Sys PV tests, then enter the Display Test. A grid pattern should appear. If the display is tilted (rotated), adjust the CRT yoke by rotating it to straighten the display.
-
Page 142: To Adjust The Crt Intensity
To adjust the CRT intensity This procedure must be performed by trained personnel. Adjustments are made with the cover removed and power applied. Do not touch the CRT monitor sweep board. High voltages exist on the sweep board that can W A R N I N G cause personal injury. - Page 143 Calibrating and Adjusting To adjust the CRT intensity Do not touch the CRT monitor sweep board. High voltages exist on the sweep board that can W A R N I N G cause personal injury. The light power meter should read 137-154 cd/m .
- Page 144 4–10...
-
Page 145: Troubleshooting
To test the flexible disk drive voltages 5–28 To test the hard disk drive voltages 5–30 To perform the BNC test 5–31 To test the logic analyzer probe cables 5–32 To verify pattern output (HP 1660CP-Series only) 5–36 To test the auxiliary power 5–38 Troubleshooting... -
Page 146: To Use The Flowcharts
Troubleshooting This chapter helps you troubleshoot the logic analyzer to find defective assemblies. The troubleshooting consists of flowcharts, self-test instructions, and tests. This information is not intended for component-level repair. If you suspect a problem, start at the top of the first flowchart. During the troubleshooting instructions, the flowcharts will direct you to perform other tests. - Page 147 Troubleshooting To use the flowcharts Troubleshooting Flowchart 1 5–3...
- Page 148 Troubleshooting To use the flowcharts Troubleshooting Flowchart 2 5–4...
- Page 149 Troubleshooting To use the flowcharts Troubleshooting Flowchart 3 5–5...
- Page 150 Troubleshooting To use the flowcharts Troubleshooting Flowchart 4 5–6...
- Page 151 Troubleshooting To use the flowcharts Troubleshooting Flowchart 5 5–7...
- Page 152 Troubleshooting To use the flowcharts Troubleshooting Flowchart 6 5–8...
- Page 153 Troubleshooting To use the flowcharts Troubleshooting Flowchart 7 5–9...
- Page 154 Troubleshooting To use the flowcharts Troubleshooting Flowchart 8 5–10...
- Page 155 Troubleshooting To use the flowcharts Troubleshooting Flowchart 9 5–11...
- Page 156 Troubleshooting To use the flowcharts Troubleshooting Flowchart 10 5–12...
- Page 157 Troubleshooting To use the flowcharts Troubleshooting Flowchart 11 5–13...
- Page 158 Troubleshooting To use the flowcharts Troubleshooting Flowchart 12 5–14...
- Page 159 Troubleshooting To use the flowcharts Troubleshooting Flowchart 13 5–15...
- Page 160 Troubleshooting To use the flowcharts Troubleshooting Flowchart 14 5–16...
-
Page 161: To Check The Power-Up Tests
Troubleshooting To check the power-up tests To check the power-up tests The logic analyzer automatically performs power-up tests when you apply power to the instrument. The revision number of the operating system shows in the upper-right corner of the screen during these power-up tests. As each test completes, either "passed" or "failed" prints on the screen in front of the name of each test. -
Page 162: To Run The Self-Tests
Troubleshooting To run the self-tests To run the self-tests Self-tests identify the correct operation of major functional areas of the instrument. You can run all self-tests without accessing the interior of the instrument. If a self-test fails, the troubleshooting flowcharts instruct you to change a part of the instrument. These procedures assume the files on the PV disk have been copied to the /SYSTEM subdirectory on the hard disk drive. - Page 163 Troubleshooting To run the self-tests Select ROM Test. The ROM Test screen is displayed. You can run all tests at one time by running All System Tests. To see more details about each test, you can run each test individually. This example shows how to run an individual test. Select Run, then select Single.
- Page 164 Troubleshooting To run the self-tests To exit the ROM Test, select Done. Note that the status changes to Passed or Failed. Install a formatted disk that is not write protected into the flexible disk drive. Connect an RS-232-C loopback connector onto the RS-232-C port. Run the remaining System Tests in the same manner.
- Page 165 Troubleshooting To run the self-tests Select Sys PV, then select Analy PV in the pop-up menu. Select Chip 2 Tests. You can run all the analyzer tests at one time by selecting All Analyzer Tests. To see more details about each test, you can run each test individually. This example shows how to run Chip 2 Tests.
- Page 166 If you have an HP 1660C-series Logic Analyzer (no oscilloscope or pattern generator), go to step 19. If you have an HP 1660CP-series Logic Analyzer, go to step 18. If you have an HP 1660CS-series Logic Analyzer, continue with step 15.
- Page 167 To run a test continuously, select Repetitive. Select Stop to halt a Repetitive Run. Go to step 19 to exit the test system. For the HP 1660CP-series Logic Analyzers, Select Analy PV, then select Patt Gen in the pop-up menu. In the Patt Gen menu select Clock Source Test.
-
Page 168: To Test The Power Supply Voltages
Troubleshooting To test the power supply voltages To test the power supply voltages To check the voltages, the power supply must be loaded by either the acquisition board or with an added resistor. Refer to chapter 6, "Replacing Assemblies," for instructions to remove or replace covers and assemblies. - Page 169 Troubleshooting To test the power supply voltages Check for the voltages on the power supply cable using the values in the following table. Signals on the Power Supply Cable Signal Signal +5.00 V –5.20 V +5.00 V Ground +5.00 V +12 V +5.00 V Ground...
-
Page 170: To Test The Crt Monitor Signals
Troubleshooting To test the CRT monitor signals To test the CRT monitor signals Refer to chapter 6, "Replacing Assemblies," for instructions to remove or replace covers and assemblies. Hazard voltages exist on the power supply, the CRT, and the CRT driver board. This W A R N I N G procedure is to be performed by service-trained personnel aware of the hazards involved, such as fire and electrical shock. -
Page 171: To Test The Keyboard Signals
Troubleshooting To test the keyboard signals To test the keyboard signals Refer to chapter 6, "Replacing Assemblies," for instructions to remove covers and assemblies. Hazard voltages exist on the power supply, the CRT, and the CRT driver board. This W A R N I N G procedure is to be performed by service-trained personnel aware of the hazards involved, such as fire and electrical shock. -
Page 172: To Test The Flexible Disk Drive Voltages
Model/Part Digitizing Oscilloscope > 100 MHz Bandwidth HP 54600B Turn off the instrument, then remove the power cable. Remove the instrument cover and the disk drive assembly. Reconnect the disk drive cable to the rear of the flexible disk drive. Turn the disk drive assembly over so that the solder connections of the cable socket on the flexible drive are accessible. - Page 173 Troubleshooting To test the flexible disk drive voltages Check for the following voltages and signals using an oscilloscope. Disk Drive Voltages Signal Description Signal Description Disk Change High Density +5 V Index +5 V Drive Select +5 V Ground Ground Motor On Ground Direction...
-
Page 174: To Test The Hard Disk Drive Voltages
Model/Part Digitizing Oscilloscope > 100 MHz Bandwidth HP 54600A Turn off the instrument, then remove the power cable. Remove the instrument cover and the disk drive assembly. Remove the hard disk drive from the disk drive assembly. Reconnect both hard disk drive cables to the rear of the disk drive. -
Page 175: To Perform The Bnc Test
To perform the BNC test Equipment Required Equipment Critical Specification Recommended Model/Part Digitizing Oscilloscope 100 MHz Bandwidth HP 54600B BNC Shorting Cap 1250-0074 BNC Cable HP 10503A BNC-Banana Adapter 1251-2277 Press the Config key. Assign pods 1 and 2 to Machine 1. -
Page 176: To Test The Logic Analyzer Probe Cables
Equipment Required Equipment Critical Specification Recommended Model/Part Pulse Generator 100 MHz, 3.5 ns pulse width, HP 8131A Option 020 < 600 ps rise time Adapter (Qty 4) SMA (m) - BNC (f) HP 1250-1200 Coupler (Qty 4) BNC (m)(m) HP 1250-0216 6x2 Test Connectors (Qty 4) Turn on the equipment required and the logic analyzer. - Page 177 Troubleshooting To test the logic analyzer probe cables Set up the Format menu. a Press the Format key. b Move the cursor to the field showing the channel assignments for the pod under test. Press the Clear Entry key until the pod channels are all assigned (all asterisks (*)). Press the Done key.
- Page 178 Troubleshooting To test the logic analyzer probe cables e Select the field to the right of the pod being tested, then select TTL. Set up the Trigger menu. a Press the Trigger key. b Select Modify Trigger, then select Clear Trigger, then select All. Set up the Listing menu.
- Page 179 Troubleshooting To test the logic analyzer probe cables Using four 6-by-2 test connectors, four BNC Couplers, and four SMA (m) - BNC (f) Adapters, connect the logic analyzer to the pulse generator channel outputs. To make the test connectors, see chapter 3, "Testing Performance." a Connect the even-numbered channels of the lower byte of the pod under test to the pulse generator channel 1 Output and J-clock.
-
Page 180: To Verify Pattern Output (Hp 1660Cp-Series Only)
Troubleshooting To verify pattern output (HP 1660CP-Series only) To verify pattern output (HP 1660CP-Series only) Equipment Required Equipment Critical Specification Recommended Model/Part ≥ 500 MHz Bandwidth Oscilloscope HP 54522A Probe 500 MHz Bandwidth HP 10441A Output Data Pod no substitute... - Page 181 Troubleshooting To verify pattern output (HP 1660CP-Series only) Repeat step 3 for each of the remaining four data pods. Connect one of the 10460-series clock pods to the end of the pattern generator clock cable. Using the oscilloscope as in step 3, verify the existence of logic-level transitions by touching the oscilloscope probe to each clock output of the clock pod.
-
Page 182: To Test The Auxiliary Power
1 minute. There should be +5 V after the 1 minute reset time. Equipment Required Equipment Critical Specifications Recommended Model/Part Digital Multimeter 0.1 mV resolution, better than HP 3478A 0.005% accuracy • Using the multimeter, verify the +5 V on pins 1 and 39 of the probe cables. 5–38... -
Page 183: Replacing Assemblies
SIMM memory 6–8 Switch actuator assembly 6–9 Rear panel assembly 6–10 HP 1660C-series acquisition board 6–11 HP 1660CS-series oscilloscope board 6–12 HP 1660CP-series pattern generator board 6–13 Front panel and keyboard 6–14 Intensity adjustment 6–14 Monitor 6–15 Handle plate 6–15 Fan 6–16... - Page 184 Tools Required #10 TORX screwdriver #15 TORX screwdriver #1 Posidrive screwdriver 3/16 inch (5 mm) nut driver 9/32 inch (7 mm) nut driver 5/8 inch (16 mm) nut driver (HP 1660CS series only) 6–2...
- Page 185 Hex nut ** MP29 Front panel spacer Lock washer ** MP30 Keyboard spacer Hex nut ** The HP 1660CP series has a pattern generator board, and the HP 1660CS series has an oscilloscope board. ** HP 1660CS series only 6–3...
- Page 186 Replacing Assemblies Exploded View of the HP 1660C 6–4...
-
Page 187: To Remove And Replace The Handle
Replacing Assemblies To remove and replace the handle To remove and replace the handle • Remove the two screws in the endcaps, then lift off the handle. To remove and replace the feet and tilt stand Remove the screws connecting the four rear feet to the instrument. Separate the rear feet from the instrument to remove them. -
Page 188: To Remove And Replace The Disk Drive Assembly
Replacing Assemblies To remove and replace the disk drive assembly To remove and replace the disk drive assembly Using previous procedures, remove the following assemblies: • Handle • Rear Feet • Cover Disconnect the two disk drive ribbon cables from the rear of both disk drives. Peel the cables away from the double-sided tape used to secure the cables to the disk drive bracket. -
Page 189: To Remove And Replace The Power Supply
Disconnect the CPU board interface cable from the acquisition board by pressing down on the cable release tabs on the cable socket located on the acquisition board. Disconnect the HP-IB and Input/Output cables from the CPU board. Disconnect the front panel cable from the CPU board. -
Page 190: To Remove And Replace Simm Memory
Replacing Assemblies To remove and replace SIMM memory To remove and replace SIMM memory Using previous procedures, remove the following assemblies: • Handle • Rear Feet • Cover • Disk Drive Assembly • Power Supply • CPU Board Hazardous voltages exist on the power supply. To avoid electrical shock, disconnect the W A R N I N G power from the instrument before performing the following procedures. -
Page 191: To Remove And Replace The Switch Actuator Assembly
Replacing Assemblies To remove and replace the switch actuator assembly To remove and replace the switch actuator assembly Using previous procedures, remove the following assemblies: • Handle • Rear Feet • Cover • Disk Drive Assembly • Power Supply • CPU Board Make sure the power switch is in the off position. -
Page 192: To Remove And Replace The Rear Panel Assembly
When installing the rear panel, check that the alignment tabs on the acquisition board are lined up with the corresponding holes in the rear panel. Also, for the HP 1660CP-series Logic Analyzers ensure the ground springs are installed on the acquisition board and on the pattern generator board before installing the rear panel. -
Page 193: To Remove And Replace The Hp 1660C-Series Acquisition Board
Replacing Assemblies To remove and replace the HP 1660C-series acquisition board To remove and replace the HP 1660C-series acquisition board Using previous procedures, remove the following assemblies: • Handle • Rear Feet • Cover • Rear Panel • Disk Drive Assembly •... -
Page 194: To Remove And Replace The Hp 1660Cs-Series Oscilloscope Board
Replacing Assemblies To remove and replace the HP 1660CS-series oscilloscope board To remove and replace the HP 1660CS-series oscilloscope board Using previous procedures, remove the following assemblies: • Handle • Rear Feet • Cover • Rear Panel • Disk Drive Assembly •... -
Page 195: To Remove And Replace The Hp 1660Cp-Series Pattern Generator Board
Replacing Assemblies To remove and replace the HP 1660CP-series pattern generator board To remove and replace the HP 1660CP-series pattern generator board Using previous procedures, remove the following assemblies: • Handle • Rear Feet • Cover • Rear Panel •... -
Page 196: To Remove And Replace The Front Panel And Keyboard
Replacing Assemblies To remove and replace the front panel and keyboard To remove and replace the front panel and keyboard Using previous procedures, remove the following assemblies: • Handle • Rear Feet • Cover • Disk Drive Assembly • Power Supply •... -
Page 197: To Remove And Replace The Monitor
Acquisition Board • Oscilloscope Board (HP 1660CS-series only) • Pattern Generator Board (HP 1660CP-series only) • Intensity Adjustment Hazardous voltages exist on the CRT and the CRT driver board. To avoid electrical shock, W A R N I N G disconnect the power from the instrument before performing the following procedures. -
Page 198: To Remove And Replace The Fan
Replacing Assemblies To remove and replace the fan To remove and replace the fan Using previous procedures, remove the following assemblies: • Handle • Rear Feet • Cover • Disk Drive Assembly • Power Supply • Rear Panel Remove the four fan screws. Lift the fan away from the rear panel. -
Page 199: To Remove And Replace The Hp 1660Cp-Series Pattern Generator Cables
Power Supply • Rear Panel Remove the two hex standoffs connecting the HP-IB cable, then slide the HP-IB cable forward and out of the rear panel. Remove the two hex standoffs connecting the RS-232-C cable, then slide the RS-232-C cable forward and out of the rear panel. -
Page 200: To Remove And Replace The I/O Board
Only return accessories to Hewlett-Packard if they are associated with the failure symptoms. Package the logic analyzer. You can use either the original shipping containers, or order materials from an HP Sales Office. For protection against electrostatic discharge, package the logic analyzer in electrostatic C A U T I O N material. -
Page 201: Replaceable Parts
Replaceable Parts Ordering 7–2 Replaceable Parts List 7–3 Exploded View 7–4 Power Cables and Plug Configurations 7–8 Replaceable Parts... -
Page 202: Replaceable Parts Ordering
Within the USA, Hewlett-Packard can supply parts through a direct mail order system. The advantages to the system are direct ordering and shipment from the HP Part Center in Mountain View, California. There is no maximum or minimum on any mail order. (There is a minimum amount for parts ordered through a local Hewlett-Packard Sales Office when the orders require billing and invoicing.) Transportation costs are prepaid (there is a small... -
Page 203: Replaceable Parts List
Replaceable Parts Replaceable Parts List Replaceable Parts List The replaceable parts list is organized by reference designation and shows exchange assemblies, electrical assemblies, then other parts. The exploded view does not show all of the parts in the replaceable parts list. Information included for each part on the list consists of the following: •... -
Page 204: Exploded View
Replaceable Parts Exploded View Exploded View Exploded view of the HP 1660 logic analyzer. 7–4... - Page 205 MS 3.0 5 TH T10 (flexible disk drive, disk drive assembly, handle plate) 0515-0430 MS M3 .0X0 .5X6MM PH T10 (acquisition board, rear panel to chassis, oscilloscope board on the HP 1660CS series, I/O board to rear panel) 0515-2349 MS M3.0 X 0.50 - 14MM LG (trim strip cover to cabinet)
- Page 206 MSF M3 6 T10 (accessory pouch) 2950-0054 NUTH 1/2-28 .125 (BNC cal ports, HP 1660CS series only) 2190-0068 WIL .505 .630 .02 (BNC cal ports, HP 1660CS series only) 01650-29101 Ground Spring (HP 1660CS series only) 54503-25701 Hex Nut (attenuator, HP 1660CS series only) 0515-1246 MS M3 x 0.5 T10 (attenuator, HP 1660CS series only)
- Page 207 01660-61607 Jumper cable assembly-orange 01660-61608 Jumper cable assembly-wht 54503-61606 Power supply cable 01660-61604 Cable - 60 Conductor (HP 1660CS and 1660CP series only) 01660-61609 Hard disk drive data cable 01660-61610 Hard disk drive power cable 01660-61611 I/O board cable 01650-61601...
-
Page 208: Power Cables And Plug Configurations
Replaceable Parts Power Cables and Plug Configurations Power Cables and Plug Configurations This instrument is equipped with a three-wire power cable. The type of power cable plug shipped with the instrument depends on the country of destination. The W15 reference designators (table, previous page) show option numbers of available power cables and plug configurations. -
Page 209: Theory Of Operation
Block-Level Theory 8–3 The HP 1660C/CS/CP Series Logic Analyzer 8–3 The Logic Acquisition Board 8–7 The Oscilloscope Board 8–10 The Pattern Generator Board 8–13 Self-Tests Description 8–15 Power-up Self-Tests 8–15 System Tests (System PV) 8–16 Analyzer Tests (Analy PV) 8–20 Oscilloscope tests (Scope PV) 8–22... - Page 210 Theory of Operation This chapter tells the theory of operation for the logic analyzer and describes the self-tests. The information in this chapter is to help you understand how the logic analyzer operates and what the self-tests are testing. This information is not intended for component-level repair.
-
Page 211: Block-Level Theory
Block-Level Theory The block-level theory is divided into two parts: theory for the logic analyzer and theory for the acquisition boards. A block diagram is shown with each theory. The HP 1660C/CS/CP Series Logic Analyzer The HP 1660C/CS/CP Logic Analyzer 8–3... - Page 212 Theory of Operation The HP 1660C/CS/CP Series Logic Analyzer HP 1660C/CS/CP Series Theory CPU Board The microprocessor is a Motorola 68EC020 running at 25 MHz. The microprocessor controls all of the functions of the logic analyzer including processing and storing data, displaying data, and configuring the acquisition ICs to obtain and store data.
- Page 213 HP-IB controller and two octal drivers/receivers. The microprocessor routes HP-IB data to the controller. The controller then buffers the 8-bit HP-IB data bits and generates the bus handshaking signals. The data and handshaking signals are then routed to the HP-IB bus through the octal line drivers/receivers.
- Page 214 I/O Board The Input/Output (I/O) Board primarily includes a Centronics port and two mini-DIN (PS/2) ports for the HP 1660C/CS/CP-series products. On products ordered with the LAN interface, the I/O board also includes isolation circuitry and LAN connectors for the LAN.
-
Page 215: The Logic Acquisition Board
Theory of Operation The Logic Acquisition Board The Logic Acquisition Board The Logic Acquisition Board 8–7... - Page 216 Acquisition The acquisition circuit is made up of a single HP proprietary ASIC. Each ASIC is a 34-channel state/timing analyzer, and one such ASIC is included for every two logic analyzer pods. All of the sequencing, pattern/range recognition, and event counting functions are performed on board the IC.
- Page 217 Theory of Operation The Logic Acquisition Board Clock optimization involves using programmable delays on board the IC to position the master clock transition where valid data is captured. This procedure greatly reduces the effects of channel-to-channel skew and other propagation delays. In the timing acquisition mode, an oscillator-driven clock circuit provides a four-phase, 100-MHz clock signal to each of the acquisition ICs.
-
Page 218: The Oscilloscope Board
Theory of Operation The Oscilloscope Board The Oscilloscope Board The Oscilloscope Board 8–10... - Page 219 Theory of Operation The Oscilloscope Board Oscilloscope Board Theory (HP 1660CS series only) Attenuator/Preamp Theory of Operation The channel signals are conditioned by the attenuator/preamps, thick film hybrids containing passive attenuators, impedance converters, and a programmable amplifier. The channel sensitivity defaults to the standard 1-2-4 sequence (other sensitivities can be set also).
- Page 220 Theory of Operation The Oscilloscope Board Time Base The time base provides the sample clocks and timing necessary for data acquisition. It consists of the 100 MHz reference oscillator and time base hybrid. The 100 MHz reference oscillator provides the base sample frequency. The time base hybrid has programmable dividers to provide the rest of the sample frequencies appropriate for the time range selected.
-
Page 221: The Pattern Generator Board
The Pattern Generator Board The Pattern Generator Board The Pattern Generator Board Pattern Generator Board Theory (HP 1660CP series only) Loop Register The loop register holds the programmable vector flow information. When the pattern generator reaches the end of the vector listing, the loop register is queried for the RAM address location of the next user-programmed vector. - Page 222 Theory of Operation The Pattern Generator Board Output Driver The output driver circuit is made up of a series of latch/logic translators and multiplexers. The latch/translators convert the working-level TTL signals to output-level ECL signals for each channel. The ECL-level signals are then directed to the multiplexers. The multiplexers, one per channel, direct the programmed data patterns to the output channels.
-
Page 223: Self-Tests Description
The self-tests identify the correct operation of major functional areas in the logic analyzer. The self-tests are not intended for component-level diagnostics. Three types of tests are performed on the HP 1660C/CS/CP series logic analyzers: the power-up self-tests, the functional performance verification self-tests, and the parametric performance verification tests. -
Page 224: System Tests (System Pv)
This means that the microprocessor can execute the operating system code and properly service interrupts generated by pressing a front panel key or receiving an HP-IB or RS-232-C command. System Tests (System PV) The system tests are functional performance verification tests. The following describes the... - Page 225 System Tests (System PV) HP-IB Test The HP-IB test performs a write/read operation to each of the registers of the HP-IB IC. A test pattern is written to each register in the HP-IB IC. The pattern is then read and compared with a known value.
- Page 226 Theory of Operation System Tests (System PV) Perform Test All Selecting Perform Test All will initiate all of the previous functional verification tests in the order they are listed. The failure of any or all of the tests will be reported in the test menu field of each of the tests.
- Page 227 The Parameters bit indicates the integrity of the LAN module self-test parameters. If this bit is not set, then the parameters sent to the self-test routine are correct. If this bit is set, then contact your nearest HP Sales and Service Office.
-
Page 228: Analyzer Tests (Analy Pv)
Theory of Operation Analyzer Tests (Analy PV) Analyzer Tests (Analy PV) The analyzer tests are functional performance verification tests. There are three types of analyzer tests: the Board Test, the Chip Tests, and the Data Input Inspection. The following describes the analyzer self-tests: Board Test The Board Test functionally verifies the two oscillators and the 9-channel comparators on the circuit board. - Page 229 The data input inspection is not an active part of the performance verification. However, the test is useful for identifying failed channels in order to temporarily work around the problem until the logic analyzer module can be sent to an HP service center for repair. 8–21...
-
Page 230: Oscilloscope Tests (Scope Pv)
The following self-tests check the major components of the HP 1660CS-series oscilloscope board as well as all associated circuitry. When the self-tests have all been completed with a "PASS" status, the major data and control pipelines in the HP 1660CS-series oscilloscope board are functioning properly. -
Page 231: Pattern Generator Tests (Patt Gen)
Theory of Operation Pattern Generator tests (Patt Gen) Pattern Generator tests (Patt Gen) The following section contains a description of each of the the pattern generator self tests. Clock Source Test The Clock Source Test checks that the internal clock sources are functioning by verifying the presence of a given clock source. - Page 232 Theory of Operation Pattern Generator tests (Patt Gen) Bits 6-13 contain the row of the page that failed. Bits 0-5 contain the failure code for the six RAM ICs on the board. Bits 0-4 contain the failure code for the RAMs for pod 1-5, and bit 5 contains the failure code for the RAM used for instructions.
- Page 233 Theory of Operation Pattern Generator tests (Patt Gen) Diagnostic Integer Value: This test is only valid for signals on the master board of the configuration. The values returned from any expansion cards will be zero. The integer returned will have the following bit format: BIT #: 15 ,14, 13, 12, 11, 10, 9, 8, 7, 6, 5, 4 3, 2, 1, 0...
- Page 234 Theory of Operation Pattern Generator tests (Patt Gen) Subtest #3 — If Instruction Test This test checks the functionality of the if branching. Instruction memory is loaded with a wait on event ’a’ instruction in the non-if branch of memory and a break instruction in the if branch. The first pass of the test sets the branch pattern to a never branch condition.
-
Page 235: Hp-Ib
Instrumentation." HP-IB is a carefully defined interface that simplifies the integration of various instruments and computers into systems. The interface makes it possible to transfer messages between two or more HP-IB compatible devices. HP-IB is a parallel bus of 16 active signal lines divided into three functional groups according to function. - Page 236 RS-232-C The logic analyzer interfaces with RS-232-C communication lines through a standard 25 pin D connector. The logic analyzer is compatible with RS-232-C protocol. When a hardwire handshake method is used, the Data Terminal Ready (DTR) line, pin 20 on the connector, is used to signal if space is available for more data in the logical I/O buffer.
- Page 237 © Copyright Hewlett- Warning Safety Symbols • Packard Company 1987 - 1997 Before turning on the All Rights Reserved. instrument, you must connect the protective earth terminal of the Instruction manual symbol: the instrument to the protective Reproduction, adaptation, or product is marked with this symbol conductor of the (mains) power when it is necessary for you to...
- Page 238 This Hewlett-Packard product has The remedies provided herein are This is the a warranty against defects in the buyer’s sole and exclusive HP 1660C/CS/CP-Series Logic material and workmanship for a remedies. Hewlett-Packard shall Analyzers Service Guide. period of one year from date of not be liable for any direct, shipment.