Table of Contents
Advertisement
Quick Links
Advertisement
Table of Contents

Related Manuals for Whirlpool AKZ 479


Summary of Contents for Whirlpool AKZ 479
- Page 1 AKZ 479 User and maintenance manual Manuel d'utilisation et d'entretien...
-
Page 3: Important Safety Instructions
IMPORTANT SAFETY INSTRUCTIONS These instructions shall also be available on website: www.whirlpool.eu YOUR SAFETY AND THAT OF OTHERS IS VERY IMPORTANT This manual and the appliance itself provide important safety warnings, to be read and observed at all times. This is the danger symbol, pertaining to safety, which alerts users to potential risks to themselves and others. - Page 4 - If the surface of the induction plate is cracked, do not use it and switch off the appliance to avoid the possibility of electric shock (only for models with induction function). - Do not touch the appliance with any wet part of the body and do not operate it when barefoot.
- Page 5 - Do not use containers made of synthetic materials. - Overheated oils and fats catch fire easily. Always remain vigilant when cooking foods rich in fat and oil. - Never leave the appliance unattended during food drying. - If alcoholic beverages are used when cooking foods (e.g. rum, cognac, wine), remember that alcohol evaporates at high temperatures.
-
Page 6: General Recommendations
GENERAL RECOMMENDATIONS Before use: Remove cardboard protection pieces, protective film and adhesive labels from accessories. Remove the accessories from the oven and heat it at 200° for about an hour to eliminate the smell and fumes from the insulating materials and protective grease. During use: Do not place heavy objects on the door as they could damage it. -
Page 7: After Sales Service
AFTER-SALES SERVICE Before calling the After-Sales Service: See if you can solve the problem yourself with the help of the suggestions given in the “Troubleshooting guide“. Switch the appliance off and back on again it to see if the fault persists. If after the above checks the fault still occurs, get in touch with the nearest After-sales Service. -
Page 8: Maintenance
• If the oven is installed below a hob, make sure that all burners or electric hotplates are switched off during the self- cleaning (pyrolysis) function. • Remove all accessories before running the pyrolysis function (also lateral grids). • For optimum cleaning of the oven door, remove the worst soiling with a damp sponge before using the pyrolytic function. The appliance is equipped with 2 pyrolysis functions: Energy-saving cycle (PYRO EXPRESS/ECO): which consumes approximately 25% less energy than the standard cycle. -
Page 9: Replacing The Oven Lamp
REPLACING THE OVEN LAMP To replace the rear lamp (if present): Disconnect the oven from the power supply. Unscrew the lamp cover (Fig. 6), replace the lamp (see note for lamp type) and screw the lamp cover back on. Reconnect the oven to the power supply. To replace the side lamp (if present): Disconnect the oven from the power supply. -
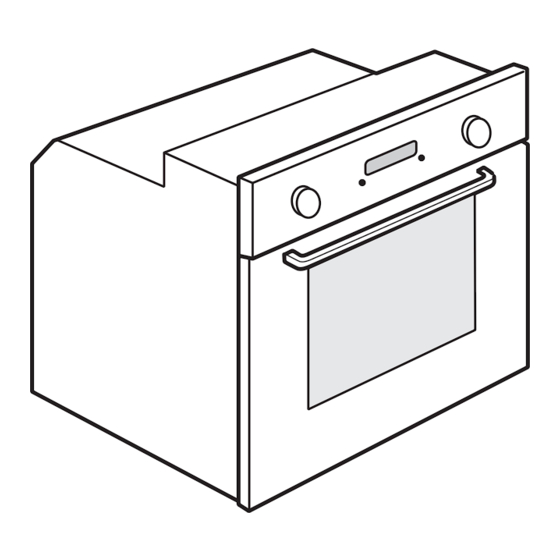
Page 10: Instructions For Oven Use
INSTRUCTIONS FOR OVEN USE FOR ELECTRICAL CONNECTION, SEE THE PARAGRAPH ON INSTALLATION Control panel Upper heating element/grill Cooling fan (not visible) Dataplate (not to be removed) Lamp Circular heating element (not visible) Turnspit Lower heating element (not visible) 10. Door 11. -
Page 11: Control Panel Description
INSERTING WIRE SHELVES AND OTHER ACCESSORIES IN THE OVEN Insert the wire shelf horizontally, with the raised part “A” upwards (Fig. 1). The other accessories, like the drip tray and baking tray, are inserted with the raised part on the flat section “B” facing upwards (Fig. -
Page 12: Setting The Time
STARTING THE OVEN - SETTING LANGUAGE At the first switch on of the oven, display shows ENGLISH. Turn the “Browse” knob until the desired language is displayed then press the button to confirm. SETTING THE TIME After setting the language, the time must be set on the clock. The two hour digits flash on the display. Turn the “Browse”... -
Page 13: Setting Cooking Time
SETTING COOKING TIME This function can be used to cook food for a set length of time, from a minimum of 1 minute to the maximum time allowed by the selected function, after which the oven switches off automatically. Once the temperature is confirmed, the symbol flashes. - Page 14 BROWNING At the end of cooking, with certain functions, the display indicates the possibility of extra browning. This function can only be used when cooking time has been set. At the end of cooking time, the display shows: “PRESS TO BROWN”. Press button , and the oven starts a 5 minute browning cycle.
-
Page 15: Automatic Oven Cleaning
Acoustic signal To activate or deactivate the acoustic signal, proceed as follows: Turn the “Browse” knob to display “SOUND. Press to access the setting (ON/OFF). Turn the “Browse” knob to select the desired setting and confirm by pressing button Brightness To change the display brightness, proceed as follows: Turn the “Browse”... - Page 16 OVEN FUNCTION DESCRIPTION TABLE FUNCTIONS KNOB To stop cooking and switch off the oven. LAMP To switch the oven interior light on/off. To speed up defrosting of food. Place food on the middle shelf. Leave food in its packaging in order to prevent it from drying out on the outside.
-
Page 17: Cooking Table
COOKING TABLE Recipe Function Pre- Shelf (from Temp. Time Accessories and heating bottom) (°C) (min) notes 160-180 30-90 Cake tin on wire shelf Shelf 4: cake tin on Leavened cakes wire shelf 160-180 30-90 Shelf 1: cake tin on GENTLE wire shelf Drip tray/baking tray 160-200... - Page 18 Recipe Function Pre- Shelf (from Temp. Time Accessories and heating bottom) (°C) (min) notes Shelf 3: drip tray / 10-15 baking tray or wire shelf Shelf 3: oven tray on Frozen pizza wire shelf (switch levels halfway 10-20 through cooking) Shelf 1: drip tray / baking tray 180-190...
- Page 19 Recipe Function Pre- Shelf (from Temp. Time Accessories and heating bottom) (°C) (min) notes Shelf 2: wire shelf (turn food two thirds of the way through Medium (2) 50-65 cooking) Shelf 1: drip tray with Roast chicken water 1-1.3 kg Shelf 2: turnspit (if present) High (3)
- Page 20 TESTED RECIPES (in compliance with IEC 60350-1:2011-12 and DIN 3360-12:07:07) Recipe Function Pre- Shelf (from Temp. Time Accessories and notes heating bottom) (°C) (min) IEC 60350-1:2011-12 § 7.5.2 15-25 Drip tray / baking tray Shelf 3: baking tray (switch Shortbread levels halfway through cooking) 20-30 Shelf 1: drip tray/baking tray...
-
Page 21: Recommended Use And Tips
RECOMMENDED USE AND TIPS How to read the cooking table The table indicates the best function to use for any given food, to be cooked on one or more shelves at the same time. Cooking times start from the moment food is placed in the oven, excluding pre-heating (where required). Cooking temperatures and times are purely for guidance and will depend on the amount of food and type of accessory used. - Page 23 Printed in Italy 02/2011 5019 300 02832...