
Related Manuals for Vaillant uniTOWER plus


Summary of Contents for Vaillant uniTOWER plus
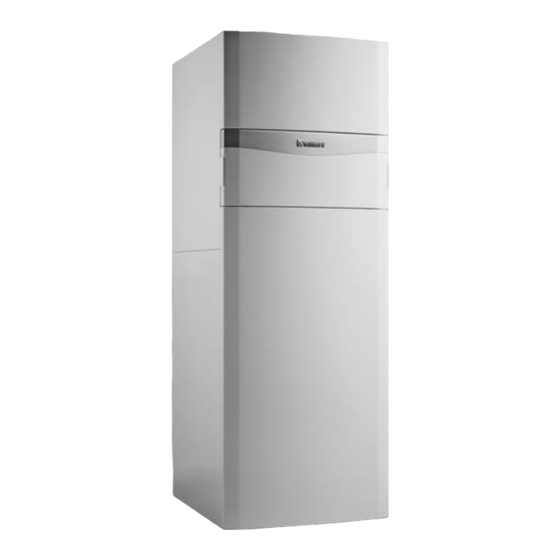
- Page 1 VIH QW 190/6 E GB en Operating instructions en Installation and maintenance instructions...
- Page 2 Operating instructions ........3 Installation and maintenance instructions..15...
-
Page 3: Table Of Contents
Operating instructions Contents Safety ..............4 Intended use ............4 General safety information ........4 Notes on the documentation ......6 Product description..........6 Heat pump system..........6 Product design............6 Opening the front flap ..........6 Control elements............ 6 Control panel ............ -
Page 4: Safety
Safety General safety information 1.2.1 Danger caused by improper Intended use operation There is a risk of injury or death to the user or Improper operation may present a danger to others, or of damage to the product and other you and others, and cause material damage. - Page 5 1.2.5 Benchmark Vaillant is a licensed member of the Bench- mark Scheme which aims to improve the standards of installation and commissioning of domestic heating and hot water systems in the UK and to encourage regular servicing to optimise safety, efficiency and performance.
-
Page 6: Notes On The Documentation
Notes on the documentation Product design ▶ Always observe all operating instructions that are en- closed with the installation components. ▶ Store these instructions and all other applicable docu- ments for further use. These instructions apply only to: Product VIH QW 190/6 E GB Product description Heat pump system Design of a typical heat pump system with split technology:... -
Page 7: Control Panel
Control panel Symbol Meaning Explanation – Without The dashed lines show the decoupling permitted range. module – Displayed statically: Filling – Filling pressure in the permitted pressure range in the – Displayed flashing: Filling building pressure outside of the circuit permitted range (measured in the... -
Page 8: Type Designation And Serial Number
After it is triggered, the safety cut-out must be replaced. Vaillant is a licensed member of the Benchmark Scheme – Max. heating circuit temperature: 89 ℃ which aims to improve the standards of installation and com-... -
Page 9: Operating Concept
Operating concept 4.4.3 Adjusting the target cylinder temperature The product has two operating levels. Danger! The operating level for the end user shows the most import- Risk of death from legionella. ant information and offers setting options which do not re- Legionella multiply at temperatures below quire any special prior knowledge. -
Page 10: Setting The Heating Flow Temperature
Setting the domestic hot water temperature You can use the Live Monitor to view the current status of the product. Condition: No system control connected 4.4.6 Displaying the building circuit pressure ▶ Press in the basic display. ▶ Menu → Live Monitor→ Building circuit pressure to change the value and confirm this. -
Page 11: Reading Maintenance Messages
Reading maintenance messages Detecting and eliminating faults ▶ If problems occur whilst operating the product, you can If the symbol is shown in the display, the product requires carry out certain checks with the aid of the table. maintenance work or the product is in restricted mode (comfort protection). -
Page 12: Guarantee And Customer Service
Guarantee and customer service Customer service The contact details for our customer service are provided on the back page or on our website. Operating instructions 0020291525_04... -
Page 13: Appendix
Appendix Troubleshooting Problem Possible cause Remedy Building power supply switched off Switch on building power supply Domestic hot water or heating set to "off"/domestic Ensure that domestic hot water mode and/or hot water temperature or target temperature set too heating mode is activated in the system control. No domestic hot water, heat- Set the domestic hot water temperature in the ing remains cold;... - Page 14 Setting level Values Unit Increment, select Factory setting Setting Min. Max. Building circuit flow rate Current value Compressor anti-cycling time Current value Immersion heater anti-cycling Current value time ℃ Target flow temp. Current value ℃ Current flow temp. Current value Energy integral Current value °min...
- Page 15 Installation and maintenance Electrical installation......... 32 Preparing the electrical installation...... 32 instructions Requirements for the quality of the mains voltage ..............32 Contents Electrical partition ..........32 Installing components for the energy supply Safety ..............17 company lockout function ........32 Intended use ............
- Page 16 Adapting the unit to the heating Characteristic values for the VR10 installation............41 internal temperature sensors, cylinder temperature ............62 Configuring the heating installation ..... 41 Characteristic values for the VRC DCF Total pressure loss in the product, building outdoor temperature sensor......63 circuit ..............
-
Page 17: Safety
– Inspection and maintenance Safety – Repair Intended use – Decommissioning There is a risk of injury or death to the user or ▶ Proceed in accordance with current tech- others, or of damage to the product and other nology. property in the event of improper use or use for which it is not intended. -
Page 18: Regulations (Directives, Laws, Standards)
▶ Make sure that the product is carried by at 1.2.11 Risk of material damage caused by least two people. using an unsuitable tool ▶ Use suitable transport and lifting equip- ▶ Use the correct tool. ment, in accordance with your job safety analysis. -
Page 19: Notes On The Documentation
Notes on the documentation Safety devices 3.2.1 Frost protection function ▶ Always observe all the operating and installation instruc- tions included with the system components. The frost protection function for the system is controlled us- ▶ ing the product itself or using the optional system control. If Pass these instructions and all other applicable docu- the system control fails, the product guarantees limited frost ments on to the end user. -
Page 20: Functional Elements
The data plate keeps record of the country in which the product is to be installed. Information Meaning Serial no. Unique unit identification number Nomen- Vaillant indirect domestic hot water clature cylinder Rectangular domestic hot water cylinder Cylinder volume With electric back-up heater... -
Page 21: Ce Marking
"S2" in the nomenclature. For these Benchmark units, an optional accessory can be used to subsequently Vaillant is a licensed member of the Benchmark Scheme. activate the cooling mode. Benchmark places responsibilities on both manufacturers It is activated via a coding resistor and via a setting on the and installers. -
Page 22: Checking The Scope Of Delivery
▶ Ensure that the pipes are routed appropriately. Permissible height difference between the outdoor unit and the indoor unit In relation to the outdoor unit's installation site, the indoor unit's installation site may be located higher or lower. The permissible height difference depends on the unit type of the outdoor unit: 4.4.1 Outdoor unit with unit type S or M... -
Page 23: Dimensions
Dimensions Minimum clearances and installation clearances 130 mm 40 mm 300 mm 10 mm 600 mm ▶ Provide sufficient clearance (B) on at least one side of the product in order to facilitate access for maintenance and repair work. ▶ When using the accessories, observe the minimum clear- ances/installation clearances. -
Page 24: Separating The Product Into Two Modules Where Necessary
4.8.1 Using the carrying straps Remove the front casing. (→ Section 4.10.1) Danger! Risk of injury due to repeated use of the carrying straps. Due to material ageing, the carrying straps are not designed to be reused during any subsequent transportation. ▶... -
Page 25: Removing The Casing
4.10 Removing the casing 30 mm 4.10.1 Removing the front casing 2×1 13 mm 4×1 1,5 x 5,5 Disconnect the plug connection for the cylinder temper- ature sensor (6). Remove the four screws (3). Unscrew the two nuts (4) on the pipe connections. 1,5 x 5,5 Use the recessed handles (5) to lift off the upper part of the product. -
Page 26: Installing The Casing
4.11 Installing the casing 4.11.1 Installing the front casing Lift the upper section of the front casing upwards and out. 4.10.2 Removing the side casing Install the upper part of the front casing as shown in the figure. 2×1 2×1 Hook the lower part of the front casing, using the re- taining brackets, into the cut-outs in the side casings and lower it down. -
Page 27: Moving The Electronics Box (Optional)
4.12 Moving the electronics box (optional) 1,5 x 5,5 1,5 x 5,5 Push the electronics box (1) upwards and pull it to- wards you. Move the electronics box into the required position. 4.13 Setting up the indoor unit When setting up the product, take its weight, including the water content, into account. -
Page 28: Removing The Carrying Straps
4.14 Removing the carrying straps Connecting the heat pump to the indoor unit After you have set up the product, cut off the carrying straps and dispose of them in accordance with the relevant regulations. Refit the front casing to the product. Hydraulics installation G 1 1/4"... -
Page 29: Installing Potable Water Pipes
Installing potable water pipes To connect the potable water pipes to the domestic hot water cylinder, various piping sets are offered as accessories for surface or concealed installation. The piping, which is to be set up on-site, requires the follow- ing components: –... - Page 30 5.6.2 Installing a drain pipe ≥ 300 mm Temperature and pres- Tundish Cold water with equal 22 mm diameter con- sure relief valve pressure nection, e.g. potable water expansion vessel 15 mm diameter con- Discharges at high level: e.g. into metal hopper and metal nection, e.g.
-
Page 31: Installing The Drain Pipe On The Expansion Relief Valve
– if plastic pipes are used as branch pipes carrying dis- Size of Minimum Minimum Maximum Resist- charge from a safety device, they should be either poly- the outlet diameter diameter permiss- ance per butalene or crosslinked polyethylene complying with na- valve of the of the... -
Page 32: Connecting The Condensate Discharge
Connecting the condensate discharge Determine whether the power supply for the product should be set up with a single-tariff meter or a dual- Condition: Cooling mode activated tariff meter. Connect the product via a fixed connection and a parti- tion with a contact gap of at least 3 mm. Leave the cable cross-section for the connection cable to the distribution box unchanged. -
Page 33: Removing The Cover From The Power Supply Pcb
Option 2: Disconnect the power supply with con- tactor ▶ Upstream of the indoor unit, install a contactor into the power supply for the low tariff. ▶ Install a 2-pole control cable. Connect the control output for the ripple control receiver to the control input for the contactor. -
Page 34: Establishing The Power Supply, 3~/400V
6.7.2 1~/230V dual power supply 6.8.1 3~/400V single power supply X311 X310 X300 Note the specifications on the sticker on the electronics X311 X310 X300 box. Install a disconnector for the product. Note the specifications on the sticker on the electronics Use the enclosed 5-pole power supply cable. -
Page 35: Installing The System Control In The Electronics Box
▶ Installing the system control in the For parallel routing to mains connection lines, guide the cables in accordance with the applicable regulations, e.g. electronics box on cable trays. ▶ Condition: Installing a multiMATIC VRC 700 Exceptions: For wall breaks and in the electronics box, it is acceptable to not reach the minimum clearance. -
Page 36: Carrying Out The Wiring
▶ 6.13 Carrying out the wiring Plug the edge connector into slot X41 on the control PCB. Ensure that the mains voltage is correctly disconnected Set the circulation pump in the system control. from the safety extra-low voltage. Only connect power supply cables to the terminals that 6.15 Connecting a limit thermostat for the are marked for the purpose. -
Page 37: Checking The Electrical Installation
6.19 Checking the electrical installation If you want to actuate the heating circuit and the do- mestic hot water cylinder, turn the selection lever to ▶ After the installation is complete, check the electrical in- "Heating circuit/domestic hot water cylinder". stallation to ensure that the connections that have been established are secured properly and are sufficiently in- Checking and treating the heating... -
Page 38: Filling And Purging The Heating Installation
Caution. Risk of material damage if the heating water is treated with unsuitable additives. Unsuitable additives may cause changes in the components, noises in heating mode and possibly subsequent damage. ▶ Do not use any unsuitable antifreeze and corrosion inhibitors, biocides or sealants. No incompatibility with our products has been detected to date with proper use of the following additives. -
Page 39: Filling The Domestic Hot Water Circuit
Filling the domestic hot water circuit To access the next item, confirm by pressing Next in each case. Open all domestic hot water tap fittings. If you do not confirm the launch of the installation assistant, Wait until water escapes from each draw-off point and it is closed 10 seconds after you switch on the unit and the then close all the hot water taps. -
Page 40: Setting The Anti-Legionella Function
▶ 8.15 Activating cooling mode Activate the internal electric back-up heater with one of the output levels. ▶ Go to the indoor unit's control panel. ▶ You can find the output levels for the electric back-up ▶ Navigate to: Menu → Installer level → Configuration → heater in the tables in the appendix. -
Page 41: Starting Up The Optional System Control
flow can be achieved by setting the available pressure Days after starting the func- Target flow temperature for (Delta T = 5 K). tion this day [°C] Total pressure loss in the product, building circuit 6–12 17–23 10 (frost protection function, 1000 2000 pump in operation) -
Page 42: 10 Troubleshooting
10 Troubleshooting 10.7 Carrying out the actuator test Menu → Installer level → Test menu → Sensor/actuator 10.1 Contacting your service partner test If you contact your service partner, please mention if pos- You can check that the components of the heating installa- sible: tion are functioning correctly using the sensor/actuator test. -
Page 43: Resetting Parameters To Factory Settings
11.3 Observing inspection and maintenance Remove the capillary tube from the temperature sensor on the electric back-up heater. intervals Remove both screws and remove the safety cut-out ▶ Adhere to the minimum inspection and maintenance in- with the retainer from the product. tervals. -
Page 44: Cleaning The Domestic Hot Water Cylinder
▶ Observe all relevant regulations. 15 Customer service Validity: Great Britain AND Vaillant Connect a hose to each of the draining cocks (1) and For contact details for our customer service department, you (2), and guide the ends of the hoses to a suitable drain- can write to the address that is provided on the back page, age point. -
Page 45: Appendix
Appendix Functional diagram Automatic air vent Cylinder temperature sensor Flow temperature sensor: Electric back-up heater Manometer output Filling/draining cock Building circuit, flow Isolation valve Building circuit, return Draining cock, heat pump and heating circuit Back-up heater Domestic hot water cylinder's draining cock Heating flow from the outdoor unit Diaphragm expansion vessel Heating return to the outdoor unit... -
Page 46: B Wiring Diagram
Wiring diagram X311 X300 X310 X312 X302 X314 X313 X328 X301 Power supply PCB [X328] Data connection to the control PCB For single power supply: 230 V bridge between [X313] Power supply for the control PCB or the op- X311 and X310; for dual power supply: Replace tional VR 70/VR 71 or the optional external current the bridge at X311 with the 230 V connection anode... -
Page 47: C Control Pcb
Control PCB 9 18 X100 / X106 eBUS 9 19 Control PCB [X15] Internal prioritising diverter valve for heating circuit/cylinder charging [X29] eBUS bus connection for the installed system [X11] Multi-function output 2: Domestic hot water control circulation pump, anti-legionella pump, dehumidifier, [X51] Display edge connector zone valve [X35] External current anode edge connector... -
Page 48: D Basic Connection Diagram For The Energy Supply Company Lockout, Shutdown Via Connection S21
Basic connection diagram for the energy supply company lockout, shutdown via connection S21 L1 L2 L3 N L2 L3 N X211 X210 X200 X206 X311 X310 X300 X106 L1 L2 L3 L2 L3 N X211 X210 X200 X206 X311 X310 X300 X106 Meter/fuse box... -
Page 49: E Basic Connection Diagram For The Energy Supply Company Lockout, Shutdown Via Partition
Basic connection diagram for the energy supply company lockout, shutdown via partition L1 L2 L3 N L2 L3 N X211 X210 X200 X206 X311 X310 X300 X106 L1 L2 L3 L2 L3 N X211 X210 X200 X206 X311 X310 X300 X106 Meter/fuse box Disconnector (circuit breaker, fuse) -
Page 50: F Installer Level Overview
Installer level overview Setting level Values Unit Increment, select, ex- Factory setting Setting planation Min. Max. Installer level → Enter code 1 (competent person code 17) Installer level → Fault list → Current value F.XX – F.XX Installer level → Test menu → Statistics → Compressor hours Current value Compressor starts... - Page 51 Setting level Values Unit Increment, select, ex- Factory setting Setting planation Min. Max. T.0.43 Building circuit: Flow rate 4000 ℃ T.0.48 Air inlet temperature ℃ T.0.55 Compressor outlet tem- perature ℃ T.0.56 Compressor inlet temper- ature ℃ T.0.57 EEV outlet temperature ℃...
- Page 52 Setting level Values Unit Increment, select, ex- Factory setting Setting planation Min. Max. ℃ Heating alt. point ℃ Max. flow temperature ℃ Min. flow temperature Heating mode activ. DHW activation K Cyl. charg. hysteresis Immers. heater mode Heating+DHW Heating Domestic hot water Limp home mode Heating Domestic hot water...
-
Page 53: G Status Codes
Setting level Values Unit Increment, select, ex- Factory setting Setting planation Min. Max. Software version Current value of the xxxx.xx.xx control PCB (HMU indoor unit xxxx, HMU outdoor unit xxxx) and the display (AI xxxx) Installer level → Resets → Statistics →... - Page 54 Code Meaning S.111 Cooling: Compressor The cooling demand is met, the demand is ended by the system control. The compressor is switched shutdown off. S.112 Cooling: Compressor The compressor is blocked for cooling mode because the heat pump is outside of its application lim- blocked its.
- Page 55 Code Meaning S.277 Building circuit: Pump If the building circuit pump is inactive, the heat pump is switched off for 10 minutes and is then restar- fault ted. If the building circuit pump does not start up after three unsuccessful restarts, the heat pump is switched off and the fault message F.788 is displayed.
-
Page 56: H Maintenance Messages
Maintenance messages Remedy Code Meaning Cause – – M.23 Status external current anode External current anode not recog- If required, check for a cable break nised – – M.32 Building circuit: Waterpress. Low Pressure loss in the building circuit Check the building circuit for leaks, due to leakages or air pockets top up with heating water and purge –... - Page 57 Remedy Code Meaning Cause – – F.517 Sensor fault: Compr. outlet temp. The sensor is not connected or the Check and, if required, replace the sensor input has short-circuited sensor – Replace the wiring harness – – F.519 Sensor fault: Building circuit re- The sensor is not connected or the Check and, if required, replace the turn temp.
- Page 58 Remedy Code Meaning Cause – F.732 Compressor outlet temperature The compressor outlet temperature is Check the compressor inlet sensor too high above 110 °C: and outlet sensor – Check the compressor outlet temper- – Application limits exceeded ature sensor (TT135) –...
- Page 59 Remedy Code Meaning Cause – – F.741 Building circuit: Return temp. too During the de-icing, the return tem- Ensure the minimum installation perature falls below 13 °C volume is maintained; if required, install a series return cylinder – The fault message is displayed until the return temperature increases to above 20 °C.
- Page 60 Remedy Code Meaning Cause – – F.819 Freq. converter fault: Overheating Internal overheating of the frequency Allow the frequency converter to cool converter and restart the product – Check the frequency converter's air route – Check that the fan is working cor- rectly –...
-
Page 61: K 5.4 Kw Back-Up Heater At 230 V And At
Remedy Code Meaning Cause – – F.1120 Immersion heater: Phase failure Electric back-up heater defective Check the electric back-up heater and its power supply – Poorly tightened electrical connec- – tions Check the electrical connections – – Mains voltage too low Measure the voltage at the electrical connection for the electric back-up heater... -
Page 62: N Characteristic Values For The Vr10 Internal Temperature Sensors, Cylinder Temperature
Temperature (°C) Resistance (ohms) 1260 1074 Characteristic values for the VR10 internal temperature sensors, cylinder temper- ature Temperature (°C) Resistance (ohms) 88130 64710 47770 35440 26460 19900 15090 11520 8870 6890 5390 4240 3375 2700 2172 1758 1432 1173 Installation and maintenance instructions 0020291525_04... -
Page 63: O Characteristic Values For The Vrc Dcf Outdoor Temperature Sensor
Temperature (°C) Resistance (ohms) Characteristic values for the VRC DCF outdoor temperature sensor Temperature (°C) Resistance (ohms) 2167 2067 1976 1862 1745 1619 1494 1387 1246 1128 1020 0020291525_04 Installation and maintenance instructions... -
Page 64: Commissioning Checklist
Commissioning Checklist Benchmark Commissioning & Warranty Validation Service Record It is a requirement that the heat pump is installed and commissioned to the manufacturers’ instructions and the data fields on the commissioning checklist completed in full. To instigate the warranty the heat pump needs to be registered with the manufacturer within one month of the installation. - Page 65 AIR TO WATER HEAT PUMP COMMISSIONING CHECKLIST This Commissioning Checklist is to be completed in full by the competent person who commissioned the heat pump and associated equipment as a means of demonstrating compliance with the appropriate Building Regulations and then handed to the customer to keep for future reference.
- Page 66 SERVICE RECORD It is recommended that your heating system is serviced regularly and that the appropriate Service Interval Record is completed. Service Provider Before completing the appropriate Service Record below, please ensure you have carried out the service as described in the manufacturer’s instructions. SERVICE 01 SERVICE 02 Date:...
-
Page 67: Q Technical Data
Technical data Note The following performance data is only applicable to new products with clean heat exchangers. Technical data – General VIH QW 190/6 E GB Product dimensions, width 595 mm Product dimensions, height 1,880 mm Product dimensions, depth 693 mm Weight, without packaging 146 kg Weight, ready for operation... - Page 68 VIH QW 190/6 E GB ≤ 30 dB(A) Sound power A7/W65 in accord- ance with EN 12102 / EN 14511 L in heating mode ≤ 30 dB(A) Sound power A35/W7 in accord- ance with EN 12102 / EN 14511 L in cooling mode ≤...
- Page 69 VIH QW 190/6 E GB Heat-up time in accordance with 125 min DIN EN 16147 to target cylinder temperature, A7 with an outdoor unit up to 7 kW Power consumption during 45 W standby in accordance with DIN EN 16147, A7 – with an outdoor unit up to 7 kW Coefficient of performance 2.55...
-
Page 70: Index
Index Intended use................ 17 Live Monitor, displaying............42 Actuator test ................ 42 Low-water pressure protection ..........19 Actuators, checking ............. 42 Maintenance message, checking ........43 Article number ..............20 Maintenance work ............... 43 Minimum clearances ............23 Basic diagram..............17 Building circuit, connecting.......... - Page 72 Supplier Vaillant Ltd. Nottingham Road Belper Derbyshire DE56 1JT Telephone 0330 100 3143 info@vaillant.co.uk www.vaillant.co.uk 0020291525_04 Publisher/manufacturer Vaillant GmbH Berghauser Str. 40 D-42859 Remscheid Tel. +49 2191 18 0 Fax +49 2191 18 2810 info@vaillant.de www.vaillant.de © These instructions, or parts thereof, are protected by copyright and may be reproduced or distributed only with the manufacturer's written consent.
Need help?
Do you have a question about the uniTOWER plus and is the answer not in the manual?
Questions and answers