
Related Manuals for Vaillant VWZ MEH 97/6


Summary of Contents for Vaillant VWZ MEH 97/6
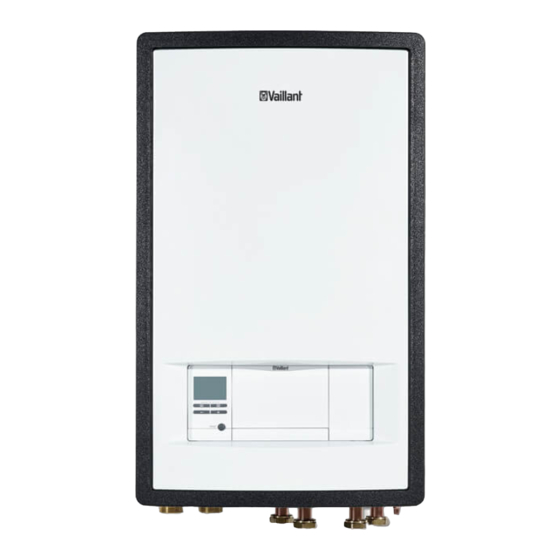
- Page 1 Hydraulic station VWZ MEH 97/6 en Operating instructions en Installation and maintenance instructions...
- Page 2 Operating instructions ........3 Installation and maintenance instructions..15...
-
Page 3: Table Of Contents
Operating instructions Contents Safety ..............4 Intended use ............4 General safety information ........4 Notes on the documentation ......6 Product description..........6 Heat pump system..........6 Design of the product..........6 Control elements............ 6 Control panel ............7 Description of the symbols ........ -
Page 4: Safety
– The water and electricity supply lines VWL ..5/6 A .. VIH QW 190/6... – to the expansion relief valve VWZ MEH 97/6 – to the drain pipework – to constructional conditions that may This product can be used by children aged... - Page 5 1.2.5 Benchmark Vaillant is a licensed member of the Bench- mark Scheme which aims to improve the standards of installation and commissioning of domestic heating and hot water systems in the UK and to encourage regular servicing to optimise safety, efficiency and performance.
-
Page 6: Notes On The Documentation
▶ Store these instructions and all other applicable docu- ments for further use. These instructions apply only to: Product VWZ MEH 97/6 Product VIH QW 190/6 E GB Product description Heat pump system Design of a typical heat pump system with monoblock tech-... -
Page 7: Control Panel
Control panel Symbol Meaning Explanation – Without The dashed lines show the decoupling permitted range. module – Displayed statically: Filling – Filling pressure in the permitted pressure range in the – Displayed flashing: Filling building pressure outside of the circuit permitted range (measured in the... -
Page 8: Type Designation And Serial Number
Operation Button Meaning – Navigating between individual menu items Basic display – Increasing or decreasing the chosen set value Adjustable values flash in the display. You must always confirm a change to a value. Only then is the new setting saved. You can press to cancel a pro- cess at any time. -
Page 9: Starting Up The Product
Starting up the product Condition: System control connected ▶ 4.4.1 Opening the isolators To do this, adjust the target cylinder temperature (De- sired DHW circuit temperature) to between 50 and Ask the competent person who installed the product to 55 °C. explain to you where these isolators are located and ▶... -
Page 10: Setting The Heating Flow Temperature
Setting the domestic hot water temperature You can use this function to display the current filling pres- sure of the heating installation. Condition: No system control connected 4.4.7 Reading the operating statistics ▶ Press in the basic display. ▶ Menu → Information → Heating op. hours to change the value and confirm this. -
Page 11: Care And Maintenance
Use Menu → Live Monitor Water pressure to display Care and maintenance the filling pressure of the heating installation. Caring for the product If the pressure drops frequently, identify and eliminate the reason for the pressure loss of heating water. In- ▶... -
Page 12: Permanently Decommissioning The Product
Guarantee and customer service Guarantee Vaillant provides a full parts and labour guarantee for this appliance for the duration as shown on the enclosed re- gistration card which must be fully completed and returned within 30 days of installation. -
Page 13: Appendix
Appendix Troubleshooting Problem Possible cause Remedy Building power supply switched off Switch on building power supply Domestic hot water or heating set to "off"/domestic Ensure that domestic hot water mode and/or hot water temperature or target temperature set too heating mode is activated in the system control. No domestic hot water, heat- Set the domestic hot water temperature in the ing remains cold;... - Page 14 Setting level Values Unit Increment, select Factory setting Setting Min. Max. Building circuit flow rate Current value Compressor anti-cycling time Current value Immersion heater anti-cycling Current value time ℃ Target flow temp. Current value ℃ Current flow temp. Current value Energy integral Current value °min...
- Page 15 Installation and maintenance 6.11 Opening the control PCB's electronics box ..29 6.12 Routing the cables in the electronics box .... 29 instructions 6.13 Carrying out the wiring......... 30 Contents 6.14 Connecting the circulation pump ......30 6.15 Connecting a limit thermostat for the underfloor heating..........
- Page 16 10.4 Querying the fault memory ........37 10.5 Resetting the fault memory........37 10.6 Using the function menu ........37 10.7 Using check programmes ........37 10.8 Carrying out the actuator test ......37 10.9 Resetting parameters to factory settings ..... 37 10.10 Preparing the repair work ........
-
Page 17: Safety
VWL ..5/6 A .. VIH QW 190/6... ▶ Wait for at least 3 minutes until the capa- VWZ MEH 97/6 citors have discharged. – observance of accompanying operating, ▶ Check that there is no voltage. installation and maintenance instructions 1.2.3 Risk of death due to lack of safety... -
Page 18: Regulations (Directives, Laws, Standards)
1.2.6 Risk of injury due to the heavy weight 1.2.11 Risk of material damage caused by of the product using an unsuitable tool ▶ Make sure that the product is transported ▶ Use the correct tool. by at least two people. Regulations (directives, laws, 1.2.7 Risk of material damage due to an standards) -
Page 19: Notes On The Documentation
At negative outdoor temperatures, there is an increased risk of the heating water freezing if a heat pump fault occurs, e.g. Product due to a power cut or a defective compressor. VWZ MEH 97/6 3.2.2 Low-water pressure protection Product This function continuously monitors the heating water pres- VIH QW 190/6 E GB sure in order to prevent a possible loss of heating water. -
Page 20: Product Overview
Product overview 3.3.2 Design of the hydraulic block 3.3.1 Product design Manometer Domestic hot water Unit mounting bracket Electronics box with cylinder flow Expansion relief valve control PCB Prioritising diverter Expansion vessel Control for the indoor Building circuit return valve (heating cir- Hydraulic block unit cuit/cylinder charging) -
Page 21: Serial Number
Heating return, domestic hot water cylin- Information Meaning Serial no. Unique unit identification number Nomen- Vaillant heat pump accessory CE marking clature Electro-hydraulic module 9 = 9 kW back-up heater 7 = integrated 3-port motorised valve for external domestic hot wa- ... -
Page 22: Set-Up
Permissible height difference between the When replacing the PCB, the values for energy consump- tion, energy yields and efficiencies are reset in the heat outdoor unit and the indoor unit pump's control panel. In relation to the outdoor unit's installation site, the indoor unit's installation site may be located higher or lower. -
Page 23: Minimum Clearances And Installation Clearances
– Minimum clearance: 200 mm Wall-mounting the product Cut the enclosed adhesive strips (1) for noise reduction into two equally sized pieces (3 cm x 3 cm). Affix the adhesive strips to the product as shown in the figure. Minimum clearances and installation clearances Check the load-bearing capacity of the wall. -
Page 24: Removing The Front Casing
▶ Removing the front casing Check whether the expansion relief valve's drain pipe- work opposite the outdoor air remains open, is installed in a frost-free environment, always runs downwards and visibly ends in an open drain. ▶ For heating installations with solenoid valves or thermo- statically controlled valves, install a bypass with bypass valve in order to guarantee a volume flow of at least 40%. -
Page 25: Connecting The Building Circuit
Connecting the building circuit Electrical installation Preparing the electrical installation Danger! Risk of death from electric shock as a res- ult of an improper electrical connection! An improper electrical connection may neg- atively affect the operational safety of the product and result in material damage or per- sonal injury. -
Page 26: Electrical Partition
Electrical partition The electrical partitions are referred to as "disconnectors" in these instructions. The fuse or the circuit breaker that is installed in the building's meter/fuse box is usually used as the disconnector. Installing components for the energy supply company lockout function Condition: Energy supply company lockout function provided The heat generation of the heat pump can be switched off in- termittently. -
Page 27: Establishing The Power Supply, 1~/230V
X311 X310 X300 Note the specifications on the sticker on the electronics box. Install a disconnector for the product. Use the preinstalled 3-pole power supply cable (3 x 4 mm Connect the power supply cable to L1, N, PE. Guide the power supply cables through the strain relief (1) to the terminals on the power supply PCB. -
Page 28: Establishing The Power Supply, 3~/400V
Use the strain relief clamps to secure the cables in place. Establishing the power supply, 3~/400V ▶ Determine the type of connection: Case Connection type Energy supply company lockout not Single power supply provided Energy supply company lockout provided, shutdown via connection Energy supply company lockout Dual power supply X311... -
Page 29: Installing The System Control In The Electronics Box
▶ Installing the system control in the For parallel routing to mains connection lines, guide the cables in accordance with the applicable regulations, e.g. electronics box on cable trays. ▶ Condition: Installing a multiMATIC VRC 700 Exceptions: For wall breaks and in the electronics box, it is acceptable to not reach the minimum clearance. -
Page 30: Carrying Out The Wiring
6.13 Carrying out the wiring Condition: Activation of the circulation via an external button Note There is a safety extra-low voltage (SELV) at con- nections S20 and S21. Note If the energy supply company lockout function is used, connect a potential-free normally open con- tact with a breaking capacity of 24 V/0.1 A to con- nection S21. -
Page 31: Connecting The Outdoor Temperature Sensor
6.17 Connecting the outdoor temperature sensor 6.22 Checking the electrical installation ▶ After the installation is complete, check the electrical in- stallation to ensure that the connections that have been established are secured properly and are sufficiently in- sulated. Operation Operating concept of the product The operating concept and the read-out and setting options of the end user level are described in the operating instruc-... -
Page 32: Checking And Treating The Heating Water/Filling And Supplementary Water
If you want to actuate the heating circuit and the do- Caution. mestic hot water cylinder, turn the selection lever to Risk of material damage if the heating "Heating circuit/domestic hot water cylinder". water is treated with unsuitable additives. Checking and treating the heating Unsuitable additives may cause changes in water/filling and supplementary water the components, noises in heating mode and... -
Page 33: Purging
Purging Open the automatic air vent. Start the purge programme for the building circuit P06 using: Menu → Installer level → Test menu → Check programmes → Purge building circuit. Allow the P06 function to run for 15 minutes. Once both purge programmes have finished, check whether the pressure in the heating circuit is 150 kPa (1.5 bar). -
Page 34: Menu Functions Without The Optional System Control
8.6.1 Ending the installation assistant Compressor hysteresis Once you have run through the installation assistant The heat pump is switched on and off via the compressor successfully, confirm by pressing hysteresis for heating mode and also for energy balancing. ◁ When the compressor hysteresis is above the target flow The installation assistant will close and will not temperature, the heat pump is switched off. -
Page 35: Calling Up The Installer Level
8.13 Calling up the installer level Days after starting the func- Target flow temperature for tion this day [°C] Press at the same time. Navigate to Menu → Installer level and confirm by 17–23 10 (frost protection function, pressing (OK). pump in operation) Set the value 17 and confirm by pressing 8.14... -
Page 36: Activating Cooling Mode
8.18 Activating cooling mode Adapting the unit to the heating ▶ installation Go to the indoor unit's control panel. ▶ Navigate to: Menu → Installer level → Configuration → Configuring the heating installation Cooling technology. ▶ Select: Active cooling. To adjust the water flow rate that is created by the heat ▶... -
Page 37: 10 Troubleshooting
▶ 10.5 Resetting the fault memory Inform the end user about all of the anti-legionella meas- ures. ▶ Press twice and then Delete and OK to delete the ▶ Inform the end user how to handle the product. fault list. ▶... -
Page 38: Safety Cut-Out
10.11 Safety cut-out 11 Inspection and maintenance The product has a safety cut-out. 11.1 Inspection and maintenance information If the safety cut-out has tripped, the cause must be elimin- 11.1.1 Inspection ated and the safety cut-out replaced. ▶ See the "Fault codes" table in the appendix. The inspection is intended to determine the actual condition ▶... -
Page 39: Observing Inspection And Maintenance Intervals
11.4 Observing inspection and maintenance 11.7 Checking the high-pressure switch-off intervals ▶ Start check programme P.29 High pressure. ▶ ◁ Adhere to the minimum inspection and maintenance in- The compressor starts and the flow rate monitoring tervals. Carry out all of the work that is listed in the "In- for the pump is deactivated. -
Page 40: 13 Decommissioning
Dispose of the product and all accessories correctly. ▶ Observe all relevant regulations. 15 Customer service Validity: Great Britain AND Vaillant For contact details for our customer service department, you can write to the address that is provided on the back page, or you can visit www.vaillant.co.uk. -
Page 41: Appendix
Appendix Functional diagram Automatic air vent Heating circuit, flow, domestic hot water Flow temperature sensor: Electric back-up heater Building circuit, flow, heating output Building circuit, return, heating Back-up heater Expansion relief valve, 3 bar Heating return to the outdoor unit Prioritising diverter valve Heating flow from the outdoor unit Diaphragm expansion vessel... -
Page 42: B Wiring Diagram
Wiring diagram X311 X310 X300 X312 X302 X314 X313 X328 X301 Power supply PCB [X328] Data connection to the control PCB For single power supply: 230 V bridge between [X313] Power supply for the control PCB or the op- X311 and X310; for dual power supply: Replace tional VR 70/VR 71 or the optional external current the bridge at X311 with the 230 V connection anode... -
Page 43: Basic Connection Diagram For The Energy Supply Company Lockout, Shutdown Via Connection S21
Basic connection diagram for the energy supply company lockout, shutdown via connection S21 L1 L2 L3 N L2 L3 N X211 X210 X200 X206 X311 X310 X300 X106 L1 L2 L3 L2 L3 N X211 X210 X200 X206 X311 X310 X300 X106 Meter/fuse box... -
Page 44: Basic Connection Diagram For The Energy Supply Company Lockout, Shutdown Via Partition
Basic connection diagram for the energy supply company lockout, shutdown via partition L1 L2 L3 N L2 L3 N X211 X210 X200 X206 X311 X310 X300 X106 L1 L2 L3 L2 L3 N X211 X210 X200 X206 X311 X310 X300 X106 Meter/fuse box Disconnector (circuit breaker, fuse) -
Page 45: E Installer Level Overview
Installer level overview Setting level Values Unit Increment, select, ex- Factory setting Setting planation Min. Max. Installer level → Enter code 1 (competent person code 17) Installer level → Fault list → Current value F.XX – F.XX Installer level → Test menu → Statistics → Compressor hours Current value Compressor starts... - Page 46 Setting level Values Unit Increment, select, ex- Factory setting Setting planation Min. Max. T.0.42 Building circuit: Water Pressure T.0.43 Building circuit: Flow rate 4000 ℃ T.0.48 Air inlet temperature ℃ T.0.55 Compressor outlet tem- perature ℃ T.0.56 Compressor inlet temper- ature ℃...
- Page 47 Setting level Values Unit Increment, select, ex- Factory setting Setting planation Min. Max. ℃ Heating biv. point ℃ DHW bivalence point ℃ Heating alt. point ℃ Max. flow temperature ℃ Min. flow temperature Heating mode activ. DHW activation K Cyl. charg. hysteresis Immers.
- Page 48 Setting level Values Unit Increment, select, ex- Factory setting Setting planation Min. Max. Only for products with cooling: None Active None, active cooling None cooling Cooling technology Intermediate heat exchanger Yes, No Output limit signal received Received, Not received Current output limit of the heat Output limit of the heat pump pump in kW...
-
Page 49: F Status Codes
Status codes Code Meaning Status external current anode Anode not connected, Anode OK, Anode Fault S.34 Heating mode: Frost pro- If the measured outdoor temperature falls below XX °C, the temperature of the heating circuit's flow tection and return is monitored. If the temperature difference exceeds the set value, the pump and com- pressor are started without a heat demand. - Page 50 Code Meaning S.256 Fan unit 1: Air inlet The compressor does not start because the outdoor temperature at the fan is below the application temp. too low limits. Heating mode: < -20 °C. Domestic hot water mode: < -20 °C. Cooling mode: < 15 °C. S.260 Fan unit 2: Fan blocked If the fan speed is 0 rpm, the heat pump is switched off for 15 minutes and then restarted.
-
Page 51: G Maintenance Messages
Code Meaning S.314 Building circuit: Return Return temperature in the building circuit too high for the compressor to start. Heating: Return tem- temperature too high perature > 56 °C. Cooling: Return temperature > 35 °C. Cooling: Check that the 4-port diverter valve works correctly. -
Page 52: Kw Back-Up Heater At 230 V And At
5.4 kW back-up heater at 230 V and at 400 V Internal control of the output Power consumption Set value levels at 230 V and at 400 V 0.0 kW 0.7 kW 1 kW 1.2 kW 1.8 kW 2 kW 2.2 kW 3 kW 3.2 kW... -
Page 53: L Characteristic Values For The Vr10 Internal Temperature Sensors, Cylinder Temperature
Characteristic values for the VR10 internal temperature sensors, cylinder temper- ature Temperature (°C) Resistance (ohms) 88130 64710 47770 35440 26460 19900 15090 11520 8870 6890 5390 4240 3375 2700 2172 1758 1432 1173 0020291544_03 Installation and maintenance instructions... -
Page 54: Characteristic Values For The Vrc Dcf Outdoor Temperature Sensor
1128 1020 Technical data Note The following performance data is only applicable to new products with clean heat exchangers. Technical data – General VWZ MEH 97/6 Product dimensions, width 440 mm Product dimensions, height 720 mm Product dimensions, depth 350 mm... - Page 55 VWZ MEH 97/6 75 ℃ Max. heating mode flow temperat- ure with back-up heater 7 ℃ Min. cooling mode flow temperat- ≤ 29 dB(A) Sound power A7/W35 in accord- ance with EN 12102 / EN 14511 L in heating mode ≤...
-
Page 56: Index
Index Intended use................ 17 Live Monitor, displaying............37 Actuator test ................ 37 Low-water pressure protection ..........19 Actuators, checking ............. 37 Maintenance................ 38 Article number ..............21 Maintenance message, checking ........38 Maintenance work ............... 39 Basic diagram..............17 Minimum clearances ............23 Building circuit connections .......... - Page 60 Supplier Vaillant Ltd. Nottingham Road Belper Derbyshire DE56 1JT Telephone 0330 100 3143 info@vaillant.co.uk www.vaillant.co.uk 0020291544_03 Publisher/manufacturer Vaillant GmbH Berghauser Str. 40 D-42859 Remscheid Tel. +49 2191 18 0 Fax +49 2191 18 2810 info@vaillant.de www.vaillant.de © These instructions, or parts thereof, are protected by copyright and may be reproduced or distributed only with the manufacturer's written consent.
Need help?
Do you have a question about the VWZ MEH 97/6 and is the answer not in the manual?
Questions and answers