Doro 8035 Manual
Hide thumbs
Also See for 8035:
- Quick start manual ,
- Quick start manual (3 pages) ,
- Quick start manual (2 pages)
Table of Contents
Advertisement
Quick Links
Advertisement
Table of Contents

Related Manuals for Doro 8035


Summary of Contents for Doro 8035
- Page 1 Doro 8035 English...
- Page 2 Your lo- cal Doro dealer provides additional accessories. The supplied accessories provide the best performance with your phone.
-
Page 3: Table Of Contents
English Contents How to set up your Doro 8035 ..............1 Step 1 – Unbox your new phone ............1 Step 2 – Getting started ............... 2 Step 3 – Insert SIM card and memory card ........3 Step 4 – Charge ..................5 Step 5 –... - Page 4 English Voice assistant................28 Phone settings.....................29 Where to find the settings ..............29 The date and time ................29 Vibrate on touch ..................30 Screen timeout ..................30 My wallpaper..................30 Home screen shortcuts...............30 My widgets ................... 31 The text size..................32 The screen brightness.................32 The text contrast..................32 The colour inversion ................32 The colour correction ................33 Improve accessibility further ..............33...
- Page 5 Applications ....................53 Beginners guide - Discover your phone ..........54 Doro Selection ..................54 Messages.....................54 Email ....................55 Camera....................57 Handle pictures in the Gallery ............58 Doro Connect & Care ................59 My Doro Manager................63 Google search..................64 Internet (Web browser) ...............65 Dock mode...................65 Magnifier....................66 Music....................66 Listen to the radio ................67...
- Page 6 English Operating environment ............... 74 Medical units ..................75 Areas with explosion risk ..............75 Li-Ion battery..................75 Protect your hearing ................76 Emergency calls................... 76 GPS/Location based functions ............76 Vehicles....................76 Protect your personal data ..............77 Malware and viruses ................77 Care and maintenance ................78 Warranty.......................79 Specifications ....................79...
-
Page 7: How To Set Up Your Doro 8035
The first step is to unbox the phone and assess the items and equipment included in the delivery. Make sure to read through the manual so you can familiarise yourself with the equipment and the basic functions.For more information about accessories or other Doro products please visit www.doro.com or contact our Helpline. -
Page 8: Step 2 - Getting Started
English Step 2 – Getting started Before you start using your new phone you may need: • nano-SIM card. To take full advantage of your new smartphone’s ca- pabilities, you should install a SIM card. The SIM card will enable you to place calls or use mobile data to connect to various Internet services. -
Page 9: Step 3 - Insert Sim Card And Memory Card
English Step 3 – Insert SIM card and memory card IMPORTANT! Turn off the phone and disconnect the charger before removing the battery cover. Remove the back cover IMPORTANT! Be careful not to damage your fingernails when you remove the battery cover. Do not bend or twist the battery cover excessively as it may get damaged. - Page 10 English Insert the memory card (optional and not included) Tip: Take care not to scratch or bend the contacts on the memory or SIM card when inserting them into the card holders. You may also optionally insert a memory card. Make sure that the memory card’s contacts are facing as shown.
-
Page 11: Step 4 - Charge
English Step 4 – Charge Charge your phone. While it's possible that your phone will already come with enough charge to be powered on right out of the box, we recom- mend to fully charge it before first use. CAUTION Only use batteries, chargers and accessories that have been approved for use with this particular model. -
Page 12: Step 5 - Turn On The Phone
Smartphone?”. • If you select “Yes, I am a beginner”, you will get Doro's unique menu system. This is action-based and allows you to navigate your phone, by just asking yourself, “What do I want to do?”. See Navigate your phone , p.23. -
Page 13: Get To Know Your Phone
English • If you select “No, I have already used one”, you will be asked if you want Doro’s action-based menu system or more traditional Android menus. Get to know your phone ™ Sign in to Google ™ Unless you already created a Google account as part of the Start-up wizard. -
Page 14: Touchscreen Motion And Gestures
English Handling Seeing Hearing Safety Touchscreen motion and gestures • Tap an item, such as a button or a program icon, to select it or to open it. Tap can be used to select or deselect a relevant tick box in a list of options. -
Page 15: Sensors
English Pinch • Place two fingers separated on the screen and pinch them together to zoom out of a map. This function is not always applicable. Zoom • Place two fingers together on the screen and spread them to zoom in. -
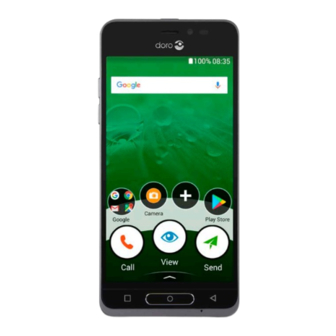
Page 16: Home Screen
English Home screen The Home screen is your start screen on your Doro 8035, and here you can collect the apps and your favourite contacts that you use most often. ™ You can also set your favourite picture as wallpaper. Use the Google search bar to quickly find what you are looking for. -
Page 17: To Use The Phone Keys
English To activate the screen lock or change the type of screen lock, tap Set. Tap A general option My screen lock. Tap to select one of the following: None to unlock, press � or the Power button. No security. •... - Page 18 (like games or video players). • To zoom in Camera mode. Soft keys Android smart phones like your Doro 8035, as well as most Android appli- cations, feature common icons. Many icons that you see on-screen are...
-
Page 19: My Applications Screen
Application is another word for program or software, a common way to shorten the term application is App. The application screen contains the applications that come pre-installed on your Doro 8035 and any other apps that you choose to install. The applications screen extends beyond the regular screen, so you need to swipe down to view all content. -
Page 20: Quick And Easy Way To Quiet Your Phone
English Tap Add. Tap an item to select it: • Recommended applications: tap to select an app. • View by categories to select an option in the pick list. Confirm with • Search on Play Store to reach Play Store. Find an item you wish to download by browsing categories or by us- ing the search function. -
Page 21: Notification Panel
English Notification panel Open the notification panel to view more information about the icons in the status bar, to view your notifications and manage the quick settings like Wifi or Aeroplane mode. Open and close the notification panel To open the notification panel, swipe the status bar down. -
Page 22: Quick Settings Panel
Enter text You can enter text, numbers and other characters using the on-screen keyboard. Your phone is preloaded with the Doro keyboard. Select a text field to open the on-screen keyboard. You can adjust your on-screen key- board in various ways to improve readability. - Page 23 English Select Voice input or Classic keyboard • Tap Voice input or Classic keyboard to select how to enter your text. Hide the keyboard or press <. • Tap the icon Special characters and numerals Tap ?123 for more characters. Select the desired character or select =\<...
- Page 24 English mistakenly autocorrected word. Tap the misspelled or mistakenly autocor- rected word to select other possible auto corrections. This is the easiest way to fix mistakes — if you don’t find the word you wanted, use the Back- space key to erase and type a new word. Enter text Start to type a word, your keyboard may provide predictions as you type.
-
Page 25: Capture A Screenshot
Connect to the Internet Your smartphone Doro 8035 is just like any other mobile phone - you can make calls and send texts. But you can also access the Internet, send and receive emails, install apps and games, and check your social net- working sites, like Facebook and Twitter, for this you need to be con- nected to Internet. - Page 26 English Connected network is highlighted with Connected. Tip: is shown in the status bar when connected. You can easily turn on and off Wifi from the quick settings in the notification panel. To open the notification panel, swipe the status bar down.
-
Page 27: Battery
English Using network services may result in traffic costs. Some product features require support from the network, and you may need to subscribe to them. Some operations and features are SIM card and/or network dependent or dependent on the compatibility of devices and the content formats supported. - Page 28 English If the device heats up or the ambient air temperature rises, the charging speed may automatically decrease. This is a normal operat- ing condition to prevent damage to the device. Battery saver mode Once activated, the battery saver mode, helps to increase battery life. The battery saver is designed to start functioning when the battery level of your phone reaches a certain level.
-
Page 29: Navigate Your Phone
Navigate your phone Select on-screen actions Doro's unique telephone menu is action-based and allows you to navigate your phone, by just asking yourself, What do I want to do? For example, send an email to a contact that is available in your contact book. -
Page 30: View
English A number to enter a phone number, see Calls, p.45. A contact to make a call from your contact book. For more info see Calls, p.45 or Contacts, p.48. A recent contact to call from the call log, see Call log, p.47 My voicemail to call your voicemail, see Call settings, p.47. -
Page 31: Send
English My tools to reach your tool apps: • The magnifier to magnify text and small parts etc, see Magnifier, p.66. • The timer to set a countdown timer, see Timer, p.69. • The calculator to make some calculations, see Calcula- tor, p.69. -
Page 32: Search
A voice record to record and send a recorded sound, see Recorded sounds, p.70. An application to add new applications, see Doro Selection, p.54. My home screen shortcuts to select the shortcuts you want access to from the Home screen. -
Page 33: Discover
To discover apps, your phone, places near you or something on the Internet. New applications to view your apps and add new ones, see Doro Se- lection, p.54. My phone to find learn more about the basic functions of your phone, see Beginners guide - Discover your phone, p.54. -
Page 34: Voice Assistant
How to use Re- mote help , p.53. My Doro Manager is a convenient web service that makes owning a Doro phone even easier. The Doro phone owner and his relatives can just log into the website and easily manage the phone’s settings and content from anywhere. -
Page 35: Phone Settings
English • How far is it to London? • What’s the latest business news? • What are the latest sports scores today? • How old are you? Voice assistance is a fast-evolving feature and it will get updated very often, so please test the service and see what it can do for you. Phone settings Where to find the settings To reach the most common settings for your phone... -
Page 36: Vibrate On Touch
Gallery • Live wallpaper • Doro wallpaper Tap an image to select it and confirm with Note! You can also reset to the default wallpaper, to reset tap Reset. Home screen shortcuts What is a shortcut? A shortcut can be a fast track to a contact or an... -
Page 37: My Widgets
English Add a shortcut from the Home screen You can add or remove a shortcut directly from the Home screen, once again. Select an item to add as shortcut from the pick list. Confirm with • To disable shortcuts switch . -
Page 38: The Text Size
English Touch and hold to select your widget. Drag and drop the widget to the Home screen. Tip: You can get more apps from Play Store. The text size From the Home screen, tap A display option The text size. Tap Normal and tap to select an option in the pick list. -
Page 39: The Colour Correction
English The colour correction From the Home screen, tap A display option The colour inversion. To switch colour mode for persons with colour vision deficiency to see things more clearly. Tap to select: • Disabled • Monochromacy (black and white display) •... -
Page 40: My Ringtone
English When done, tap Tip: You can also press the volume keys to adjust the volume. During a call the volume keys adjusts the call volume and from standby they adjust the ringtone volume. My ringtone Adjust settings for various sounds on your device. From the Home screen, tap An audio option ringtone. -
Page 41: The Bluetooth Connection
English Hearing aid compatible (HAC) This telephone is hearing aid compatible. Hearing aid compatibility is not a guarantee that a specific hearing aid will work with a specific telephone. Mobile telephones contain radio transmitters that may interfere with hearing aid performance. This phone has been tested for use with hear- ing aids, for some of the wireless technologies that it uses, but there may be some newer wireless technologies that have not been tested yet for use with hearing aids. -
Page 42: Aeroplane Mode
English Note! If you can’t spot the unit that you want to connect with, tap Refresh, to refresh the list. Or you can request to make the device visible to others, a selection you make on the other unit. Refer to the other device’s user manual. -
Page 43: Connect The Phone To A Computer
English From the Home screen, tap A general option Advanced settings More. Tap Aeroplane mode. Switch to enable. Tip: To enable you can also press and hold the Power button and then select Aeroplane mode in the menu that opens. You can also enable flight mode from the quick settings in the Notification panel. -
Page 44: My Phone Information
English Note! You might need to wait for the driver to be installed on your computer before you can access the phone. Mac users, see https://www.android.com/filetransfer/. You are prompted, on the computer screen, to choose what to do when you connect your phone to a computer. Select to open the device and view files in the computers file explorer. -
Page 45: Backup
English Updating your device When a system software update is available and your device is con- nected to a Wi-Fi network it will automatically download the software us- ing the firmware over-the-air (FOTA) service. You need to confirm when to install the system software update. -
Page 46: Reset The Phone
English Reset the phone IMPORTANT! Resetting the phone means that most information, such as downloaded and installed applications, accounts, system and application data and settings, will be erased. Be sure to backup any data and files you want to keep before you perform the reset. A backup is a safety copy of information. -
Page 47: Memory And Storage
English CAUTION This is the last step before ALL data from the device, including Google or other account settings, system and application data and settings will be permanently erased. After your phone resets, it will be set back to factory defaults and will be just like it was when it came out of the box. - Page 48 English Note! If you insert an external memory, it is recommended you change the default storage location. This allows you to save more files on your phone, like pictures and videos. We recommend that you regularly copy your photos from the phone's internal storage to your computer as a form of backup, see Connect the phone to a computer, p.37.
-
Page 49: Change The Sim Pin Code
English Press < to return. Tip: The cache will fill up again over time, and you’ll want to delete it again. Uninstall applications that you don't use From the Home screen, tap View My applications. Tap I want to. Tap Uninstall. for the items to delete. -
Page 50: Google ™ Play Store
English ™ Google Play Store IMPORTANT! You need an Internet connection to use this service. It is recommended to use Wi-Fi connections when available to reduce costs for data traffic. Contact your service provider for detailed subscription costs. ™ Note! You need to have a Google account to use Play Store. -
Page 51: Uninstall Applications
English You can select to update all applications that needs to be updated, tap Update all, or select a specific application and tap Update and confirm. Uninstall applications Play Store, tap and tap to select My apps. Tap to select an application, tap Uninstall and confirm. -
Page 52: End A Call
English • Silence the ringer press the volume button (up or down) to si- lence the ringer. From unlocked screen • Answer the call tap Answer • Reject the call tap Reject • Silence the ringer press the volume button (up or down) to si- lence the ringer End a call •... -
Page 53: Headset
English CAUTION Tap I want to to switch between Boost volume and Normal volume. Boost volume can be very loud, so be careful to not cause any hearing damage. Headset Headset • Connect a headset to the headset socket. The internal microphone in the phone is automatically disconnected. -
Page 54: Sos Calls
English Note! Only applies to calls made directly from View My contacts. • Call Timer to view and reset the total time for outgoing and in- coming calls since you started to use the phone or since the lat- est reset. The most recent call is displayed with both time and receiver. -
Page 55: Manage Your Contacts
Import and export contacts If you have a Doro service such as My Doro Manager or Doro Connect & Care, you can use that service to import and export to/from SIM/SD card. Import contacts from storage services to your device... -
Page 56: How To Find The Ice Contacts
English How to find the ICE contacts In case of emergency (ICE) enables first responders to contact your next of kin or any of your stored contacts. See ICE (In Case of Emergency) p.52. How to find the ICE contacts from locked screen Swipe to unlock the screen. - Page 57 Cancel is pressed. Assistance button settings You can select to use your Assistance button together with Connect & Care, see Doro Connect & Care, p.59. Below we describe how to set up the Assistance button. From the Home screen, tap An assistance option My assistance button.
-
Page 58: Ice (In Case Of Emergency)
English • Silent. Select your assistance contacts Tap Add contact. Select how to add a contact. To delete a contact, press the minus sign after the number. Note! Some private security companies can accept automatic calls from their clients. Always contact the security company before using their phone number. -
Page 59: How To Use Remote Help
For detailed technical information regarding connections, security and data privacy in TeamViewer, see the security statement at http://www.teamviewer.com/en/products/security.aspx. Applications Applications can be a program or game that you can use on your Doro 8035. Depending on market and service provider, the pre-installed... -
Page 60: Beginners Guide - Discover Your Phone
My phone. Doro Selection The easiest way to look for applications is to use the Doro Selection. Searches are made easier thanks to categories with a selection of apps for such as home, digital life, news, health and wellness, finance and more. -
Page 61: Email
English Tip: Text messages (sms) are delivered immediately to a device that most of us have with us at all times, a text message also represents a more personal and intimate connection. Most modern smartphones can receive emails (that may be preferable for more formal communications or inquiries) but texting remains simpler and is the only option for those using a more basic cell phone. - Page 62 English IMPORTANT! You need an Internet connection to use this service. It is recommended to use Wi-Fi connections when available to reduce costs for data traffic. Contact your service provider for detailed subscription costs before activating. Tip: Gmail is always available under Google that you reach from the Home screen.
-
Page 63: Camera
English Tap Reply / Forward to select an option from the pick list. Compose your email. If desired, tap I want to to access more options. When done, tap Send. Email settings From the Home screen, tap View My emails. Tap I want to. -
Page 64: Handle Pictures In The Gallery
English When you see your face in the display, tap or press the physical Camera button (on the lower right side of the phone) to take a pic- ture of yourself. How to record a video On the camera preview screen, tap to record a video. -
Page 65: Doro Connect & Care
Add to favourites • Delete this picture Doro Connect & Care Note! You need to have Internet access to use most of the features in Connect & Care. Depending on how you use your phone, it can use up a lot of Internet bandwidth really quickly. - Page 66 (remote help). Note! In order to use some of the features of Connect & Care, either the Doro 8035 user or the helper needs to have a Care service subscription with Doro. Connect & Care can override the normal assistance button behaviour.
- Page 67 Accept or Decline the contact request. After accepting a contact request, select to share information with the contact or not (this option is only available on the Doro 8035 and only if a Care service subscription exists). When done, tap Note! Even when the Doro 8035 user selects to share information with a helper, only the information available within the Doro Connect &...
- Page 68 Doro 8035 user. How to activate Care service subscription This can be done either from the Doro 8035 phone if the Doro 8035 user will pay for the subscription, or from a helper's phone if the helper will pay for the subscription.
-
Page 69: My Doro Manager
On the website you can also watch tutorials and discover a lot of possibilities in your Doro 8035. Note! The Doro 8035 user needs to have both a Connect & Care profile ™ and a Google —account to use My Doro Manager. To be able to use the... -
Page 70: Google Search
Select either to manage your own phone or help someone else. ™ Sign in using your Google account. Note! To help the Doro 8035 user remotely from their phone the helpers can also install the Doro Connect & Care application from Play store or App store. See Remote setup, p.61. -
Page 71: Internet (Web Browser)
Note! The first time you are asked if you want to Sign in with your Google account. Dock mode You may think of the dock mode as a screensaver that turns your Doro 8035 into a side-table clock, a photo frame, a music player and more. Turn Dock mode on and off Dock mode is launched automatically when the device is placed in the charging cradle. -
Page 72: Magnifier
English Note! Do not disturb is a helpful setting for when you do not want to be disturbed, such as when you are sleeping or in a meeting. All notifications, alerts and calls are stopped from making any noise, vibration or lighting up the phone screen. You can schedule quiet hours to be repeated at the same time every day. -
Page 73: Listen To The Radio
English Tap to pause the track. Press � to return to the Home screen. The music continues to play. For more options, tap I want to. Tip: While you're listening to music you can start and pause the music from the quick settings in the Notification panel. To open the Notification panel, swipe the status bar down. -
Page 74: Alarm
English To edit or delete events View My calendar. to scroll month or day. Dates that already has saved events or tasks in it are marked with a green dot. Tap the date and then tap an event to edit it. For more options tap I want to. -
Page 75: My Notes
English The weather forecast View The weather forecast. Follow the on-screen instructions. For more options, tap I want to. My notes Add a note View My tools My notes Add note. Enter required information. For more options, tap I want to: •... -
Page 76: Recorded Sounds
English Tap My applications to get to My applications Calculator. Enter the first number, select an operation (+, -, x, ÷) and enter next number. Repeat if needed. Select = to calculate the result. Recorded sounds Use the sound recorder to record memos and messages. Add a sound recording From the Home screen, tap A voice record. -
Page 77: Google Apps
English Activate the code safe From the Home screen swipe up or tap the arrow at the bottom of the Home screen. Tap My applications to get to My applications Code safe. Enter a 3 digit code to get started. When done, tap Enter the same 3 digit code and turn the handle down. -
Page 78: The Cloud
English • Google quickly search for items on the Internet or on your phone. • Chrome search for information and browse webpages. • Gmail send or receive emails via the Google Mail service. • Maps find your location on the map, search for locations, and view location information for various places. -
Page 79: Status Icons
English traffic. By law, location-based services must be permission-based. That means that you must opt in (actively say yes) to the service in order to use it. Tip: is shown in the status bar when your phones location is being used by any app. -
Page 80: Safety Instructions
English Call ongoing Missed call Call forwarding on Examples of soft keys Validate Take photo Discard Add current location Advanced Add template text Call contact Record video Write text or picture Voice recording message (SMS/MMS) Write email Bring up the keypad Handle attachments Safety instructions CAUTION... -
Page 81: Medical Units
English Medical units The use of equipment that transmits radio signals, for example, mobile phones, can in- terfere with insufficiently protected medical equipment. Consult a doctor or the manu- facturer of the equipment to determine if it has adequate protection against external radio signals, or if you have any questions. -
Page 82: Protect Your Hearing
English WARNING Danger of explosion if battery is incorrectly replaced. To reduce risk of fire or burns, do not disassemble, crush, puncture, short external contacts, expose to temperature above 60° C (140° F), or dispose of in fire or water. Recycle or dispose of used batteries according to the local regulations or reference guide supplied with your product. -
Page 83: Protect Your Personal Data
English Do not keep or transport flammable liquids, gases or explosives together with the unit or its accessories. For vehicles equipped with air bags: Remember that air bags fill with air with considerable force. Do not place objects, including fixed or portable radio equipment in the area above the airbag or the area where it might expand. -
Page 84: Care And Maintenance
English Care and maintenance Your unit is a technically advanced product and should be treated with the greatest care. Negligence may void the warranty. • Protect the unit from moisture. Rain, snow, humidity, and all types of liquids can contain substances that corrode the electronic circuits. If the unit gets wet, you should immediately power off the phone, remove the battery and allow the unit to dry completely before you replace it. -
Page 85: Warranty
Please note that this is a voluntary manufacturer’s warranty and provides rights in addi- tion to, and does not affect statutory rights of end-users. This guarantee does not apply if batteries other than DORO original batteries are used. Specifications Network bands (MHz) -
Page 86: Copyright And Other Notices
Doro reserves the right to revise this document or withdraw it at any time without prior notice. - Page 87 226 43 Lund, Sweden. To be valid, such a request must be made within three (3) years from the date of the distribution of this product by Doro AB, or in the case of code li- censed under the GPL v3 for as long as Doro AB offers spare parts or customer support...
-
Page 88: Hearing Aid Compatibility
English Hearing aid compatibility Note! For hearing aid compatibility, turn off Bluetooth connectivity. This phone is hearing aid compatible. Hearing aid compatibility is not a guarantee that a specific hearing aid will work with a specific phone. Mobile phones contain radio transmitters that may interfere with hearing aid performance. -
Page 89: Correct Disposal Of This Product
English when full power is not needed for the call. The lower the power output of the device, the lower its SAR value. This device meets RF exposure guidelines when used against the head or when posi- tioned at least 0.5 cm away from the body. When a carry case, belt clip or other form of device holder is used for body-worn operation, it should not contain metal and should provide at least the above stated separation distance from the body. -
Page 90: Declaration Of Conformity
English Declaration of Conformity Hereby, Doro declares that the radio equipment type DSB-0170 (Doro 8035) is in com- pliance with Directives: 2014/53/EU and 2011/65/EU. The full text of the EU declara- tion of conformity is available at the following internet address: www.doro.com/dofc. - Page 91 English...
- Page 92 DSB-0170 (Doro 8035) (1011) English Version 1.0 © 2018 Doro AB. All rights reserved. www.doro.com REV 18073 — STR 20170530...
Need help?
Do you have a question about the 8035 and is the answer not in the manual?
Questions and answers