Table of Contents
Advertisement
Advertisement
Table of Contents

Related Manuals for Doro 8080


Summary of Contents for Doro 8080
- Page 1 Doro 8080 English...
- Page 2 Your local Doro dealer provides addi- tional accessories. The supplied accessories provide the best performance with your phone.
- Page 3 Overview Headset port, for standard 10. Power button, press and hold headset with 3.5 mm phone to turn phone on/off jack 11. USB port Type-C, for battery Earpiece, for phone calls charging or connection to with the phone by the ear other device like a computer 12.
-
Page 4: Table Of Contents
English Contents How to set up your Doro 8080 ..............1 Unbox your new phone ................. 1 Getting started ..................2 Insert SIM card and memory card ............3 Charge your phone................. 4 Turn on the phone ................. 6 Get to know your phone................7 Screen protection................... - Page 5 English Set....................29 Phone settings....................30 Where to find the settings..............30 Date & time ..................30 Homepage/display settings ............31 Sound settings ................. 34 Improve accessibility further ............... 36 The Bluetooth connection ® ..............36 Aeroplane mode................... 37 Connect the phone to a computer ............38 My phone information.................
- Page 6 English Assistance options..................53 My assistance button ..............53 Response by Doro ................54 ICE (In Case of Emergency) ............54 The remote help ................55 Google search....................55 To use the web browser ..............56 Applications....................56 Messages....................56 Email.....................
- Page 7 English Care and maintenance ................. 69 Warranty ...................... 70 Specifications ....................71 Copyright and other notices ..............72 Hearing aid compatibility..............73 Specific Absorption Rate (SAR) ............74 Correct disposal of this product ............75 Correct disposal of batteries in this product ........75 Declaration of Conformity ..............
-
Page 8: How To Set Up Your Doro 8080
Appearances and specifications are subject to change without prior • notice. You can purchase additional accessories from your local Doro retailer. • Make sure they are compatible with the device before purchase. • Only use chargers and accessories that have been approved for use with this particular model. -
Page 9: Getting Started
English Getting started Before you start using your new phone you may need: nano-SIM card. To take full advantage of your new smartphone’s ca- • pabilities, you should install a SIM card. The SIM card will enable you to place calls or use mobile data to connect to various Internet serv- ices. -
Page 10: Insert Sim Card And Memory Card
English Insert SIM card and memory card SIM card is not included and memory card is optional and not included CAUTION Turn off the phone and disconnect the charger before removing the SIM/ memory card tray. Pull out the SIM/memory card tray Use your fingernail or other similar object, to gently pull out the SIM/memory card tray. -
Page 11: Charge Your Phone
English CAUTION This device accepts nano-SIM or 4FF SIM card. Using a modified incompatible SIM card that is thicker than a nano-SIM card may damage the card itself, the card slot and corrupt any data stored on the card. Use only compatible memory cards with this device. Compatible card type: microSD, microSDHC, microSDXC. - Page 12 English A. Insert the small end of the included USB cable into the charging port on the phone. B. You can also charge the phone using the cradle. Insert the small end of the included USB cable into the charging port on the backside of the cradle and place the phone in the cradle.
-
Page 13: Turn On The Phone
English Note! To save power, the screen is locked after a while. Press the Power button to activate the screen, see Lock screen, p.11 If the battery is completely discharged, the device cannot be turned on immediately when the charger is connected. Allow a depleted battery to charge for a few minutes before turning on the device. -
Page 14: Get To Know Your Phone
English Get to know your phone Screen protection Before you start to use your new phone, remove the protection film that covers the device. Please note the helpful directions that is printed on the protection film. Screen covers and protectors may help you protect your device against damage. -
Page 15: And Google
English ™ Create Google account From the Home screen, select Play Store. Follow the on-screen instructions to complete the account setup. IMPORTANT! It is crucial that you remember your Google account username and password. During a factory settings restoration or microSD card-based update, Google's anti-theft mechanism requires you to enter the Google account your phone last logged in to on the startup navigation screen for identity authentication. -
Page 16: Touchscreen Motion And Gestures
English Touchscreen motion and gestures Tap an item, such as a button or a program icon, to select it or to open • it. Tap can be used to select or deselect a relevant tick box in a list of options. -
Page 17: Sensors
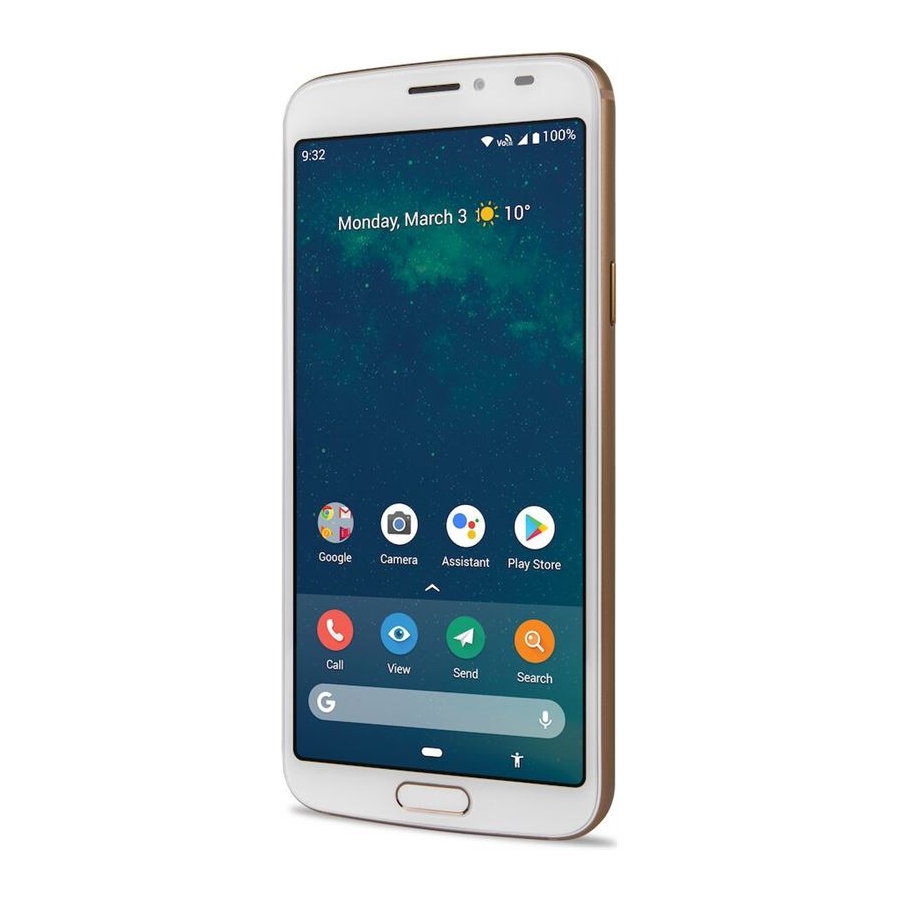
Home screen The Home screen is your start screen on your Doro 8080, and here you can collect the apps and your favourite contacts that you use most often. You ™ can also set your favourite picture as wallpaper. Use the Google... -
Page 18: Lock Screen
English bar to quickly find what you are looking for. To manage shortcuts on the Home screen see My widgets, p.31. Go to the Home screen Press the centre oval key/fingerprint sensor or the display icon • Lock screen The screen turns off and locks when you are not using the phone. The lock screen can show time and date as well as notifications like missed calls or messages. -
Page 19: Fingerprint Recognition
English • Pattern to unlock you trace a pattern with your finger on the screen. This option gives medium security. Note! You can trace over the dots in any order, but you can trace over the same dot only once. The pattern must cover at least four dots. - Page 20 If your pattern, PIN, or password is forgotten, you will not be able to use the device if you do not reset it. Doro is not re- sponsible for any data loss or inconvenience caused by forgotten codes.
- Page 21 English • Do not cover the fingerprint sensor with protective films, stickers, or other accessories that may deteriorate the fingerprint recognition. If the fingerprint sensor initially is covered with a protective film, re- move it before using the fingerprint recognition sensor. Register a fingerprint for the first time Advanced settings Security &...
-
Page 22: To Use The Phone Keys
To set up Wi-Fi, see Connect to Internet using wireless networks (Wi-Fi), p.23. Doro shortcuts panel Note! This feature needs to be activated before the icon is visible. See Navigation, p.16... - Page 23 English in the command bar to open a panel which contains several short- cuts to ease your phone use. Back key Tap to return to the previous screen, or to close a dialog box, menu, or keyboard. Recents key is only visible if Swipe up on Home button is deactivated, see Note! Swipe up on Home button, p.16.
- Page 24 Soft keys Android smart phones like your Doro 8080, as well as most Android appli- cations, feature common icons. Many icons that you see on-screen are ac- tually buttons on the touchscreen. If you don’t see the text, images or information that you want, try to touch the screen or to tap an icon for a pick list or to reach another menu.
-
Page 25: My Applications Screen
Application is another word for program or software, a common way to shorten the term application is App. The application screen contains the applications that come pre-installed on your Doro 8080 and any other apps that you choose to install. The applications screen extends beyond the reg- ular screen, so you need to scroll down to view all content. -
Page 26: Status Bar
English Status bar The status bar, located at the top of your screen, shows signal strength, on- going and new applications as well as battery status. Notification panel Open the notification panel to view more information about the icons in the status bar, to view your notifications and manage the quick settings like Wi-Fi or Torch. -
Page 27: Quick Settings Panel
English • Tap to reply. Double tap to go to the relevant app. • Note! To hide sensitive alerts, swipe the status bar down twice and tap Apps & notifications Notifications On lock screen Hide sensitive content or Don't show notifications at all. Quick settings panel Use the quick setting buttons Swipe the status bar down to open the Quick settings panel. - Page 28 English Hide the keyboard Tap the icon or tap • Special characters and numerals Tap ?123 for more characters. Select the desired character or select =\< to view additional characters. To return, select ABC. Move the cursor within text • Tap somewhere in the text to get the marker.
-
Page 29: Capture A Screenshot
English This is the easiest way to fix mistakes — if you don’t find the word you wanted, use the Backspace key to erase and type a new word. Enter text Start to type a word, your keyboard may provide predictions as you type. -
Page 30: Connect To The Internet
8 seconds. Connect to the Internet Your smartphone Doro 8080 is just like any other mobile phone - you can make calls and send texts. But you can also access the Internet, send and... - Page 31 English Connect to Internet using mobile data Use Mobile data to connect your phone to a network provider with a data traffic plan. What that means is that your phone can connect to the Inter- net anytime it is in range of your operators mobile network a service you pay for through a monthly data traffic plan.
-
Page 32: Battery
English other data services using mobile data traffic, then you need to activate da- ta roaming. To limit your data usage when abroad roaming is Off as default. Tip: R is shown in the status bar when roaming. Your phone can still access the Internet over the Wi-Fi connection even if you disable roaming. - Page 33 Location re- porting is off, see How to turn off GPS location services, p.65. Use Doro original handsfree devices to listen to music. Handsfree devi- • ces consume less battery than your device's own loudspeakers.
-
Page 34: Navigate Your Phone
Meet “EVA” – ”Enkel, Vänlig och för Alla” (Swedish) (Easy, friendly and for everyone) While Doro smartphones offer as true an Android experience as there is, we take simplicity even further thanks to our intuitive, action-based inter- face, EVA. EVA makes using a smartphone even easier. It’s like having someone who understands your needs always by your side. -
Page 35: View
English View To reach many of the most frequently used apps. My messages to view messages. My emails to view emails, create or add an email account, see Email, p.57 My call history to view call logs, see Call log, p.48 My pictures and videos to view stored images and videos, see Handle pictures in the Gallery, p.59 My contacts to see and handle your ICE card (In Case of Emergency),... -
Page 36: Add
English Something on the Internet to search the Internet, see Internet (Web browser), p.60. Directions, an address, a place to find an address, a place or your way from your current position. Around me to find useful facilities nearby your current position. What song is playing now to search the name of that of song/melody that you hear. -
Page 37: Phone Settings
English My other connections to activate and set your connection with The Bluetooth connection or The geolocation options, see The Bluetooth ® connection , p.36 or Location based services, p.64. My homepage to personalise the Home screen with your own wallpa- per and widgets, see My Wallpaper, p.31 and My widgets, p.31. -
Page 38: Homepage/Display Settings
English From the Home screen, tap Advanced settings System. Tap Date & time. Automatic date & time is activated to automatically update the time, date and time zone. Note! Switch to disable and manually set time, date and time zone. Homepage/display settings My Wallpaper Wallpaper is the background on the Home screen and on the Lock screen. - Page 39 English Touch and hold to select your widget. Drag and drop the widget to the Home screen. Note! You can also longpress on the home screen and then tap Widgets to add a widget. My home settings Notification dots Some apps show a dot, a small marking above the individual app icon, when you get notifications.
- Page 40 English Tip: When Adaptive brightness is enabled, the screen brightness will automatically adapt to your current environment. Swipe the status bar down to open the Quick settings panel. Swipe down again to reach the brightness slider control. Screen timeout You can set the length of time the device waits before turning off the dis- play backlight.
-
Page 41: Sound Settings
English • Tritanomaly (blue-yellow) (enhance the perception of blue colour, blue-yellow) • Monochromacy (black and white display) Note! Colour correction is currently an experimental feature, so it might not work correctly in all apps. Colour inversion Colour inversion exchanges colour values. For example, black text on a white screen becomes white text on a black screen. - Page 42 English Ringtone and other tones Adjust settings for various sounds on your device. From the Home screen, tap Advanced settings Sound Phone ringtone. Tap a ringtone to hear the tone. Tap OK to confirm. Tip: Tap Advanced to see more sounds and other sound settings. You can also press the volume keys on the side of the phone to adjust the volume.
-
Page 43: Improve Accessibility Further
English best results, try using the telephone in different positions relative to your hearing aid—for example, placing the receiver slightly above the ear may result in better performance for hearing aids with micro- phones positioned behind the ear. T: To use your hearing aid in this mode, make sure that your hearing •... -
Page 44: Aeroplane Mode
English Select the unit that you want to connect to. Tap Pair to connect. You may be asked to input a password or to press a button. If prompted, input the password or otherwise ac- knowledge the connection on your phone or the other device. After you acknowledge the password (or not), the units are connected and communicating. -
Page 45: Connect The Phone To A Computer
English From the Home screen, tap Advanced settings Net- work & Internet. to activate the Aeroplane mode. Tip: To enable/disable you can also press and hold the Power button and then select Aeroplane mode in the menu that opens. is shown in the status bar when enabled. Connect the phone to a computer Connect the phone to a computer and start transferring pictures, music and other file types. -
Page 46: My Phone Information
English You are prompted, on the computer screen, to choose what to do when you connect your phone to a computer. Select to open the device and view files in the computers file explorer. Wait until the phone/memory card appears as external disks in the computer's file explorer. -
Page 47: Backup
English IMPORTANT! We recommend that you always update your device to the latest software version to get optimal performance and the latest enhancements. When a new software is available, a notification message is shown in the status bar, or as a notification. Select it to start downloading. -
Page 48: Reset The Phone
English Reset the phone IMPORTANT! Resetting the phone means that most information, such as downloaded and installed applications, accounts, system and application data and settings, will be erased. Be sure to backup any data and files you want to keep before you perform the reset. A backup is a safety copy of information. -
Page 49: Memory And Storage
English • Background data restrictions for apps. Any permission restrictions. • You will not lose any app data or the app itself, only any changed set- tings for the app. Erase all data (factory reset) to erase all data from your phone's in- ternal storage, including: •... - Page 50 English if used as extended internal memory. Most applications can read data from a memory card but only certain apps can save files to this type of memory. You can, for example, set the camera application to save photos directly to the memory card.
-
Page 51: Change The Sim Pin Code
English Delete pictures If you use your phone to take a lot of pictures, remember to back • them up on your computer every now and again. Not only will this prevent you from losing any photos if anything were to happen to your phone, but it also gives you the opportunity to delete them from your phone and free up space. -
Page 52: Google Play Store
English Switch to activate PIN code. You need to enter the PIN code • every time the phone is started. Switch to deactivate PIN code. • WARNING If the SIM card is lost/stolen it is unprotected. ™ Google Play Store IMPORTANT! You need an Internet connection to use this service. -
Page 53: Uninstall Applications
English Open an installed application Play Store, tap and tap to select My apps & games. Select the downloaded application. If needed tap Open. Update an installed application Play Store, tap and tap to select My apps & games. You can select to update all applications that needs to be updated, tap Update all, or select a specific application and tap Update and confirm. -
Page 54: End A Call
English Note! The phone will not ring if the phone is set to Vibration mode or ring/vibrate if the phone is set to Silent mode. The phone will not ring, vibrate or even turn on the screen if you have set it to Do not disturb mode, see more in Sound settings , p.34. -
Page 55: Headset
English To disable, tap once again. Keypad (tone sending) During a voice call, tap Enter number. To close the keypad, tap Loudspeaker During a voice call, tap Speak clearly into the microphone at a maximum distance of 1 m. Use the volume keys to adjust the loudspeaker volume. -
Page 56: Call Settings
English Clear call history to clear all. Call settings Lock the screen during calls, call log limitation and more From the Home screen, tap View My call history Tap Settings to view the call settings. Tip: For more help about call settings, see support.google.com/phoneapp/ SOS calls As long as the phone is switched on, you can always make an SOS call. -
Page 57: Add A Contact Shortcut To The Home Screen
English Find and tap the wanted contact to open it. to add as favourite contact. Tap Edit contact if you want to change any details. to add image. Follow the on-screen instructions to complete contact information. Tap Save, when you are done. Your contacts are automatically synced with your Google account (provided that you are logged onto your Google account). -
Page 58: Mydoro
Response by Doro and Smart- Care by Doro on your Doro 8080. It also gives the helper the opportunity to manage some basic settings on the Doro 8080 of the Senior user from an app or the web portal www.mydoro.com, like settings for sound, display... -
Page 59: For The Helper(S)
Note! To help the Doro 8080 user remotely from their phone the helpers can also install the MyDoro application from Play store or App store. A trusted helper can also get full access to the Doro 8080 by the use of Teamviewer, see The remote help , p.55. -
Page 60: For The Senior
You need an Internet connection to use this service. Contact your service provider for detailed subscription costs before activating. The Doro 8080 user needs to have a MyDoro account to use the service. To be able to use the MyDoro web portal or the app any helpers also need a MyDoro account which they can set up on the web portal. -
Page 61: Response By Doro
By pressing the assistance button on the Doro phone, the user can easily call for help. First the alarm contacts the relatives, and if no relative is able to answer it is automatically sent to one of our alarm centres, where there is staff on duty 24/7. -
Page 62: The Remote Help
The remote help Let somebody you trust manage your phone remotely, for example, this can be requested when you contact Doro support. Allow access so they can remotely administrate and transfer files, help you to perform mainte- nance tasks and help with problems should they occur. -
Page 63: To Use The Web Browser
To go back, tap Applications Applications can be a program or game that you can use on your Doro 8080. Depending on market and service provider, the pre-installed applica- tions can vary. Some applications need Internet access. Contact your serv- ice provider for detailed subscription costs before activating. -
Page 64: Email
English Tip: Text messages (SMS) are delivered immediately to a device that most of us have with us at all times, a text message also represents a more personal and intimate connection. Most modern smartphones can receive emails (that may be preferable for more formal communications or inquiries) but texting remains simpler and is the only option for those using a more basic cell phone. -
Page 65: Camera
English Tip: Gmail is pre-installed and available under Google that you reach from the Home screen. For more help see support.google.com/mail/. You can of course install other email client apps if you wish. Write emails Here we will explain how to send an email to a contact that is available in your contact book. -
Page 66: Handle Pictures In The Gallery
English How to open the Camera From the Home screen, tap Camera. Tap camera button in the app to take a picture. How to take a selfie Selfie means to take a picture of yourself. You can use the front camera to take self-portraits. -
Page 67: Internet (Web Browser)
Dock mode will activate the screen saver that turns your Doro 8080 into a side-table clock unless set otherwise. The screen will dim and turn off after a while. Press the home or power button to wake up the screen. -
Page 68: Calendar
English Play music From the Home screen tap Google folder and tap Play Music. The first time you start this app you will be asked if you want to subscribe to Google’s music. Music library to see your available music. Select from different categories like playlists, artists, albums. -
Page 69: Timer
English Tip: To save battery and prevent incoming calls or messages, you can turn on Aeroplane mode but still keep the alarm function, see Aeroplane mode, p.37. To edit or delete alarms From the Home screen, tap My alarms. To turn on and off switch Tap an alarm to edit it. -
Page 70: Torch
English Torch Swipe down the notification panel and tap Torch to turn on the light. Tap again to turn off. Note! The battery will drain very quickly. Remember to switch off after use. Calculator Perform simple calculations. From the Home screen swipe up or tap the arrow at the bottom of the Home screen and tap the app Calculator to open it Enter the first number, select an operation (+, -, x, ÷) and enter next... -
Page 71: The Cloud
English • YouTube watch or create videos and share them with others Drive store your content on the cloud, access it from anywhere, • and share it with others. • Play Music discover, listen to, and share music on your phone. You can upload music collections stored on your device to the cloud and access them later. -
Page 72: Status Icons
English Note! Turning off location for your device also turns it off for Google apps and other non-Google apps. This means that apps can’t use your phone's location, and many useful features will be turned off. How to turn off GPS location services From the Home screen, open the notification panel, tap My other connections The geolocation options. -
Page 73: Safety Instructions
English Safety instructions CAUTION The unit and the accessories can contain small parts. Keep all of the equipment out of the reach of small children. The mains adapter is the disconnect device between the product and mains power. The mains socket outlet must be close to the equipment and easily accessible. Network services and costs Your device is approved for use on the 4G LTE: 1 (2100), 3 (1800), 7 (2600), 8 (900 MHz), 20 (800), 28 (700), 38 (2600) MHz / WCDMA: 1 (2100), 2 (1900), 5 (850), 8 (900) MHz /... -
Page 74: Implanted Medical Devices
• Doro does not accept liability for any damage or loss if these warnings and instruc- tions are not followed. -
Page 75: Protect Your Hearing
English Protect your hearing This device has been tested to comply with the Sound Pressure Level requirement laid down in the applicable EN 50332-1 and/or EN 50332-2 standards. WARNING Excessive exposure to loud sounds can cause hearing damage. Exposure to loud sounds while driving may distract your attention and cause an accident. -
Page 76: Protect Your Personal Data
English It is prohibited to use the unit in flight. Turn off the unit before you board a plane. Using wireless telecom units inside a plane can pose risks to air safety and interfere with tele- communications. It may also be illegal. Protect your personal data Protect your personal data and prevent leakage or misuse of sensitive information While using your device, be sure to back up important data. -
Page 77: Warranty
English Do not keep the unit in warm places. High temperatures can reduce the lifespan for • electronic equipment, damage batteries and distort or melt certain plastics. Do not keep the unit in cold places. When the unit warms up to normal temperature, •... -
Page 78: Specifications
Please note that this is a voluntary manufacturer’s warranty and provides rights in addi- tion to, and does not affect statutory rights of end-users. This guarantee does not apply if batteries other than DORO original batteries are used. Specifications Network bands (MHz):... -
Page 79: Copyright And Other Notices
Doro reserves the right to revise this document or withdraw it at any time without prior notice. -
Page 80: Content Copyright
Malmö, Sweden. To be valid, such a request must be made within three (3) years from the date of the distribution of this product by Doro AB, or in the case of code licensed under the GPL v3 for as long as Doro AB offers spare parts or customer support for this product model. -
Page 81: Specific Absorption Rate (Sar)
English M: To use your hearing aid in this mode, make sure that your hearing aid is set to • "M-mode" or acoustic coupling mode, and position the phones receiver near the hearing aid’s built-in microphone. For the best results, try using the phone in differ- ent positions relative to your hearing aid—for example, placing the receiver slightly above the ear may result in better performance for hearing aids with microphones positioned behind the ear. -
Page 82: Correct Disposal Of This Product
Declaration of Conformity Hereby, Doro declares that the radio equipment type DSB-0220 (Doro 8080) is in compli- ance with Directives: 2014/53/EU and 2011/65/EU including delegated Directive (EU) 2015/863 amending Annex II. - Page 83 English...
- Page 84 DSB-0220 (Doro 8080) (1031) English Version 1.0 ©2019 Doro AB. All rights reserved. www.doro.com REV 19203 — STR 20190830...
Need help?
Do you have a question about the 8080 and is the answer not in the manual?
Questions and answers