
Related Manuals for Windhager PUROWIN PWPE 60


Summary of Contents for Windhager PUROWIN PWPE 60
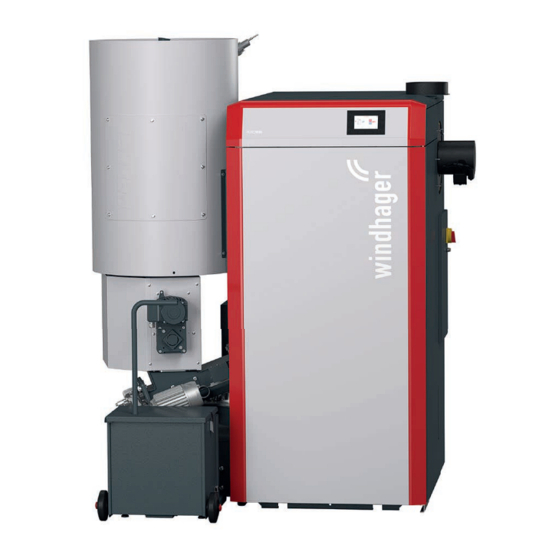
- Page 1 INSTALLATION INSTRUCTIONS PUROWIN PELLET BOILER PELLET BOILER 10/2021 095849/00...
-
Page 2: Table Of Contents
Table of contents TABLE OF CONTENTS IMPORTANT INFORMATION ....................General information ........................4 Relevant documents ..............................4 Safety instructions and other symbols in this documentation ...................4 Units of measurement ..............................5 Safety ............................5 General safety information............................5 Flue .............................. 6 Guidance values for dimensioning the flue gas system....................6 Technical data for calculating the flue gas system acc. - Page 3 Table of contents FOR THE ELECTRICIAN ....................Cable cross-sections and cable lengths ..................47 Electrical connections ........................48 15.1 Boiler mains connection, control system connection, emergency heating switch ..........49 15.2 Installing function modules (MES INFINITY control system) .................. 50 Connecting the function modules ....................
-
Page 4: Important Information
IMPORTANT INFORMATION All content in this document is the property of WINDHAGER and is therefore protected by copyright. Reproducing this content, passing it on to others or using it for other purposes without the written consent of the owner is strictly pro- hibited. -
Page 5: Units Of Measurement
Important information Symbol Type of risk or meaning Symbol Type of risk or meaning Press the ON / OFF button Ensure sufficient ventilation before ente- ring Only enter the store under the supervision Protect from damp Access only with a personal CO detector 1.2.3 Keywords KEYWORD... -
Page 6: Flue
Important information Flue A properly dimensioned flue is required for optimum functioning of the combustion system. The dimensions must be calculated in accordance with EN 13384-1. See the technical data section for the values required for this calculation. Please note that in the lower performance range, flue gas temperature may be below 90 °C. Therefore, thermally insu- lated flues meeting thermal transmittance coefficient Group I requirements according to DIN 18160 T1 or otherappro- priate, officially approved flue gas systems may be connected to the hearths. -
Page 7: Boiler Room/Installation Room
Important information Boiler room/installation room Important information for the design of the boiler house, fuel store. DANGER Injury The construction and layout of the boiler house, fuel store and chimney must comply with the fire safety requirements of Approved Document B for high risk compartments. The configuration of the entire system must comply with the requirements of regional legislation, local plan- ning, applicable regulations, standards and guidelines. -
Page 8: Fuel Storage Room
DANGER Injury Unauthorised start-up! The boiler/system must be started up for the first time by Windhager Customer Service or the customer ser- vice partner, who will familiarise the customer with system operation and how to clean the boiler by refer- ring to the operating manual. -
Page 9: For The Installer
For the installer FOR THE INSTALLER 10. Scope of supply, packaging DANGER Risk of suffocation from plastic films. Plastic films, bags and so on can become dangerous ‘toys’ in a child's hands. Therefore, never leave packa- ging material unattended or allow children to get hold of it. When delivered, the boiler and integral fuel hopper (for pneumatic feed) are on a wooden pallet covered with a plastic sack. -
Page 10: System
For the installer 11. System 11.1 Area of use For heating buildings acc. to EN 12831. The boilers are designed and approved as heat generators for hot water heating systems with permissible flow tempe- ratures of up to 90 °C. They are to be installed in sealed systems only. The resulting flow temperature depends on the relevant operating status and the line losses to the system. -
Page 11: Heat Accumulator (Buffer)
For the installer 11.6 Heat accumulator (buffer) Having a correctly sized heat accumulator (buffer tank) is essential for correct operation. Recommended minimum sizes for buffer / heat accumulator for PuroWIN: PuroWIN Buffer / heat accumulator PWPE 60 ≥ 1500 l PWPE 75 ≥... -
Page 12: Water-Side Resistance (Pressure Loss)
For the installer 11.9 Water-side resistance (pressure loss) 11.9.1 PuroWIN PWPE 60 PuroWIN PWPE 60 0,00 1,00 2,00 3,00 4,00 5,00 6,00 Flow rate (m Diagram 1 Water-side resistance 11.9.2 PuroWIN PWPE 75–100 12,00 10,00 8,00 PuroWIN PWPE 75–100 6,00... -
Page 13: Combustion Air
For the installer 12. Combustion air DANGER Injury The configuration of the entire system must comply with the requirements of regional legislation, applicable regulations, standards and guidelines. The combustion air is drawn directly by the boiler from the installation room; therefore, the installation room has to be adequately ventilated. -
Page 14: Installation Sequence
Follow the installation guidelines for boiler rooms! The configuration of the flue gas line must comply with technical fire protection requirements in accordance with the applicable regulations, standards and guide- lines. PuroWIN PWPE 60 All measurements in mm. Minimum room height: 2100 mm 1320... -
Page 15: Taking Into The Building And Installing
For the installer 13.2 Taking into the building and installing It is best to transport the boiler to the place of installation by lift truck on a wooden pallet. If transporting via stairs or similar, the boiler should be secured appropriately. For installation dimensions and weights, see Section 10 and also the technical data. - Page 16 For the installer a) Using iron rods to roll it off by hand CAUTION Material losses Before removing the base pallet, screw in all 4 adjustable feet on the bottom of the boiler; otherwise, there is a risk of causing damage – Fig. 8. f To make it easier to remove the pallet, slide some iron rods with a diameter of between 25 and 30 mm under the boiler (Fig.
- Page 17 For the installer c) Lifting it off by crane using the eye Alternatively, the boiler can also be lifted off the pallet by using the crane eye on the top of the boiler – Fig. 14. f Remove the 4 self-tapping screws and the cover concealing the crane eye – Fig. 15. Fig.
-
Page 18: Installing The Ash Removal Device
13.3 Installing the ash removal device Fig. 17 Ash removal device (Illustration PuroWIN PWPE 60) f Slide the ash removal device into the guides on the left-hand side of the boiler (Fig. 18), making sure that the guide for the ember bed slide is at the top and the one for the ash scraper is at the bottom of the boiler (open the ash chamber door) –... -
Page 19: Installing The Retaining Bracket For The Integral Fuel Hopper
For the installer 13.4 Installing the retaining bracket for the integral fuel hopper Fig. 22 Retaining bracket for the integral fuel hopper f Screw the retaining bracket onto the boiler with 4 M8 flange nuts – Fig. 23. Fig. 23 Screwing down the retaining bracket... -
Page 20: Installing The Cladding
For the installer 13.5 Installing the cladding 13.5.1 Installing the left side panel f Punch out this cut-out [1] –Fig. 26. Fig. 24 Le side panel (Figure: PuroWIN PWPE 75–100) Fig. 25 Removing the rear panel that has been stuck onto the side panel Only at PuroWIN PWPE 75–100 f Secure the top part [2] of the left side wall with self-tapping screws –Fig. - Page 21 Before installing the side panel, you must remove the rear panel that has been stuck inside the side panel – Fig. 25. Fig. 29 Installing the le side panel (Illustration PuroWIN PWPE 60) 1 ..Level control proximity switch (LC 12V) 2 ..Ember bed slide proximity switch (GB 12V) 3 ..
- Page 22 For the installer f Screw the side panel onto the bottom left-hand side of the base at the back (Fig. 30). At the front, secure it using 1 self-threading M5x12 TT screw at the bottom (Fig. 31) and 2 self-tapping screws at the top – Fig. 32. TT M5x12 Fig.
- Page 23 AS 12V LON 12V STW 12V GB 230VAC GB 12V GB 12V AS 12V AS 12V AS 230VAC PuroWIN PWPE 75–100 PuroWIN PWPE 60 Datum 10.06.2016 Projekt : Schaltplan der Komponenten K1 Gezeichnet PuroWIN mit Direktzuführung PuroWIN Geprüft ------- 2...
- Page 24 13.5.2 Installing the top connector f Only at PuroWIN PWPE 60: Route the pre-assembled door safety switch to the top left-hand corner of the boiler and push the grommet (already threaded onto the cable) into the opening – Fig. 38.
- Page 25 1 ... Door retaining bracket f Secure the cladding bracket at the bottom using 1 M5x12 self-threading TT screw (Fig. 44) and at the top using 1 self-tapping screw (only at PuroWIN PWPE 60, Fig. 45). Fig. 42 Cladding bracket Fig.
- Page 26 For the installer f On the right side panel, you will find two flaps at the cleaning opening. Bend them inwards by approximately 90° – Fig. 47. Fig. 46 Right side panel Fig. 47 Bending in the two aps at the cleaning opening 1 ...
- Page 27 Fig. 52 Attaching the side panel to the cladding bracket with screws (Illustration PuroWIN PWPE 60) f Insert the insulation in the cleaning opening (Fig. 53) f Install the red knob of the main switch (which can be found in control panel 1), the cleaning cover and the cover for control panel 1 using self-tapping screws –...
- Page 28 For the installer f According to the position of the flue connection (top or rear), punch out the relevant cut-out on the top part of the cladding – Fig. 55. Flue connection at top = punch out at the top Flue connection at rear = punch out at rear f Attach the top part of the cladding to the side panel on the right (Fig.
- Page 29 For the installer 13.5.4 Installing the rear panel f Put the top part of the rear panel insulation in place with the smooth side against the boiler and then put the bottom part of the rear panel insulation in place against the boiler (Fig. 61); remember to detach the fan cable from the boiler first –...
- Page 30 Installing the top and bottom of the rear panel f Insert the insulation for the cleaning linkage (Fig. 66) and mount the cover using 4 self-tapping screws – Fig. 67. Fig. 65 Insulation and cover for cleaning linkage (Illustration PuroWIN PWPE 60) Fig. 66 Inserting the insulation Fig.
- Page 31 Install the insulation (Fig. 69) and cladding above the combustion chamber door using self-tapping screws – Fig. 70 Fig. 68 Insulation and cladding for tting above combustion chamber door – PuroWIN PWPE 60 Fig. 69 Attaching the insulation – PuroWIN PWPE 60 Fig.
- Page 32 (only at PuroWIN PWPE 60) Fig. 73 Insulation and cladding for tting below combustion chamber door Fig. 74 Attaching the insulation (only at PuroWIN PWPE 60) Fig. 75 Notch must line up with door mounting 1 ... Notch Fig. 76...
- Page 33 For the installer f Attach the cladding below the ash chamber door (only at PuroWIN PWPE 60), making sure that the top notch lines up with the door mounting (Fig. 78); secure it using 2 self-tapping screws – Fig. 79.
- Page 34 (audible clicking) up until the point at which the cladding door is totally closed. If necessary, to readjust the switch – Fig. 86, Fig. 87. Fig. 86 Adjusting the door safety switch PuroWIN PWPE 60 Fig. 87 Adjusting the door safety switch PuroWIN PWPE 75–100...
- Page 35 Put on the top cover plate at the front and secure it using 4 self-tapping screws – Fig. 93. Fig. 92 Top cover plate Fig. 93 Putting on the top cover plate at the front and securing it (only at PuroWIN PWPE 60)
- Page 36 Place the front cover on the boiler, push it forwards (Fig. 95) and secure it internally at each side using 1 self-tapping screw – Fig. 96. PuroWIN PWPE 60 PuroWIN PWPE 75–100 Cut-out for a flue connection that is at the top Cut-out for a flue connection that is at the top Fig.
- Page 37 Attach the rating plate and serial number (barcode) supplied to the inside of the central cover at the front – Fig. 100. 1 ... Rating plate 2 ... Serial number (barcode) 3 ... Additional rating plate only for PuroWIN PWPE 60 Fig. 100 Attaching the rating plate and serial number (barcode) 13.5.11 Installing the frequency converters and mains filters f Install and connect the frequency converters as follows: install the one labelled Stok (FU1) on the left and the one labelled RAS or Tank (FU2) on the right, using 2 M5x12 TT screws for each one –...
- Page 38 For the installer 13.5.12 Installing the covers for the frequency converters and strain reliefs Tip! Do not install the covers until all the cables have been properly connected and routed. f Screw on the cover over the strain reliefs using 3 self-tapping screws – Fig. 104. f Hook on the cover for the frequency converters at the bottom and secure it at the top using 1 self-tapping screw –...
-
Page 39: Installing The Stoker Auger
For the installer 13.6 Installing the stoker auger Fig. 106 Stoker auger with seal f Slide the stoker auger into the boiler and secure it together with the seal – Fig. 107. je 6 x M10x25 Fig. 107 Slide in and screw down the stoker auger f Connect the safety temperature limiter (STW 12V) –... -
Page 40: Installing The Boiler Pellet Hopper
For the installer 13.7 Installing the boiler pellet hopper f Unscrew and remove both covers on the integral fuel hopper – Fig. 109. f 2 screws each. Loosen the fastening screws at the top of the transport foot to the integral fuel hopper and at the rotary feeder to the wooden frame –... - Page 41 For the installer f Plug the 2 cables from control panel 5 of the hopper into the connection console – Fig. 111. f For details of how to connect the RAS-TANK cable, see section 18 on page 53. RAS S4 SRAS 230VAC LC 12V GB 230VAC...
-
Page 42: Installing The Ash Box Or The Automatic Ash Conveyor (Accessory)
For the installer 13.8 Installing the ash box or the automatic ash conveyor (accessory) 13.8.1 Automatic ash conveyor (accessory) f Refer to the supplied installation instructions for this accessory. Fig. 114 Automatischen Ascheaustragung (Zubehör) 13.8.2 Installing the ash box Fig. 115 Ash box f Remove the cover on the storage container –... - Page 43 For the installer f Remove cover on motor – Fig. 118. f Mount the motor with 1x M8x16 screw at the top first (the screw is pre-assembled on the storage container), followed by 4x M10x25 screws and M10 nuts at the bottom – Fig. 119. M8 x 16 M10 M10 x 25 Fig.
- Page 44 For the installer f Mount the motor cover with 2x M5x12 screws – Fig. 124. f Mount the storage container cover with 7x M6x12 screws – Fig. 125. M6 x 12 M5 x 12 Fig. 124 Fig. 125 f Secure the ash box with both lower side bracket fasteners – Fig. 126. f Adjust the set screws on the ash box and secure with nuts –...
-
Page 45: Installing The Feed And Return Air Hose
For the installer 13.9 Installing the feed and return air hose f Expose approx. 5 cm of the flexible earth leads on all hose ends and bend inwards into the hose – Fig. 128. Important: See also the notes on installing the feed and return air hose in the instructions provided for storage room accessories (changeover unit). -
Page 46: Fitting The Flue Connection
EN 1856-1 and EN 1856-2. Please ensure a sufficient immersion depth when fitting (e.g. when using Windhager stainless steel flue systems). f) The entire flue gas line should be insulated to a minimum thickness of 2 cm in order to prevent or minimise conden- sation. -
Page 47: For The Electrician
For the electrician FOR THE ELECTRICIAN The boiler and related accessories are designed to be installed only in dry areas (protection type IP 20). Installation of electrical components may only be performed by a qualified electrician and must fully comply with Approved Document P and all electrical standards in place at the time of the installation. -
Page 48: Electrical Connections
For the electrician 15. Electrical connections PuroWIN mains connection:230 V AC, 50 Hz, fuse 13 A slow-blow Mains connection for pneumatic feed: 400 V AC, 50 Hz, fuse 16 A slow-blow We recommend: – Establishing the mains connection for the boiler using fine-wire PVC-sheathed cables, round cable Ø 6.5 – 8.3 mm, e.g. -
Page 49: Boiler Mains Connection, Control System Connection, Emergency Heating Switch
Log on with your user name (e-mail address) and password and "myComfort" connects to your heating system. An administration fee will be charged by Windhager UK Ltd to activate the web server Touch and to connect to the My- Comfort remote access. -
Page 50: Installing Function Modules (Mes Infinity Control System)
For the electrician Fig. 133 Removing the rear cover Fig. 134 Removing the 2 screws Fig. 135 Sliding the front cover backwards and li ing it o Fig. 136 Terminals 1 ... LON for control system 2 ... Vertical auger ModBUS 3 ... - Page 51 For the electrician f Loosen the screws at the bottom of the cover for the function module and lift up the cover. f Drill mounting holes (Ø 6 mm) in the wall in accordance with the diagram (Fig. 139). f Screw the function module onto the wall with the D6 dowels and 3.5x30 screws supplied. f Establish all electrical connections in line with Section 25–26 and the instructions supplied for the respective func- tion modules.
-
Page 52: Connecting The Function Modules
For the electrician Fig. 140 PuroWIN cabling 1 ... Cable, extra-low voltage (sensor, LON, etc.) 2 ... Cable, low voltage (230 V AC) 3 ... Cable ties as strain relief 16. Connecting the function modules See the separate instructions for the respective function modules. 17. -
Page 53: Connecting The Frequency Converters (Fu)
For the electrician 18. Connecting the frequency converters (FU) f Connect the cable wires from the lower Stok motor to the frequency converter on the left – Fig. 141, Fig. 142, Fig. 143. f Connect the cable wires from the upper room conveyor motor or, in the case of the pneumatic feed version, connect the tank motor of the hopper to the frequency converter on the right –... -
Page 54: Routing The Cables For The Proximity Switches And Motors
For the electrician 19. Routing the cables for the proximity switches and motors CAUTION Material losses The extra-low-voltage line (12 V AC) and low-voltage line (230 V AC) must be routed separately! f Secure the cables with cable ties, making sure that the 12 V AC and 230 V AC lines are routed separately – Fig. 145. For further details of plug connections, see also Fig. -
Page 55: Connect Cable From The Integral Fuel Hopper
For the electrician 20. Connect cable from the integral fuel hopper f Unscrew the cover of control panel 5 on the integral fuel hopper – Fig. 149. Fig. 149 Unscrew the cover of contr ol panel 5 f Connect both cables FA 2 230 VAC and LON 12 V from control panel 5 to the connection console on the boiler – Fig. -
Page 56: Connection/Block Diagram
For the electrician 21. Connection/block diagram Fig. 152... -
Page 57: For The Service Technician
22. Commissioning and operating instructions Windhager Customer Service or an approved technician with a valid WIN-5 certificate will start up the boiler and will familiarise the customer with the system operator and cleaning of the boiler. Commissioning and full service are part of the guarantee requirements of the "Warranty conditions". -
Page 58: Checking And Servicing The Thermal Discharge Safeguard
For the service technician Handling the frequency converter (FU) DANGER Electric shock! Once the frequency converter has been disconnected from the supply voltage, do not touch any parts of the device that may still be live or any line connections straight away. This is because the capacitors remain charged when the supply voltage is disconnected. -
Page 59: Dimensional Drawings
Dimensional drawings 1928 1906 DIMENSIONAL DRAWINGS 1674 1763 PuroWIN pellet boiler Fig. 155 Rear view Designation Unit PWPE 60 PWPE 75–100 Boiler feed Inch thread 5/4“ sleeve 2“ sleeve Boiler return Inch thread 5/4“ sleeve 2“ sleeve Freimaßtoleranz: WN 001 Top flue gas pipe Ø... -
Page 60: Electric Circuit Diagrams
Electric circuit diagrams ELECTRIC CIRCUIT DIAGRAMS 25. Basic circuitry, PuroWIN pellet boiler 25.1 Plan SB 1 / E1... -
Page 61: Plan Sb 1 / E2
Electric circuit diagrams 25.2 Plan SB 1 / E2... -
Page 62: Plan Sb 1 / E3
Electric circuit diagrams 25.3 Plan SB 1 / E3 Y100 EDV Nr.:012014... -
Page 63: Connection Diagram For Control Panel 5
Electric circuit diagrams 26. Connection diagram for control panel 5... - Page 64 IMPRESSUM Media owner, issuer and publisher: Windhager Zentralheizung Technik GmbH, Anton- Windhager-Straße 20, 5201 Seekirchen am Wallersee, Austria, T +43 6212 2341 0, F +43 6212 4228, info@at.windhager.com, Images: Windhager; subject to amendments, printing and layout errors. Translatet from 024329/00 – AWP-vor...
Need help?
Do you have a question about the PUROWIN PWPE 60 and is the answer not in the manual?
Questions and answers