
Related Manuals for Navman N20


Summary of Contents for Navman N20
-
Page 1: User Manual
User Manual N-Series with SmartS 2006 SE ™ English - Australia/Canada/United States... -
Page 2: Safety Camera Pois
Manual in all material respects. Safety Camera POIs Navman products are designed to be used as an aid to safer driving. You can receive messages to alert you to locations of safety cameras, which will enable you to monitor your speed through these areas. -
Page 3: Important Safety Information
On main roads, the distance to an exit calculated by the Navman may be further than the distance shown on road signs. Road signs show the distance to the start of an exit while your Navman shows the distance to the next intersection, i.e., the end of the exit ramp or road. -
Page 4: Internal Battery-Specific Safety Information
AC Adapter-specific safety information To charge your Navman from the mains power, use the AC adapter/AC power pack supplied by Navman as an accessory (may be sold separately). Using other AC adapters with your Navman could result in serious injury or property damage. -
Page 5: Table Of Contents
Volume ...15 Internal battery...16 How do I get started?...17 How do I turn my Navman off?...19 What are the main screens I will use?...20 How do I navigate with GPS? ...21 How do I go from A to B? ...22 What if I miss a turn? ...22... - Page 6 NavAlbum features ...99 Toolbar ...100 How do I use NavAlbum?...101 How do I copy photos or albums from my Navman to my computer? ...101 How do I copy photos from my computer to my Navman? ...104 Reference ...106 What can I customize?...107 Route Preferences...108...
-
Page 7: Welcome
N-Series User Manual Welcome Thank you for purchasing your Navman. This manual has been prepared to guide you through the operation of your Navman from first set-up through to continuous use, and will help you Drive-Away™ with your Navman, straight out of the box. Please read this manual carefully before using your Navman for the first time. -
Page 8: Box Contents
N-Series User Manual Box Contents Item Navman with integrated GPS receiver 100/240V AC Mains power-pack for use in your home or office The mains power-pack is not supplied with all models. The number of plugs included depends on the country of purchase. -
Page 9: Typographical Conventions
Formatting The following kinds of formatting in the text identify special information: Convention Type of Information Bold Navman components or items displayed on screen, including buttons, headings, field names and options. Italics Indicates the name of a screen. Icons The following icons are used throughout this manual:... -
Page 10: Getting To Know Your Navman
N-Series User Manual Getting to know your Navman We recommend that you familiarize yourself with the Navman's basic operations. Front components Component Battery indicator Touch screen Infrared receiver Description Indicates the level of internal battery charge: Green - battery full Orange - battery charging. -
Page 11: Side Components
Component Volume control Description Connection socket for GPS MMCX External Antenna (not included). To access the socket, gently lift the rubber cover. Slot for memory card. The memory card must be inserted with the label facing the front of your Navman. -
Page 12: Back Components
N-Series User Manual Back components Component Speaker Mirror Camera Description Broadcasts voice commands and warnings. Use the Volume control to adjust up or down. Enables you to see what the camera lens sees. You can then take a photo of yourself against the background of your choice. -
Page 13: Top Components
Component Hot shoe plate Battery Switch Description Turns the Navman on or off; when off, the Navman enters a suspended state. Turns the camera on. Press to take a photo. The camera is not available on all models. Description Connection plate for the P1 or T1 module (sold separately). -
Page 14: Remote Control
N-Series User Manual Remote Control The remote control may be sold separately. Component CAUTION Do not expose the remote control to direct sunlight for prolonged periods. Overheating may damage the remote control. CAUTION If you are not going to use the remote control for three months or longer, remove the batteries from the remote control. -
Page 15: Volume
N-Series User Manual Volume The volume on your Navman can be adjusted either by the volume control on the Navman or by using the volume control buttons on the remote control (may be sold separately). Volume control To hear a sound test and adjust the volume, press the Volume buttons located on the side of the Navman up or down. -
Page 16: Internal Battery
Navman. To begin charging, ensure your Navman is turned off (press To charge the Navman using an electrical wall outlet, plug the AC power cable into of the Navman and the AC power pack into the wall outlet (not included with all models; may be purchased separately). -
Page 17: How Do I Get Started
Navman on. The Navman will turn on and display the Language screen. If your Navman was last turned off (o) via the battery switch, it will automatically turn on when the battery switch is switched on (|). - Page 18 To revisit the previous screen, tap You can view the Tutorial again while using your Navman (see "Tutorial" on page 112). When you have finished the Tutorial, the 3D Map screen will display. If you have a GPS fix, your...
-
Page 19: How Do I Turn My Navman Off
If battery power is very low, your Navman will enter a suspended state whether you have set a pre- determined period of time or not. If you are not going to be using your Navman for an extended period of time, switch the battery switch to off (o) to save battery power. -
Page 20: What Are The Main Screens I Will Use
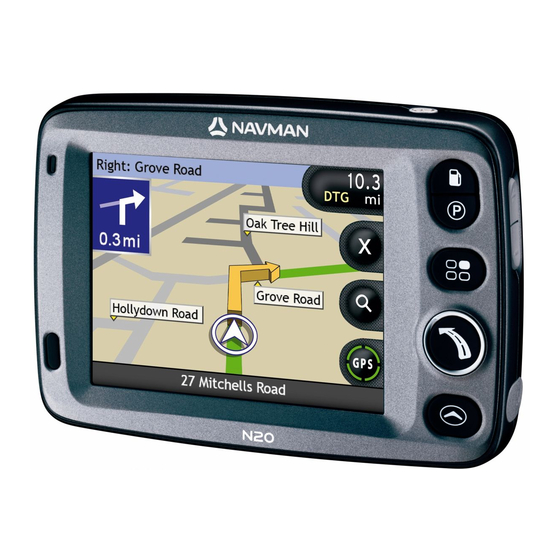
N-Series User Manual What are the main screens I will use? Map screens There are four map screens used to view the route to your destination: 3D Map 2D Map Next Turn Turn-by-Turn™ To display the 3D Map screen, or the map screen that you were last viewing, press cycle through the map screens. -
Page 21: How Do I Navigate With Gps
20,200km (12,552mi). Each satellite transmits a range of signals which are utilized by GPS receivers, such as your Navman, to determine an exact location. Although a GPS receiver can detect signals from up to 12 satellites at any time, only four signals are required to provide a position or "GPS fix"... -
Page 22: How Do I Go From A To B
N-Series User Manual How do I go from A to B? Your Navman is equipped with maps that provide street-level detail for door-to-door navigation, including Points of Interest such as accommodation, parking areas, gas stations, railway stations and airports. When you ... -
Page 23: How Do I Navigate To A Navpix Photo
How do I navigate to a NavPix photo? Your Navman contains preinstalled NavPix photos that you can navigate to. Your five most recently used NavPix photos are displayed on the NavPix Menu. If you have not yet navigated to a NavPix photo, five of the preinstalled NavPix photos will display. -
Page 24: How Do I Navigate To A Navpix Photo I Have Taken Or Downloaded
How do I navigate to a NavPix photo I have taken or downloaded? To navigate to a photo location, a GPS fix must have been available when the photo was taken. From the Album screen, select and tap a photo. -
Page 25: How Do I Search For An Address
How do I search for an address? Select a destination using the Destination Search, Keyboard and Destination Preview screens, which used together form an address-entry wizard. This section describes how to use each of these screens and provides a case study to help guide you through setting your destination. - Page 26 N-Series User Manual 2. Select the country and state If this is the first time you are setting your destination and you have maps from only one country, but more than one state installed and selected, then the Select State screen will display instead of the Destination Search screen. The next time you perform this procedure, the Destination Search screen will open as expected.
- Page 27 3. Search for the city/area From the Destination Search screen, tap City/Area. The Keyboard screen will display. Use the Keyboard screen to search for the city or area of your destination. The Destination Search screen will display. 4. Search for the street From the Destination Search screen, tap Street.
-
Page 28: Using The Keyboard Screen
N-Series User Manual Using the Keyboard screen The Keyboard screen will display when you are required to enter text, such as when searching for a street name. As you tap each character, the first two matching results will display. Tap see more search results. - Page 29 Use the Keyboard screen to search for the street of your destination. Where there are multiple matches, select the city or area that best describes your destination. The Destination Search screen will display. If house numbers and intersection information are not available for your selected street, the Destination Preview screen will display.
- Page 30 N-Series User Manual Complete one of the following: Ensure that the route preferences are applicable for the route that you have specified, before you tap Go. If you want to ... calculate the route and open the 3D Map screen view the position on the map screen add the destination to a multi stop trip save the destination as My Home...
-
Page 31: How Do I Create A Trip With Multiple Stops
How do I create a trip with multiple stops? You can use the Multi-stop Trip Planner screen to set multiple waypoints for your trip. Your route will be calculated to go via each of these points in the specified order. Waypoints can be added via the Multi-stop Trip Planner screen or by selecting Location from the pop- up Map menu on the 2D Map or 3D Map screen, then Add to Trip. -
Page 32: Case Study: How Do I Navigate To Multiple Addresses
N-Series User Manual Case Study: How do I navigate to multiple addresses? This case study will show you how to set a multi-stop trip by selecting your country, then state, then town or city, then street, then house number for each waypoint. 1. - Page 33 2. Select the country and state If this is the first time you are setting your destination and you have maps from only one country, but more than one state installed and selected, then the Select State screen will display instead of the Destination Search screen. The next time you perform this procedure, the Destination Search screen will open as expected.
- Page 34 N-Series User Manual 3. Search for the city/area From the Destination Search screen, tap City/Area. The Keyboard screen will display. Use the Keyboard screen to search for the city or area of your destination. The Destination Search screen will display. 4.
- Page 35 Use the Keyboard screen to search for the street of your destination. The Destination Search screen will display. If house numbers and intersection information are not available for your selected street, the Waypoint Preview screen will display. Go to step 5b. 5.
- Page 36 N-Series User Manual Tap Add. The destination is automatically saved and the Multi-Stop-Trip Planner screen will display. Complete one or more of the following: If you want to ... add another waypoint Waypoints added after a multi-stop trip has commenced will not be included in the current route.
-
Page 37: How Do I Skip A Waypoint During A Multi-Stop Trip
How do I skip a waypoint during a multi- stop trip? You can modify a multi-stop trip at any time from the Multi-stop Trip Planner screen, however if you have already commenced a trip, changes will not affect the current route: To skip a waypoint during a multi-stop trip, complete the following: Tap the map to display the cross-hairs. -
Page 38: How Do I Search For A Landmark Or Venue
You can press to quickly find the nearest gas station. Your Navman will show you a list of the nearest gas stations based upon your current location. Press The Select a point of interest screen will display, showing a list of the nearest gas stations based upon your current location. -
Page 39: How Do I Find The Nearest Parking Area
This case study will show you how to set your destination by locating and selecting a parking area. The Navman will show you a list of the nearest parking areas based upon your current location. Press The Select a point of interest screen will display, showing a list of the nearest parking areas based upon your current location. -
Page 40: How Do I Search For Other Pois
N-Series User Manual How do I search for other POIs? Select a POI destination using the Destination Search, Keyboard and Destination Preview screens, which used together form a POI-entry wizard. This section describes how to use each of these screens and provides a case study to help guide you through setting your POI. - Page 41 2. Select the country and state If this is the first time you are setting your destination and you have maps from only one country, but more than one state installed and selected, then the Select State screen will display instead of the Destination Search screen. The next time you perform this procedure, the Destination Search screen will open as expected.
- Page 42 N-Series User Manual 3. Select the type of Directory location To narrow the search for a POI, you can first search by Area or Postcode/ZIP code. From the Destination Search screen, tap Point of Interest. The Select POI Category screen will display. Select a POI type from the list.
- Page 43 d) Complete one of the following: Ensure that the route preferences are applicable for the route that you have specified, before you tap Go. If you want to ... calculate the route and open the 3D Map screen view the position on the map screen add the destination to a multi stop trip save the destination as My Home save the destination as a Favorite...
-
Page 44: How Do I View My Route
N-Series User Manual How do I view my route? Once a route has been calculated, the 3D Map screen will display. You will be directed to your destination by vocal and visual instructions. You can view your route in several ways by pressing 3D Map screen The 3D Map screen is oriented to your travelling direction. - Page 45 Green Quadrants - Indicates a valid GPS signal is being used to fix your position. Between one and four quadrants will display indicating the signal strength. Tap and hold to display the GPS Status screen. Red Circle - Indicates no GPS signal. Tap and hold to display the GPS Status screen.
-
Page 46: 2D Map Screen
N-Series User Manual 2D Map screen The 2D Map screen shows your current position (if a GPS fix is active) and surrounding street names. If a route has been calculated, the route and turns are highlighted. The 2D Map screen is displayed Course Up, unless the Map Display preference is set to North. - Page 47 Tap and hold to display the GPS Status screen. Red circle - Indicates no GPS signal. Tap and hold to display the GPS Status screen. The name of the street you are located on Speed warnings Active POIs.
-
Page 48: Next Turn Screen
N-Series User Manual Next Turn screen The Next Turn screen displays information that you need for the next turn, the direction of the turn and the distance to the turn. A route must first have been calculated, for this screen to be available. To view the Next Turn screen when a route has been calculated, press screens. - Page 49 Green Quadrants -Indicates a valid GPS signal is being used to fix your position. Between one and four quadrants will display indicating the signal strength. Tap and hold to display the GPS Status screen. Red Circle - Indicates no GPS signal. Tap and hold to display the GPS Status screen.
-
Page 50: Turn-By-Turn™ Screen
N-Series User Manual Turn-by-Turn™ screen The Turn-by-Turn screen displays the next four turns of your route, the turn direction, the street name and the distance to the turn. You can view all the turns in the list, using the up and down arrows. A route must first have been calculated for this screen to be available. -
Page 51: How Do I Save Favorites And My Home
How do I save Favorites and My Home? You can save up to 200 destinations as Favorites, one of which can be saved as My Home. My Home can be any designated Favorite, but we recommend that it is your home or other common destination. You can save a Favorite from the Destination Preview screen after searching for an address, or from the Maps Menu on the 3D or 2D Map screens. -
Page 52: How Do I Navigate To A Favorite
N-Series User Manual Complete one of the following: If you want to ... save as a Favorite save as My Home How do I navigate to a Favorite? Tap the Favorite destination you want to travel to. The Favorite Preview screen will display. Tap Go. -
Page 53: How Do I Navigate To My Home
How do I navigate to My Home? If you have not set an address as My Home, the first time you try to navigate to My Home you will be prompted to search for an address using the address-entry wizard. Option 1 - From the Go To Menu The route is calculated and displayed on the Map screen. -
Page 54: How Do I Edit The Name Of A Favorite
N-Series User Manual How do I edit the name of a Favorite? From the Favorite Destinations screen, select a Favorite to edit. The Favorite Preview screen will display. Tap Edit. The Edit Name screen will display. To edit the name of the Favorite, tap After you have edited the Favorite name, tap OK. -
Page 55: How Do I Delete A Favorite
How do I delete a Favorite? From the Favorite Destinations screen, select a Favorite to delete. The Favorite Preview screen will display. Tap Delete. The Favorite is deleted. The Favorite Destinations screen will display. N-Series User Manual... -
Page 56: How Do I Use The Camera
This enables you to navigate directly to where the photo was taken. Photos can be stored in an Album on the Navman's hard drive or a memory card and viewed in full screen mode. You can also share your photos with other NavPix users by uploading them to www.navman.com/navpix. -
Page 57: How Do I Take A Photo
The captured image will preview in the Viewfinder for two seconds before it is automatically saved in your NavPix album on the Navman internal memory. If the Viewfinder screen is inactive for more than two minutes it will revert to the map screen. -
Page 58: Viewfinder Screen
Displays the current lighting setting. Tap to view lighting options. Displays the brightness setting. Tap to view brightness options. Allows you to frame the image within the Viewfinder. Viewfinder Indicates if GPS information is available. on top of the Navman. -
Page 59: How Do I Customize Camera Preferences
How do I customize camera preferences? The camera has lighting and brightness settings which you can customize before taking a photo. Lighting options To view the Viewfinder screen, press From the Viewfinder screen, tap The range of lighting options will display. Setting Description For outdoor use, in bright sunlight For outdoor use, with cloud cover... -
Page 60: How Do I Manage My Photos
Navman internal memory or store them on your memory card. When you take a photo, it is always saved to the NavPix album on the Navman internal memory. You can then copy it to another album or a memory card. - Page 61 How do I copy photos to the album on my memory card? Photos can be copied from the Albums on your Navman internal memory to your memory card and vice versa. The first time a photo is copied to your memory card, a folder will be created on the memory card called NavPix.
-
Page 62: Photo Management
Allows you to assign a photo to an existing Favorite, if GPS co-ordinates are associated with the photo. Deletes a photo from the album on your Navman or memory card. Allows you to create a title for a photo using the Keyboard screen. - Page 63 How do I view a photo in full-screen? From the Photo Details screen, tap the thumbnail of the photo. The photo will appear in full-screen. Complete the following: If you want to ... zoom into the photo zoom out of the photo rotate the photo view parts of the photo not displayed on-screen...
-
Page 64: How Do I Navigate To A Navpix Photo
How do I navigate to a NavPix photo? Your Navman contains preinstalled NavPix photos that you can navigate to. Your five most recently used NavPix photos are displayed on the NavPix Menu. If you have not yet navigated to a NavPix photo, five of the preinstalled NavPix photos will display. -
Page 65: How Do I Navigate To A Navpix Photo I Have Taken Or Downloaded
How do I navigate to a NavPix photo I have taken or downloaded? To navigate to a photo location, a GPS fix must have been available when the photo was taken. From the Album screen, select and tap a photo. -
Page 66: How Do I Assign A Photo To A Favorite
Complete the following: If you want to ... assign a photo to an existing Favorite location create a new Favorite (when GPS co- ordinates are associated with a photo) Then ... and select a Favorite destination from the list. The Favorite title will display. -
Page 67: How Do I Save, E-Mail Or Print Photos
All photos in My Pictures are part of the same photo album and can be viewed on your Navman. Once a photo has been copied to the photo album on your memory card, you can then use the card with your computer to save, e-mail or print the photos, or take the memory card to a digital photo retailer for printing. -
Page 68: What Else Can I Do
2D Map screens calculate a route that avoids a specified area on the map preview your route, or plan and view a route without a GPS fix view statistical information on both your current trip and all trips to date Then ... -
Page 69: How Do I Navigate To A Recent Location
How do I navigate to a recent location? To make navigating to an address easier, your Navman will automatically save all your start locations and destinations in a list of recent locations. Tap a recent location. The Recent Location Preview screen will display. -
Page 70: Map Menu Options
N-Series User Manual How do I use the Map Menu? The Map Menu allows you to access navigational functions from the 3D Map and 2D Map screen. Displaying the Map Menu to display the 3D Map or 2D Map screen. Tap and drag to move around the map to your selected location. - Page 71 Menu Option Route Add Avoid Area Remove Avoid Area Description Only available when navigating a route. Displays the Route sub-menu from which you can: Detour. Detours your route to avoid the next 1, 2, 5, 10 or 20 kilometers or the next 1, 2, 5, 10 or 20 miles. Demonstrate.
-
Page 72: How Do I Delete All Avoid Areas
N-Series User Manual How do I avoid an area? Your Navman can calculate a route that avoids a specified area on the map. Avoid Areas are displayed as shaded areas. CAUTION If no alternative route around an Avoid Area exists, the route calculation will fail. -
Page 73: How Do I Preview A Route
"Demonstration and Logging 4/4" on page 111. 1. Select a departure point If you have a GPS fix, you do not need to select a departure point unless you want the demonstrated route to start elsewhere. Tap the map screen at your departure point. - Page 74 N-Series User Manual 3. Demonstrate the route Once the route has been determined, you can demonstrate the route by completing the following: Tap the map screen to display the Map Menu. Tap Route. The Route submenu will display. Tap Demonstrate. The 3D Map screen will display the calculated route in Route Demonstration mode.
-
Page 75: How Do I View My Route Statistics
How do I view my route statistics? The Navman provides information on your: distance travelled average speed maximum speed time taken for trip stationary time. Trip information is presented in two different ways. These are: information for the current trip information for all trips to date, or since the tripmeter was last reset. -
Page 76: How Do I View Statistics Of My Trips To Date
N-Series User Manual How do I view statistics of my trips to date? The Tripmeter - Global screen is used to view statistical information for all of your trips to date, or since the trip meter was last reset. From the Tripmeter - Current Route screen, tap The Tripmeter - Global screen will display. -
Page 77: What Is Smartst Desktop
What is SmartST Desktop? Smart Desktop is software for your computer and is used to install maps to your Navman. You can also use it to: remove maps from your Navman obtain software updates manage Custom Points of Interest manage subscriptions to safety camera information. -
Page 78: Can I Use Smart Desktop With My Computer
Desktop on your computer (see "How do I install Smart computer?" on page 79). Check for software updates for Smart date?" on page 84). Install one or more maps on your Navman (see "How do I install maps onto my Navman?" on page 85). Desktop with my ®... -
Page 79: How Do I Install Smart Desktop Onto My Computer
Smart Desktop will open. If prompted to connect your Navman to your computer, complete the following: Plug the large end of the USB cable directly into a USB port on your computer (not a USB hub) and plug the small end into the USB Socket ( Where possible, plug the USB cable into a USB port at the back of your computer. - Page 80 N-Series User Manual Press Your Navman will turn on. When the following screen displays on your Navman, click Next: Microsoft ActiveSync will synchronize with your Navman. You are now ready to use Smart Desktop to install maps to your Navman.
-
Page 81: Smart Desktop Features
View menu. For more information, see "Toolbars" on page 83. Follow the steps on the Add Maps tab to install maps to your Navman, memory card, or memory card via a memory card reader. For more information, see "How do I install maps onto my Navman?" on page 85. - Page 82 N-Series User Manual Element Map Information Map Color Key Description The following information will display when you point to a map: Map name File size (if the map is on the inserted CD or a CD in the same set) Map status Latitude Longitude co-ordinates in degrees, minutes and seconds Local time offset UTC...
-
Page 83: Toolbars
Click and drag the edge of a floating toolbar to reshape it. You cannot reshape a toolbar that is docked at the top of the screen. Desktop: Description Indicates that your Navman is connected to your computer via ActiveSync. Indicates that your Navman is not connected to your computer. Click to zoom in to the globe. -
Page 84: How Do I Keep Smart Up-To-Date
Updating vs. Upgrading Updating software is different from upgrading software: When you update Smart , the latest service packs and bug fixes are downloaded from Navman and applied to your Navman. To upgrade Smart , you must first purchase a new version of Smart How do I update Smart If you connect to the Internet via a dial-up connection, connect to the Internet now. -
Page 85: How Do I Install Maps Onto My Navman
Your Navman comes with one or more pre-activated maps. You can install maps from the enclosed CDs to memory card or your Navman internal hard drive; however you may need to purchase a Map Product Key to activate the maps. - Page 86 Your computer will connect to the Internet and activate your Map Product Key. When activation has completed, the map will change color to Click the map you want to install to your Navman. The map will change color to the Review Selected Maps section of the Add Maps tab.
-
Page 87: How Do I Remove Maps From My Navman
When they have been installed, the map or maps will change color to yellow. 10. To use your Navman, disconnect the USB cable. WARNING Do not disconnect the USB cable from the Navman USB Socket until the Globe has refreshed, and the installed map or maps have changed color to yellow. -
Page 88: How Do I Know Which Map Contains A Particular City Or Town
N-Series User Manual How do I know which map contains a particular city or town? Use the Find City window to find the map that contains a particular city or town. On the Map menu, select Find City. The Find City window will open. Type the name of the city or town in the City Name field. -
Page 89: How Do I Subscribe To Safety Camera Information
If you select the free update option then it is redeemed immediately. If you select the subscription option, you will be directed to the Navman Store website. You have a choice of selecting one OR the other special offer. If you select the subscription option, the free update is no longer available. -
Page 90: How Do I Check For Special Offers
Start > All Programs > Navman > SmartST Desktop 2006 SE From the Subscriptions menu, select Check for Special Offers. Your computer will connect to the Navman server to check for applicable special offers. If special offers are available, complete the following: Select a region to view the applicable special offers. -
Page 91: How Do I Install Safety Camera Information
How do I install Safety Camera information? If you do not accept the free download of the latest safety camera map information, you need to complete the following steps to install safety camera information on your Navman. Purchase a Subscription. Activate your Subscription. -
Page 92: How Do I Check For Subscription Updates
From the Subscriptions menu, select Check for Subscription Updates, then select either a single subscription or Update all Subscriptions. Your computer will connect to the Navman server to check for applicable subscription updates. If a subscription update is available, click Continue. -
Page 93: How Do I Install Custom Points Of Interest
(see "Alerts" on page 128). Navman is not responsible for the content or accuracy of the information or the reliability or availability of these websites.The use of information regarding safety camera locations may be subject to local laws in the country of use. You are responsible for checking that you can use the information in your country or in the country where the information will be used. -
Page 94: How Do I Create A Custom Point Of Interest File
Points of Interest. The file will be saved on your computer in .csv (Comma Separated Values) format. When you have finished creating or editing the file, you can copy it to your Navman. For more information, see "How do I copy a Custom POI file to my Navman?" on page 95. -
Page 95: How Do I Copy A Custom Poi File To My Navman
The Point of Interest file is saved. You are now ready to copy your custom Point of Interest file to your Navman. For more information, see "How do I copy a Custom POI file to my Navman?" on page 95. - Page 96 Select the destination media for the selected maps; for example, memory card or Navman internal memory, then click Copy POI. The POI file is saved to the Navman or memory card as a POI category. Then ... type the name of the POI category in the POI Name field.
- Page 97 Click OK to save your list of sound files and close the My Sounds Admin window. How do I delete a Custom POI File from my Navman? Points of Interest Click The Manage POI Files window will open, displaying a list of custom POI files installed on your Navman.
-
Page 98: How Do I Backup My Navman
N-Series User Manual How do I backup my Navman? You can save backups of the following information, and later restore them to your Navman: Favorites and My Home Preferences, including Point of Interest and photo preferences Multi-stop trips Recent locations. -
Page 99: What Is Navalbum
What is NavAlbum? NavAlbum is software for your computer which is used to transfer NavPix photos from your Navman to your computer. You can then upload them to www.navman.com/navpix to share with other NavPix users. NavAlbum features NavAlbum enables you to copy, delete or move photos or albums between the NavPix library on your Navman and the NavPix library on your computer. -
Page 100: Toolbar
Transfer to your Navman. Click to transfer the selected photo to your Navman. If you are viewing photos in the Navman library this will display as Transfer to your computer. Click to transfer the selected photo(s) to the NavPix library on your computer. -
Page 101: How Do I Use Navalbum
Navman. How do I copy photos or albums from my Navman to my computer? Photos taken with your Navman can be saved on your computer, printed, emailed to friends or shared with other NavPix users around the world. Quick steps Copy photos or albums from your Navman. - Page 102 Select the required photo or photos and click the Export to disk icon on the toolbar. 4. Email or print photos or upload to the Internet To upload your photos to the Internet, visit www.navman.com/navpix. What else can I do with photos and albums on my...
- Page 103 If you want to ... view and edit photo details view all photos in the library Then ... select the photo then click the View Details icon on the toolbar. edit the fields as required. click the View all photos button at the bottom of the Desktop album section.
-
Page 104: How Do I Copy Photos From My Computer To My Navman
You can copy any photos from your computer to your Navman, including NavPix photos downloaded from www.navman.com/navpix. You can import any photo into NavAlbum, add or edit GPS information, and then copy the photo to your Navman. You can then navigate to where the photo was taken. - Page 105 3. Transfer photos from NavAlbum to your Navman Select the album to transfer to your Navman. b) Either click the Transfer to your Navman icon, or drag the album from the Desktop album section to the Navman album section. 4. Navigate to the NavPix photo For more information, (see "How do I navigate to a NavPix photo?"...
-
Page 106: Reference
N-Series User Manual Reference In this section What can I customize? ...107 How do I insert a Memory Card? ...130 Street types - US ...131 Street types - Canada...136 Point of Interest categories ...139 Specifications ...141... -
Page 107: What Can I Customize
Options to control aspects of your route; for example, indicating a preference for freeways. Displays the Smart Options to control how the Navman functions; for example, power and language controls. Options to control the screen brightness, touch screen alignment, map display and measurement preferences. -
Page 108: Route Preferences
N-Series User Manual Route Preferences You can enhance your navigation experience by modifying aspects of your route and route calculation. The first route preference screen is the Route Calculation screen, and is accessed by tapping the Preferences menu. Tap Route Calculation 1/4 Complete the following: If you want to... -
Page 109: Road Types
Road Types 2/4 Complete the following: If you want to... avoid toll roads receive a warning if your route includes toll roads avoid unsealed roads receive a warning if your route includes unsealed roads avoid ferry routes receive a warning if your route includes ferry routes Your preferences are automatically saved. - Page 110 Then... select the speed in the Alert me when my speed exceeds check box. select your preferred speed from the Speed box. select the Warn me not to operate my Navman while driving check box.
- Page 111 SmartST shop demonstration check box. After a 10- second delay, the route demonstration will navigate between your first and second Favorite. contact Navman Customer Support, as we recommend this feature be used only under the supervision of a Navman technician. N-Series User Manual...
-
Page 112: Tutorial
N-Series User Manual Tutorial The Tutorial displays when you turn your Navman on, unless you have cleared the Show on start-up check box. You can view the Tutorial at any other time: To prevent the Tutorial from displaying again on startup, tap the Show on start-up check box to clear it. -
Page 113: System Preferences
Options to control the type of keyboard used for entering an address. Displays the GPS status, with an option to reset the GPS signal. Options to control the way power to your Navman is used; for example, the time to elapse before the unit is automatically turned off. -
Page 114: Select Keyboard
N-Series User Manual Select Keyboard Complete the following: If you want to... use an alphabetic keyboard for entering addresses use a keypad type keyboard for entering addresses Your preferences are automatically saved. to return to the previous screen. Then... select the Use alphabetic type (a, b, c...) option. select the Use keypad type (abc, def...) option. -
Page 115: Resetting Your Gps Fix
Resetting your GPS fix On occasion, the GPS fix may need to be reset. This may occur if the receiver has been transported a long distance since last being used; for example, to a different country, and is still trying to establish the previous position. - Page 116 N-Series User Manual Power The Battery Status bar shows the percentage of power left in the Navman battery; the word External Power will display when the battery is charging from an external power source. To charge the battery, see "Internal battery" on page 16.
- Page 117 Language Complete the following: If you want to... change the on-screen language enable voice guidance instructions while driving to your destination change the voice scheme Your preferences are automatically saved. to return to the previous screen. Then... select your preferred language from the Language box and tap OK. Your language preference is saved and the map screen is displayed.
-
Page 118: Saved Information
N-Series User Manual Saved Information Complete the following: If you want to... delete recent locations delete Favorites delete avoid areas restore factory default settings clear all settings; for example, for use in a rental car When the warning dialog box displays, tap Yes. to return to the previous screen. - Page 119 Start-up Complete the following: If you want to... show the Tutorial when you turn on your Navman show the Language Selection screen when you turn on your Navman Your preferences are automatically saved. to return to the previous screen. Then...
-
Page 120: Display Preferences
N-Series User Manual Display Preferences You can enhance your navigation experience by modifying aspects of the way your Navman displays information. The Display Preferences menu is shown below, and is accessed by tapping menu. Element Description Options to control the screen brightness and touch screen alignment. -
Page 121: Screen Display
Screen Brightness slider towards Dim to decrease screen brightness. Warning: The Navman can heat up when the Brightness scale is set above 70% - i.e., when more than seven rectangles are coloured - therefore, use lower brightness whenever acceptable. -
Page 122: Map Display
N-Series User Manual Map Display 1/3 Complete the following: If you want to... change the color scheme improve screen contrast in light or dark conditions set the screen contrast to automatically adjust Your preferences are automatically saved. to return to the previous screen. Then... - Page 123 Map Display 2/3 Complete the following: If you want to... enable automatic zooming during navigation display North at the top of the 2D Map screen display “no entry” icons on “no entry” roads on the 2D Map and 3D Map screens Your preferences are automatically saved.
- Page 124 N-Series User Manual Change Continent 3/3 Complete the following: If you want to... use maps from a different continent Your preferences are automatically saved. to return to the previous screen. Then... select a different continent. When selected, the maps for the new continent will load and the 3D Map screen will display.
- Page 125 Measurements 1/2 Complete the following: If you want to... change the local time offset change the distance units Your preferences are automatically saved. to return to the previous screen. Only available when AU English, UK English or US English language is selected. Then...
- Page 126 N-Series User Manual Measurements 2/2 Complete the following: If you want to ... change the Position Format Your preferences are automatically saved. to return to the previous screen. Then ... select either the Decimal degrees or the Degrees, minutes and seconds option.
- Page 127 POI Menu You can enhance your navigation experience by modifying aspects of the way your Navman displays and manages POIs. The POI Menu is shown below. To access this menu press Element Description Options to to set warning chimes and visual warnings for custom POI categories that will activate within a chosen distance-radius of your location.
- Page 128 (set by the Warning Distance preferences), but not necessarily on your route. Custom directory categories must first be installed on your Navman using Smart as active.
- Page 129 How do I enable Points of Interest? Points of Interest (POIs) are grouped into categories. You may either choose to display (or hide) icons of all POI categories on the map screens, or to selectively display desired icons chosen from the list of categories.
-
Page 130: How Do I Insert A Memory Card
CAUTION Do not to apply pressure to the center of the memory card. How do I remove a Memory Card? Before removing the memory card, turn off the Navman. Next, gently push the top edge of the card to release it, and pull it out of the slot. -
Page 131: Street Types - Us
Street types - US Country United States of America Street Type ALLEY ANNEX ARCADE AVENUE BAYOU BEACH BEND BLUFF BLUFFS BOTTOM BOULEVARD BRANCH BRIDGE BROOK BROOKS BURG BURGS BY-PASS CAMP CANYON CAPE CAUSEWAY CENTER CENTERS CIRCLE CIRCLES CLIFF CLIFFS CLUB COMMON CORNER CORNERS... - Page 132 N-Series User Manual Country Street Type ESTATE ESTATES EXPRESSWAY EXTENSION EXTENSIONS FALLS FERRY FIELD FIELDS FLATS FORD FORDS FOREST FORGE FORGES FORK FORKS FORT FREEWAY GARDEN GARDENS GATEWAY GLEN GLENS GREEN GREENS GROVE GROVES HARBOR HARBORS HAVEN HEIGHTS HIGHWAY HILL HILLS HOLLOW HOUSE...
- Page 133 Country Street Type LAKE LAKES LANDING LANE LIGHT LIGHTS LOAF LOCK LOCKS LODGE LOOP MANOR MANORS MARKET MEADOW MEADOWS MILL MILLS MISSION MOTORWAY MOUNT MOUNTAIN MOUNTAINS NECK ORCHARD OVAL OVERPASS PARK PARKS PARKWAY PARKWAYS PASS PASSAGE PATH PIKE PINE PINES PLACE PLAIN PLAINS...
- Page 134 N-Series User Manual Country Street Type RADIAL RAMP RANCH RIDGE RIDGES RIVER ROAD ROADS ROUTE SHOAL SHOALS SHORE SHORES SKYWAY SPRING SPRINGS SPUR SPURS SQUARE SQUARES STATION STRAVENUE STREAM STREET STREETS SUMMIT TERRACE THROUGHWAY TRACE TRACK TRAFFICWAY TRAIL TUNNEL TURNPIKE UNDERPASS UNION UNIONS...
- Page 135 Country Street Type WALK WALKS WALL WAYS WELL WELLS N-Series User Manual Abbreviation WALK WALK WALL WAYS...
-
Page 136: Street Types - Canada
N-Series User Manual Street types - Canada Country Canada Street Type ABBEY ACRES ALLEE ALLEY AUTOROUTE AVENUE (English) AVENUE (French) BEACH BEND BOULEVARD (English) BOULEVARD (French) BY-PASS BYWAY CAMPUS CAPE CARRÉ CARREFOUR CENTER (English) CENTER (French) CERCLE CHASE CHEMIN CIRCLE CIRCUIT CLOSE COMMON... - Page 137 Country Street Type FARM FIELD FOREST FREEWAY FRONT GARDENS GATE GLADE GLEN GREEN GROUNDS GROVE HARBOUR HEIGHTS HIGHLANDS HIGHWAY HILL HOLLOW ÎLE IMPASSE ISLAND KNOLL LANDING LANE LIMITS LINE LINK LOOKOUT LOOP MALL MANOR MAZE MEADOW MEWS MONTEE MOOR MOUNT MOUNTAIN ORCHARD N-Series User Manual...
- Page 138 N-Series User Manual Country Street Type PARADE PARC PARK PARKWAY PASSAGE PATH PATHWAY PINES PLACE (English) PLACE (French) PLATEAU PLAZA POINT PORT PRIVATE PROMENADE QUAY RANG RANGE RIDGE RISE ROAD ROND POINT ROUTE RUELLE SENTIER SQUARE STREET SUBDIVISION TERRACE TERASSE THICKET TOWERS TOWNLINE...
-
Page 139: Point Of Interest Categories
Point of Interest categories Icon Description Airline Access Amusement Park Bank Boat Ramp Building Car Dealer Cash Dispenser Centre of Settlement Cinema College or University Concert Hall, Music Center, Opera Courthouse Dentist Drive-Through Bottle Shop Emergency Medical Service Fire Station General POI Government Office Hotel or Motel... -
Page 140: Point Of Interest Categories By Subscription
N-Series User Manual Icon Description Railway Station Rest Area Scenic or Panoramic View Shop Stadium Tennis Court Tourist Information Office Vehicle Equipment Provider Water Sports Yacht Basin Point of Interest categories by subscription Icon Description Safety Cameras Safety Camera (mobile) Safety Camera (average) Red Light Camera Icon... -
Page 141: Specifications
Specifications General Operating voltage Maximum operation current Grounding System AC adapter Operating voltage range Output Connection type Car adapter Operating voltage Operating voltage range Maximum operation current TFT monitor Screen diagonal Usable display area Resolution Brightness Top viewing angle Bottom viewing angle Horizontal viewing angle Dimensions Dimensions... - Page 142 N-Series User Manual Aperture Battery Capacity Type Battery life Hardware Processor SD/MMC Memory Expansion Environment Operating temperature Storage temperature Operating humidity Storage humidity Operating shock Non-operating shock * Indicates the average of the value, which may change. N40i f/2.8 1200mAH 1200mAH Lithium-Ion polymer Lithium-Ion polymer...
-
Page 143: Support Information
Support information Support for Australia Navman Australia Pty Ltd PO Box 479 Gladesville, NSW 2111 Australia Support: http://support.navman.com Website: http://www.navman.com Support for New Zealand Navman New Zealand PO Box 68-155 Newton Auckland New Zealand Support: http://support.navman.com Website: http://www.navman.com N-Series User Manual... - Page 144 MN000688B-G...
Need help?
Do you have a question about the N20 and is the answer not in the manual?
Questions and answers