
Related Manuals for Gendex GXDP-700


Summary of Contents for Gendex GXDP-700
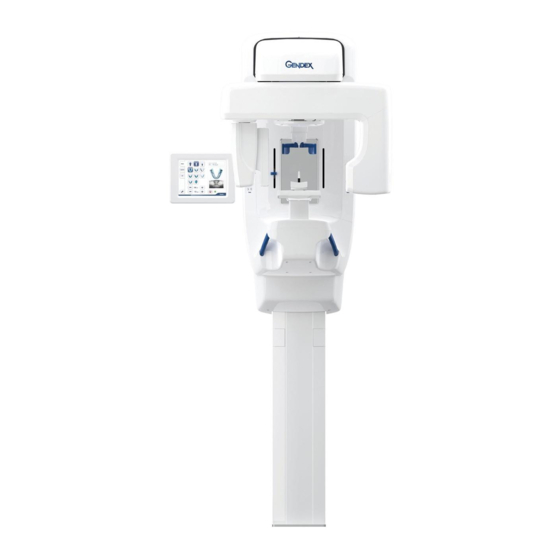
- Page 1 ENGLISH GXDP-700™ Digital Panoramic X-Ray System User Manual 207723 rev. 7 Reviewed: Nieminen Timo Antero 2016-12-02 15:31 D507729, 7 Approved: Laihonen Tuuli 2016-12-02 16:41...
- Page 2 Reviewed: Nieminen Timo Antero 2016-12-02 15:31 D507729, 7 Approved: Laihonen Tuuli 2016-12-02 16:41...
- Page 3 Gendex Dental Systems. The original language of this manual is English. Gendex Dental Systems reserves the right to make...
- Page 4 GXDP-700™ Reviewed: Nieminen Timo Antero 2016-12-02 15:31 D507729, 7 Approved: Laihonen Tuuli 2016-12-02 16:41...
-
Page 5: Table Of Contents
Table of Contents Introduction........................1 1.1 GXDP-700™ ......................1 1.2 Intended use ......................2 1.3 Intended user profile ..................... 2 1.4 Associated documentation ..................2 1.5 References......................2 1.6 Abbreviations used in this manual ................ 3 1.7 Warnings and precautions ..................4 1.7.1 Warnings to be observed during use ............ - Page 6 5.3 Panoramic exposures ..................43 5.3.1 Positioning devices .................. 43 5.3.2 General instructions ................. 44 5.3.3 Patient positioning..................46 5.3.3.1 Panoramic exposure..............46 5.3.3.2 TMJ exposure ................49 5.3.3.3 Maxillary Sinus exposure............52 5.3.3.4 Taking a panoramic exposure ........... 53 5.4 Cephalometric exposures ...................
- Page 7 8.5.1 Ceph pixel calibration................93 8.5.2 Ceph Quality check program (Optional)........... 94 Technical data......................97 9.1 Technical specifications ..................97 9.2 Unit dimensions....................108 9.3 Symbols that may appear in the unit..............111 9.4 Labels on the unit....................112 9.5 Electromagnetic Compatibility (EMC) tables............. 113 9.6 X-ray tube assemblies..................
- Page 8 Reviewed: Nieminen Timo Antero 2016-12-02 15:31 D507729, 7 Approved: Laihonen Tuuli 2016-12-02 16:41...
-
Page 9: Introduction
GXDP-700 is a dental X-ray system for producing high quality digital images of dentition, TM-joints and skull. In order to take images with GXDP-700, you need a suitable PC hardware connected to the GXDP-700 unit and imaging software to capture and manage images. -
Page 10: Intended Use
Only for professionally qualified dental / medical personnel. Typical user is a dental assistant with specific training for using dental x-ray units. 1.4 Associated documentation • GXDP-700 user manual • GXDP-700 installation manual • GxPicture Driver software installation manual •... -
Page 11: Abbreviations Used In This Manual
SRT = Scatter Reduction Technology™ reduces the effect of metal and other dense radiopaque objects, which typically create artifacts that are seen as stripes and shadows. 207723 rev 7 Gendex Dental Systems Reviewed: Nieminen Timo Antero 2016-12-02 15:31 D507729, 7 Approved: Laihonen Tuuli 2016-12-02 16:41... -
Page 12: Warnings And Precautions
207723 rev 7 Gendex Dental Systems Reviewed: Nieminen Timo Antero 2016-12-02 15:31 D507729, 7 Approved: Laihonen Tuuli 2016-12-02 16:41... -
Page 13: Warnings For Cross Infection
• Bite guide hygienic barrier • Chin support hygienic barrier • Temple support hygienic barrier • Ear plug cover 207723 rev 7 Gendex Dental Systems Reviewed: Nieminen Timo Antero 2016-12-02 15:31 D507729, 7 Approved: Laihonen Tuuli 2016-12-02 16:41... -
Page 14: General Warnings
A PC is a medical one if it complies IEC 60601-1 standard and that is indicated in the accompanying documents of the PC. 207723 rev 7 Gendex Dental Systems Reviewed: Nieminen Timo Antero 2016-12-02 15:31 D507729, 7 Approved: Laihonen Tuuli 2016-12-02 16:41... - Page 15 The unit or its parts must not be changed or modified in any way without approval and instructions from the manufacturer. 207723 rev 7 Gendex Dental Systems Reviewed: Nieminen Timo Antero 2016-12-02 15:31 D507729, 7 Approved: Laihonen Tuuli 2016-12-02 16:41...
-
Page 16: Disclaimer
Unit has at least the following parts that should be regarded as non-environmental friendly waste products: 207723 rev 7 Gendex Dental Systems Reviewed: Nieminen Timo Antero 2016-12-02 15:31 D507729, 7 Approved: Laihonen Tuuli 2016-12-02 16:41... - Page 17 1 Introduction ■ Tubehead (Pb, oil) ■ Collimator (Pb) ■ All electronic circuits, electronic boards inside ■ Sensor covers (EMC painted) 207723 rev 7 Gendex Dental Systems Reviewed: Nieminen Timo Antero 2016-12-02 15:31 D507729, 7 Approved: Laihonen Tuuli 2016-12-02 16:41...
- Page 18 1 Introduction 207723 rev 7 Gendex Dental Systems Reviewed: Nieminen Timo Antero 2016-12-02 15:31 D507729, 7 Approved: Laihonen Tuuli 2016-12-02 16:41...
-
Page 19: Unit Description
All software must conform to the MDD and the relevant legal requirements in the USA. The PC must conform to all the unit and dental imaging software requirements. 207723 rev 7 Gendex Dental Systems Reviewed: Nieminen Timo Antero 2016-12-02 15:31 D507729, 7 Approved: Laihonen Tuuli 2016-12-02 16:41... - Page 20 1. Sensor holder (panoramic units without 3D option) 2. Panoramic sensor 1. 3D sensor (units with 3D option) 2. Panoramic sensor 207723 rev 7 Gendex Dental Systems Reviewed: Nieminen Timo Antero 2016-12-02 15:31 D507729, 7 Approved: Laihonen Tuuli 2016-12-02 16:41...
-
Page 21: Patient Positioning Lasers
5. TMJ laser 6. Horizontal laser, top of FOV (3D option only) 7. Horizontal laser, bottom of FOV (3D option only) 207723 rev 7 Gendex Dental Systems Reviewed: Nieminen Timo Antero 2016-12-02 15:31 D507729, 7 Approved: Laihonen Tuuli 2016-12-02 16:41... - Page 22 2 Unit description Panoramic lasers 1. Midsagittal laser 2. FH laser (Frankfort Horizontal) 1. Image layer laser 2. TMJ laser 207723 rev 7 Gendex Dental Systems Reviewed: Nieminen Timo Antero 2016-12-02 15:31 D507729, 7 Approved: Laihonen Tuuli 2016-12-02 16:41...
- Page 23 FOV. 1. Midsagittal laser 2. Horizontal (H) light, top of FOV 3. Horizontal (H) laserlight, bottom of FOV 207723 rev 7 Gendex Dental Systems Reviewed: Nieminen Timo Antero 2016-12-02 15:31 D507729, 7 Approved: Laihonen Tuuli 2016-12-02 16:41...
-
Page 24: Control Panel
6. Image Layer Control - 'Normal' position; also use to reset position 7. Image Layer Control - Protrusion 8. Chin support UP 9. Chin support DOWN 10.Reset button 207723 rev 7 Gendex Dental Systems Reviewed: Nieminen Timo Antero 2016-12-02 15:31 D507729, 7 Approved: Laihonen Tuuli 2016-12-02 16:41... -
Page 25: Image Layer Controls
Cephalometric unit control panel (optional) Located in Cephalostat secondary collimator enclosure. 1. Carriage UP 2. Carriage DOWN 3. Positioning lasers ON/OFF 207723 rev 7 Gendex Dental Systems Reviewed: Nieminen Timo Antero 2016-12-02 15:31 D507729, 7 Approved: Laihonen Tuuli 2016-12-02 16:41... -
Page 26: Accessories
Bite guide disposable covers • Chin support disposable covers • Temple support disposable covers • Nasion support disposable covers • Ear holder disposable covers 207723 rev 7 Gendex Dental Systems Reviewed: Nieminen Timo Antero 2016-12-02 15:31 D507729, 7 Approved: Laihonen Tuuli 2016-12-02 16:41... -
Page 27: Other Detachable Parts
Panoramic quality check tool Panoramic quality check tool (option) adapter for ceph (option) Sensor (Pan & Ceph) Platform for dental model 207723 rev 7 Gendex Dental Systems Reviewed: Nieminen Timo Antero 2016-12-02 15:31 D507729, 7 Approved: Laihonen Tuuli 2016-12-02 16:41... -
Page 28: Emergency Stop Switch
Press to stop the unit, rotate to release. 207723 rev 7 Gendex Dental Systems Reviewed: Nieminen Timo Antero 2016-12-02 15:31 D507729, 7 Approved: Laihonen Tuuli 2016-12-02 16:41... -
Page 29: Patient Contacting Parts
Disposable cover for Skin <5 min Nose support Temple support Skin <5 min Disposable cover for Skin <5 min Temple support 207723 rev 7 Gendex Dental Systems Reviewed: Nieminen Timo Antero 2016-12-02 15:31 D507729, 7 Approved: Laihonen Tuuli 2016-12-02 16:41... - Page 30 2 Unit description 207723 rev 7 Gendex Dental Systems Reviewed: Nieminen Timo Antero 2016-12-02 15:31 D507729, 7 Approved: Laihonen Tuuli 2016-12-02 16:41...
-
Page 31: Imaging Programs
Selecting different size patient settings may also affect some panoramic program trajectories or collimation settings, as described in individual program descriptions. 207723 rev 7 Gendex Dental Systems Reviewed: Nieminen Timo Antero 2016-12-02 15:31 D507729, 7 Approved: Laihonen Tuuli 2016-12-02 16:41... - Page 32 This program may also be suitable for patients with jaw shapes that are more narrow than average. 207723 rev 7 Gendex Dental Systems Reviewed: Nieminen Timo Antero 2016-12-02 15:31 D507729, 7 Approved: Laihonen Tuuli 2016-12-02 16:41...
- Page 33 Clicking on the same key for the TMJ Programs will alternate between the Lateral and Frontal TMJ Programs, as designated by the letter L or the letter F. 207723 rev 7 Gendex Dental Systems Reviewed: Nieminen Timo Antero 2016-12-02 15:31 D507729, 7 Approved: Laihonen Tuuli 2016-12-02 16:41...
-
Page 34: Advanced Panoramic Programs
50mm in length and centered on the anterior teeth. Typical coverage will be the upper and lower dentition from canine to canine. 207723 rev 7 Gendex Dental Systems Reviewed: Nieminen Timo Antero 2016-12-02 15:31 D507729, 7 Approved: Laihonen Tuuli 2016-12-02 16:41... - Page 35 The same technique factors and trajectories that apply to a full panoramic image will also apply to the half-panoramic image, when you select a Small, Medium, or Large Patient. 207723 rev 7 Gendex Dental Systems Reviewed: Nieminen Timo Antero 2016-12-02 15:31 D507729, 7 Approved: Laihonen Tuuli 2016-12-02 16:41...
- Page 36 You can shift the Sinus Program image layer 10 mm in an anterior direction by pressing Image Layer Retrusion button. 207723 rev 7 Gendex Dental Systems Reviewed: Nieminen Timo Antero 2016-12-02 15:31 D507729, 7 Approved: Laihonen Tuuli 2016-12-02 16:41...
-
Page 37: Default Exposure Settings
4. Select Set current program as default. The selected program is automatically activated when an exam is started for a new patient and at startup. 207723 rev 7 Gendex Dental Systems Reviewed: Nieminen Timo Antero 2016-12-02 15:31 D507729, 7 Approved: Laihonen Tuuli 2016-12-02 16:41... -
Page 38: Cephalometric Programs
■ LL Max (22 x 24 cm) ■ LL Vertical (22 x 18 cm) ■ LL Horizontal (18 x 24 cm) 207723 rev 7 Gendex Dental Systems Reviewed: Nieminen Timo Antero 2016-12-02 15:31 D507729, 7 Approved: Laihonen Tuuli 2016-12-02 16:41... - Page 39 Lateral or PA ceph view. The Carpus view should only be used where local laws and regulations permit its use. 207723 rev 7 Gendex Dental Systems Reviewed: Nieminen Timo Antero 2016-12-02 15:31 D507729, 7 Approved: Laihonen Tuuli 2016-12-02 16:41...
-
Page 40: Programs
61 x 78 mm FOV (optional) High resolution (200μm voxel size) Standard resolution (300μm voxel size) Dose Reduction Technology DRT (330μm voxel size) 207723 rev 7 Gendex Dental Systems Reviewed: Nieminen Timo Antero 2016-12-02 15:31 D507729, 7 Approved: Laihonen Tuuli 2016-12-02 16:41... -
Page 41: Srt™, Scatter Reduction Technology
CBCT image may have affect to image reconstruction time SRT™-button is ON. SRT™-button becomes visible on the 3D modality. SRT™-button is OFF. 207723 rev 7 Gendex Dental Systems Reviewed: Nieminen Timo Antero 2016-12-02 15:31 D507729, 7 Approved: Laihonen Tuuli 2016-12-02 16:41... -
Page 42: Exposure Settings For 3D Imaging
(h x w) ning time 61 x 41 mm Scout 12.5 0,02 s 61 x 78 mm Scout 12.5 0,04 s (optional) 207723 rev 7 Gendex Dental Systems Reviewed: Nieminen Timo Antero 2016-12-02 15:31 D507729, 7 Approved: Laihonen Tuuli 2016-12-02 16:41... -
Page 43: Controlling The Unit
Controlling the unit 4.1 Main control panel 1. Modality / imaging program section 2. Status of the unit 3. Settings 4. Exposure settings 207723 rev 7 Gendex Dental Systems Reviewed: Nieminen Timo Antero 2016-12-02 15:31 D507729, 7 Approved: Laihonen Tuuli 2016-12-02 16:41... -
Page 44: Modality Section
Exposure indicators and settings kV value mA value Patient name Exposure value and time Dose value (DAP) Patient size settings Test mode (No radiation) 207723 rev 7 Gendex Dental Systems Reviewed: Nieminen Timo Antero 2016-12-02 15:31 D507729, 7 Approved: Laihonen Tuuli 2016-12-02 16:41... -
Page 45: Patient Size Settings
Green means ready to capture and red means not ready. During actual exposure, a large radiation warning symbol will fill the Touchscreen display. Exposure Indicator 207723 rev 7 Gendex Dental Systems Reviewed: Nieminen Timo Antero 2016-12-02 15:31 D507729, 7 Approved: Laihonen Tuuli 2016-12-02 16:41... -
Page 46: Other Sections
“Retrieve With SRT”- button will not be visible. 207723 rev 7 Gendex Dental Systems Reviewed: Nieminen Timo Antero 2016-12-02 15:31 D507729, 7 Approved: Laihonen Tuuli 2016-12-02 16:41... - Page 47 - Use this to reach the programs for periodical maintenance ■ Languages - Use this to select language on the touch screen 207723 rev 7 Gendex Dental Systems Reviewed: Nieminen Timo Antero 2016-12-02 15:31 D507729, 7 Approved: Laihonen Tuuli 2016-12-02 16:41...
- Page 48 4 Controlling the unit 207723 rev 7 Gendex Dental Systems Reviewed: Nieminen Timo Antero 2016-12-02 15:31 D507729, 7 Approved: Laihonen Tuuli 2016-12-02 16:41...
-
Page 49: Using The Unit
NOTICE! Normally there is no need to remove the sensor. 1. Insert the four slots on the rear of the sensor, into the four hooks in the sensor holder. 207723 rev 7 Gendex Dental Systems Reviewed: Nieminen Timo Antero 2016-12-02 15:31 D507729, 7 Approved: Laihonen Tuuli 2016-12-02 16:41... -
Page 50: Removing The Sensor
1. Slide the locking knob upwards on the side of the sensor to unlock the sensor. UNLOCKING 2. Slide the sensor up and remove it. 207723 rev 7 Gendex Dental Systems Reviewed: Nieminen Timo Antero 2016-12-02 15:31 D507729, 7 Approved: Laihonen Tuuli 2016-12-02 16:41... -
Page 51: Preparing The System
5.3.1 Positioning devices Bite rod with Bite rod with Chin support for the bite guide the edentulous bite edentulous positioner patients 207723 rev 7 Gendex Dental Systems Reviewed: Nieminen Timo Antero 2016-12-02 15:31 D507729, 7 Approved: Laihonen Tuuli 2016-12-02 16:41... -
Page 52: General Instructions
1. Open the imaging software on the acquisition computer. NOTICE! You can also scan a patient without the viewing software running for 2D scans. You receive an image 207723 rev 7 Gendex Dental Systems Reviewed: Nieminen Timo Antero 2016-12-02 15:31 D507729, 7 Approved: Laihonen Tuuli 2016-12-02 16:41... - Page 53 NOTICE! Local country regulations may set different standard for lead apron usage needs. 207723 rev 7 Gendex Dental Systems Reviewed: Nieminen Timo Antero 2016-12-02 15:31 D507729, 7 Approved: Laihonen Tuuli 2016-12-02 16:41...
-
Page 54: Patient Positioning
4. Adjust the unit height to get the Frankfort plane laser passing over the orbitale and porion. 207723 rev 7 Gendex Dental Systems Reviewed: Nieminen Timo Antero 2016-12-02 15:31 D507729, 7 Approved: Laihonen Tuuli 2016-12-02 16:41... - Page 55 If the light is in front of the canine on the patient, click this button to have the unit compensate during image capture. The unit will automatically make a 3-mm posterior adjustment. 207723 rev 7 Gendex Dental Systems Reviewed: Nieminen Timo Antero 2016-12-02 15:31 D507729, 7 Approved: Laihonen Tuuli 2016-12-02 16:41...
- Page 56 9. Ask the patient to swallow, place their tongue firmly against the roof of their mouth, and remain still for the du- ration of the exposure. 207723 rev 7 Gendex Dental Systems Reviewed: Nieminen Timo Antero 2016-12-02 15:31 D507729, 7 Approved: Laihonen Tuuli 2016-12-02 16:41...
-
Page 57: Tmj Exposure
TMJ nose support. 4. Adjust the unit height to get the Frankfort plane laser passing over the orbitale and porion. 207723 rev 7 Gendex Dental Systems Reviewed: Nieminen Timo Antero 2016-12-02 15:31 D507729, 7 Approved: Laihonen Tuuli 2016-12-02 16:41... - Page 58 Image Layer Adjust- ment laser buttons.. In this case, the light will reposition on the patient's TMJ area. 207723 rev 7 Gendex Dental Systems Reviewed: Nieminen Timo Antero 2016-12-02 15:31 D507729, 7 Approved: Laihonen Tuuli 2016-12-02 16:41...
- Page 59 Ask the patient to open their mouth to the fullest extent possible and remain still for the duration of the exposure. 207723 rev 7 Gendex Dental Systems Reviewed: Nieminen Timo Antero 2016-12-02 15:31 D507729, 7 Approved: Laihonen Tuuli 2016-12-02 16:41...
-
Page 60: Maxillary Sinus Exposure
5. Check the position of the midsagittal laser. If it is not on the midsagittal plane of the patient, gently adjust the pa- tient’s head. 207723 rev 7 Gendex Dental Systems Reviewed: Nieminen Timo Antero 2016-12-02 15:31 D507729, 7 Approved: Laihonen Tuuli 2016-12-02 16:41... -
Page 61: Taking A Panoramic Exposure
This allows immediate termination of radiation by the re- lease of the exposure button in the event of a malfunction or disturbance. 207723 rev 7 Gendex Dental Systems Reviewed: Nieminen Timo Antero 2016-12-02 15:31 D507729, 7 Approved: Laihonen Tuuli 2016-12-02 16:41... - Page 62 4. PC: The image can be viewed at the PC using the view- ing software. 207723 rev 7 Gendex Dental Systems Reviewed: Nieminen Timo Antero 2016-12-02 15:31 D507729, 7 Approved: Laihonen Tuuli 2016-12-02 16:41...
-
Page 63: Cephalometric Exposures
Select CEPH tab at the touchscreen display. Select the imaging program. Set the kV and mA or select the patient size (small, medium, large). 207723 rev 7 Gendex Dental Systems Reviewed: Nieminen Timo Antero 2016-12-02 15:31 D507729, 7 Approved: Laihonen Tuuli 2016-12-02 16:41... - Page 64 (necklaces, tongue rings, lip rings, etc.) and hair clips, and pins. Place a protective lead apron on the patient. 207723 rev 7 Gendex Dental Systems Reviewed: Nieminen Timo Antero 2016-12-02 15:31 D507729, 7 Approved: Laihonen Tuuli 2016-12-02 16:41...
-
Page 65: Patient Positioning
Slide the ear plugs in the patient’s ears. Tall patients can also sit on a chair. 207723 rev 7 Gendex Dental Systems Reviewed: Nieminen Timo Antero 2016-12-02 15:31 D507729, 7 Approved: Laihonen Tuuli 2016-12-02 16:41... -
Page 66: Pa-Ap Projections
Slide the ear rods towards patient’s ears. Tall patients can also sit on a chair. 207723 rev 7 Gendex Dental Systems Reviewed: Nieminen Timo Antero 2016-12-02 15:31 D507729, 7 Approved: Laihonen Tuuli 2016-12-02 16:41... -
Page 67: Carpus View (Not Available In Usa And Canada)
Adjust the unit height if needed. Ask the patient to remove rings and metal objects and to place hand on the carpus holder. 207723 rev 7 Gendex Dental Systems Reviewed: Nieminen Timo Antero 2016-12-02 15:31 D507729, 7 Approved: Laihonen Tuuli 2016-12-02 16:41... -
Page 68: Taking A Cephalometric Exposure
This allows immediate termination of radiation by the release of the exposure button in the event of a malfunction or disturbance. 207723 rev 7 Gendex Dental Systems Reviewed: Nieminen Timo Antero 2016-12-02 15:31 D507729, 7 Approved: Laihonen Tuuli 2016-12-02 16:41... -
Page 69: Exposures
- 61 x 41 mm - 61 x 78 mm (optional) 4. Select scout or resolution selection: - DRT - Standard - High - Endo 207723 rev 7 Gendex Dental Systems Reviewed: Nieminen Timo Antero 2016-12-02 15:31 D507729, 7 Approved: Laihonen Tuuli 2016-12-02 16:41... -
Page 70: Patient Positioning
5. Adjust the unit height using the carriage Up Down but- tons on the column control panel to slightly higher than the patient's chin. 207723 rev 7 Gendex Dental Systems Reviewed: Nieminen Timo Antero 2016-12-02 15:31 D507729, 7 Approved: Laihonen Tuuli 2016-12-02 16:41... - Page 71 A horizontal line from the superior border of the tra- gus to the inferior border of the ala is a close approximation for occlusal plane horizontal. 207723 rev 7 Gendex Dental Systems Reviewed: Nieminen Timo Antero 2016-12-02 15:31 D507729, 7 Approved: Laihonen Tuuli 2016-12-02 16:41...
- Page 72 B button. Releasing the buttons locks the assembly. Next, turn the C knob to close the temple supports. 207723 rev 7 Gendex Dental Systems Reviewed: Nieminen Timo Antero 2016-12-02 15:31 D507729, 7 Approved: Laihonen Tuuli 2016-12-02 16:41...
-
Page 73: Taking A Scout Image
3. Two scout preview images appear on the touchscreen display. 207723 rev 7 Gendex Dental Systems Reviewed: Nieminen Timo Antero 2016-12-02 15:31 D507729, 7 Approved: Laihonen Tuuli 2016-12-02 16:41... - Page 74 (B) and trigger the exposure button. Use the Back button (C) to return to the previous screen to make changes to capture settings. 207723 rev 7 Gendex Dental Systems Reviewed: Nieminen Timo Antero 2016-12-02 15:31 D507729, 7 Approved: Laihonen Tuuli 2016-12-02 16:41...
-
Page 75: Taking A 3D Image
4. Select SRT™ ON or OFF based on your estimation of the need. See chapter 3.7 SRT™, Scatter Reduction Technology Reduction. 207723 rev 7 Gendex Dental Systems Reviewed: Nieminen Timo Antero 2016-12-02 15:31 D507729, 7 Approved: Laihonen Tuuli 2016-12-02 16:41... -
Page 76: Stone Model And Radiographic Guide Scan
3. Take scout image with default values. Correct position if needed. 4. Select same resolution and parameters as in patient scan. NOTICE! Position the radiographic guide in similar way. 207723 rev 7 Gendex Dental Systems Reviewed: Nieminen Timo Antero 2016-12-02 15:31 D507729, 7 Approved: Laihonen Tuuli 2016-12-02 16:41... -
Page 77: Warnings And Error Messages
If restarting the PC and/or restarting the dental imaging software does not allow you to retrieve the images, contact technical support without restarting the unit. 207723 rev 7 Gendex Dental Systems Reviewed: Nieminen Timo Antero 2016-12-02 15:31 D507729, 7 Approved: Laihonen Tuuli 2016-12-02 16:41... - Page 78 5 Using the unit 207723 rev 7 Gendex Dental Systems Reviewed: Nieminen Timo Antero 2016-12-02 15:31 D507729, 7 Approved: Laihonen Tuuli 2016-12-02 16:41...
-
Page 79: Troubleshooting
207723 rev 7 Gendex Dental Systems Reviewed: Nieminen Timo Antero 2016-12-02 15:31 D507729, 7 Approved: Laihonen Tuuli 2016-12-02 16:41... - Page 80 Spine shadow. maintaining a secure hold of the handgrips. ANECK 207723 rev 7 Gendex Dental Systems Reviewed: Nieminen Timo Antero 2016-12-02 15:31 D507729, 7 Approved: Laihonen Tuuli 2016-12-02 16:41...
- Page 81 Rows of teeth exposed too Chin rest was not used with bite Install chin rest. low. Mandible not exposed rod. completely in the image. 207723 rev 7 Gendex Dental Systems Reviewed: Nieminen Timo Antero 2016-12-02 15:31 D507729, 7 Approved: Laihonen Tuuli 2016-12-02 16:41...
-
Page 82: Image Appearance
2. kV used is too high. 3. Adjust Gamma value 3. Gamma value is not cor- rect for the monitor being used. 207723 rev 7 Gendex Dental Systems Reviewed: Nieminen Timo Antero 2016-12-02 15:31 D507729, 7 Approved: Laihonen Tuuli 2016-12-02 16:41... -
Page 83: Artifacts
Right and left image sides Orthogonal procedure was mis- Select correct panoramic proce- are incomplete. TMJs are takenly used. dure. not shown. 207723 rev 7 Gendex Dental Systems Reviewed: Nieminen Timo Antero 2016-12-02 15:31 D507729, 7 Approved: Laihonen Tuuli 2016-12-02 16:41... - Page 84 CEPH: Lateral view has Cephalostat lock not 1. Lock it 2 ear plugs. locked 2. Call service 2. Ear plugs misaligned 207723 rev 7 Gendex Dental Systems Reviewed: Nieminen Timo Antero 2016-12-02 15:31 D507729, 7 Approved: Laihonen Tuuli 2016-12-02 16:41...
-
Page 85: Unit Operation
Ask patient to relax shoulders, raise machine slightly stretch neck. 207723 rev 7 Gendex Dental Systems Reviewed: Nieminen Timo Antero 2016-12-02 15:31 D507729, 7 Approved: Laihonen Tuuli 2016-12-02 16:41... - Page 86 6 Troubleshooting 207723 rev 7 Gendex Dental Systems Reviewed: Nieminen Timo Antero 2016-12-02 15:31 D507729, 7 Approved: Laihonen Tuuli 2016-12-02 16:41...
-
Page 87: Maintenance
Two (2) times annually nance NOTICE! The calibrations mentioned in this manual can be done by the user or qualified service personnel. 207723 rev 7 Gendex Dental Systems Reviewed: Nieminen Timo Antero 2016-12-02 15:31 D507729, 7 Approved: Laihonen Tuuli 2016-12-02 16:41... -
Page 88: Changing The Fuses
NEVER use abrasive cleaning agents or polishes to clean the covers. 207723 rev 7 Gendex Dental Systems Reviewed: Nieminen Timo Antero 2016-12-02 15:31 D507729, 7 Approved: Laihonen Tuuli 2016-12-02 16:41... - Page 89 These parts are: bite rods, bite guides and chin supports. If autoclaving is performed for these items, disinfection by alternate methods is not needed.s 207723 rev 7 Gendex Dental Systems Reviewed: Nieminen Timo Antero 2016-12-02 15:31 D507729, 7 Approved: Laihonen Tuuli 2016-12-02 16:41...
- Page 90 Exposure time: 3 minutes Steam-flush pressure-pulse steam sterilization Temperature: 270 F to 275 F (132°C to 135°C) Exposure time: 3 to 4 minutes 207723 rev 7 Gendex Dental Systems Reviewed: Nieminen Timo Antero 2016-12-02 15:31 D507729, 7 Approved: Laihonen Tuuli 2016-12-02 16:41...
-
Page 91: Calibration And Adjustment
(e.g. no radiation, colli- mator severely tilted, image data corrupted…). Contact service if the problem persists after restart- ing the unit and PC. 207723 rev 7 Gendex Dental Systems Reviewed: Nieminen Timo Antero 2016-12-02 15:31 D507729, 7 Approved: Laihonen Tuuli 2016-12-02 16:41... -
Page 92: Preparing For Calibration
5. Touch the settings button on the touch screen display. 6. Select the Quality assurance button. The calibration display appears. 207723 rev 7 Gendex Dental Systems Reviewed: Nieminen Timo Antero 2016-12-02 15:31 D507729, 7 Approved: Laihonen Tuuli 2016-12-02 16:41... -
Page 93: Panoramic Calibration
3. Install the double cone calibration tool. 4. Take an exposure. 5. Repeat the calibration until calibration result “passed” is achieved. 207723 rev 7 Gendex Dental Systems Reviewed: Nieminen Timo Antero 2016-12-02 15:31 D507729, 7 Approved: Laihonen Tuuli 2016-12-02 16:41... -
Page 94: Panoramic Pixel Calibration
2. Select the program. 3. Press Patient In. 4. Take an exposure. Touch screen display informs when the calibration is passed. 207723 rev 7 Gendex Dental Systems Reviewed: Nieminen Timo Antero 2016-12-02 15:31 D507729, 7 Approved: Laihonen Tuuli 2016-12-02 16:41... -
Page 95: Panoramic Quality Check (Optional)
1. Attach a panoramic Quality Check Tool (optional) to the chin support. 2. Select the Pan QC program. 3. Press Patient In. 4. Take an exposure. 207723 rev 7 Gendex Dental Systems Reviewed: Nieminen Timo Antero 2016-12-02 15:31 D507729, 7 Approved: Laihonen Tuuli 2016-12-02 16:41... - Page 96 1 mm copper filter. Ask Technical Support to adjust the copper thickness setting as required. 207723 rev 7 Gendex Dental Systems Reviewed: Nieminen Timo Antero 2016-12-02 15:31 D507729, 7 Approved: Laihonen Tuuli 2016-12-02 16:41...
-
Page 97: Calibration
5. Take an exposure. 6. Repeat the calibration until calibration result “passed” is achieved. This calibration is only needed with 3D units. 207723 rev 7 Gendex Dental Systems Reviewed: Nieminen Timo Antero 2016-12-02 15:31 D507729, 7 Approved: Laihonen Tuuli 2016-12-02 16:41... -
Page 98: Pixel Calibration
2. Select the program. 3. Press Patient In. 4. Take an exposure. The result image informs when the calibration is passed. 207723 rev 7 Gendex Dental Systems Reviewed: Nieminen Timo Antero 2016-12-02 15:31 D507729, 7 Approved: Laihonen Tuuli 2016-12-02 16:41... -
Page 99: Quality Check Program
Please redo 3d ge- ometry and 3d pixel calibrations. If the quality check is still not passed, contact service. 207723 rev 7 Gendex Dental Systems Reviewed: Nieminen Timo Antero 2016-12-02 15:31 D507729, 7 Approved: Laihonen Tuuli 2016-12-02 16:41... - Page 100 8 Calibration and adjustment 207723 rev 7 Gendex Dental Systems Reviewed: Nieminen Timo Antero 2016-12-02 15:31 D507729, 7 Approved: Laihonen Tuuli 2016-12-02 16:41...
-
Page 101: Cephalometric Calibration
2. Select Ceph Pix program. 3. Press Patient In. 4. Take an exposure. 5. This calibration should always be a pass. 207723 rev 7 Gendex Dental Systems Reviewed: Nieminen Timo Antero 2016-12-02 15:31 D507729, 7 Approved: Laihonen Tuuli 2016-12-02 16:41... -
Page 102: Ceph Quality Check Program (Optional)
2. Select the Ceph QC program. 3. Press Patient In. 4. Take an exposure. 5. Visually evaluate the result using the installed imaging software. 207723 rev 7 Gendex Dental Systems Reviewed: Nieminen Timo Antero 2016-12-02 15:31 D507729, 7 Approved: Laihonen Tuuli 2016-12-02 16:41... - Page 103 2. High contrast resolution; minimum 3.1LP/mm must be distinguishable. 3. All four low contrast holes must be visible. 207723 rev 7 Gendex Dental Systems Reviewed: Nieminen Timo Antero 2016-12-02 15:31 D507729, 7 Approved: Laihonen Tuuli 2016-12-02 16:41...
- Page 104 8 Calibration and adjustment 207723 rev 7 Gendex Dental Systems Reviewed: Nieminen Timo Antero 2016-12-02 15:31 D507729, 7 Approved: Laihonen Tuuli 2016-12-02 16:41...
-
Page 105: Technical Data
CAN/CSA –C22.2 No. 601-1-M90 This product complies with DHHS 21 CFR Chapter I, Subchapter J at the date of manufacture. GXDP-700 is in conformity with the provisions of Council Directive 93/42/EEC as amended by the Directive 2007/ 47/EC concerning medical devices. - Page 106 Max. continuous heat dissipation of 38 W the X-ray tube assembly Total filtration min. 3.2 mm Al, 90kV Leakage Technique Factors 5625 mAs/h @ 90kV/4mA 207723 rev 7 Gendex Dental Systems Reviewed: Nieminen Timo Antero 2016-12-02 15:31 D507729, 7 Approved: Laihonen Tuuli 2016-12-02 16:41...
- Page 107 One of the three technique factors is always fixed. Table 1: 100 VAC 12.5 207723 rev 7 Gendex Dental Systems Reviewed: Nieminen Timo Antero 2016-12-02 15:31 D507729, 7 Approved: Laihonen Tuuli 2016-12-02 16:41...
- Page 108 9 Technical data Table 2: 120 VAC 12.5 Table 3: 240 VAC 12.5 207723 rev 7 Gendex Dental Systems Reviewed: Nieminen Timo Antero 2016-12-02 15:31 D507729, 7 Approved: Laihonen Tuuli 2016-12-02 16:41...
- Page 109 3,2 - 16 mA (+/- 1 mA) Supply frequency 75 - 150 kHz Spine compensation kV / mA compensated Spine compensation Automatic (ASC), Pre-programmed mode 207723 rev 7 Gendex Dental Systems Reviewed: Nieminen Timo Antero 2016-12-02 15:31 D507729, 7 Approved: Laihonen Tuuli 2016-12-02 16:41...
- Page 110 (5 m), remote exposure button. Patient positioning Positioning panel, integrated Connection cable CAT6 UTP Ethernet cable (GXDP-700 - PC) Panoramic programs & technique factors & magnification: Standard Adult Panoramic 57-90 kV/ 3.2-16 mA/2.5-16.4 s Small Panoramic 57-90 kV/ 3.2-16 mA/2.5-14.4 s...
- Page 111 GUI are: • kV: +- 5kV • mA: +- 1mA / +-20% • time: +- 10% • DAP: +- 50% 207723 rev 7 Gendex Dental Systems Reviewed: Nieminen Timo Antero 2016-12-02 15:31 D507729, 7 Approved: Laihonen Tuuli 2016-12-02 16:41...
- Page 112 3 positioning laser lights Cephalostat scanning Scanning method Horizontal scan, synchronized sensor and secondary slot motion Scanning time 10 - 20 s. 207723 rev 7 Gendex Dental Systems Reviewed: Nieminen Timo Antero 2016-12-02 15:31 D507729, 7 Approved: Laihonen Tuuli 2016-12-02 16:41...
- Page 113 3D image receptor Sensor unit 3D sensor Technology/Sensor type CMOS 200 x 200 m and 13 bits Image pixel size and depth 207723 rev 7 Gendex Dental Systems Reviewed: Nieminen Timo Antero 2016-12-02 15:31 D507729, 7 Approved: Laihonen Tuuli 2016-12-02 16:41...
- Page 114 +10°...+35°C, RH max. 85%, 700 - 1060 mbar Ceph ready option (Ordered separately) Options Description Ceph Upgrade to GXDP-700 pan Unit has the same sensor as ceph unit. Cost saving with future digital ceph upgrade. 207723 rev 7 Gendex Dental Systems...
- Page 115 - 3D unit to 3D MFOV unit* *availability based on unit serial number, contact your local distributor for more information. 3D Imaging Kit Add 3D imaging capability to GXDP-700™ digital pan or pan and ceph. FOV 61 x 41 mm. 3D Large Field Of View...
-
Page 116: Unit Dimensions
9 Technical data 9.2 Unit dimensions NOTICE! The cephalostat arm and the touchscreen can be on either side (L/R). 207723 rev 7 Gendex Dental Systems Reviewed: Nieminen Timo Antero 2016-12-02 15:31 D507729, 7 Approved: Laihonen Tuuli 2016-12-02 16:41... - Page 117 9 Technical data 207723 rev 7 Gendex Dental Systems Reviewed: Nieminen Timo Antero 2016-12-02 15:31 D507729, 7 Approved: Laihonen Tuuli 2016-12-02 16:41...
- Page 118 9 Technical data NOTE! The touchscreen can be on either side (L/R). 207723 rev 7 Gendex Dental Systems Reviewed: Nieminen Timo Antero 2016-12-02 15:31 D507729, 7 Approved: Laihonen Tuuli 2016-12-02 16:41...
-
Page 119: Symbols That May Appear In The Unit
Unit can collide with a seated patient when driving the carriage downwards. Pay attention on the unit movement. Laser radiation (yellow label) Attention,consult accompanying documents Ground (Functional) 207723 rev 7 Gendex Dental Systems Reviewed: Nieminen Timo Antero 2016-12-02 15:31 D507729, 7 Approved: Laihonen Tuuli 2016-12-02 16:41... -
Page 120: Labels On The Unit
The main label of the unit is located on the vertical carriage next to the on/off power switch. The unit is Class I, type B and with IP20 protection. 207723 rev 7 Gendex Dental Systems Reviewed: Nieminen Timo Antero 2016-12-02 15:31 D507729, 7 Approved: Laihonen Tuuli 2016-12-02 16:41... -
Page 121: Electromagnetic Compatibility (Emc) Tables
EMC information. Table 1.1 Electromagnetic emissions IEC 60601-1-2 Ed3 GXDP-700 is suitable for use in the specified electromagnetic environment. The purchaser or user of GXDP-700 should assure that it is used in an electromagnetic environment as described below: Emissions Test... - Page 122 Table 1.2 Electromagnetic immunity IEC 60601-1-2 Ed3 GXDP-700 is suitable for use in the specified electromagnetic environment. The purchaser or user of GXDP-700 should assure that it is used in an electromagnetic environment as described below: Immunity Test IEC 60601-1-2...
- Page 123 RF immunity of non-life-support equipment or system IEC 60601-1-2 GXDP-700 is suitable for use in the specified electromagnetic environment. The purchaser or user of GXDP-700 should assure that it is used in an electromagnetic environment as de- scribed below: Immunity...
- Page 124 If not installed and used in accordance with this manual, it may cause harmful interference to radio communications. Portable and mobile RF communications equipment can also affect the performance of GXDP-700 Table 1.4 Table 4 Recommended Separation Distances...
- Page 125 Relative humidity must be maintained above 30 percent. Stacked components & equipment The GXDP-700 should not be used adjacent to or stacked with other equipment; if adjacent or stacked use is necessary, the GXDP-700 should be observed to verify normal operation in the configuration in which it will be used.
-
Page 126: X-Ray Tube Assemblies
Focal Spot : 0.5 mm 70kV 70kV 80kV 80kV 60kV 60kV 90kV 90kV 50kV 50kV 100kV 100kV EXPOSURE TIME [s] EXPOSURE TIME [s] 207723 rev 7 Gendex Dental Systems Reviewed: Nieminen Timo Antero 2016-12-02 15:31 D507729, 7 Approved: Laihonen Tuuli 2016-12-02 16:41... - Page 127 9 Technical data Figure 1.6 207723 rev 7 Gendex Dental Systems Reviewed: Nieminen Timo Antero 2016-12-02 15:31 D507729, 7 Approved: Laihonen Tuuli 2016-12-02 16:41...
-
Page 128: Scatter Radiation Measurement
The image shows the set-up of the tests and the arrows indicate the radiation direction. 207723 rev 7 Gendex Dental Systems Reviewed: Nieminen Timo Antero 2016-12-02 15:31 D507729, 7 Approved: Laihonen Tuuli 2016-12-02 16:41... -
Page 129: Scatter Radiation In Panoramic Program
0.227mR 15cm up from 0.158mR 0.134mR 0.161mR 0.144mR 0.158mR central beam 15cm down 0.171mR 0.202mR 0.275mR 0.248mR 0.204mR from central beam 207723 rev 7 Gendex Dental Systems Reviewed: Nieminen Timo Antero 2016-12-02 15:31 D507729, 7 Approved: Laihonen Tuuli 2016-12-02 16:41... -
Page 130: Scatter In Cone Beam Programs
0.861 15cm up from 0.878mR 0.662mR 0.490mR 0.747mR 0.911 central beam 15cm down 1.285mR 0.944mR 0.800mR 1.019mR 1.380 from central beam 207723 rev 7 Gendex Dental Systems Reviewed: Nieminen Timo Antero 2016-12-02 15:31 D507729, 7 Approved: Laihonen Tuuli 2016-12-02 16:41... -
Page 131: Scatter Radiation In Ceph Program
0.025mR 0.034mR 0.066mR 15cm up from 0.021mR 0.022mR 0.059mR central beam 15cm down 0.038mR 0.029mR 0.081mR from central beam 207723 rev 7 Gendex Dental Systems Reviewed: Nieminen Timo Antero 2016-12-02 15:31 D507729, 7 Approved: Laihonen Tuuli 2016-12-02 16:41... - Page 132 9 Technical data 207723 rev 7 Gendex Dental Systems Reviewed: Nieminen Timo Antero 2016-12-02 15:31 D507729, 7 Approved: Laihonen Tuuli 2016-12-02 16:41...
-
Page 133: Pc Requirements
USB ports (for HASP Dongle keys) • 1 for reconstruction system • 1 for 3D viewing SW (if needed) Mouse Mouse with scroll wheel 207723 rev 7 Gendex Dental Systems Reviewed: Nieminen Timo Antero 2016-12-02 15:31 D507729, 7 Approved: Laihonen Tuuli 2016-12-02 16:41... - Page 134 NOTICE! This is an abbreviated list of requirements. Please refer to the software installation manual or contact your local dealer for detailed installation requirements. 207723 rev 7 Gendex Dental Systems Reviewed: Nieminen Timo Antero 2016-12-02 15:31 D507729, 7 Approved: Laihonen Tuuli 2016-12-02 16:41...
- Page 135 Multiple extension cables shall not be used. Do not position the PC where it could be splashed 207723 rev 7 Gendex Dental Systems Reviewed: Nieminen Timo Antero 2016-12-02 15:31 D507729, 7 Approved: Laihonen Tuuli 2016-12-02 16:41...
-
Page 136: The Dental Imaging Software
The dental imaging software installed in the PC that is used with the unit must have CE-mark according to Medical Device Directive. 207723 rev 7 Gendex Dental Systems Reviewed: Nieminen Timo Antero 2016-12-02 15:31 D507729, 7 Approved: Laihonen Tuuli 2016-12-02 16:41...
Need help?
Do you have a question about the GXDP-700 and is the answer not in the manual?
Questions and answers