Advertisement
Available languages
Available languages
Advertisement
Chapters

Related Manuals for ieGeek ZS-GQ2


Summary of Contents for ieGeek ZS-GQ2
- Page 1 PTZ OUTDOOR SECURITY CAMERA USER MANUAL Official Email:service@iegeek.com...
- Page 3 Technical Support If you need help, please contact ieGeek before returning your product.Most questions can be answered through our online http://www.iegeek.com support center at or our after-sale mailbox at service@iegeek.com. Technische Unterstützung Wenn Sie Hilfe brauchen, kontaktieren Sie bitte ieGeek Support Team zuerst, bevor Sie Ihre Bestellung zurücksenden.
-
Page 5: Table Of Contents
CONTENT English 01-07 Deutsch 10-17 Français 19-26 Italiano 28-35 Espanol 37-44... -
Page 6: English
English Camera Introduction ........... .1 APP Installation and Account Registration ..2 Download 'CloudEdge' APP ................... 2 Register Account......................3 How to Add a Camera for APP .........4 Mounting The Camera To The Wall .......6 FAQs ..................7... -
Page 7: Camera Introduction
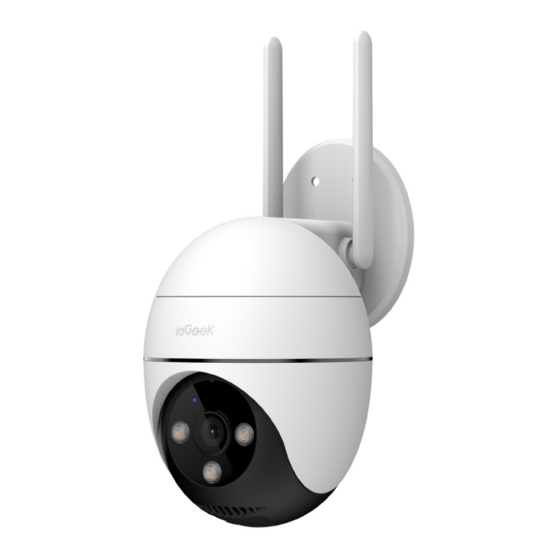
Camera Introduction Power Supply WI-FI Antenna Bracket Working Status Light LED Light Lens SD Card Slot Speaker Reset Key... -
Page 8: App Installation And Account Registration
APP Installation and Account Registration • Download 'CloudEdge' APP Method 1: Download 'CloudEdge' and 'ieGeek Cam' APP from APP Store (iOS) or Google Play (Android); Method 2: Scan 'CloudEdge' APP QR code to download it. GET IT ON Google Play... -
Page 9: Register Account
Tips:Please turn on 2 below permissions while using this APP for the first time. 1. Allow 'CloudEdge' APP to access mobile cellular data and wireless LAN or it will fail to add IP camera. 2. Allow 'CloudEdge‘ APP to receive pushed message or the phone will not receive alarm push when motion detection or audible alarm is triggered. -
Page 10: How To Add A Camera For App
Note: • When registering a new account, please choose the region which you are actually in and correct country code. (Different registered regions can't share the camera. • Please choose to register by e-mail. How to Add a Camera for APP Before Using: 1. - Page 11 Wait for Input Wi-Fi Scan QR Code Device Added Connection Password My camera fails to connect Wi-Fi? 1. Before adding a device, make sure that the device is in the state of slow flashing.red light. If the indicator status is abnormal, please restore the device to factory settings(long press and hold the device RESET button until you hear the 'boogu'Sound) 2.
-
Page 12: Mounting The Camera To The Wall
Wi-Fi, please try to re-download the APP, reset the camera and restart the router, and then add the camera again. 7. If you tried all steps, but still no luck, please message your order and problem to service@iegeek.com. Mounting The Camera To The Wall Note:... -
Page 13: Faqs
FAQs In the process of using this product, if you encounter the following problems, you can adjust the motion detection sensitivity to solve them. • If the phone receives alarm messages too frequently, it is recommended to lower the motion detection level or set the alarm area. -
Page 14: Deutsch
Deutsch Kamera Einführung ............9 APP-Installllation und Kontoregistrierung ..10 Laden Sie die “CloudEdge”-App herunter ........10 Konto Registrieren ..................11 So fügen Sie der APP eine Kamera Hinzu ...12 Montage der Kamera an der Wand ....14 Benachrichtigungseinstellungen ......15 Ewegungserkennungseinstellungen ..........15 Rauscherkennung ..................15 Wichtige Hinweise zum Reduzieren von Fehlalarmen .............. -
Page 15: Kamera Einführung
Kamera Einführung Stromschnittstelle WI-FI-Antenne Arbeitsstatusleuchte Halterung LED-Licht Linse Kartensteckplatz Schlüssel Zurücksetzen Lautsprecher... -
Page 16: App-Installllation Und Kontoregistrierung
Leuchtet blau: Wi-Fi erfolgreich verbunden APP-Installllation und Kontoregistrierung • Laden Sie die “CloudEdge”-App herunter Methode 1:Laden Sie die "CloudEdge" und "ieGeek Cam" App aus dem APP Store (iOS) oder Google Play (Android) herunter. Methode 2:Scannen Sie den APP-QR-Code "CloudEdge",um ihn herunterzuladen. -
Page 17: Konto Registrieren
Tipps:Bitte schalten Sie 2 untenstehende Berechtigungen ein, wenn Sie diese APP zumersten Mal verwenden. 1. Erlauben Sie der 'CloudEdge'-APP den Zugriff auf mobile Mobilfunkdaten und WLAN, oder es wird keine Kamera hinzugefügt. 2. Erlauben Sie der 'CloudEdge'-APP, Push-Nachrichten zu empfangen, oder das Telefon empfängt keinen Alarm-Push, wenn eine Bewegungserkennung oder ein akustischer Alarm ausgelöst wird. -
Page 18: So Fügen Sie Der App Eine Kamera Hinzu
Hinweis: • Wenn Sie ein neues Konto registrieren, wählen Sie bitte die Region aus,in der Sie sich tatsächlich befinden,und korrigieren Sie den Ländercode. (Verschiedene registrierte Regionen können die Kamera nicht gemeinsam nutzen.) • Bitte wählen Sie die Registrierung per E-Mail. So fügen Sie der APP eine Kamera Hinzu Vor Gebrauch: 1. - Page 19 Auf Verbindung Geben Sie das Gerät hinzugefügt QR-Code scannen warten WLAN-Passwort ein Meine Kamera kann keine Wi-Fi-Verbindung herstellen? 1. Stellen Sie vor dem Hinzufügen eines Geräts sicher, dass das Gerät langsam rot blinkt.Wenn der Status der Anzeige anormal ist,setzen Sie das Gerät bitte auf die Werkseinstellungen zurück (halten Sie die RESET-Taste des Geräts lange gedrückt,bis Sie den“Boogu”-Ton hören).
-
Page 20: Montage Der Kamera An Der Wand
Kamera zurückzusetzen,den Routerneu zu starten und die Kamera erneut hinzufügen,wenn die Kamerakeine Verbindung zum WLAN herstellen kann. 7. Wenn Sie alle Schritte ausprobiert haben,aber immer noch keinGlück haben,senden Sie bitte Ihre Bestellung und Ihr Problem an service@iegeek.com. Montage der Kamera an der Wand... -
Page 21: Benachrichtigungseinstellungen
Notiz: Um die beste Produktleistung zu erzielen und unnötige Umweltbelastungen zu vermeiden, beachten Sie bitte während des Installationsprozesses Folgendes: • Versuchen Sie, das Produkt möglichst nicht am Rand einer belebten Straße zu installieren. Häufige Fußgänger und Fahrzeuge wecken die Kamera immer wieder auf, was zu häufigen Alarmmeldungen. •... -
Page 22: Wichtige Hinweise Zum Reduzieren Von Fehlalarmen
Wichtige Hinweise zum Reduzieren von Fehlalarmen • Richten Sie die Kamera nicht auf Objekte mit hellem Licht, einschließlich Sonnenschein, hellem Lampenlicht usw. • Stellen Sie die Kamera nicht in der Nähe von Steckdosen auf, einschließlich der Lüftungsöffnungen von Klimaanlagen, Luftbefeuchtern, Wärmeübertragungsöffnungen von Projektoren usw. •... -
Page 23: Français
Français Kamera Einführung .............18 Ajoutez la Camera à L'application .......19 Télécharger l'application "Cloud Edge" ..........19 Créer un Compte ..................20 Comment Ajouter une Caméra à l'APP ....21 Fixation de la Caméra au Mur .......23 Paramètres D'alerte ...........24 Paramètres de Détection de Mouvement ........24 Détection de Bruit .................. -
Page 24: Kamera Einführung
Kamera Einführung interface d'alimentation Antenne Wi-Fi Voyant d'état de fonctionnement Support Lumière LED Lentille Fente pour carte SD Touche de réinitialisation Conférencier... -
Page 25: Ajoutez La Camera À L'application
Ajoutez la Camera à L'application • Télécharger l'application "Cloud Edge" Méthode 2: Téléchargez l'application « CloudEdge » et « ieGeek Cam » depuis l'APP Store (iOS) ou Google Play (Android) ; Méthode 2: Scannez le code QR de l'application « CloudEdge » pour le télécharger.herunterzuladen. -
Page 26: Créer Un Compte
Conseils: veuillez activer les 2 autorisations ci-dessous lorsque vous utilisez cette application pour la première fois. 1. Autorisez l'application « CloudEdge » à accéder aux données cellulaires mobiles et au réseau local sans fil, sinon elle ne parviendra pas à ajouter la caméra lP. 2. -
Page 27: Comment Ajouter Une Caméra À L'app
Noter: • Lors de l'enregistrement d'un nouveau compte, veuillez choisir la région dans laquelle vous vous trouvez et le code pays correct. (Différentes régions enregistrées ne peuvent pas partager la caméra.) • Veuillez choisir de vous inscrire par e-mail. Comment Ajouter une Caméra à l'APP Avant d'utiliser: 1. - Page 28 Saisir le mot Attendre la Appareil ajouté Scannez le code QR de passe Wi-Fi connexion Ma caméra ne parvient pas à se connecter au Wi-Fi ? 1. Avant d'ajouter un appareil, assurez-vous que l'appareil est dans l'état de lumière rouge clignotant lentement. Si l'état de l'indicateur est anormal, veuillez restaurer l'appareil aux paramètres d'usine (appuyez longuement sur le bouton RESET de l'appareil et maintenez-le enfoncé...
-
Page 29: Fixation De La Caméra Au Mur
7. Si vous avez essayé toutes les étapes, mais que vous n'avez toujours pas réussi, veuillez envoyer votre commande et votre problème à service@iegeek.com. Fixation de la Caméra au Mur Noter: Afin d'obtenir les meilleures performances du produit et d'éviter des perturbations environnementales inutiles, veuillez prêter attention aux points... -
Page 30: Paramètres D'alerte
Paramètres D'alerte • Paramètres de Détection de Mouvement Entrez dans l'interface de l'application - "Paramètres" - "Paramètres d'alerte" - "Détection de mouvement", vous pouvez régler les paramètres de détection de mouvement. • Low appartient à la sensibilité à faible vitesse, distance de détection de mouvement de 4 à... -
Page 31: Faqs
FAQs Lors de l'utilisation de ce produit, si vous rencontrez les problèmes suivants, vous pouvez régler la sensibilité de détection de mouvement pour les résoudre. • Si le téléphone reçoit trop fréquemment des messages d'alarme, il est recommandé de baisser le niveau de détection de mouvement ou de définir la zone d'alarme. -
Page 32: Italiano
Italiano Introduzione alla Fotocamera .......27 Installazione APP e Registrazione Account ..28 Registrare Account ..................29 Come Aggiungere una Telecamera all'APP ... 30 Montaggio della Fotocamera al Muro ....32 Impostazioni di Avviso ..........33 Impostazioni di Rilevamento del Movimento ......33 Rilevamento del Rumore .................33 Note lmportanti sulla Riduzione dei falsi ..33 Allarmi ................33 FAQs ................. -
Page 33: Introduzione Alla Fotocamera
Introduzione alla Fotocamera Interfaccia di alimentazione Antenna WI-FI Spia di stato di lavoro Staffa Luce a led Lente Slot per scheda SD Reimposta chiave Relatore... -
Page 34: Installazione App E Registrazione Account
Relatore Uscita audio a due vie Installazione APP e Registrazione Account Metodo 1: Scarica I'APP "CloudEdge" e "ieGeek Cam"da APP Store (iOS) o Google Play (Android); Metodo 2: Scansiona il codice QR dell'APP "CloudEdge" per scaricarlo. GET IT ON Google Play... -
Page 35: Registrare Account
Suggerimenti: Attiva le 2 autorizzazioni sottostanti durante l'utilizzo di questa APP per la prima volta. 1. Consenti all'APP "CloudEdge" di accedere ai dati mobili e alla LAN wireless o non sarà possibile aggiungere la fotocamera. 2. Consenti all'APP "CloudEdge" di ricevere messaggi push o il telefono non riceverà... -
Page 36: Come Aggiungere Una Telecamera All'app
Come Aggiungere una Telecamera all'APP Prima di usare: 1. lnserire la scheda Micro SD prima dell'accensione, altrimenti la scheda SD non può essere rilevata. 2. Posizionare la telecamera e lo smartphone a 1-3 piedi (30-100 cm) di distanza dal router per impostare il Wi-Fi. 3. - Page 37 Dispositivo Attendi lnserisci la Scansiona il aggiunto connessione password Wi-Fi codice QR La mia telecamera non riesce a connettersi al Wi-Fi? 1. Prima di aggiungere un dispositivo, assicurarsi che il dispositivo sia nello stato di luce rossa a lampeggio lento. Se lo stato dell'indicatore è anomalo, ripristinare il dispositivo alle impostazioni di fabbrica (tenere premuto a lungo il pulsante RESET del dispositivo finché...
-
Page 38: Montaggio Della Fotocamera Al Muro
7. Se hai provato tutti i passaggi, ma non hai ancora avuto fortuna, invia un service@iegeek.com. messaggio con il tuo ordine e problema a Montaggio della Fotocamera al Muro... -
Page 39: Impostazioni Di Avviso
Impostazioni di Avviso • Impostazioni di Rilevamento del Movimento Accedere all'interfaccia "Impostazioni"-"Impostazioni avviso"-"Rilevamento movimento" dell'applicazione, è possibile regolare le impostazioni di rilevamento del movimento. • Basso appartiene alla sensibilità della marcia bassa, distanza di rilevamento del movimento di 4-5 metri. •... -
Page 40: Faqs
FAQs Durante l'utilizzo di questo prodotto, se si verificano i seguenti problemi, è possibile regolare la sensibilità di rilevamento del movimento per risolverli. • Se il telefono riceve messaggi di allarme troppo frequentemente, si consiglia di abbassare il livello di rilevamento del movimento o di impostare l'area di allarme. -
Page 41: Espanol
Espanol Introducción a la Cámara........36 APP-Installation und Kontoregistrierung ..37 Laden Sie die 'CloudEdge-App herunter ........37 Registrar Cuenta ..................38 Cómo Agregar la Cámara a la Aplicación ..39 Montaje de la Cámara en la Pared ..... 41 Configuración de Alertas ........42 Configuración de Detección de Movimiento ...... -
Page 42: Introducción A La Cámara
Introducción a la Cámara Interfaz de alimentación Antenna WI-FI Luz de estado de trabajo Soporte Luz LED Lente Ranura para tarjetas SD Tecla de reinicio Orador... -
Page 43: App-Installation Und Kontoregistrierung
Salida de audio bidireccional APP-Installation und Kontoregistrierung • Laden Sie die 'CloudEdge-App herunter Methode 1: Laden Sie die CloudEdge und ieGeek Cam App aus dem APP Store (iOS) oder Google Play (Android) herunter. Methode 2: Scannen Sie den APP-QR-Code "CloudEdge",um ihn herunterzuladen. -
Page 44: Registrar Cuenta
Consejos: Active los 2 permisos a continuación mientras usa esta APLICACIÓN por primera vez. 1 . Permita que la aplicación 'CloudEdge' acceda a datos móviles y LAN inalámbrica o no podrá agregar la cámara. 2. Permite que la aplicación 'CloudEdge' reciba un mensaje de empuje o que el teléfono reciba una alerta de empuje si se activa una alarma de detección de movimiento o sonido. -
Page 45: Cómo Agregar La Cámara A La Aplicación
Cómo Agregar la Cámara a la Aplicación Antes de usar: 1. Inserte la tarjeta Micro SD antes de encender, de lo contrario, no se podrá detectar la tarjeta SD. 2. Coloque la cámara y el teléfono inteligente a una distancia de 30 a 100 cm (1 a 3 pies) del enrutador para configurar Wi-Fi. - Page 46 Ingrese la contr- Dispositivo Escanea el código Espere la conexión asena de Wi-Fi agregado ¿Mi Cámara no se Conecta a Wi-Fi? 1. Antes de agregar un dispositivo, asegúrese de que el dispositivo esté en el estado de luz roja intermitente lenta. Si el estado del indicador es anormal, restaure el dispositivo a la configuración de fábrica (mantenga presionado el botón RESET del dispositivo hasta que escuche el sonido 'boogu')
-
Page 47: Montaje De La Cámara En La Pared
Wi-Fi, intente volver a descargar la aplicación, reinicie la cámara y reinicie el enrutador, y luego agregue la cámara nuevamente. 7. Si probó todos los pasos, pero aún no tuvo suerte, envíe un mensaje con su service@iegeek.com. pedido y problema a Montaje de la Cámara en la Pared... -
Page 48: Configuración De Alertas
Configuración de Alertas • Configuración de Detección de Movimiento Ingrese a la interfaz de la aplicación - "Configuración" - "Configuración de alerta" - "Detección de movimiento", puede ajustar la configuración de detección de movimiento. • Bajo pertenece a la sensibilidad de engranaje bajo, distancia de detección de movimiento de 4-5 metros. -
Page 49: Faqs
FAQs En el proceso de uso de este producto, si encuentra los siguientes problemas, puede ajustar la sensibilidad de detección de movimiento para resolverlos. • Si el teléfono recibe mensajes de alarma con demasiada frecuencia, se recomienda reducir el nivel de detección de movimiento o configurar el área de alarma. - Page 50 Consult the dealer or an experienced radio/TV technician for help. Responsible for compliance could void the user's authority to operate this equipment.( Example-use only shielded interface cables when connecting to computer or peripheral devices). Any Changes or modifications not expressly approved by the party responsible for compliance could void the user's authority to operate the equipment.
Need help?
Do you have a question about the ZS-GQ2 and is the answer not in the manual?
Questions and answers
What is the length of the cable from camera to the plug ?
The power cable length of the ieGeek ZS-GQ2 camera is just over 2 meters.
This answer is automatically generated
Can I still use the solar panel as supplied with the Model ZS - GX5 with this camera? Ser No. 06145109
Bonjour, J'ai une camera ZS-GQ2 Quand il y a détection la camera tourne de 360°environ .Est il possible de réduire cette rotation sur 90°environ. Merci pour votre réponse. Bien cordialement. Guy Bouvier