Advertisement
Quick Links
HermanMiller
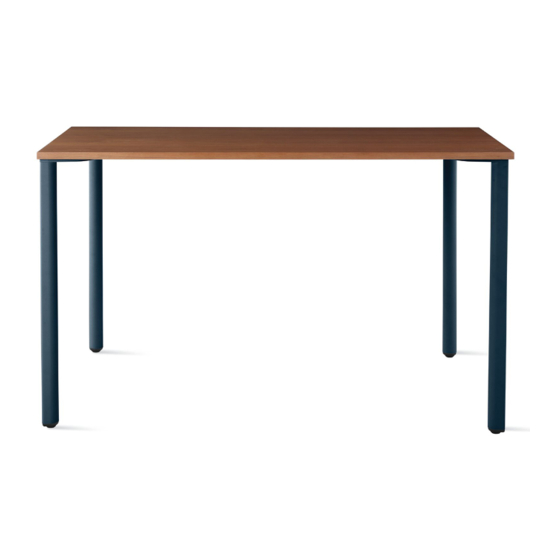
OE1 Rectangular Table Assembly Instructions
Step 2
To attach legs to the worksurface follow the below procedure.
A. Screw two flat head screws into marked two piloted holes first to locate
the leg.
B. Finish by installing additional flat head screws in marked locations that
are NOT piloted. These screws are field drilled.
Note: Attach legs with worksurface upside down
A
A
Parts Included
Parts Included
Parts Included
Parts Included
Step 3 (for 1500 wide table only)
To attach the stiffener to worksurface follow the below procedure.
Parts Included
Parts Included
Parts Included
Plate
Plate
Plate
A. Locate stiffener with pilot holes on the ends. Place end cap over
Plate
the end holes and install together with pan head screws.
A
B. Install remaining pan head screws in an alternating pattern.
A
Plate (x4)
Plate
Plate
C
D
#10 Flat Head
#10 Pan Head
#10 Flat Head
#10 Flat Head
#10 Flat Head
#10 Pan Head
#10 Pan Head
#10 Pan Head
Tapping Screw (x40)
Tapping Screw (x11)
#10 Flat Head
#10 Pan Head
Tapping Screw
Tapping Screw
Tapping Screw
Tapping Screw
Tapping Screw
Tapping Screw
Tapping Screw
Tapping Screw
F
#10 Flat Head
#10 Flat Head
#10 Pan Head
Work surface
Work surface
Work surface
Tapping Screw
Tapping Screw
Tapping Screw
Work surface
Work surface (x1)
B B
Work surface
Work surface
HermanMiller
B
B
B
A
Leg
Leg
Leg
Leg
Plate
E
Leg
Leg
M8 Flat Head Screw
M8 Flat Head Screw
M8 Flat Head Screw
M8 Flat Head Screw
(x8)
M8 Flat Head Screw
G
#10 Pan Head
M8 Flat Head Screw
M8 Flat Head Screw
#10 Flat Head
#10 Pan Head
Stiffener (for 1500 wide table only)
Stiffener (for 1500 wide table only)
Stiffener (for 1500 wide table only)
Tapping Screw
Tapping Screw
Tapping Screw
Stiffener (for 1500 wide table only)
Stiffener* (x1)
B B
Stiffener (for 1500 wide table only)
Stiffener (for 1500 wide table only)
Work surface
Stiffener (for 1500 wide table only)
HermanMiller
HermanMiller
Rectangular table assembly Instructions
Rectangular table assembly Instructions
B
How to assemble Rectangular table
How to assemble Rectangular table
Tools Required
Tools Required
B
Power Driver
Power Driver
Rectangular table
Rectangular table
Step 1
Step 1
IMPORTANT!
Leg
Leg (x4)
1.1 Attach top plate to the leg, with two M8 flat head machine screws.
1.1 Attach top plate to the leg, with two M8 flat head machine screws.
PLEASE READ THIS GUIDE THOROUGHLY BEFORE
Tighten screws until snug plus 1/2 turn.
Tighten screws until snug plus 1/2 turn.
BEGINNING INSTALLATION.
1.2 There are 2 ways to mount the plate to the leg :
1.2 There are 2 ways to mount the plate to the leg :
H
A. Creased edge facing outward.
IT IS STRONGLY RECOMMENDED THAT INSTALLATION BE
Disassembly for Recycling:
B. Round edge facing outward.
PERFORMED BY AT LEAST 2 ADULTS. FAILURE TO DO SO MAY
Materials Identification and Segregation:
RESULT IN PRODUCT DAMAGE AND/OR PERSONAL INJURY.
Where possible, plastic components are marked with ASTM recycling codes. Use these codes to identify
material type for recycling. Non marked components should be treated as mixed plastic. Ferrous
metals can be identified using a small magnet for recycling. Non-ferrous metals should be separated
M8 Flat Head Screw
andrecycled separately. To disassemble product, reverse the above installation steps
PLEASE SAVE THESE INSTRUCTIONS FOR DISASSEMBLY
Stiffener End Cap
Stiffener End Cap
Stiffener End Cap
© 2009 Herman Miller, Inc., Zeeland, Michigan Printed in U.S.A.
Stiffener End Cap
Stiffener End Cap* (x2)
OR RECONFIGURATION.
® YHermanMiller, Abak, Action Office, Avive, Co/Struc, Ethospace, Intersect, Meridian, Passage,
Prospects, Quadrant, Resolve, Scooter, Vivo interiors, Lifework, Teneo, and V-Wall are among the
*1500 wide table only
registered trademarks of Herman Miller Inc.
Burdick Group, CLT, Flex-Edge, My Studio Environments, and Q system, are among the trademarks of
TM
Herman Miller Inc.
Illustrations and specifications are based on the latest product information available at the time of
publication. The right is reserved to make changes in design and specifications at any time, without
notice, and also to discontinue products.
Stiffener End Cap
Stiffener End Cap
Stiffener End Cap
2
1
Phillips Bit
Phillips Bit
A. Creased edge facing outward.
Disassembly for Recycling:
B. Round edge facing outward.
Materials Identification and Segregation:
Where possible, plastic components are marked with ASTM recycling codes. Use these codes to id
material type for recycling. Non marked components should be treated as mixed plastic. Ferrous
metals can be identified using a small magnet for recycling. Non-ferrous metals should be separat
andrecycled separately. To disassemble product, reverse the above installation steps
© 2009 Herman Miller, Inc., Zeeland, Michigan Printed in U.S.A.
® YHermanMiller, Abak, Action Office, Avive, Co/Struc, Ethospace, Intersect, Meridian, Passage,
Prospects, Quadrant, Resolve, Scooter, Vivo interiors, Lifework, Teneo, and V-Wall are among the
registered trademarks of Herman Miller Inc.
Burdick Group, CLT, Flex-Edge, My Studio Environments, and Q system, are among the trademar
TM
Herman Miller Inc.
Illustrations and specifications are based on the latest product information available at the time o
publication. The right is reserved to make changes in design and specifications at any time, witho
notice, and also to discontinue products.
1BSSGX rev A
1BSSGX rev A
2
1BT8FR Rev A
5mm Allen Key
5mm Allen Key
A.
A.
Assembly Instructions
Assembly Instru
OR
OR
Advertisement

Summary of Contents for HermanMiller OE1
- Page 1 HermanMiller OE1 Rectangular Table Assembly Instructions Step 2 ach legs to the worksurface follow the below procedure. To attach legs to the worksurface follow the below procedure. Screw two flat head screws into marked two piloted holes first to locate A.
- Page 2 NOT piloted. These screws are field drilled. are NOT piloted. These screws are field drilled. ote: Attach legs with worksurface upside down Note: Attach legs with worksurface upside down 1BSSGX rev A HermanMiller Assembly Instructions 1BSSGX rev A HermanMiller Assembly Instructions...


Need help?
Do you have a question about the OE1 and is the answer not in the manual?
Questions and answers