Advertisement
Quick Links
Y
Tools Required:
2 lbs Hammer
Power Driver
Materials Identification and Segregation:
Where possible, plastic components are marked with ASTM recycling codes. Use
these codes to identify material type for recycling. Non marked components should
be treated as mixed plastic. Ferrous metals can be identified using a small magnet
for recycling. Non-ferrous metals should be separated and recycled separately.
Disassembly Steps:
1. Remove front and back
screws of arm pad using
T-20 torx driver.
Z
© 2012 Herman Miller, Inc. Zeeland, Michigan. Printed in the U.S.A.
® Y, Z, Embody, Co/Struc and Mirra are among the registered trademarks of Herman Miller, Inc.
Sense, Setu, Tu and SAYL are among the trademarks of Herman Miller, Inc.
TM
Illustrations and specifications are based on the latest product information available at the time of publication.
The right is reserved to make changes in design and specifications at any time, without notice, and also to discontinue products.
Flat Blade
T-20
Screwdriver
Torx Driver
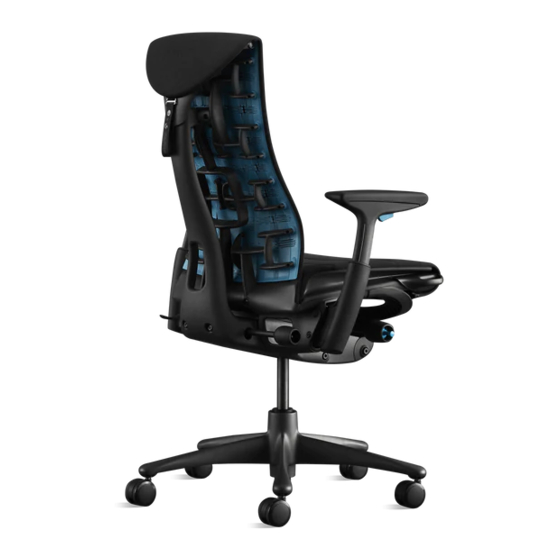
Embody
Disassembly For Recycling
®
T-27
T-30
Torx Bits
Torque Wrench
Needlenose
Plier
2. Remove arm pad. Repeat
for opposite side.
Safety Glasses
T-40
Ratchet
Part no. 1b9vtc rev A.
1
Advertisement

Related Manuals for HermanMiller X LOGITECH G EMBODY


Summary of Contents for HermanMiller X LOGITECH G EMBODY
- Page 1 Embody Disassembly For Recycling ® Tools Required: Safety Glasses T-27 T-30 T-40 Torx Bits Torque Wrench Ratchet Flat Blade T-20 Needlenose 2 lbs Hammer Power Driver Screwdriver Torx Driver Plier Materials Identification and Segregation: Where possible, plastic components are marked with ASTM recycling codes. Use these codes to identify material type for recycling.
- Page 2 3. Pull to remove back 4. Remove both bolts using angle adjust handle. power driver to remove arm. Repeat for opposite side. 6. Pull out the arms from 5. Depress the button. bottom assembly. Part no. 1b9vtc rev A. © 2012 Herman Miller, Inc. Zeeland, Michigan. Printed in the U.S.A. ®...
- Page 3 No Arm Plugs: 7. Pry up gently until no 8. Pull to remove no arm arm plug attachment is plug. Repeat for opposite loose. side. 10. Remove both lower back 9. Remove both lower spine bolts using T-40 torx wrench. bolts using T-40 torx wrench.
- Page 4 11. Slide your finger 12. Remove the dome between the antler and the separately. fabric cover and pull up to release the dome trees from the antler. 14. Remove fabric 13. Insert needlenose plier separately. between fabric and wiffle material. Twist plier until attachment pegs pop loose.
- Page 5 15. Using T-27 torx wrench, 16. Remove hinge covers. remove both spine cap screws. 18. Remove the two top 17. Pull out pivot pin. antler attachment screws using a T-27 torx wrench. Part no. 1b9vtc rev A. © 2012 Herman Miller, Inc. Zeeland, Michigan. Printed in the U.S.A. ®...
- Page 6 19. Lift up on antler to 20. Pull one end of the release it from spine. antler away from top frame and remove. 21. Remove back. 22. Pull out spine cover from back assembly. Part no. 1b9vtc rev A. © 2012 Herman Miller, Inc. Zeeland, Michigan. Printed in the U.S.A. ®...
- Page 7 23. Insert needlenose plier 24. Remove both “S” clips. between back strap and twist plier until attachment loose. 25. Remove back corners of 26. Disengage the fabric fabric from clip posts. from rear mount posts. Part no. 1b9vtc rev A. ©...
- Page 8 27. Remove the fabric from 28. Peel the strip from seat the seat. fabric. 30. Unscrew and remove 29. Unscrew and remove bull nose. handle using screw driver from seat assembly. Repeat other end. Part no. 1b9vtc rev A. © 2012 Herman Miller, Inc. Zeeland, Michigan. Printed in the U.S.A. ®...
- Page 9 32. Remove single lower 31. Remove weldment from bolt from each arm housing seat assembly. using T-27 torx wrench. Repeat for opposite side. 33. Remove two lower front 34. Pull lower cover forward link shoulder bolts and to remove. bushings using T-40 torx wrench.
- Page 10 35. Lift up front of seat 36. Locate wire clip for tilt assembly and remove. tension knob. Slide flat blade screwdriver under cable collar. Pry up gently until cable collar is free. 38. Hold the Knob assembly 37. Grasp the cable and using a flat blade screw driver.
- Page 11 39. While pulling out on front 40. Slide flat blade ears, pull front tilt cover screwdriver along side of forward and out. rear tilt cover and pry off. 41. Rotate back of rear tilt 42. Remove wire clip from cover up and pull off. tilt tension knob assembly.
- Page 12 43. Remove tilt lock lever 44. Remove shoulder bolt down to unlock position. and flange bushing from each side of rack. 45. Remove 2 hex washer 46. Rotate rack and pull free head screws. from assembly. Part no. 1b9vtc rev A. ©...
- Page 13 47. Lay chair on back. 48. Grasp and pull to remove casters from the base. 49. Hold base legs firmly 50. Remove base. and strike the bottom of cylinder with a 2 pound hammer until base comes loose. Part no. 1b9vtc rev A. ©...
- Page 14 51. Hit the bottom of the 52. Pull out the cylinder from chair with hammer until assembly. cylinder separates from chair. Part no. 1b9vtc rev A. © 2012 Herman Miller, Inc. Zeeland, Michigan. Printed in the U.S.A. ® Y, Z, Embody, Co/Struc and Mirra are among the registered trademarks of Herman Miller, Inc. Sense, Setu, Tu and SAYL are among the trademarks of Herman Miller, Inc.
Need help?
Do you have a question about the X LOGITECH G EMBODY and is the answer not in the manual?
Questions and answers