Table of Contents
Advertisement
Quick Links
Advertisement
Table of Contents

Related Manuals for Biotage VacMaster 10


Summary of Contents for Biotage VacMaster 10
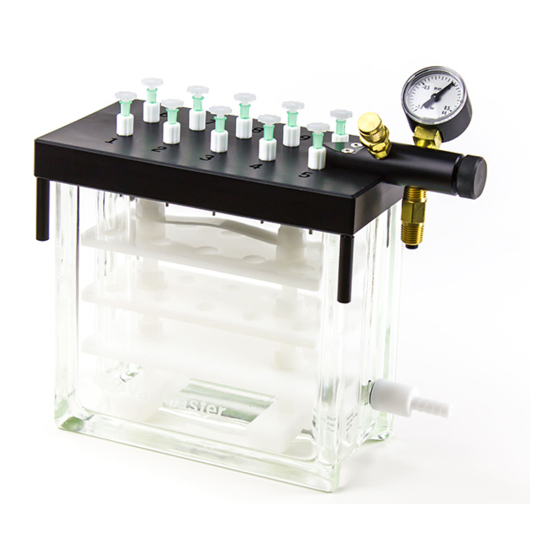
- Page 1 Biotage VacMaster 10 & 20 ® ™ Sample Processing Manifold User Manual...
-
Page 2: Table Of Contents
Using the Vacuum Control and Gauge Using the Waste Outlet Fitting Using Biotage VacMaster with ® ™ Biological or Hazardous Materials Maintenance and Troubleshooting Maintenance Troubleshooting Ordering Information Biotage VacMaster 10 & 20 User Manual | © Biotage 2020 ® ™... -
Page 3: Important Information
3. Avoid knocking or scratching VacMaster with any sharp or heavy object. 4. If the VacMaster glass tank is dropped, scratched or damaged in any way, we strongly recommend that it should be replaced. Warranty and Liability See the “Biotage Terms & Conditions of Sale” document at www.biotage.com. -
Page 4: Introduction
» A complete collection tube rack fitted with Dimensions – Biotage VacMaster 10, 12, 16, 25, or 27 mm plates (VacMaster 10) or ® ™ 10, 12, 16, or 20 mm plates (VacMaster 20). See page 3. - Page 5 Introduction 267–274 mm Biotage VacMaster 10 197 mm Biotage VacMaster 10 267–274 mm...
- Page 6 Introduction Dimensions – Biotage VacMaster ® ™ 373 mm Biotage VacMaster 20 Biotage VacMaster 20 298 mm 373 mm Biotage VacMaster 10 & 20 User Manual | © Biotage 2020 ® ™...
-
Page 7: Principle Of Operation
Rack plates are available for 10, 12, and 16 mm diameter one tank to process the samples and dedicate a second low tubes as standard (plus 25 and 27 mm for VacMaster 10 and cost tank for the elution step. Thus, the second tank can remain 20 mm for VacMaster 20). - Page 8 Biotage VacMaster 10 Figure 2. Glass tank. For replacement tank complete with fittings, Figure 4. Collection tube rack. order P/N 121-1039 (VacMaster 10) or P/N 121-2068 (VacMaster 20). A. Rack dome nut. A. Thick walled glass tank. B. Rack handle.
-
Page 9: Installation
Place a trap in the vacuum line to shipping company that delivered your VacMaster and file collect any liquid for proper disposal. a claim. Please contact Biotage or your local distributor for » Vacuum pump assistance in repairing or replacing the product. -
Page 10: Installing The Needles
Racks are available to accommodate 10, 12, or 16 mm tubes Bottom, Middle and Top Plates (and 25 or 27 mm for VacMaster 10 and 20 mm for VacMaster 20). Raise the Plate Turn the nut washers above the plate counterclockwise until Installing the Needles they reach the correct height. -
Page 11: Routine Operation
Without a trap, the liquid would enter the vacuum pump and or sample to the column reservoirs. could damage the pump. 2. Open the stopcocks if they are being used. 3. Open both the coarse and fine vacuum control valves on Using Biotage VacMaster with ® ™... -
Page 12: Maintenance And Troubleshooting
Liquid in the collection tubes is Air is entering tank above tubes Install air flow tube in right side of lid disturbed when vacuum is released Biotage VacMaster 10 & 20 User Manual | © Biotage 2020 ® ™... -
Page 13: Ordering Information
121-1045 Complete lid (tested) 121-1012 Complete with 12 mm diameter collection tube rack 121-1133 VacMaster 10 rack 12 mm tubes 121-1016 Complete with 16 mm diameter collection 121-1134 VacMaster 10 rack 16 mm tubes tube rack 121-1131 VacMaster 10 rack 27 mm tubes... - Page 16 Part Number: UI303-B © 2020 Biotage. All rights reserved. No material may be reproduced or published without the written permission of Biotage. Information in this document is subject to change without notice and does not represent any commitment from Biotage. E&OE.
Need help?
Do you have a question about the VacMaster 10 and is the answer not in the manual?
Questions and answers