Table of Contents
Advertisement
Quick Links
Advertisement
Table of Contents

Related Manuals for Biotage TurboVap Series


Summary of Contents for Biotage TurboVap Series
- Page 1 TurboVap ® Installation and Safety...
-
Page 2: Table Of Contents
Safety Intended Use Education, Training, and Competence Warranty and Liability Service Labels Product Safety Warning Safety Requirements Restriction of Hazardous Substances Directive (RoHS) Policy WEEE Compliance Statement Safety in Other Languages TurboVap Installation and Safety | © Biotage 2017 ®... -
Page 3: Site Requirements
Site Requirements Site Requirements Before the system is installed, the installation site should be Gas Supply The system should operate using inert prepared as follows: gas. Compressed air can be used but is not recommended with some solvents due to the possible risk of explosion. -
Page 4: Installation Of Turbovap
Note: We recommend that the boxes and packing materials are kept by the customer in case the system needs to be returned for service or moved to another location. If you need to ship the system, please contact Biotage 1-Point Support for instructions. Install the System Warning »... -
Page 5: Fill The Water Bath
Installation of TurboVap ® Fill the Water Bath Adjust the TurboVap LV Manifold ® 1. Open the lid of the TurboVap LV system and pour deionized 1. If using the TurboVap LV multi rack with 24 positions, plug the water into the water bath until the level reaches the MIN nozzles that are not in use using nozzle plugs (see Figure 3A). -
Page 6: Installation Of Turbovap
Note: We recommend that the boxes and packing materials are kept by the customer in case the system needs to be returned for service or moved to another location. If you need to ship the system, please contact Biotage 1-Point Support for instructions. Install the System Warning »... -
Page 7: Fill The Water Bath
Installation of TurboVap ® Fill the Water Bath 1. Open the lid of the TurboVap II system and pour deionized water into the water bath until the level reaches the MIN level marked on the water bath; see Figure 6A. This should be about 4.5 liters. -
Page 8: Installation Of Turbovap
Note: We recommend that the boxes and packing materials are kept by the customer in case the system needs to be returned for service or moved to another location. If you need to ship the system, please contact Biotage 1-Point Support for instructions. Install the System Warning »... -
Page 9: Fill The Water Bath
Installation of TurboVap ® Fill the Water Bath Adjust the TurboVap EH Manifold ® 1. Open the lid of the TurboVap EH system and pour deionized 1. If using the TurboVap EH system with only one sample/ water into the water bath until the level reaches the MIN collection rack, plug the nozzles that are not in use using level marked on the water bath;... -
Page 10: Connections
To avoid the risk of fire or electrical shock, the system must be electrically grounded (earthed). Use only a power cord supplied by Biotage. The plug should only be connected to a grounded outlet as per local and national regulations. Keep the mains plug easily accessible in case the system needs to be disconnected quickly from mains power. -
Page 11: Technical Specifications
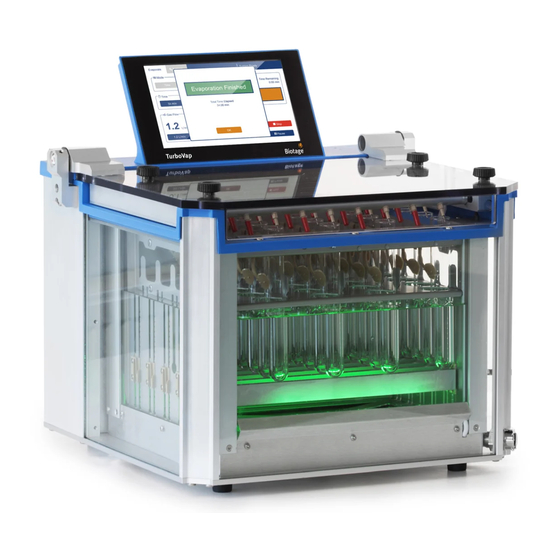
Technical Specifications Technical Specifications » Evaporation Racks and Tube TurboVap LV multi racks: Sizes » Water Bath Ambient to 90°C, ± 2°C accuracy. 48 positions for 10–16 mm (OD), Temperature Range <45 mm (length) mini vials » 48 positions for 10–20 mm (OD), Temperature Heating time from 20°C to 55°C is 75–165 mm (length) tubes... - Page 12 24 positions: 160 liters/min » 6 positions: 50 liters/min External Fire External fire protection should be installed Protection according to local regulations for equipment operating unattended. Certifications CE marked and CB and NRTL certified. TurboVap Installation and Safety | © Biotage 2017 ®...
-
Page 13: Safety
Biotage 1-Point Support be emptied of all liquid and cleaned from harmful residues. (www.biotage.com). It is the responsibility of the customer to inform Biotage 1-Point Support representatives if the system has been used with hazardous biological, radioactive, or toxic samples and/or solvents, prior to any service being performed. - Page 14 » user documentation available at www.biotage.com. If Follow regional safety practices when handling the system is used in a manner not specified by Biotage, and moving shipping boxes and containers, the safety features of the system may be impaired. and when moving the system.
-
Page 15: Restriction Of Hazardous Substances Directive (Rohs) Policy
Biotage Sweden AB. Before forwarding a product for recycling or disposal, it should be emptied of all liquid and cleaned from harmful residues. When returning a product to Biotage, this should be done in accordance with the material return procedures supplied separately by Biotage. -
Page 16: General Information
Accessories and Spare Parts Only genuine Biotage accessories must be used in the system. To order consumables and accessories, see contact information on the back of this document or visit our website www.biotage.com. -
Page 17: Notes
Notes Notes... - Page 18 Notes TurboVap Installation and Safety | © Biotage 2017 ®...
- Page 20 Part Number: 415389-D © 2017 Biotage. All rights reserved. No material may be reproduced or published without the written permission of Biotage. Information in this document is subject to change without notice and does not represent any commitment from Biotage. E&OE.
Need help?
Do you have a question about the TurboVap Series and is the answer not in the manual?
Questions and answers