OmniPod DASH System Quick Start Guide
- Quick start manual (21 pages) ,
- User manual (60 pages) ,
- User manual (104 pages)
Advertisement
- 1 BEFORE YOU DASH ON...
- 2 REGISTER YOUR OMNIPOD DASH SYSTEM AT PODDERCENTRAL
- 3 CURRENT USER? START HERE!
- 4 NEW USER? SKIP THIS SECTION
- 5 How to Find Your Basal Program(s)
- 6 How to Find Your Bolus Calculator Settings
- 7 SET UP YOUR OMNIPOD DASH SYSTEM PERSONAL DIABETES MANAGER
- 8 Pair your CONTOURNEXT ONE BG Meter
- 9 SET UP A NEW POD
- 10 KEY INSULIN DELIVERY ACTIONS
- 11 Videos
- 12 Documents / Resources
This guide provides you with step-by-step instructions for getting started with your new Omnipod DASH™ System.
+ If you are new to the Omnipod DASH™ System, this guide will be helpful during your live-training with your Certified Pod Trainer.
+ If you are a current user of the Omnipod® System, use the Omnipod DASH™ System User Guide, Quick Start Guide and online training module to get started. You can view the Omnipod DASH™ System online training module in your PodderCentral™ account.
BEFORE YOU DASH™ ON...
+ Take an inventory of your Personal Diabetes Manager (PDM) Kit
+ Register your Omnipod DASH™ System at PodderCentral™
 Kit")
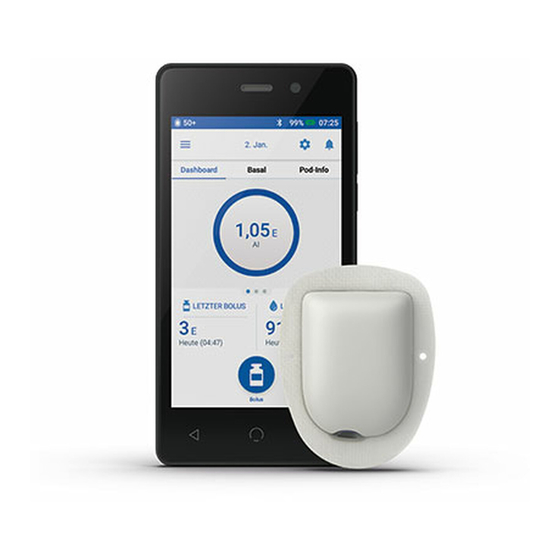
Personal Diabetes Manager (PDM) Kit

PDM + Battery

Black PDM Skin

Charging Cable & Adapter

Carry Case

User Guide
If you have any questions about setting up your new Personal Diabetes Manager please contact Customer Care at 800-591-3455 (outside US 978-600-7850) for support 24 hours a day, 7 days a week.
If you have any questions about your individual pump therapy settings, please contact your healthcare provider.
Please ensure you thoroughly review your Omnipod DASH™ System User Guide before you attempt to start your device.
REGISTER YOUR OMNIPOD DASH™ SYSTEM AT PODDERCENTRAL™
A Digital Home For Podders™
+ Get Access to Omnipod DASH™ System Online Training!
+ Manage your Omnipod DASH™ account online
Here's How to Access:
- Visit www.myomnipod.com/PodderCentral and create an account
- If you don't have access to a computer, call Customer Care at 800-591-3455 and select Option 2
CURRENT USER? START HERE!
+ To set up your new Omnipod DASH™ System Personal Diabetes Manager, you need settings from either your current Personal Diabetes Manager (model UST400) or pump therapy settings provided by your healthcare provider.
+ If you currently use the previous generation Personal Diabetes Manager (model UST400), the instructions to the right will help you find your current settings.
NEW USER? SKIP THIS SECTION
Your Certified Pod Trainer will work with your healthcare provider to obtain your pump therapy settings.
For your safety, please do not attempt to create your own Omnipod DASH™ System Personal Diabetes Manager settings.
How to Find Your Basal Program(s)
- On Home Screen Select Settings
 Step 1")
- Select Basal Programs
 Step 2")
- Select the basal program to review. On the next screen, select View
 Step 3")
- You will first see the graph, press List to view your basal segments as shown
 Step 4")
+ Take note of your Total Daily Basal
 Step 1")
 Step 2")
 Step 3")
 Step 4")
How to Find Your Bolus Calculator Settings
- On Home Screen Select Settings

- Select System setup

- Select Bolus/basal/calcs

- Select Ratios/factors/targets.
NOTE: Bolus calcs must be "0n."

- Select Review all settings


SET UP YOUR OMNIPOD DASH™ SYSTEM PERSONAL DIABETES MANAGER
Be sure to register your Omnipod DASH™ Personal Diabetes Manager (PDM) on PodderCentral™!
The Personal Diabetes Manager Battery
+ Use the pull-tab to remove the back cover.
+ Insert the battery into the Personal Diabetes Manager.
+ Remove the pull-tab and replace the back cover.
+ The Personal Diabetes Manager is rechargeable, similar to common mobile devices.
+ Charge frequency is based on device usage.
We suggest you charge your device during bedtime and stick with a similar time each day.

Omnipod DASH™ System Initial Personal Diabetes Manager Setup
Your initial pump therapy settings are needed to setup your new Personal Diabetes Manager. These settings are provided to you by your healthcare provider.
+ Hold down the Power button to wake your Personal Diabetes Manager.

+ You will begin by personalizing your new Personal Diabetes Manager!
+ After personalization, you will enter your insulin delivery settings.
+ The Personal Diabetes Manager guides you step-by-step. Be sure to read each screen, and accurately enter each setting.
+ For more information, refer to "Initial PDM Setup" in the Omnipod DASH™ System User Guide.

Pair your CONTOUR® NEXT ONE BG Meter
+ Pair your CONTOUR® NEXT ONE Blood Glucose Meter with your PDM during the initial setup, or you can do so later through the PDM settings screens. Only readings taken on a paired CONTOUR® NEXT ONE meter will be transferred wirelessly to the PDM's bolus calculator.
+ BG readings taken on a different meter can only be entered manually. If you do not want to pair a CONTOUR® NEXT ONE BG Meter at this time, tap SKIP.
- Tap "BG Meter Pairing Instructions"
If you do not want to pair to a BG meter, tap "SKIP"

- Follow the on-screen instructions, then tap "START SEARCH"

- Select the device to pair from available meters

- Your PDM is now paired with your blood glucose meter


SET UP A NEW POD
- In the "Pod Info" screen, tap "SET UP NEW POD"

- Carefully follow the onscreen instructions


- Collect the following supplies:
+ Omnipod DASH™ System Personal Diabetes Manager
+ Unopened Omnipod DASH™ System Pod
+ Alcohol swabs
+ Vial of room temperature rapid-acting U-100 insulin - Wash your hands with soap and water. Clean the top of the insulin vial with an alcohol swab.
- Remove the fill needle and syringe from the Pod's tray. Keep the Pod in its tray during set up. Confirm the Pod's needle cap is blue. This ensures your Pod is compatible with your Omnipod DASH System Personal Diabetes Manager. Twist the fill needle clockwise onto the top of the syringe. Do not use any other type of needle or filling device besides the syringe provided with each Pod.
- Remove the syringe's protective cap from the needle. Draw air into the syringe equal to the amount of insulin you will use. You must fill your syringe with at least 85 units of insulin. Insert the needle into the vial and inject air.
- Turn the vial upside down and slowly withdraw insulin. Tap or flick the filled syringe to remove any bubbles.
- Remove the needle from the vial and insert it into the Pod's insulin fill port. An arrow on the white paper backing points to the fill port. Do not inject insulin into any other location on the Pod. The Pod should still be in its package during fill.
![warning]() To ensure proper fill, do not insert the fill syringe at an angle into the fill port.
To ensure proper fill, do not insert the fill syringe at an angle into the fill port. - Inject the insulin into the fill port. The Pod beeps twice. Remove the needle from the insulin fill port. Replace the needle's protective cap and remove the needle from the fill syringe for proper sharps disposal.
![]() NEVER inject air into the fill port. Doing so may result in unintended or interrupted insulin delivery.
NEVER inject air into the fill port. Doing so may result in unintended or interrupted insulin delivery.
![]() NEVER use a Pod if you feel resistance while depressing the plunger of the fill syringe. This condition can result in interrupted insulin delivery.
NEVER use a Pod if you feel resistance while depressing the plunger of the fill syringe. This condition can result in interrupted insulin delivery. - With the Pod still in its tray place it next to and touching the Personal Diabetes Manager to ensure proper communication. Press "NEXT" on the Personal Diabetes Manager. The system performs a series of safety checks and automatically primes the Pod.
- Your Pod is now ready for application and cannula insertion. For more information, please refer to "Changing your Pod" in your Omnipod DASH™ System User Guide.
 To ensure proper fill, do not insert the fill syringe at an angle into the fill port.
 NEVER inject air into the fill port. Doing so may result in unintended or interrupted insulin delivery.
KEY INSULIN DELIVERY ACTIONS
Disclaimer: The following screens are for demonstration purposes only. The values shown are educational and may not reflect real life scenarios.
Suspend Insulin Delivery
- Tap Menu icon on the Home screen

- Tap "Suspend Insulin" and follow the on-screen instructions


Set a Temporary Basal Rate
- Tap Menu icon on the Home screen

- Tap "Set Temp Basal"

- Tap "Basal Rate" entry box and select your % change. Tap "Duration" entry box and select your time duration. Tap "Confirm"


Edit an Active Basal Program
NOTE: You must suspend insulin before editing the active Basal Program.
- Tap "Basal" tab on the Home screen. Tap "VIEW"

- Tap "EDIT"

- Tap "SUSPEND INSULIN"

- Tap to edit program name and tag or tap "NEXT" to edit basal time segments and rates

- Once you are finished editing, tap "RESUME INSULIN"


Deliver a Bolus
- Tap the "Bolus" icon on the Home screen

- Tap the "Enter Carbs" entry box to input grams of carbs. Sync or enter your BG manually by tapping the "ENTER BG" entry box

- Review your values, then tap "CONFIRM"

- Tap "START" to begin bolus delivery


For More Information:
Please refer to your Omnipod DASH™ System User Guide
Visit us online at myomnipod.com
Download the Omnipod® Patient App!


800-591-3455
978-600-7850
www.myomnipod.com
Insulet Corporation
100 Nagog Park
Acton, MA 01720
© 2018 Insulet Corporation. Omnipod, the Omnipod logo, DASH, the DASH logo, Podder, and PodderCentral are trademarks or registered trademarks of Insulet Corporation. All rights reserved.

VideosOmnipod DASH® - How to Apply a New Pod (video)
Documents / Resources
References
Download manual
Here you can download full pdf version of manual, it may contain additional safety instructions, warranty information, FCC rules, etc.
Advertisement


Need help?
Do you have a question about the DASH System and is the answer not in the manual?
Questions and answers