
Subscribe to Our Youtube Channel
Related Manuals for Jenoptik Jendigital JD 1300 ds


Summary of Contents for Jenoptik Jendigital JD 1300 ds
-
Page 1: Table Of Contents
Contents Contents 1 - 2 Identifying the Parts 3 - 6 Warning 7 - 8 Caution FCC Notice Accessories System Requirements Preparing the Power Supply Using Batteries On Battery Usage 12 - 13 Using the Power Adapter Vorbereitung Loading the CompactFlash -Card Attaching the Strap Setting the Date and Time... - Page 2 Contents How to set the OSD (On-Screen Display) language? How to set the Self-Timer? How to format the CF (CompactFlash ) card? Operating Modes and Menues Record Mode WHITE BALANCE EV COMPENSATION Play Mode LCD BRIGHTNESS SLIDE SHOW COPY TO CF CARD: (Optional) SETUP Mode DATE/TIME LANGUAGE...
-
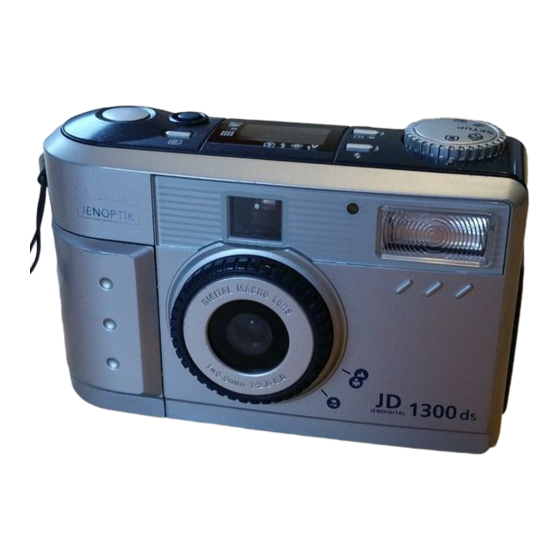
Page 3: Identifying The Parts
Identifying the Parts Top View Resolution/Quality Button Operating Mode Knob Power Button Shutter Button Menu Button Flash Mode Button Status LCD Viewfinder Window Front View Flash Focus Knob Lens Jack Cover... - Page 4 Identifying the Parts Rear View Viewfinder LED 1 Strap Holder LED 2 Up/Backward/Self-timer Button Down/Forward Button LCD Monitor OK / Zoom Button Display Button Bottom View Battery Cover CF Cover Tripod Socket...
- Page 5 Identifying the Parts Operating Mode Knob The camera provides 5 different operating modes for your selection: 1, Record Mode 2. Play Mode 3. Setup Mode SETUP 4. Delete Mode 5.PC Mode A Status LCD The status LCD contains the following indicators: 1 Resolution Indicator 2.
- Page 6 Identifying the Parts LCD Monitor The LCD Monitor shows the current image information: 1. Resolution 2. Quality 3. Time 4. Date 5. File Name USB Port Connectors USB Port Video Port Video Port DC IN Port DC IN Port...
-
Page 7: Warning
Warning Do not use this camera if it is emitting smoke, becomes unusually hot to be touched emitting any unusual odor or noise or if it is in any other abnormal states. Operating the camera in any of these situations may cause a fire or an electrical shock. Stop using the camera immediately, tum the camera off and then disconnect the power source (batteries or AC power adapter). - Page 8 Warning Do not expose the camera to moisture and make sure that there is no water getting into the camera. Take particular care when using the camera under extreme weather conditions such as rain or snow, or when operating the camera at the beach on near water. Water in the camera may cause a fire or an electrical shock. Do not insert or drop metallic or inflammable foreign objects into the camera through access points such as the Compact Flash card slot.
-
Page 9: Caution
Caution Handle the camera carefully and do not bump the camera into any hard object. Handling the camea roughly may cause a malfunction.. Do not move the camera while it is switched on. (if you are using the AC power adapter, unplug the adapter from the AC power outlet alter you have switched off the camera.) Ensure that any connector cords or cables to other devices are disconnected before moving the camera, Failure to do so may damage the cords or cables and cause a fire or an electrical shock. -
Page 10: Fcc Notice
FCC Notice This equipment has been tested and found to comply with the limits for a Class B digital device, pursuant to part 15 of the FCC Ruies. These limits are designed to provide reasonable protection against harmful interference in commerical installation. -
Page 11: Accessories
Accessories Thanks for the purchase of the digital camera. With the camera, you will live a whole new camera experience and make photo shooting more interesting and fun. Here below we will guide you through the whole picture taking process, please keep this booklet an hand and enjoy your time. Standard Accessories: 4 x "AA"... -
Page 12: System Requirements
System Requirements Pentium 166 MHz processor or higher Windows 98/2000/ME Available USB port At least 32 MB RAM 80 MB available hard disk space CD-ROM drive Color monitor(800x600 24-bit or higher recommended) Preparing the Power Supply Using Batteries (Fig. 1) Slide the battery cover in the direction indicated by the arrow. -
Page 13: Using The Power Adapter
Preparing the Power Supply Batteries should be inserted in the battery compartment with the "+" and "-" sides facing correctly. Batteries should be replaced when the battery indicator appears an empty icon. To improve battery performance, replace all installed batteries at the same time and keep batter away from heat. Do not drop, puncture or disassemble batteries. -
Page 14: Loading The Compactflash -Card
Preparing the Power Supply Loading The CompactFlash Card (Fig. 3) To record images, please insert a Compact Flash card if no internal memory is built in your digital camera. To load the CIF card, perform the following: 1. Make sure to turn off the camera. 2. -
Page 15: Basic Operations
Basic Operations How to record an image? If there is no internal memory built in your camera, you have to insert a CF card first before photoshooting. To record an image, perform the following: Power on the camera. Set the operating mode to RECORD LED1 will be on under Record mode 3. -
Page 16: How To Playback Images
Basic Operations How to playback images? To playback the images recorded in the CF card, make sure to insert the card before the image review. To playback the images recorded in the camera (internal memory), do not insert any CF card or the camera will not be able to read the internal data with an external memory card attached. -
Page 17: How To Delete Images
Basic Operations How to delete images? To delete the images recorded in the CF card, make sure to insert the card before deletion. To delete the images recorded in the camera (internal memory), do not insert any CF card or the camera will not be able to read the internal data with an external memory card attached. -
Page 18: How To Set The Focus
Basic Operations How to set the focus? Before taking a picture, you may need to set the focus. The camera provides 2 different type for your selection: Mode Effective Range Description Icon For a normal/long distance shot (0.6 M~ Portrait/Telephoto Icon (0.3 ~ 0.6 M) For a macro shot... -
Page 19: Resolution Indicator
Basic Operations Resolution Indicator In RECORD mode: Shows the captured image resolution setting. In PLAY mode: Shows the currently displayed image resolu- tion setting. Image Quality Indicator In RECORD mode: Shows the captured image quality setting. In PLAY mode: Shows the currently displayed image quality setting. -
Page 20: How To Set The Flash
Basic Operations How to set the Flash? The Flash Mode can only be set under RECORD mode. There are 4 modes available: Auto, Red-Eye, Fill-in and Off. The default setting is OFF. To change the setting, press the Flash Mode button number of times until the desired one is selected. Mode Description Auto... -
Page 21: Advanced Operation
Advanced Operation How to adjust the EV compensation? To adjust the EV compensation, perform the following: 1. Set the operating mode to RECORD 2. Press the Menu button, The Record menu appears. 3. Select the EV COMPENSATION item. 4. Select the desired exposure value. * The effective range is from -1.8 to +1.8 in steps of 0.3 EV. -
Page 22: How To Adjust The White Balance
Advanced Operation How to adjust the White Balance? To adjust the White Balance, perform the following: 1. Set the operating mode to RECORD 2. Press the Menu button. The Record menu appears. 3. Select the WHITE BALANCE item. 4. Select the desired white balance setting. This setting is reset to AUTO when the camera power is off. -
Page 23: How To Set The Self-Timer
Advanced Operation How to set the Self-Timer? The self-timer can only be set under RECORD mode. To use the Self-Timer function, perform the following: 1. Press the Self-Timer button to activate the Self-timer. 2. Press the Shutter button. 3. After 10 seconds, an image is captured and the timer will turn itself off. The Self-Timer is designed to count down for 10 seconds. -
Page 24: Operating Modes And Menues
Operating Modes and Menues Record Mode Set the operating mode to RECORD for image capturing. Record Menu Press the Menu button in RECORD mode, the Record menu appears. PLAY MENU LCD BRIGHTNESS SLIDE SHOW The menu contains the following items: COPY TO CF CARD LCD BRIGHTNESS: Changes the brightness setting (-5 ~ +5, Interval = 1) of the LCD display. -
Page 25: White Balance
Operating Modes and Menues WHITE BALANCE: Select either one of the 5 (Auto, Daylight, Shade, Fluorescent, Tungsten) manual white balance settings. The auto white balance is recommended for most cases. For certain critical circumstances, if the result did not come out as expected, you may manually change to another white balance type according to the ambient lighting condition. -
Page 26: Play Mode
Operating Modes and Menues Play Mode In Play mode, users can review the recorded images on the LCD Monitor or on a TV. Set the operating mode to PLAY for image review. Play Menu Press the Menu button in PLAY mode, the Play menu appears. The menu contains the following items: PLAY MENU LCD BRIGHTNESS SLIDE SHOW... -
Page 27: Slide Show
Operating Modes and Menues SLIDE SHOW: Displays the recorded images sequentially, with a user-defined delay between images. Select the item by the arrow buttons and then press the OK button to confirm. The cursor skips to the data field as the OK button being pressed. -
Page 28: Setup Mode
Operating Modes and Menues Setup Mode In SETUP mode, users can customize their own preferences according to the actual requirements. Setup Menu Switch the Operating Mode knob to SETUP , the Setup menu appears. SETUP MENU DATE / TIME The menu contains the following items: LANGUAGE SOUND FORMAT MEDIA... -
Page 29: Format Media
Operating Modes and Menues SOUND: Enables/disables the sound effects. You may choose either to turn on or off (default=ON) the sound effects while pressing a button is produced by the camera. Select the item by the arrow buttons and then press the OK button to confirm. The cursor skips to the data field as the OK button being pressed. -
Page 30: Reset To Default
Operating Modes and Menues RESET TO DEFAULT: Returns all the camera settings to the factory default settings. Select the item by the arrow buttons and then press the OK button to confirm.The cursor skips to the data field as the OK button being pressed. Use the arrow buttons toggle the selection. -
Page 31: Delete Mode
Operating Modes and Menues DELETE Mode In DELETE mode, users can delete all the recorded images at a time or just delete one after another Delete Menu Switch the operating mode to DELETE To delete the images recorded in the CF card, make sure to insert the card before deletion. To delete the images recorded in the camera (internal memory), do not insert any CF card or DELETE MENU DELETE CURRENT? -
Page 32: Transferring Your Images To The Computer
Transferring your Images to the Computer Before image transfer, please read the following guideline carefully. Driver Installation For Users of Windows 98 If you are planing to transfer your images into a Windows 98-based computer, make sure to complete the driver installation before the camera connection, The steps are as below: Insert the software CD-ROM disc into your CD-ROM drive The setup program starts. - Page 33 Transferring your Images to the Computer Launch MGI PhotoSuite. Navigation bar Get button Welcome screen Click the large Get button on the Welcome screen, or the Get button on the Navigation bar. Choose a photo source (e.g. computer) and click the Open button.(see below) Now you are able to process your images with all the tools provided by PhotoSuite.
-
Page 34: Using Mgi Photovista
Transferring your Images to the Computer Using MGI PhotoVista MGI PhotoVista is an easy-to-use program that lets you create spectacular 3600 panoramic images in a snap. When you view these panoramas, you get the experience of being totally immersed in a realistic environment. Photovista's powerful engine quickly and automatically stitches images together, and its intuitive interface will let even a novice get great results in minutes. - Page 35 Transferring your Images to the Computer Step 3: Preview the Stitch Click the Stitch Panorama icon, The Stitch Options dialog box appears. Click Preview Stitch button. Step 4: View the Panorama In Action. Choose Show Viewer from the Panorama menu. The Stitch Preview window changes to viewer mode, Press and drag the pointer over the panorama vertically and horizontally.
- Page 36 Transferring your Images to the Computer Step 5: Create a Full Stitch Click the Stitch Panorama icon, The Stitch Options dialog box appears, Click Full Stitch button, The Stitch Progress dialog box displays the progress of the stitch, Follow the procedure in Step 4 to view the panorama in action.
-
Page 37: Additional Information
Additional Information Names and Functions Viewfinder Window The optical viewfinder is the real-image type with 5% alignment tolerance. LCD Monitor When you are about to take a picture, you may use the LCD monitor to frame the image. Press the Display button to turn on/off the LCD monitor. - Page 38 Additional Information Power Button Press the power button to turn on/off the camera. While the camera is powered on and there is no button activity or host communication for about 60 seconds, the camera will automatically turn itself off to conserve battery power (standby) meanwhile press any button or rotate the Mode knob will bring the camera back immediately.
- Page 39 Additional Information Operating Mode Knob Switch the Operating Mode knob to select the desired operating mode. There are five operating modes available as follows: RECORD: Capture/stores images PLAY: Review images in memory SETUP: Change camera settings SETUP DELETE: Delete images in memory PC: Transfer images to PC Battery Power Indicator You may check the battery status by the battery power indicator on the LCD display.
-
Page 40: Led Messages
Additional Information LED Messages Type Color Status Description Sound LED1 Blinking While detecting the system error LED1 Green Camera is powered on LED1 Image processing (Compression/Decompression) LED2 Green CF card is inserted SELF-Timer Blinking Camera is capturing an image Indicator SELF-Timer Self-Timer button is pressed Indicator... -
Page 41: Specification
Specification Image Sensor CCD sensor with 1.3 mega pixels Image Resolution 1280*960/640*480 Image Quality Normal, Fine, Super Fine Color 24-bit Color (RGB) Lens Fixed Lens with Macro (0.3m~0.6m), Aperture-2 step (Auto)F:2.8/8 Zoom 2 X Digital Zoom File Format JPEG, EXIF 2.1 Internal Memory 0 or 8MB Flash Memory External Memory...
Need help?
Do you have a question about the Jendigital JD 1300 ds and is the answer not in the manual?
Questions and answers