
Related Manuals for Jenoptik JDC 3.0S


Summary of Contents for Jenoptik JDC 3.0S
- Page 1 GETTING STARTED C 3.0S 3 Megapixels Digital Camera User’s Guide User’s Guide www.jenoptik-camera.com...
- Page 2 CONGRATULATIONS Congratulations on the purchase of your new camera. Your camera has been carefully engineered and manufactured to give you dependable operation. Read this manual before operating the camera to become more familiar with it. This manual has been written and formatted with depth and detail so that you can easily follow the instructions to maximize the features of your camera.
-
Page 3: Table Of Contents
Table of Contents GETTING STARTED Package Contents ..........................4 System Requirements ........................4 Camera Overview ..........................5 Loading the Batteries ........................6 Inserting an SD Card (Optional) ....................... 6 Turning the Camera On and Off ....................... 7 Turning the LCD/Icons On and Off ....................7 Setting the Camera’s Operational Mode ................... - Page 4 CONNECTING TO PC Installing Software ........................... 19 Downloading Pictures and Video Clips onto Your Computer ............20 Unplugging Your Camera from the Computer ................21 Using the Camera as A Web Camera ..................... 21 APPENDIX Troubleshooting ..........................22 Specifications ..........................24 Getting Help ............................
-
Page 5: Getting Started
GETTING STARTED GETTING STARTED PACKAGE CONTENTS Check if all of the items shown below are included . Digital camera USB cable Wrist strap 3x AAA Batteries Quick Start guide CD-ROM (Includes Camera Driver, Photo editing software, multi-lingual User’s Guide etc.) Battery charger (Optional) SYSTEM REQUIREMENTS Windows:... -
Page 6: Camera Overview
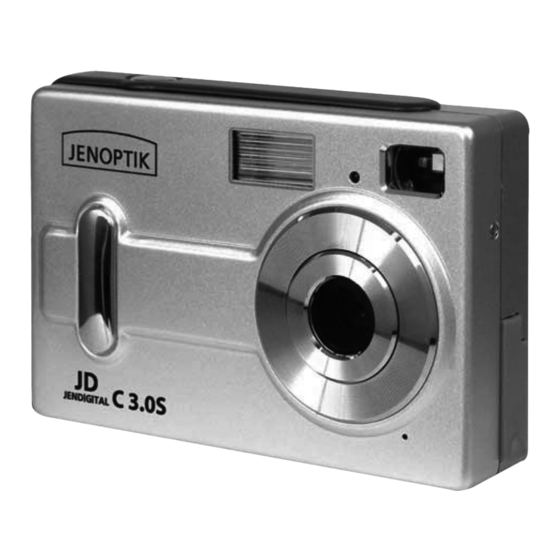
GETTING STARTED CAMERA OVERVIEW Front View 1. Flash 2. Self-Timer LED 3. Lens 4. Viewfinder 5. USB port 6. Tripoad Socket Back View 7. Flash Ready LED 8. Shutter Button 9. Power Button 10.Wrist Strap Holder 11. Battery/Memory Card Door 12. -
Page 7: Loading The Batteries
GETTING STARTED LOADING THE BATTERIES The camera uses 3x AAA alkaline or rechargeable batteries. 1. Slide the Battery Door and lift it open. 2. Insert the batteries according to the polarity indication engraved on the battery contact. 3. Close the battery compartment cover. Checking the Battery Level The battery level indicates the power of the batteries. -
Page 8: Turning The Camera On And Off
GETTING STARTED TURNING THE CAMERA ON OR OFF Press and hold the Power button for a few second to turn the camera on. The blue Flash Status LED will light up first, and then the LCD will turn on automatically. The camera will be turned on at the last set mode. -
Page 9: Setting The Camera's Operational Mode
GETTING STARTED SETTING THE CAMERA’S OPERATIONAL MODE The camera has four capture modes and a review mode: Mode Icon Description Single Use this mode to take pictures. Use this mode to take pictures where you want to be Self-Timer included in the photograph Capture mode Use this mode to record video clips in 320x240... -
Page 10: Taking Pictures And Video Clips
TAKING PICTURES AND VIDEO CLIPS TAKING PICTURES AND VIDEO CLIPS Shutter button Power button TAKING PICTURES 1. Power on the camera. 2. Set the camera to Single capture mode ( ). (p. 8) 3. Frame your subject with the LCD or viewfinder. •... -
Page 11: Taking Pictures With Self-Timer
TAKING PICTURES AND VIDEO CLIPS TAKING PICTURES WITH SELF-TIMER This function is useful for taking pictures where you want to be included in the photograph. Fix the camera securely on a tripod or the flat surface for self-timer shooting. 1. Power on the camera. 2. -
Page 12: Setting Image Quality
TAKING PICTURES AND VIDEO CLIPS SETTING IMAGE QUALITY The camera provides two image quality settings: Mode Quality Indicator Description High Can be used for printing images Standard Can be used for general purpose pictures. 1. Power on the camera. 2. Make sure the camera to set at Capture mode instead of Review Quality mode. -
Page 13: Setting White Balance
TAKING PICTURES AND VIDEO CLIPS Setting White Balance When the white balance is set to match the light source, the camera can take picture more accurately. The camera sets the white balance automatically according to shooting Auto (Default) conditions. Daylight Use when shooting outdoors in sunlight on a clear day. -
Page 14: Taking Video Clips
TAKING PICTURES AND VIDEO CLIPS TAKING VIDEO CLIPS The camera provides two video resolutions: Icon Resolution Frame Rate (per second) Description 320 x 240 10 fps Suitable for both view and email. 192 x 144 10 fps Best for e-mail. 1. -
Page 15: Customizing Your Camera Settings
CUSTOMIZING YOUR CAMERA SETTINGS CUSTOMIZING YOUR CAMERA SETTINGS SETTING AUTO POWER OFF By default the camera will be turned off automatically to save battery power after being idled for 30 seconds. However, you can set the auto-off timing freely. Auto Power Off Auto Power Off Cancel 03:00... -
Page 16: Setting Anti-Flicker Frequency
CUSTOMIZING YOUR CAMERA SETTINGS SETTING ANTI-FLICKER FREQUENCY While taking pictures or recording video clips under indoor florescent lighting, the flicker of the light source will decrease the image quality. To overcome this phenomenon, you can change the light frequency setting to suit the light source. 50Hz (Default) Setting the flicker frequency to 50 Hz. -
Page 17: Reviewing Your Files
REVIEWING YOUR FILES REVIEWING YOUR FILES VIEWING FILES 1. Press the Review button to enter playback mode. The LCD will show the stored pictures and or video clips in Thumbnail View mode by default. The last file will be highlighted with a yellow border. The file type will be shown on the upper left corner of the LCD: •... -
Page 18: Deleting Stored Files
REVIEWING YOUR FILES DELETING STORED FILES Note: Once file is deleted, it cannot be recovered. Deleting One File Erase 1. When the file to be deleted is shown on the LCD, press the Menu button. Cancel 2. Press button to highlight Erase. 3. -
Page 19: Printing Stored Pictures
PRINTING STORED PICTURES PRINTING STORED PICTURES SELECTING PICTURES FOR PRINTING You can select pictures that were stored on SD card for direct printing by a photo developing service center or on a direct print compatible printer. 1. In Review mode, press the Menu button 2. -
Page 20: Connecting To Pc
CONNECTING TO PC CONNECTING TO PC INSTALLING SOFTWARE (FOR WINDOWS USERS) The software CD provided in your camera package contains the following items: Installation Requirement Option Function Windows Windows Windows Windows 98SE 2000 Enables the camera to become an Required No need No need No need... -
Page 21: Downloading Pictures And Video Clips Onto Your Computer
CONNECTING TO PC Step 4 When the splash screen appears, click the software you want to install to start installing the software. Step 5 Follow the on-screen instructions to complete the installation. Note: To ensure the smooth running of the software just installed, please reboot your computer even if the computer did not remind you to restart. -
Page 22: Unplugging Your Camera From The Computer
CONNECTING TO PC UNPLUGGING YOUR CAMERA FROM THE COMPUTER Windows 98SE: fig.1.1 Unplug the Mini-USB from the camera directly. Windows ME/2000/XP: 1. Turn the camera off. 2. Click once on the “Unplug or Eject Hardware” icon on the right hand side of your task bar. (fig. 1.1) 3. -
Page 23: Appendix
APPENDIX APPENDIX TROUBLE SHOOTING Problem Possible Cause Possible Solution Camera Press the Power button to turn the camera The power is not on. The batteries were not The correct direction to insert the AAA loaded properly. batteries is indicated on the camera. The camera is not Replace with unused alkaline or fully running. - Page 24 APPENDIX Ensure hands are steady when taking Hands were not steady picture and remain steady one second when taking the picture. after clicking the Shutter button. The lens is dirty. Clean the lens. The pictures are blurred. Keep a minimum distance of 1.5m (5ft.) The picture subject was between the picture subject and the not in the focus range of...
-
Page 25: Specifications
APPENDIX SPECIFICATION Image Sensor CMOS Sensor, 3 Mega pixel, 4 Mega pixel by interpolation Lens Specification F 2.8, f = 8.35 mm, 2G2P Shutter Speed Electronic shutter 1/5000-1/5Sec. Focus Range 1.5m to Infinity Flash Range 1.0m to 1.5m Flash Strobe Auto, Flash On, Flash Off White Balance Auto / Daylight / Dusk / Tungsten / Fluorescent /Sunrise... -
Page 26: Getting Help
Website FAQ Please visit our website at www.jenoptik-camera.com to view the Frequently Asked Questions (FAQ). Website Customer Support If the problem you are encountering is not listed in the FAQ section, please send us an email through our web site by clicking on Contact Us. -
Page 27: Safety Tips And Maintenance
APPENDIX SAFETY TIPS AND MAINTENANCE Cleaning the camera body Please use a soft dry cloth to clean the camera. Cleaning the lens and LCD 1. Blow off dirt or dust with a blower or canned air. 2. Gently wipe the lens and/or LCD with a micro-fiber cloth. 3. - Page 28 APPENDIX • It is normal that the temperature of the camera body rises after being in use for a long period. • Do not leave this camera in places subject to extremely high temperatures such as in a sealed vehicle, direct sunlight or other places with extreme variances in temperature. Exposure to extreme temperatures may adversely affect the camera’s internal components and could cause a fire.
-
Page 29: Regulatory Information
APPENDIX REGULATORY INFORMATION FCC INFORMATION FCC WARNING: This equipment meets the limits for a Class B digital device, pursuant to Part 15 of FCC rules. Only the cable supplied with the camera should be used. Operation with other cables is likely to result in interference to radio and TV reception and could void the user’s authorization to operate this equipment. - Page 30 The Jenoptik trademark is used by Concord Camera Corp. and its subsidiaries under license. Concord and the Concord logo are registered trademarks or trademarks of Concord Camera Corp., in the United States and/or other countries.
- Page 31 Visit Concord on the Internet www.jenoptik-camera.com Version 1.0 JDC 3.0S User’s Guide 585750-00 Copyright 2005 Concord Camera Corp.
Need help?
Do you have a question about the JDC 3.0S and is the answer not in the manual?
Questions and answers