
Related Manuals for Siemens CM836GP 6 Series


Summary of Contents for Siemens CM836GP 6 Series
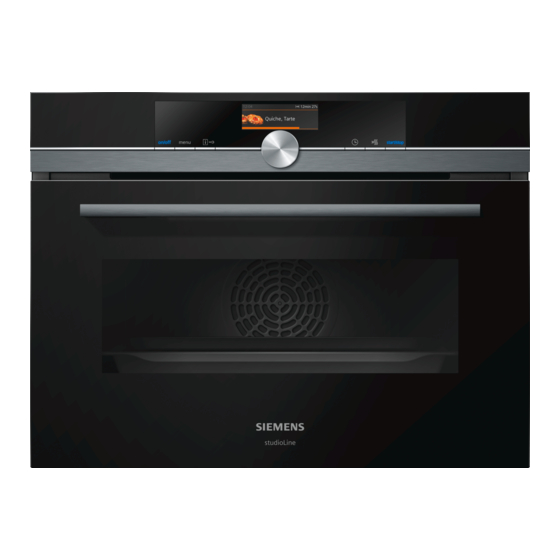
- Page 1 Oven CM836GP.6 User manual and installation instructions Register your product on My Siemens and discover exclusive ser- vices and offers. siemens-home.bsh-group.com/welcome The future moving in. Siemens Home Appliances...
-
Page 2: Table Of Contents
en Safety Table of contents 1 Safety Observe the following safety instructions. 1.1 General information INFORMATION FOR USE ¡ Read this instruction manual carefully. Safety .............. 2 ¡ Keep the instruction manual and the Preventing material damage ....... 6 product information safe for future refer- Environmental protection and saving en- ence or for the next owner. -
Page 3: Safety
Safety en 1.4 Safe use Hot steam may escape when you open the appliance door. Steam may not be visible, de- Always place accessories in the cooking com- pending on the temperature. partment the right way round. ▶ Open the appliance door carefully. → "Accessories", Page 12 ▶... - Page 4 en Safety If the insulation of the power cord is dam- 1.5 Microwave aged, this is dangerous. CAREFULLY READ THE IMPORTANT SAFETY ▶ Never let the power cord come into contact INSTRUCTIONS AND KEEP THEM SAFE FOR with hot appliance parts or heat sources. FUTURE USE ▶...
- Page 5 Safety en Using the appliance for anything other than its WARNING ‒ Risk of burns! intended purpose is dangerous. This is be- Foods with peel or skin may burst or explode cause, for instance, overheated slippers, pil- during heating, or even afterwards. lows filled with grain or cereal, sponges and ▶...
-
Page 6: Preventing Material Damage
en Preventing material damage Never operate the appliance if the cooking WARNING ‒ Risk of electric shock! compartment door or the door seal is dam- The appliance uses a high voltage. aged. Microwave energy may escape. ▶ Never remove the casing. ▶ Never use the appliance if the cooking WARNING ‒ Risk of serious harm to compartment door, the door seal or the health! -
Page 7: Environmental Protection And Saving En- Ergy
Environmental protection and saving energy en 2.2 Microwave Placing aluminium containers in the appliance may cause sparks, which will damage the appliance. Follow these instructions when using the microwave. ▶ Do not use aluminium containers in the appliance. ATTENTION! Operating the appliance without food in the cooking Metal touching the wall of the cooking compartment compartment may lead to overloading. -
Page 8: Familiarising Yourself With Your Appliance
en Familiarising yourself with your appliance 4 Familiarising yourself with your appliance 4.1 Control panel Buttons The buttons on the left- and right-hand side of You can use the control panel to configure all functions the control panel have a pressure point. Press of your appliance and to obtain information about the a button to execute its function. - Page 9 Familiarising yourself with your appliance en If you have set a cooking time and the cooking time is ¡ Heating-up control deleted, the countdown time takes over from the time After the operation starts, the heating-up indicator that has already elapsed from the cooking time. You displays the rising temperature in the cooking com- can therefore always check how long the operation has partment.
-
Page 10: Operating Modes
en Operating modes Cooling fan If the self-cleaning surfaces no longer clean themselves adequately during operation, heat up the cooking com- The cooling fan switches on and off depending on the partment specifically to the right temperature. appliance's temperature. The hot air escapes above → "Cleaning self-cleaning surfaces in the cooking com- the door. - Page 11 Operating modes en Symbol Types of heating Temperature What it's used for and how it works range Possible additional options Top/bottom heating 30–300 °C Gently cook selected dishes. Heat is emitted from above and below. This heating function is most effective between 150 and 250 °C. This type of heating is used to measure the energy consumption in the conventional mode.
-
Page 12: Accessories
en Accessories 6 Accessories Use original accessories. These have been made espe- The accessories supplied may differ depending on the cially for your appliance. appliance model. Note: Accessories may become deformed if they get hot. Deformation has no effect on function. As the ac- cessory cools down, it will regain its original shape. -
Page 13: Basic Operation
button lights up blue. The appliance will switch itself off automatically if it is ‒ not used for a certain period of time. a The Siemens logo appears in the display. A type of ▶ heating and a temperature are then displayed. Press ... -
Page 14: Rapid Heating
en Rapid heating 8.6 Setting the type of heating and the a The time or residual heat indicator appears in the display. temperature When you switch on the appliance, the types of heating 8.3 Starting operation operating mode is set automatically. You must start each cooking operation. Turn the rotary selector to select the required type ATTENTION! of heating. - Page 15 Time-setting options en 10 Time-setting options 10.3 Setting the cooking time Your appliance has different time-setting options, with which you can control its operation. You can set a cooking time for operation of up to 23 hours 59 minutes. 10.1 Overview of the time-setting options Requirement: The type of heating and a temperature You can set a cooking time and an operation end time or setting have been set.
-
Page 16: Microwave
en Microwave Cancelling the end time To set a later end time, turn the rotary selector. Press to start the operation. The set end time can only be changed when the oven a The status bar shows a notification when the opera- is in standby mode. - Page 17 Microwave en You can switch off this drying function in the basic Cookware and ac- Information settings. cessories → "Basic settings", Page 24 Metal cookware and Metal can be used with Micro- bakeware Combi. WARNING ‒ Risk of burns! Note: Metal must be kept at At the highest settings in microwave only mode, the least 2 cm from the cooking drying function will automatically switch on an addi- compartment walls and the in-...
- Page 18 en Meat probe ¡ Circulated air grilling If necessary, set another combination. ‒ ¡ Grill, large area When the food is ready, press to switch the ‒ ¡ Grill, small area appliance off. Possible microwave power settings include: Changing the temperature ¡...
- Page 19 Meat probe en 12.3 Setting the meat thermometer Thin Insert the meat probe into the thickest pieces part of the meat from the side. The roasting sensor measures the temperature inside of meat the food between 30 °C and 99 °C. Thick Insert the meat probe diagonally into the Requirements pieces meat from above, pushing it in as far as...
- Page 20 en Dishes Changing the type of heating Beef Core temperature in °C When you change the type of heating, the other set- tings are also reset. Tenderloin or sirloin, rare 45 - 52 Press to pause operation. Tenderloin or sirloin, medium rare 55 - 62 Press the type of heating.
-
Page 21: Meat Probe
Dishes en Recommended settings Category Foods For the recommended settings, the optimum type of Side dishes, Vegetables heating is preset. The display shows the type of heat- vegetables Potatoes ing. Rice You can adjust the preset temperature and the cooking Cereals time. -
Page 22: Childproof Lock
en Childproof lock Press to silence the audible signal manu- a Once the cooking time has elapsed, an audible sig- ‒ ally. nal sounds. The appliance stops heating. The noti- If you want to extend the cooking time again, fication for extending the cooking time appears ‒... - Page 23 Home Connect en 16.1 Setting up Home Connect Open the Home Connect app and scan the follow- ing QR code. Requirements ¡ The appliance is connected to the power supply and is switched on. ¡ You have a mobile device with a current version of the iOS or Android operating system, e.g.
-
Page 24: Sabbath Mode
en Basic settings As soon as a software update is available, you will be 16.6 Data protection informed via the Home Connect app and will be able to Please see the information on data protection. start the software update via the app. Once the update The first time your appliance is registered on a home has been successfully downloaded, you can start in- network connected to the Internet, your appliance will... -
Page 25: Cleaning And Servicing
Cleaning and servicing en Select the "Settings" operating mode. Basic setting Selection a The first basic setting appears. Home Connect Home Connect Settings Press to switch between the different settings. → "Home Connect ", Use the rotary selector to change the basic setting. Page 22 Press ... -
Page 26: Rails
en Cleaning and servicing Area Suitable cleaning agents Information Door cover ¡ Made of stainless Do not use glass cleaner or a glass scraper. steel: Do not use stainless steel care products. Stainless steel cleaner Tip: Remove the door cover for thorough cleaning. ¡... - Page 27 Cleaning assistance en For some surfaces, you can use alternative Remove accessories and cookware from the cook- ‒ cleaning agents. ing compartment. → "Suitable cleaning agents", Page 25 Detach the shelf supports and remove them from the cooking compartment. Dry with a soft cloth. → "Rails", Page 29 Remove coarse dirt using soapy water and a soft 18.3 Cleaning self-cleaning surfaces in the...
- Page 28 en Drying 20 Drying To prevent residual moisture, dry the cooking compart- In order to use the drying function, set the drying ‒ ment following operation. function. → "Setting the drying process", Page 28 ATTENTION! If there is water on the cooking compartment floor Setting the drying process when operating the appliance at temperatures above Allow the appliance to cool down.
- Page 29 Rails en Push the front pane to the appliance until the left- WARNING ‒ Risk of serious harm to health! and right-hand hook is opposite the support . If the screws are undone, the safety of the appliance can no longer be guaranteed.
-
Page 30: Troubleshooting
en Troubleshooting 22.2 Fitting the retainers Hook the rear retainers with the hook into the top hole and push them into the bottom hole . The retainers may fall out when you detach the rails. Note: The retainers at the front differ from those at the rear. 22.3 Attaching the rails Notes ¡... -
Page 31: Customer Service
Troubleshooting en Fault Cause and troubleshooting The appliance is not There has been a power cut. working. ▶ Check whether the lighting in your kitchen or other appliances are working. Electronics fault Briefly disconnect the appliance from the power supply by switching off the fuse. Reset the basic settings to the factory settings. -
Page 32: Declaration Of Conformity
▶ Next time, set lower or higher values. Tip: A lot of information about the food preparation and corresponding setting values can be found on our website siemens-home.bsh-group.com . 24 Disposal 24.1 Disposing of old appliance This appliance is labelled in accord- ance with European Directive Valuable raw materials can be reused by recycling. -
Page 33: How It Works
How it works en UK (NI) 5 GHz WLAN (Wi-Fi): For indoor use only. 5 GHz WLAN (Wi-Fi): For indoor use only. 27 How it works Here, you can find the ideal settings for various types Use the 4D hot air heating function. of food as well as the best accessories and cookware. Notes We have perfectly tailored these recommendations to ¡... - Page 34 en How it works Roasting in uncovered cookware 27.4 Microwave cooking ¡ Use a deep roasting dish. If you use the microwave mode, you can reduce the ¡ If you do not have any suitable cookware, you can cooking time considerably. use the universal pan. General information Roasting in covered cookware ¡...
- Page 35 How it works en 27.7 List of foods Recommended settings for a variety of foods, sorted into food categories. Recommended settings for various types of food Food Accessory/cook- Shelf pos- Heating Temperature in Microwave Cooking ware ition function °C power setting time in in W mins → Page 10...
- Page 36 en How it works Food Accessory/cook- Shelf pos- Heating Temperature in Microwave Cooking ware ition function °C power setting time in → Page 10 in W mins Lasagne, frozen, 400 g Uncovered cook- 200 - 210 20 - 25 ware Potato gratin, raw in- Ovenproof dish ...
- Page 37 How it works en Food Accessory/cook- Shelf pos- Heating Temperature in Microwave Cooking ware ition function °C power setting time in → Page 10 in W mins Millet, whole, 250 g, + Covered cookware 1. 600 1. 8 - 10 2. 180 2.
- Page 38 en How it works 27.8 Special cooking methods and other Requirement: The cooking compartment is cold. applications Use fresh, clean, hygienic meat without bones. Place the cookware onto the wire rack at level 1 in Information and recommended settings for special the cooking compartment. cooking methods and other applications, e.g.
- Page 39 How it works en Food Accessory/cook- Shelf pos- Heating Temperature in Microwave Cooking ware ition function °C power setting time in → Page 10 in W mins Minced meat, mixed, Uncovered cook- 1. 180 1. 5 2. 90 2. 10 - 15 500 g ware 1.
- Page 40 en How it works Food Accessory/cook- Shelf pos- Heating Temperature in Microwave Cooking ware ition function °C power setting time in → Page 10 in W mins Plated meal, 1 portion Covered cookware 4 - 8 Chilled Bakes, 400 g, e.g. Uncovered cook- ...
-
Page 41: Installation Instructions
Installation instructions en Food Accessory/cookware Shelf posi- Heating Temperature in °C Cooking time tion function in mins → Page 10 Hot water sponge cake Springform cake tin, 160–170 25–35 diameter 26 cm Hot water sponge cake Springform cake tin, 160–170 30–45 diameter 26 cm... -
Page 42: 28.1 General Installation Instructions
en Installation instructions 28.1 General installation instructions Follow these instructions before you start with the installation of the appliance. ¡ The installation cabinet must not have a back panel behind the appliance. There ¡ Wear protective gloves so that you do not should be a gap of at least 35 mm cut yourself. - Page 43 Installation instructions en 28.3 Installation below a worktop ¡ To ventilate the appliance, the intermediate floor must have a ventilation cut-out. Observe the installation dimensions and the installation ¡ The worktop must be secured to the built-in unit. instructions when installing below a worktop. ¡...
- Page 44 en Installation instructions panel or fit a ventilation grille. Ensure that the air ex- ¡ The power cable must only be replaced with a cable change is guaranteed in accordance with the dia- from the original manufacturer. This is available from gram.
- Page 45 Installation instructions en Screw the appliance into place. For handleless kitchens with vertical bar handle strips: Attach a suitable filling piece in order to cover ‒ any sharp edges and to guarantee a safe install- ation. Pre-drill aluminium profiles to establish a screw ‒...
- Page 48 Valid within Great Britain: Imported to Great Britain by BSH Home Appliances Ltd. Grand Union House Old Wolverton Road Wolverton, Milton Keynes MK12 5PT United Kingdom Manufactured by BSH Hausgeräte GmbH under the trademark licence of Siemens AG *9001617054* 9001617054 (020503)