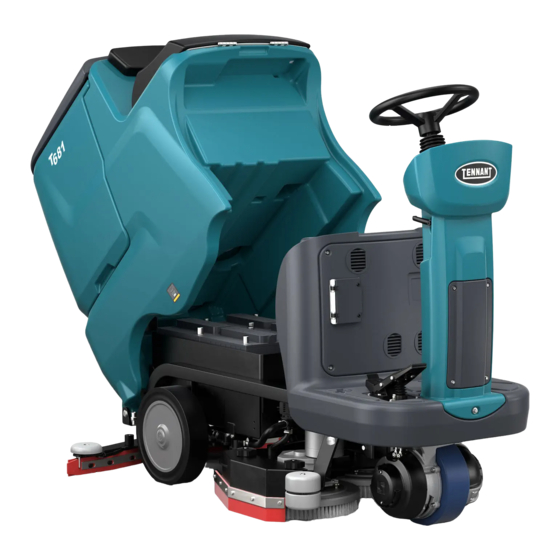
Tennant T681 Operator's Manual
Battery floor scrubber
Hide thumbs
Also See for T681:
- Technical & service manual (92 pages) ,
- Quick manual (2 pages) ,
- Operator's manual (34 pages)
Table of Contents

Related Manuals for Tennant T681


Summary of Contents for Tennant T681
- Page 1 T681 BATTERY FLOOR SCRUBBER OPERATOR’S MANUAL (EN) Model Part No.: LPTB03308 - SCRUBBER [T681 70CM,CD,PD,ANZ] To view, print or download the parts manual, visit: www.tennantco.com/manuals PLDC04602 www.tennantco.com Rev. 01 (07-2022)
-
Page 2: Table Of Contents
TABLE OF CONTENTS IMPORTANT SAFETY PRECAUTIONS ..........................3 SAFETY SYMBOLS ................................6 TECHNICAL SPECIFICATIONS .............................7 MACHINE DIMENSIONS ................................8 GENERAL INFORMATION ..............................9 Purpose of this manual ......................................9 Identifying the machine ......................................9 Documentation provided with the machine ................................9 TECHNICAL INFORMATION ..............................10 General description ........................................ -
Page 3: Important Safety Precautions
IMPORTANT SAFETY ! ATTENTION: make certain that the electrical PRECAUTIONS power consumption) indicated on the data plate are compatible with those of the mains electricity supply. Parts of the text requiring special attention are printed in bold and preceded by the symbols illustrated and described Do not use the machine: below. - Page 4 for example in hotels, schools, hospitals, and without making U-turns. The machine must not be used by persons premises generally. Do not use for other (including children) with diminished physical, purposes. sensory or mental capabilities, or lack of The machine can be used only indoors. experience and knowledge, unless they are The machine must be stored only indoors.
- Page 5 Cleaning and maintenance operations that can be performed by the user must not be entrusted to children unless under supervision. All repairs must be carried out by a TENNANT approved service technician. Use only original accessories and spare parts supplied exclusively by the manufacturer, as only these are able to guarantee safe and troublefree operation of the machine.
-
Page 6: Safety Symbols
SAFETY SYMBOLS WARNING! RISK OF CUTTING WARNING! RISK OF CRUSHING LIMBS WARNING! RISK OF ABRASION MAXIMUM SLOPE OPERATOR MANUAL, INSTRUCTIONS FOR USE READ THE OPERATOR'S MANUAL DIRECT CURRENT SYMBOL INSULATION CLASS: THIS CLASSIFICATION ONLY APPLIES TO BATTERY POWERED MACHINES. EXTERNAL BATTERY CHARGER CONNECTION POINT. -
Page 7: Technical Specifications
TECHNICAL SPECIFICATIONS 70cm Disk 85cm Disk 70cm Cylindrical Brush Model Cleaning width Squeegee width 1090 1090 Cleaning capacity per hour 4200 4920 4680 Number of brushes Brush diameter Maximum brush pressure 23,6 Brush rotation speed Brush motor power Drive motor power Suction motor power Machine power (P 1824... -
Page 8: Machine Dimensions
MACHINE DIMENSIONS X-Y-Z: See “TECHNICAL SPECIFICATIONS” table... -
Page 9: General Information
GENERAL INFORMATION Purpose of this manual This manual has been written by the Manufacturer and is an integral part of the machine operators information for maintenance personnel The terms “right” and “left”, “clockwise” and “anti-clockwise” refer to the forward movement of the machine. Constant compliance with the instructions provided in this manual guarantees the safety of the operator and the machine, ensures low running costs and high quality results and extends the working life of the machine. -
Page 10: Technical Information
TECHNICAL INFORMATION Main parts of the machine The main parts of the machine are listed below: General description 1. Dirty water tank. 2. Solution tank. This machine is a scrubber dryer for washing and drying 3. Control panel. 4. Head assembly. 5. -
Page 11: Control Panel
Control panel 29. Drive wheel operating status indicator Led. The machine has the following controls and indicator lights: 16. Battery charge warning light, consisting of 4 Leds that indicate the charge level of the battery. 17. Main switch/Ignition switch: connects disconnects electrical power to and from all functions of the machine. -
Page 12: Accessories
Accessories and polishing. washing. Tynex brushes/rollers: for removing accumulated Pad drive boards: these enable use of the following disks: Yellow pad, for washing and polishing marble and similar surfaces. soiled with stubborn dirt. concentrated detergent independently from the solution tank. SPE CBHD3 battery charger. -
Page 13: Handling And Installation
HANDLING AND INSTALLATION Lifting and transporting the palletized machine ! ATTENTION: during all lifting operations, make sure tipping over or being accidentally dropped. The machine must be loaded onto/unloaded from vehicles in areas with adequate lighting. The machine is packaged on a wooden pallet by the Manufacturer. -
Page 14: Batteries
Press the emergency stop button to turn the WET batteries, preparation: ! DANGER: The installation and connection/ removal of the batteries must be entrusted to a TENNANT-approved service technician (referred to hereinafter as skilled technician). -
Page 15: Batteries: Installation And Connection
! DANGER: during installation of the batteries or any type of battery maintenance, the skilled technician must wear the Personal Protective following precautions: Equipment (gloves, eyewear, overalls, etc.) Contact with the skin can cause irritation; wash needed to limit the risk of accidents. Keep away with soap and water. -
Page 16: Selection Of Battery Charger
Selection of battery charger ! ATTENTION: where machines are shipped without batteries, the machine and the battery charger are factory set for GEL-AGM batteries as the default type of battery, the battery charger setting MUST be changed as described below. Failure to observe these instructions could result in damage to the battery. -
Page 17: Fitting The Brush/Pad Drivers
Fitting the brush/pad drivers ! ATTENTION: before carrying out the operations ! NOTICE Where the terms RIGHT and LEFT appear, this is always referred to the forward movement of the machine Fitting the right brush (or abrasive disk): Position the right hand brush, under the pad drive board. -
Page 18: Fitting The Brushes (Cylindrical Brush Model)
Fitting the brushes (Cylindrical Brush Filling the detergent tank Model) ! ATTENTION: before carrying out the operations ! ATTENTION: before carrying out the operations Assembly: the knobs. temperature of between 4 and 55 °C. ! ATTENTION: the machine has been designed for use with detergents supplied or recommended by the Manufacturer. -
Page 19: Chem Dose (Accessory)
Chem Dose (accessory) ! ATTENTION: before carrying out the operations Position the detergent tank in the housing located under the driving seat. Unscrew the cap of the detergent tank and insert the tapered plug and hose into the neck of the tank. liquids. -
Page 20: Practical Guide For The Operator
PRACTICAL GUIDE FOR THE Working OPERATOR reading the operating and maintenance manual. Clothing and equipment ! NOTICE Wear safety shoes with non-slip soles. The machine is equipped with a safety system Wear protective goggles or visor and safety garments. that prevents it from tipping over by noticeably Depending on the surface being cleaned and on the reducing the speed when steering, independently environment, the protective measures necessary for... - Page 21 Using the “SELECT” button, select the most Begin cleaning, manoeuvring the machine by turning the steering wheel and depressing the washing operation in hand. The following operating pedal to set the machine in motion: front part of modes can be selected: the pedal for forward, rear part for reverse.
-
Page 22: Dual Wash
Dual wash Drying: Press the suction motor button: the suction fan switches on and the squeegee is lowered dirt, scrubbing and drying operations can be performed in two separate stages. Prewash with brushes or pads: Turn the ignition key to switch the machine on. Press the brush button. -
Page 23: Emergency Stop Button
Emergency stop button Battery charge indicator In the event of emergency, this button isolates the machine from its power source. To restart the machine, rotate the button. The indicator shows the level of charge remaining in the batteries, expressed in percentage terms. When the batteries are completely discharged, all cleaning functions remain inhibited until recharging has taken Detergent solution tank empty indicator... -
Page 24: Emptying The Dirty Water Tank
Emptying the dirty water tank Emptying the solution tank ! ATTENTION: before carrying out the operations ! ATTENTION: before carrying out the operations When cleaning operations have been completed, empty The detergent solution tank can be emptied by proceeding the dirty water tank. as follows: If the tank is full, the indicator lights up and the cleaning functions of the machine will be inhibited;... -
Page 25: Removing The The Brush/Pad Drivers
Removing the the brush/pad drivers ! ATTENTION: before carrying out the operations ! NOTICE Where the terms RIGHT and LEFT appear, this is always referred to the forward movement of the machine Releasing the right hand brush (or abrasive disk): Turn the brush “anticlockwise”... -
Page 26: Maintenance Instructions
Maintenance operations on the electrical circuit — and in any event, all other operations not explicitly described in this operating manual — must be performed by a TENNANT approved service technician, in compliance with current safety regulations and as indicated in the maintenance manual. -
Page 27: Fuses: Replacing
Useful battery life is dependent on proper maintenance. To The replacement of fuses must be entrusted only to a following rules: TENNANT service centre or to a TENNANT-approved Do not leave batteries partially discharged for long service technician. periods of time. -
Page 28: Battery Charger Error Codes
Take the battery charger plug from its housing. Battery: removal Plug into the mains power socket. Start the recharge cycle. following precautions: Contact with the skin can cause irritation; wash with soap and water. Inhalation of vapours can cause irritation to the airways;... -
Page 29: Replacement Of Brushes And Pads
Replacement of Brushes and Pads Replacing the squeegee blades ! ATTENTION: before carrying out the operations ! ATTENTION: before carrying out the operations The machine can be equipped with disc brushes, roller brushes and pads. Check the brushes and the pads every day to make certain there are no wires, threads or strings time, and the constant wiping action, the edge of the blade entangled around the brush or the drive board. -
Page 30: Periodic Checks
Check the battery charge level at CLEAN THE DIRTY WATER TANK AND THE SOLUTION least once a week TANK CHECK THE BATTERY ELECTROLYTE LEVEL HAVE THE ELECTRICAL SYSTEM CHECKED BY A TENNANT-APPROVED SERVICE TECHNICIAN... -
Page 31: Troubleshooting
TROUBLESHOOTING PROBLEMS CAUSES SOLUTIONS The machine does not work The batteries are disconnected Connect the batteries to the machine Recharge the batteries Blown fuse Replace Ignition key not engaged Turn the key Emergency button pressed Release the emergency button The brushes do not turn The dirty water tank is full Empty the dirty water tank Blown fuse... -
Page 32: Drive Wheel Pcb Alarms
ALARMS/WARNINGS DISPLAYED NO24 Battery below minimum level (18V) NOFR Main fuse blown or power relay fault NOEP EEPROM management error FH20 No water in tank. SH20 Dirty water tank full Machine in the process of shutting down R (xxx) Indicates software release CD (xx) Indicates CHEM DOSE quantity STOP... -
Page 33: Recommended Spare Parts
RECOMMENDED SPARE PARTS T681 85cm Disk Part Number Descriptions MPVR08041 BLADE, SQGE, FRONT, 1170L, LATEX MPVR08037 BLADE, SQGE, REAR, 1170L, LATEX MPVR05808 BLADE, SQGE, FRONT, 1170L, PYU MPVR05810 BLADE, SQGE, REAR, 1170L, PYU MPVR06547 BLADE, SQGE, FRONT, 1170L, LINATEX [STANARD]... - Page 34 MOCC00323 ACTUATOR, SCRUB HEAD KTRI02209 DRIVE ASSY, WHEEL [T681] RTRT00533 MOTORWHEEL, RING REPLMT MOCC00399 MOTOR, TRACTION RDGR00040 GEAR BOX, TRACTION MEVR02030 BRAKE, MOTOR WHEEL MECI00532 CONTACTOR, 24V-100A METT45116 CONTACTOR, T106P, 24V RTRT00539 WHEEL, REAR, PYU [T681] MECE00456 RELAY, BRUSH HEAD...
- Page 36 Tennant Company PO. Box 10400 Clean Street Eden Prairie, MN 55344-2650 Phone: (800) 553- 8033 www.tennantco.com Copyright © 2021 Tennant Company. All rights reserved.
Need help?
Do you have a question about the T681 and is the answer not in the manual?
Questions and answers