
Subscribe to Our Youtube Channel
Related Manuals for Taylor C723


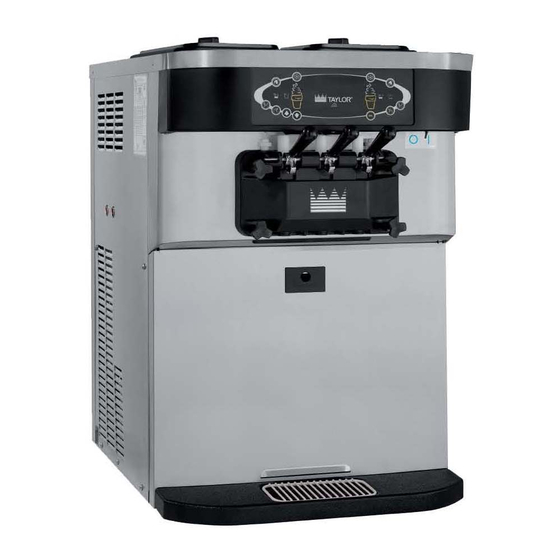
Summary of Contents for Taylor C723
- Page 1 SERVICE MANUAL Model C723 Soft Serve Freezer Original Service Instructions 069127-S 10/12/11 (Original Publication) (Updated 02/05/16)
-
Page 3: Table Of Contents
..........C723 UVC4 Update Instructions . - Page 4 ........... . CAUTION: Information in this manual is intended to be used by Taylor Authorized Service Technicians only.
-
Page 5: Section 1: Introduction
Section 1: Introduction Safety Specifications Running Specifications General Installation Instructions Environmental Notices Important to the Operator Model C723 Introduction... -
Page 6: Safety
The many built-in safety features that currents may exceed 10 mA, particularly are part of all Taylor equipment are aimed at when disconnected, not used for long protecting operators and trained service technicians periods, or during initial installation, shall alike. - Page 7 NEVER use a water jet or hose to rinse or clean this unit. Using a water jet or hose on or around this equipment may result in the electrocution of the user or damage to the equipment. Model C723 Introduction...
-
Page 8: Model C723 Specifications
Model C723 Specifications Freezing Cylinder Air Cooled The Model C723 air cooled unit requires a minimum Two, 2.8 quart (2.7 liter) of 6” (152 mm) on the left and right sides and 0” on the back. The Model C723 unit equipped with top air discharge Mix Hopper chute directs heated air exhaust upward. - Page 9 Model C723 Specifications (Continued) Model C723 and C20600-000 Cart Figure 1 Model C723 and C20600-AFB Cart Figure 2 140401 Model C723 Introduction...
-
Page 10: Running Specifications
Pressures/Temperatures Low Side (Suction) The following are the Taylor recommended settings Suction pressure equals expansion valve setting. for various components within this model. The C723 uses R404A. High Side (Discharge) Expansion Valve (AXV) High side pressure varies for air cooled units, depending on the ambient temperature. -
Page 11: General Installation Instructions
Care should be taken to ensure that all basic safety practices are followed during the installation and The Model C723 air cooled unit requires a minimum servicing activities related to the installation and of 6” (152 mm) on the left and right sides and 0” on service of Taylor equipment. - Page 12 If the supply cord is damaged, it must be replaced by an authorized Taylor service CAUTION: THIS EQUIPMENT MUST BE technician in order to avoid a hazard. PROPERLY GROUNDED! FAILURE TO DO SO...
- Page 13 Note: The following repairs must be performed by Refrigerant an authorized Taylor Service Technician. In consideration of our environment, Taylor proudly uses only earth friendly HFC refrigerants. The HFC refrigerant used in this unit is R404A. This refrigerant is generally considered nontoxic and Disconnect all power to the unit.
-
Page 14: Environmental Notices
If the crossed-out wheeled bin symbol is It should be noted that Taylor does not warrant the affixed to this product, it signifies that this product is refrigerant used in its equipment. For example, if the... -
Page 15: Important To The Operator
Important to the Operator Model C723 Figure 4 ITEM DESCRIPTION ITEM DESCRIPTION POWER SWITCH SELECT KEY LIQUID CRYSTAL DISPLAY SERVICE MENU KEY KEYPADS BRUSH CLEAN COUNTER MIX OUT INDICATOR ARROW KEYS STANDBY KEY SYRUP HEATER KEY (INACTIVE) MIX LOW INDICATOR... - Page 16 Fluorescent Display Your Taylor equipment is designed with these International symbols. The fluorescent display is located on the front control panel. During normal operation, the display is blank.
- Page 17 (See Figure 5.) hole. Install the air orifice. Model C723 Introduction...
- Page 18 5 to 7-1/2 oz. (142 to 213 g.) of product by weight per 10 seconds. To INCREASE the flow rate, tighten the screw. To DECREASE the flow rate, loosen the screw. (See Figure 6.) Figure 6 Introduction Model C723...
-
Page 19: Section 2: Controls, Systems And Operations
Section 2: Controls, Systems and Operations Universal Control Programming Freezer Lockout Timers Beater Stir Cycles Setting Viscosity Jumper Pins - UVC4 Control Overview Refrigeration Schematic Refrigeration System Components Model C723 Controls, Systems and Operations... -
Page 20: Universal Control Programming
After with the alarm on for 60 seconds or until any control hour 99, it will change to a letter and a number key is pressed. (example: A0, A1, ... B0, B1, etc.). Controls, Systems and Operations Model C723... - Page 21 Note: The machine will continue operation in the mode it was in when the menu was selected. However, the control keys will not be illuminated and are non-functional when the Manager's Menu is displayed. Figure 12 140519 Model C723 Controls, Systems and Operations...
- Page 22 UP arrow key to move the arrow (>) to “YES” and > Exit then press the SEL key. The servings counter will reset to zero and return to the Manager's Menu. (See Figure 14.) Figure 17 Controls, Systems and Operations Model C723...
- Page 23 (See Figure 24.) AUTO START TIME Figure 20 DISABLED Enable > Disable Pressing the SEL key with the arrow next to the appropriate month will display the following screen. (See Figure 21.) Figure 24 Model C723 Controls, Systems and Operations...
- Page 24 Pressing the SEL key any time faults are > Exit displayed will clear corrected faults upon returning to the Manager's Menu. Press the Menu key to return Figure 27 to the Manager's Menu. Controls, Systems and Operations Model C723...
- Page 25 Note: Refer to your local health codes regarding variable messages that may appear. Press the SEL temperature recommendations for procedures to key to return to the Manager's Menu. follow if these fault screens appear. Model C723 Controls, Systems and Operations...
- Page 26 Press the SEL or MENU keys to machine. (See Figure 32.) return to the Manager's Menu. (See Figure 35.) SOFTWARE VERSION VISC C723 CONTROL UVC4 HOPPER 41.0 41.0 VERSION V00.00.000 BARREL 41.0...
- Page 27 COMPRESSOR ON DELAY BEATER OFF DELAY MIX PUMP OFF DELAY STANDBY TEMP EDIT UNIT ID CUT IN AT 39.0 SELECT LANGUAGE CURRENT 39.0 > Next MANUAL CONTROL SOFTWARE UPDATE RESET TO DEFAULTS Figure 39 Model C723 Controls, Systems and Operations...
- Page 28 0.1 amp. Pressing SEL key accepts the setting and returns to the the SEL key accepts the viscosity setting and Service Menu screen. returns to the Service Menu screen. 120127 Controls, Systems and Operations Model C723...
- Page 29 − Pressing the UP or DOWN arrow key increases or decreases the time delay by one second, respectively. Pressng the SEL key accepts the setting and returns to the Service Menu screen. Figure 49 Model C723 Controls, Systems and Operations...
- Page 30 Pressing the SEL key with Compressor the arrow next to one of the choices selects that Hopper Cooling choice and returns to the Service Menu screen. If no language is selected, the factory default is English. Controls, Systems and Operations Model C723...
- Page 31 Pressing the SEL key to “No” cancels the update and returns to the with the cursor next to “No” has no effect and Service Menu screen. returns the display to the Service Menu screen. Model C723 Controls, Systems and Operations...
-
Page 32: Freezer Lockout
R: DO NOT DRAW Note: These criteria must be met simultaneously for 5 minutes. These criteria will FREEZER LOCKED be met when the unit is properly brush cleaned, Figure 61 following the procedures in the Operator's Manual. Controls, Systems and Operations Model C723... - Page 33 Power Switch Off screen. (See Figure 64.) Figure 65 POWER SWITCH OFF > English − = − = − = − = − = − Espanol UNIT CLEANED Dansk Francais Figure 64 Figure 66 Model C723 Controls, Systems and Operations...
- Page 34 If a language PRESS SEL KEY has been selected and the unit is powered down, the machine should not ask for a language selection Figure 68 unless there is another FRAM fault. Controls, Systems and Operations Model C723...
-
Page 35: Timers
Standby Temperature, a fault is generated, the brush cleaning, starting with the next hour change alarm sounds, and the compressor continues to run (3:00 PM, 4:00 PM, etc.). until the Standby Temp Setpoint is satisfied. Model C723 Controls, Systems and Operations... -
Page 36: Setting Viscosity
(thickens), the amperage load increases. When the may range from 16_F to 19_F (‐8.8_C to ‐7.2_C). amperage load reaches the setpoint, the (See Figure 70.) refrigeration cycle discontinues. VISCOSITY SETTING VISC AMPS CURRENT Exit Figure 70 Controls, Systems and Operations Model C723... -
Page 37: Beater Motor & Belt Removal
Step 1 Remove the back and side panels. Step 4 Remove the beater motor belt. Step 2 Disconnect the wiring harness plug from the beater Step 5 motor. Set the beater motor aside. Figure 71 Model C723 Controls, Systems and Operations... -
Page 38: Jumper Pin Chart - Uvc4
Heat and Standby keys and hopper temperature display. ** Jumper initially installed at factory. Jumper should be installed on shake machines to enable proximity sensor. It is not active on soft serve units; jumper can remain installed. 131028 Controls, Systems and Operations Model C723... -
Page 39: C723 Control Overview
C723 Control Overview Figure 72 140519 Model C723 Controls, Systems and Operations... -
Page 40: C723 Uvc4 Update Instructions
C723 UVC4 Update Instructions Total Estimated Time: 35 minutes Step 10 Perform a “Reset to Defaults” by selecting “YES” to IMPORTANT! clear all RAM memory. Before performing software update, reset Step 11 the control to defaults. This will clear the... -
Page 41: Refrigeration Schematic
Refrigeration Schematic Figure 73 130409 Model C723 Controls, Systems and Operations... -
Page 42: Refrigeration System Components
Receiver The liquid receiver is a The use of a liquid receiver storage tank for liquid makes the quantity of refrigerant. refrigerant in a system less critical. Controls, Systems and Operations Model C723... -
Page 43: Section 3: Troubleshooting
Section 3: Troubleshooting General Troubleshooting Electrical Troubleshooting Bacteria Troubleshooting Model C723 Troubleshooting... -
Page 44: General Troubleshooting Guide
Worn or missing drive shaft seal. a. If worn, nicked, or missing, replace the rear of the unit into the drip the drive shaft seal. pan. b. Inadequate lubrication. b. Lubricate properly. c. Drive shaft rotates forward. c. Check gear alignment. Troubleshooting Model C723... - Page 45 Lubricate properly. o‐rings. c. Wrong type of lubricate being c. Use proper lubricant. Example: used. Taylor Lube High Performance. 9. Product is not being fed into the a. Inadequate mix in the hopper (mix a. Fill hopper with mix. freezing cylinder.
- Page 46 Check the fault screen in the fault tone. operator's menu. b. Insufficient air space. b. Make sure there is sufficient air space surrounding the unit (see “Specifications”). 21. When “AUTO” is pressed, freezer a. Mix‐out condition. a. Add mix. goes into “STANDBY”. Troubleshooting Model C723...
- Page 47 Make sure the door switch is fully installed. inserted. d. The 24V relay is faulty. d. Replace the relay. e. There is low voltage from the 24V e. Check the power supply transformer. connections/shorts. Replace transformer. Model C723 Troubleshooting...
-
Page 48: Electrical Troubleshooting Guide
Electrical Troubleshooting Guide MODES OF OPERATION: COMPONENT STANDBY WASH AUTO Compressor Beater Motor Agitator Troubleshooting Model C723... -
Page 49: Electrical Troubleshooting Guide
7 of At the completion of a draw, the beater motor and the J6 terminal, beater interlock relay, and to the compressor are cycled off by the personality board beater motor contactor coil. amperage monitor. Model C723 Troubleshooting... -
Page 50: Bacteria Troubleshooting
3. Worn, damaged, or cracked parts. a. Provide a food grade lubricant (example: Taylor Lube). b. Inspect o‐rings for holes or tears. O‐rings, seals and other wear items must be supplied by the freezer company to meet food industry standards. - Page 51 45_F (7.2_C) will allow cell division in as little as one hour. f. Once the mix is placed in the hopper, covers must be properly installed to maintain adequate refrigeration and to prevent airborne contaminants from entering the mix. Model C723 Troubleshooting...
- Page 52 Notes: Troubleshooting Model C723...
-
Page 53: Section 4: Parts
Section 4: Parts Parts Warranty Explanation Parts Identification Parts List Wiring Diagrams Model C723 Parts... -
Page 54: Parts Warranty Explanation
Class 000 Parts: Wear Items ‐ no warranty. CAUTION: Warranty is valid only if required service work is provided by an Authorized Taylor Service Technician. NOTE: Taylor reserves the right to deny warranty claims on equipment or parts if a non-approved refrigerant was installed in the machine, system modifications were performed beyond factory recommendations, or it is determined that the failure was caused by neglect or abuse. - Page 55 Notes: Model C723 Parts...
-
Page 56: Model C723 Exploded View
Model C723 Exploded View Figure 74 150603 Parts Model C723... - Page 57 Model C723 Exploded View Parts Identification ITEM DESCRIPTION PART NO. ITEM DESCRIPTION PART NO. SHELL A.-INSULATED X81793-SER SCREW-8X1/4 SLTD HEX 009894 BEARING-REAR SHELL 031324 CLAMP-DRYER 9.5" LONG 002911 WASHER-BEARING LOCK 012864 CHANNEL-REAR BEARING 041819 NUT-BEARING 028991 PAN A.-DRIP-HINGED X41844 GUIDE-DRIP SEAL...
- Page 58 Model C723 Exploded View Parts Identification (Cont'd.) ITEM DESCRIPTION PART NO. ITEM DESCRIPTION PART NO. PROBE A.-MIX X56912 NUT-1/4-20 FINISHED HEX NUT 000707 SPACER-PROBE-MIX-UPPER 056910 SCREW-10-32X2-1/4 SLOT RD 057610 PROBE-MIX OUT 056908 O-RING 1-3/8 OD X .070 W 017395 SPACER-PROBE-MIX-MIDDLE...
- Page 59 Model C723 Operator Parts Figure 75 140519 Model C723 Parts...
- Page 60 Model C723 Operator Parts Identification ITEM DESCRIPTION PART NO. ITEM DESCRIPTION PART NO. COVER-HOPPER 041682-BLA SCREW-1/4-20X3/8 SLTD 011694 ORIFICE 022465-100 SCREW-WING HEAD 081582 O-RING-3/8 OD X .070W 016137 TRAY-DRIP 080781 (100 TO BAG) SHIELD-SPLASH-WIRE 046177-SP TUBE A.-FEED-SS-5/32 HOLE X29429-2 PAN A.-DRIP 15 1/8 LONG X51601 O-RING-.643 OD X .077W...
- Page 61 CASTER-3" SWV 3/4-10 STEM 030307 CASTER-3" SWV 3/4-10 STEM 021279 W/BRAKE NOTE: ADA COMPLIANT HEIGHT CART, NOT PANEL-SIDE-STD CART 069428 EQUIPPED WITH A DOOR. PANEL-REAR-STD CART 069429 NOTE: STANDARD HEIGHT CART WITH REVERSIBLE FRONT DOOR PANEL AND REAR PANEL. 140519 Model C723 Parts...
- Page 62 120/200/240V RELAY-3 POLE-20A-208/240 066795-33 FILTER-CORCOM 6EH1 040140-001 SOCKET-RELAY-FOR USE 052112 BLOCK-TERMINAL 2P .25 SPD 051644 W/05211 SCREW-6X5/16 SLTD ROUND B 013646 BUSHING-SNAP 11/16 ID X 7/8 010548 RELAY-DPDT 100UA -7A 1/8HP 052111-03 HARNESS-WIRE-CNTRL 068874 *NOT SHOWN 140519 Parts Model C723...
- Page 63 063922-SER PCB A.-CONTROL*UVC 4 X69137-SER INSULATOR-PCB-INTERFACE 059706 CONTROL-UVC4 - BASE BRD X68114-SER CABLE-RIBBON-20C-17"L-DIL/ 040040-013 INSULATOR-PCB-UVC111 059708 SCREW-8X1/4 SLTD HEX 009894 STANDOFF-NYLON-SNAP-1/2L 053413 BUSHING-SNAP 15/16 ID 023396 CABLE-RIBBON-20C-14"L-DIL/ 040040-040 HARNESS-WIRE-LW V-CNTL 068917 CABLE-RIBBON-20C-16"L-DIL/ 040040-049 * NOT SHOWN 140519 Model C723 Parts...
- Page 64 DESCRIPTION PART NO. ITEM DESCRIPTION PART NO. RELAY-START-COMPRESSOR 062363 CAPACITOR-RUN 25UF/440V 037431 SCREW-8X1/4 SLTD HEX WASH 009894 STRAP-CAPACITOR 7-11/32 037890 CONNECTOR-BX 3/4 STR-2 031231 SCREW-10X3/8 SLOTTED HEX 015582 SCREW HARNESS-WIRE-CAP/RELAY 069079-27 CAPACITOR-START 033044-1 189-227UF/33 *NOT SHOWN 140519 Parts Model C723...
- Page 65 O-RING-1/4 OD X .070W 50 015872 (25 TO BAG) SHAFT-BEATER 054194 HANDLE A.-DRAW X56421-1 SEAL-DRIVE SHAFT 032560 NUT-STUD-BLACK 3.250 LONG 058765 PIN-HANDLE-TWIN 059894 DOOR A.-*SH BAF*W/PRG X68889-SER VALVE A.-DRAW X69615 BAFFLE A.-SHORT 4 IN X50883 O-RING-7/8 OD X .103W-SIL 083693 160205 Model C723 Parts...
- Page 66 ITEM DESCRIPTION PART NO. SPRING-RETURN-LEFT 038923 ARM-DRAW SWITCH-LEFT 069166 BRACKET A.-SPRING-RETURN X69481 ARM-DRAW SWITCH-RIGHT 069167 SPRING-RETURN-RIGHT 038924 ROD-SPRING RETAINER 038254-SP PIN-PIVOT-DRAW SWITCH 038484 SPRING-EXTENSION.467X.062 069392 BRACKET A.-SWITCH X69836 SCREW-ADJUSTMENT-DRAW 069374 PADDLE E-RING 1/4 BLACK PHOS 032190 140519 Parts Model C723...
- Page 67 Switch A-Dual Lever - X69838 Figure 82 ITEM DESCRIPTION PART NO. SWITCH-LEVER-SPDT 10A 028889 WASHER-#6 SAE FLAT 18-8 SS 023546 ACTUATOR-TANDEM LEAF 062408 Model C723 Parts...
- Page 68 SCREW-10-32X3/8 UNSL HWH 039381 CONDENSER-AC 7X6X1.25- 027155 2 ROW GUARD-FAN 028534-1 DRYER-CAP. TUBE .026ID X 13' 047699 SCREW-8X1/4 SLTD HEX WASH 009894 MOTOR-FAN 95.3 CFM 2700 062253-27 SHROUD-DANFOSS 068883 CONNECTOR-BX 3/8 STR-2 014569 HARNESS-WIRE-DANFOSS 081309-27 SCREW *NOT SHOWN 140519 Parts Model C723...
- Page 69 Plate A.-Dec C723 - X68829-SER Figure 84 ITEM DESCRIPTION PART NO. ITEM DESCRIPTION PART NO. PLATE-DEC 068830 SCREW-6-32X3/8 SLTD 002201 PCB A.-INTERFACE 063925-SER CABLE-RIBBON-14C-3"L-SIL/SIL 056864 INSULATOR-PCB-INTERFACE 057168 Model C723 Parts...
- Page 70 X49463-80 SANITIZER-STERA SHEEN SEE NOTE *A sample container of sanitizer is sent with the unit. For reorders, order Stera Sheen part no. 055492 (100 2 oz. packs) or Kay-5 part no. 041082 (200 packs). **Not Shown. 120106 Parts Model C723...
- Page 71 Brushes Figure 86 ITEM DESCRIPTION PART NO. ITEM DESCRIPTION PART NO. BLACK BRISTLE BRUSH 013071 WHITE BRISTLE BRUSH 023316 (3” x 7”) DOUBLE END BRUSH 013072 WHITE BRISTLE BRUSH 013073 (1” x 2”) Model C723 Parts...
- Page 72 DESCRIPTION PART QTY. WARR. REMARKS NUMBER CLASS C72327FW00 & C72333FW00 - 208-230V 60HZ 1PH & 208-230V 60-HZ 3 PH A/C-BRISTOL (R404A) - ROHS COMPLIANT ACCUMULATOR-COPPER 2"DIA 10"LG 047062 ACTUATOR A.-DRAW SWITCH * X69835 S/N M1116244 & UP REPLACES X62401 ARM-DRAW SWITCH-LEFT 069166 ARM-DRAW SWITCH-RIGHT 069167...
- Page 73 DESCRIPTION PART QTY. WARR. REMARKS NUMBER CLASS BUSHING-SNAP 11/16 ID X 7/8OD 010548 BUSHING-SNAP 1-5/8ID X 2 OD 043637 BUSHING-SNAP 15/16 ID X 1-3/32 023396 BUSHING-SPLIT 43/64ID X 7/8OD 027691 MAIN COMP CABLE-CONTROL/INTERFACE * 069023 S/N M1063856 & UP - REPLACED 069024 CABLE-RIBBON-14C-3"L-SIL/SIL 056864 DEC PLATE...
- Page 74 DECAL-INST-CLN HPR 019029 DECAL-TROUBLESHOOT 038374 DIAGRAM-WIRING *C723* 068807-27 208-230V 60HZ 1PH DIAGRAM-WIRING *C723* 068807-33 208-230V 60HZ 3PH DOOR A.-*SH BAF*W/PRG *C723* X68889-SER BAFFLE A.-SHORT 4 IN W/RAD THD X50883 +FRONT BEARING 050216 +GASKET-DOOR HT 4"-DOUBLE 048926 +HANDLE A.-DRAW *C602*C606* X56421-1 +O-RING-1/4 OD X .070W 50 DURO...
- Page 75 081837 S/N M3044207 & UP GUIDE-FILTER-LEFT *C708/C709* 056941 S/N M3044206 & PRIOR GUIDE-FILTER-RIGHT *C708/C709* 056943 S/N M3044206 & PRIOR HARNESS-WIRE-BTR MTR *C723* L 068915-27L 208-230V 60HZ 1PH HARNESS-WIRE-BTR MTR *C723* R 068915-27R 208-230V 60HZ 1PH HARNESS-WIRE-BTR MTR *C723* 068915-33L 208-230V 60HZ 3PH...
- Page 76 DESCRIPTION PART QTY. WARR. REMARKS NUMBER CLASS HARNESS-WIRE-MAIN POWER *C723* 069083-27G 208-230V 60HZ 1PH HARNESS-WIRE-MAIN POWER *C723* 069083-33G 208-230V 60HZ 3PH HARNESS-WIRE-MIX LVL *C723* 068873 INTERLOCK A.-DOOR X65658 SWITCH-REED*DOOR INTERLOCK*68" 056771 JACK A.-FLAVORBURST X56353 KIT A.-DANFOSS *GENERAL* X48314SER2 +COMPRESSOR TL3G-R134A...
- Page 77 +CHANNEL-REAR BEARING DRIP *794 041819 PANEL A.-FRONT *C723* X81843 S/N M3054682 & UP PANEL A.-FRONT *C723* X68777 S/N M3054680 & PRIOR PANEL A.-SHELF *C723* LOWER X81840 S/N M3054682 & UP PANEL A.-FRONT-LOWER *C72 X81841 SCREW-1/4-20X3/8 SLTD ROU 011694 SHELF-DRIP TRAY *C722* 080782 PANEL A.-FRONT-LOWER *C723*...
- Page 78 081582 SHAFT-BEATER 054194 +SEAL-DRIVE SHAFT 032560 SHELF-DRIP TRAY *C722* 080782 S/N M2086696 & UP +SCREW-1/4-20X3/8 SLTD ROUND 011694 SHELF-DRIP TRAY *C723* 068863 S/N M2086695 & PRIOR SHELL A.-INSULATED *C723* X81793-SER S/N M3044207 & UP - REPLACES X68948-SER BEARING-REAR SHELL-NICKEL 031324...
- Page 79 +STUD-NOSE CONE *C602* 055987 SHIELD-SPLASH-WIRE *C722*C72 046177-SP S/N M2086696 & UP SHIELD-SPLASH *M706/707/708 SS 049203 S/N M2086695 & PRIOR SHROUD A.-CONDENSER *C723 X81838 S/N M3044207 & UP SHROUD A.-CONDENSER *C708/C709 X56922 S/N M3044206 & PRIOR STARTER-1 PHASE 4 TO 6.5 AMP 066794-27J 208-230V 60HZ 1PH - UPPER CONTROL +OVERLOAD-THERMAL-1P-4.0/6.5A...
- Page 80 DESCRIPTION PART QTY. WARR. REMARKS NUMBER CLASS VALVE-ACCESS-1/4MFL X 3/8ODSDR 053565 LINE A.-DISCHARGE *C723* +CAP-VALVE-ACCESS 9/16 HEX 054518 +CAP-VALVE-ACCESS 13/16 HEX 054519 VALVE-EPR 1/4S 022665 LINE A.-DANFOSS *C723* VALVE-EXP-AUTO-1/4S X1/4 FPT 046365 +BOOT-VALVE-EXPANSION 050900 VALVE-SOLENOID 7/16 ORF 5/8ODF 048626-27 S/N M2016590 & UP...
- Page 81 +CAPACITOR-RUN 25UF/370VAC 023739 220-240V 50HZ 1PH +CAPACITOR-START 161-193UF 031790 220-240V 50HZ 1PH +RELAY-START-COMPRESSOR 038146 220-240V 50HZ 1PH DIAGRAM-WIRING *C723* 068807-39 220-240 50 HZ 3PH - 200V 50/60HZ 3PH DIAGRAM-WIRING *C723* 068807-40 220-240V 50HZ 1PH DIAGRAM-WIRING *C723* 068807-58 380-415V 50HZ 3N~(4WIRE)
- Page 82 O-RING-1-3/8 OD X .070W 017395 MAGNET A.-AGITATOR-INNER 066937 MAGNET A.-AGITATOR*C708* X57341 SCREW-8-32X3/16 SOCKET SET 006812 MOTOR-AGITATOR-24VAC 50/60 H 050535-03 PLATE-HOLDING-AGITATOR *C708 056587 +CAPACITOR-MOTOR-AGITATOR 057525 SCREW-4-40X1/4 SOCKET HEAD 600165 LABEL-CAUTION-AGITATOR 045191 SHELL A.-INSULATED *C723* X68775-SER STUD-NOSE CONE *C602* 055987 TRANS.-120/208/240V PRI 2 051660...
- Page 83 +O-RING-.500 OD X .070W 024278 +PIN-HANDLE-TWIN *C712/C717* 059894 +VALVE A.-DRAW *C712/C713* X69615 +O-RING-13/16 OD X .103W 019330 KIT A.-TUNE UP-3 SPT C723 X49463-80B REPLACED X49463-80A - NEW KIT INCLUDES ADDITIONAL 083693 O-RING TRIM A.-CORNER-LIGHTS *72 X80240-SER S/N M3044207 & UP CONTROL-ROHS-LED-4 POSITION...
- Page 84 DESCRIPTION PART QTY. WARR. REMARKS NUMBER CLASS CASTER-3" SWV 3/4-10STM X1"P 021279 DOOR A.-STD CART *C723* X69295 HANDLE-STNLS FLUSH PULL 019043 HINGE A.-DOOR *8634* LEFT X45741 HINGE A.-PIN *8634* LEFT X45743 HOOD A.-CART *C723* X69059 MAGNET 6-12LBS. 013645 NUT-10-24 HEX MACHINE SCREW...
- Page 85 DESCRIPTION PART QTY. WARR. REMARKS NUMBER CLASS PANEL A.-FRONT *C723* X81843 PANEL A.-SHELF *C723* X81840-SPN PANEL-REAR *C723*WC 069171-SPN PANEL-SIDE LEFT *C723* 068851-SPN PANEL-SIDE-RIGHT *C723*WC 069170-SPN PLATE-END TERMINAL BLOCK 080969 SHELF-DRIP TRAY *C722* 080782-SPN TRIM-REAR CORNER-L *C723* 068846-SPN TRIM-REAR CORNER-R *C723* 068847-SPN TRIM A.-CORNER-LIGHTS...
- Page 86 --THERMISTOR PROBES-- BEATER 96 95 INTERLOCK WHT/ORN WHT/ORN RELAY BEATER MOTOR OVERLOAD SWITCH WHT/ORN SUCTION BEATER LINE MOTOR SOLENOID STARTER COIL BARREL LIQUID SOLENOID SEE FIG. 3 SOFT SERVE GRN/YEL BEATER MOTOR BEATER MOTOR BEATER MOTOR STARTER STARTER C723 068807-27 11/11/13...
- Page 87 FUSE BEATER 96 95 INTERLOCK WHT/ORN WHT/ORN RELAY BEATER MOTOR OVERLOAD SWITCH WHT/ORN SUCTION BEATER LINE MOTOR SOLENOID STARTER COIL BARREL LIQUID SOLENOID SEE FIG. 3 SOFT SERVE GRN/YEL BEATER MOTOR BEATER MOTOR BEATER MOTOR STARTER STARTER C723 068807-33 11/11/13...
- Page 88 96 95 INTERLOCK WHT/ORN WHT/ORN RELAY BEATER MOTOR OVERLOAD SWITCH WHT/ORN SUCTION LINE BEATER SOLENOID MOTOR STARTER GRN/YEL COIL BARREL LIQUID GRN/YEL SOLENOID SEE FIG. 3 GRN/YEL SOFT SERVE BEATER MOTOR GRN/YEL BEATER MOTOR STARTER BEATER MOTOR STARTER C723 068807-58 11/11/13...
Need help?
Do you have a question about the C723 and is the answer not in the manual?
Questions and answers