
Related Manuals for Huawei TaiShan X6000


Summary of Contents for Huawei TaiShan X6000
- Page 1 TaiShan X6000 Server User Guide Issue Date 2020-06-05 HUAWEI TECHNOLOGIES CO., LTD.
- Page 2 Notice The purchased products, services and features are stipulated by the contract made between Huawei and the customer. All or part of the products, services and features described in this document may not be within the purchase scope or the usage scope. Unless otherwise specified in the contract, all statements, information, and recommendations in this document are provided "AS IS"...
-
Page 3: About This Document
About This Document About This Document Purpose This document describes the TaiShan X6000 server (X6000 for short) in terms of its appearance, features, specifications, and system components. It also explains how to install, configure, and verify the installation of the X6000. - Page 4 Added the "Powered by Kunpeng" label on the front panel. 2020-03-03 Modified the description of power consumption. 2019-03-11 Updated 2.3 Rear Panel Components. 2018-10-30 This issue is the first official release. Issue 04 (2020-06-05) Copyright © Huawei Technologies Co., Ltd.
-
Page 5: Table Of Contents
4.4 Installing the Guide Rails and Chassis........................... 34 4.4.1 Installing the L-Shaped Guide Rails and Chassis....................36 4.4.2 Installing the Adjustable Guide Rails and Chassis....................38 4.4.3 Installing the Holding Rails and Chassis........................40 4.5 Connecting Cables................................46 Issue 04 (2020-06-05) Copyright © Huawei Technologies Co., Ltd. - Page 6 12.1 Logging In to the Server Node iBMC WebUI and CLI....................81 12.1.1 Logging In to the iBMC CLI or WebUI of a Server Node Through the iBMC Management Network Port........................................81 Issue 04 (2020-06-05) Copyright © Huawei Technologies Co., Ltd.
- Page 7 12.5 Logging In to a Server Node Over a Serial Port by Using PuTTY..............102 13 Support and Other Resources..................104 13.1 Technical Support................................104 13.2 Maintenance Tools................................105 A Appendix..........................106 A.1 Glossary....................................106 A.2 Acronyms and Abbreviations............................107 A.3 Sensor List.....................................112 Issue 04 (2020-06-05) Copyright © Huawei Technologies Co., Ltd.
-
Page 8: Overview
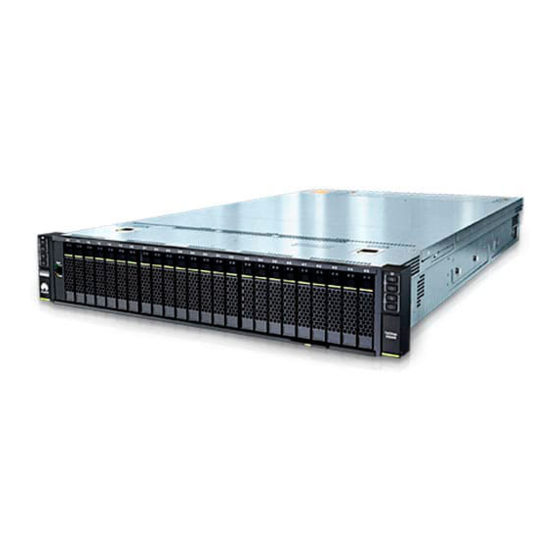
1 Overview Overview The TaiShan X6000 server powered by Huawei Kunpeng 916 processors is dedicated for data centers. It is a 2U 4-node high-density server. The X6000 can accommodate up to four 2-socket server nodes. It features high density, reliability, scalability, and energy efficiency, and is easy to manage and maintain. - Page 9 The X6000 uses carrier-class components and manufacturing processes to improve stability and ensure a longer lifecycle. ● Support for Customization – Huawei designs the product and owns the intellectual property. – Huawei provides quick customized development and delivery. Issue 04 (2020-06-05) Copyright © Huawei Technologies Co., Ltd.
-
Page 10: Components
2.8 PSUs 2.9 HMM 2.10 Physical Structure 2.1 Front Panel Components Figure 2-1 shows the front panel of the X6000 fully configured with 2U4 server nodes. Figure 2-1 X6000 front panel Issue 04 (2020-06-05) Copyright © Huawei Technologies Co., Ltd. - Page 11 The serial number (SN) on the label is a string that uniquely identifies a server. The SN is required when you contact Huawei technical support. Figure 2-2 shows the SN format. Figure 2-2 SN example...
-
Page 12: Front Panel Indicators And Buttons
TaiShan X6000 Server User Guide 2 Components Description Vendor code (two characters). 10 indicates Huawei and other values indicate outsourcing vendors. Year and month (two characters). ● The first character indicates the year. Digits 1 to 9 indicate 2001 to 2009, letters A to H indicate 2010 to 2017, letters J to N indicate 2018 to 2022, and letters P to Y indicate 2023 to 2032. - Page 13 ● You can press this button to turn on or off the UID indicator. ● You can press and hold down this button for 4 to 6 seconds to reset the iBMC. Issue 04 (2020-06-05) Copyright © Huawei Technologies Co., Ltd.
- Page 14 ● Blinking red at 1 Hz: A major alarm has been generated on the server node. ● Blinking red at 5 Hz: A critical alarm has been generated on the server node. ● Steady green: The server node is operating properly. Issue 04 (2020-06-05) Copyright © Huawei Technologies Co., Ltd.
-
Page 15: Rear Panel Components
X6000 fully configured with 2U4 server nodes. Figure 2-4 X6000 rear panel Server node 3 Server node 1 UCP of a server node Standard PCIe card/RAID controller card slot 10GE optical port GE port Issue 04 (2020-06-05) Copyright © Huawei Technologies Co., Ltd. -
Page 16: Rear Panel Indicators And Buttons
Power input socket through which power is supplied input to the server. socket 2.4 Rear Panel Indicators and Buttons Figure 2-5 shows the indicators and buttons on the X6000 rear panel. Issue 04 (2020-06-05) Copyright © Huawei Technologies Co., Ltd. - Page 17 10GE optical ports do not support GE autonegotiation. Data transmission ● Off: No data is being transmitted. status indicator for ● Blinking yellow: Data is being an optical port transmitted. ● Steady yellow: ethtool-p tool. Issue 04 (2020-06-05) Copyright © Huawei Technologies Co., Ltd.
- Page 18 ● Blinking red at 1 Hz: A major alarm has been generated on the server. ● Blinking red at 5 Hz: A critical alarm has been generated on the server. ● Steady green: The server is operating properly. Issue 04 (2020-06-05) Copyright © Huawei Technologies Co., Ltd.
- Page 19 ● Blinking yellow: Data is being the iBMC transmitted. management port Connection status ● Off: The network port is not indicator for the connected. iBMC management ● Steady green: The network port is port properly connected. Issue 04 (2020-06-05) Copyright © Huawei Technologies Co., Ltd.
-
Page 20: Hard Disk Backplane Connectors
Figure 2-6 Disk backplane Backplane signal cable Slimline connector (J17) connector (J30) Slimline connector (J13) Slimline connector (J6) Slimline connector (J39) Backplane signal cable connector (J31) Issue 04 (2020-06-05) Copyright © Huawei Technologies Co., Ltd. -
Page 21: Disk Slot Numbers And Indicators
1 RAID controller card/Directly SATA disk SSD) connected to the CPU/SoftRAID backplane 2.6.2 Disk Indicators Figure 2-8 shows the disk indicators. Figure 2-8 Disk indicators Table 2-7 describes the disk indicators. Issue 04 (2020-06-05) Copyright © Huawei Technologies Co., Ltd. -
Page 22: Fan Modules
Figure 2-9 shows a fan module. Figure 2-9 Fan module 2.8 PSUs An X6000 is equipped with two AC or 240 HVDC PSUs. Issue 04 (2020-06-05) Copyright © Huawei Technologies Co., Ltd. - Page 23 AC PSU. Figure 2-10 AC PSU The PSU has a latch, an AC power input socket, and an operating status indicator, as shown in Figure 2-11. Figure 2-11 AC PSU panel Issue 04 (2020-06-05) Copyright © Huawei Technologies Co., Ltd.
-
Page 24: Hmm
Users can also log in to the iBMC of a server node through the management network port provided by the server node. Figure 2-12 shows an aggregation module. Figure 2-12 Aggregation module Figure 2-13 shows an HMM. Issue 04 (2020-06-05) Copyright © Huawei Technologies Co., Ltd. -
Page 25: Physical Structure
Figure 2-14 Panel of an aggregation module Connection status indicator Aggregation network port Data transmission status indicator 2.10 Physical Structure Figure 2-15 shows the system components of the X6000. Issue 04 (2020-06-05) Copyright © Huawei Technologies Co., Ltd. - Page 26 The X6000 supports the backplane for 2.5-inch SAS/SATA disks. Drives the fans in the chassis. backplane System A passive backplane used to transmit signals between the backplane server nodes, Hyper Management Module (HMM), and disk backplane. Issue 04 (2020-06-05) Copyright © Huawei Technologies Co., Ltd.
- Page 27 PSU will decrease to 1000 W. ● If the input power is between 200 V and 240 V, or 240 V HVDC, the working power is 1700 W. Issue 04 (2020-06-05) Copyright © Huawei Technologies Co., Ltd.
-
Page 28: System Architecture And Management
The server is 2U high and supports four server nodes. Each node supports up to six disks. ● All server nodes in a chassis share PSUs in 1+1 redundancy mode. ● All server nodes in a chassis share fan modules in N+1 redundancy mode. Issue 04 (2020-06-05) Copyright © Huawei Technologies Co., Ltd. -
Page 29: Cooling Design
The X6000 minimizes noise through speed adjustment, shock absorption, and noise isolation design. ● The high-pressure counter-rotating fans provide a 10% more air volume than normal fans. The refined air channels implement concentrated cooling of Issue 04 (2020-06-05) Copyright © Huawei Technologies Co., Ltd. -
Page 30: Psu Working Modes
Complies with Intelligent Platform Management Interface (IPMI) V2.0. ● Supports SNMPv3. ● Supports the common information model (CIM). ● Provides a graphical web user interface to facilitate management. Table 3-1 describes the iBMC specifications. Issue 04 (2020-06-05) Copyright © Huawei Technologies Co., Ltd. - Page 31 Allows users to view screen snapshots and videos without snapshot and logging in, facilitating preventive maintenance inspection (PMI). screen video Domain Supports domain management and directory services, name service significantly simplifying network and configuration (DNS) and management. directory service Issue 04 (2020-06-05) Copyright © Huawei Technologies Co., Ltd.
-
Page 32: Hmm Features
Chassis Provides intelligent asset management. asset manage ment Intellige Uses the power capping technology to increase deployment density and the dynamic energy saving technology to lower O&M costs. power manage ment Issue 04 (2020-06-05) Copyright © Huawei Technologies Co., Ltd. -
Page 33: Management Principles
TACH signals for detecting the fan speed. The HMM uses Huawei speed adjustment algorithms to determine a fan speed based on the temperature of temperature-sensitive components and the environment, and sends fan speed data to the fan backplane. The fan... - Page 34 The default configuration in the BIOS is the point-to-point cabling. To change it to aggregation management cabling, see 12.1.2 Logging In to the iBMC CLI or WebUI of a Server Node Through the Aggregation Network Port. Issue 04 (2020-06-05) Copyright © Huawei Technologies Co., Ltd.
- Page 35 TaiShan X6000 Server User Guide 3 System Architecture and Management Figure 3-3 Aggregation management cabling Issue 04 (2020-06-05) Copyright © Huawei Technologies Co., Ltd.
-
Page 36: Installing The X6000
4.4 Installing the Guide Rails and Chassis 4.5 Connecting Cables 4.6 Verifying the Installation 4.1 Installation Overview Understand the entire installation process before installing the X6000. Figure 4-1 shows the process for installing the X6000. Issue 04 (2020-06-05) Copyright © Huawei Technologies Co., Ltd. -
Page 37: Preparations
Tools and Meters Table 4-1 lists the required tools and meters. ● Huawei provides only the list of tools and meters and negotiates with the customer to determine the suppliers of these tools. ● The multimeter must be calibrated before use. - Page 38 Used to measure resistance and voltage and to check connectivity. ESD wrist strap Used to prevent ESD damage. Cable tie Used to bind cables. ESD gloves Used to prevent ESD damage. Issue 04 (2020-06-05) Copyright © Huawei Technologies Co., Ltd.
-
Page 39: Unpacking Devices And The Chassis
DVD and Documents Table 4-2 lists the required DVD and documents. You can also obtain product documents from Huawei Enterprise support website (http:// enterprise.huawei.com/). Table 4-2 DVD and documents Category Description Driver DVD: contains network interface card (NIC) chip drivers. - Page 40 If the outer packing is damaged (for example, the outer packing is soaked or deformed, or the seals or pressure-sensitive adhesive tape is unsealed), keep the field evidence and provide feedback to the supplier or Huawei. Step 2 Use a pallet truck to carry the device packing case to the equipment room, and take away the pallet truck.
-
Page 41: Installing The Guide Rails And Chassis
(CMAs) are installed and there is sufficient space in the cabinet. If CMAs are not installed and there is little space, you can install chassis without leaving 1U space under them. Preparations Issue 04 (2020-06-05) Copyright © Huawei Technologies Co., Ltd. - Page 42 Figure 4-3 Spacing of 1U on a mounting bar of a cabinet Cabinet Installation Requirements The depth of an X6000 chassis is 805 mm (31.69 in.): ● If CMAs are installed, the minimum depth of the cabinet is 1.1 m (3.61 ft). Issue 04 (2020-06-05) Copyright © Huawei Technologies Co., Ltd.
-
Page 43: Installing The L-Shaped Guide Rails And Chassis
CMAs. 4.4.1 Installing the L-Shaped Guide Rails and Chassis Scenario L-shaped guide rails are only for Huawei cabinets. Procedure Step 1 Install floating nuts. Determine the position for installing a floating nut according to the installation plan. - Page 44 Figure 4-6. Figure 4-6 Installing an L-shaped guide rail Tighten the screws. Install the other guide rail using the same method. Issue 04 (2020-06-05) Copyright © Huawei Technologies Co., Ltd.
-
Page 45: Installing The Adjustable Guide Rails And Chassis
The three holes for installing the guide rail should be within a 1U mark. Insert the plugs (delivered with the server) into the following two square holes to secure the guide rail. See (2) in Figure 4-8. Issue 04 (2020-06-05) Copyright © Huawei Technologies Co., Ltd. - Page 46 Lift the X6000 on both sides. This task requires at least three persons. Place the X6000 on the guide rails and push it into the cabinet. See (1) in Figure 4-9. Issue 04 (2020-06-05) Copyright © Huawei Technologies Co., Ltd.
-
Page 47: Installing The Holding Rails And Chassis
Push the hook backward until the metal sheet is in contact with the post. See (5) in Figure 4-10. Optional: Install an M6 screw into the third square hole at the rear of the holding rail to secure it. See (6) in Figure 4-10. Issue 04 (2020-06-05) Copyright © Huawei Technologies Co., Ltd. - Page 48 Pull out an inner rail from a holding rail until the inner rail cannot move, push the release lever upward, and remove the inner rail from the holding rail. See (1) and (2) in Figure 4-11. Issue 04 (2020-06-05) Copyright © Huawei Technologies Co., Ltd.
- Page 49 Align the mounting brackets of the inner rail with the fastening screws on one side of the server, and push the inner rail forward until it is secured to the server, as shown in Figure 4-12. Issue 04 (2020-06-05) Copyright © Huawei Technologies Co., Ltd.
- Page 50 Lift the server, align the inner rails with the holding rails, and push the server into the cabinet, as shown in Figure 4-13. At least three people are required to lift the server from both sides. Issue 04 (2020-06-05) Copyright © Huawei Technologies Co., Ltd.
- Page 51 Figure 4-14 Clipping the inner rail into the middle rail Press the release levers on both sides, and push the server into the cabinet until the server cannot move forward, as shown in Figure 4-15. Issue 04 (2020-06-05) Copyright © Huawei Technologies Co., Ltd.
- Page 52 4 Installing the X6000 Figure 4-15 Pushing a server into a cabinet Tighten the captive screws on the mounting ears to secure the server, as shown in Figure 4-16. Figure 4-16 Securing a server Issue 04 (2020-06-05) Copyright © Huawei Technologies Co., Ltd.
-
Page 53: Connecting Cables
(PDC) in the equipment room and the power distribution box (PDB) in the cabinet are switched off. Table 4-4 describes the precautions for connecting an AC power cable, multi-port cable, and data cable to the chassis in a cabinet. Issue 04 (2020-06-05) Copyright © Huawei Technologies Co., Ltd. -
Page 54: Connecting A Power Cable
Use power cables that support a maximum current of 10 A and comply with IEC 320/C19–C20. Procedure Step 1 Connect the power cable to a PSU. Connect one end of the power cable to the PSU, as shown in Figure 4-18. Issue 04 (2020-06-05) Copyright © Huawei Technologies Co., Ltd. - Page 55 Secure the power cable using a velcro strap. See Figure 4-19. Figure 4-19 Securing a power cable Connect the other end of the power cable to the busbar of the cabinet. Issue 04 (2020-06-05) Copyright © Huawei Technologies Co., Ltd.
-
Page 56: Connecting A Multi-Port Cable
DVD-ROM drive or hard disk. Figure 4-20 Multi-port cable VGA connector (DB-15) One USB 2.0 connector Serial port (RJ45) Two USB 2.0 connectors Multi-port connector (connected to the UCP on a server node) Issue 04 (2020-06-05) Copyright © Huawei Technologies Co., Ltd. -
Page 57: Connecting An Optical Cable
To avoid damage to an optical module, do not frequently or quickly remove or insert it. Procedure Step 1 Wear an ESD wrist strap or ESD gloves. Step 2 Remove the dust-proof cap from an optical module. See (1) in Figure 4-22. Issue 04 (2020-06-05) Copyright © Huawei Technologies Co., Ltd. - Page 58 Do not look into the optical port without any eye protection. Step 5 Horizontally insert the optical cable into the optical module until you hear a click,. See (4) in Figure 4-22. ----End Issue 04 (2020-06-05) Copyright © Huawei Technologies Co., Ltd.
-
Page 59: Connecting Ethernet Cables To Service And Management Network Ports
Connecting an Ethernet Cable to a Management Network Port A server node provides a management network port on its front panel. Figure 4-24 shows how to connect an Ethernet cable to the management network port. Issue 04 (2020-06-05) Copyright © Huawei Technologies Co., Ltd. -
Page 60: Connecting The Aggregation Management Network Cable
● Before installing a network cable to a network port, check that the network cable connector is intact and the pins have no sundries or deformation. Figure 4-25 shows how to connect the aggregation management network cable. Issue 04 (2020-06-05) Copyright © Huawei Technologies Co., Ltd. -
Page 61: Laying Out Cables
Cables must be routed straight and neatly bound. The minimum bending radius of a cable varies according to the cable position. – If you need to bend the middle of a cable, the minimum bending radius is twice the cable diameter. Issue 04 (2020-06-05) Copyright © Huawei Technologies Co., Ltd. - Page 62 Cable Layout Scheme Figure 4-26 shows the cable layout scheme for the server with a CMA. Figure 4-26 Cable layout scheme for the server with a CMA Issue 04 (2020-06-05) Copyright © Huawei Technologies Co., Ltd.
-
Page 63: Verifying The Installation
To avoid personal injury or device damage, ensure that the chassis is powered off and the cabinet busbar is switched off before verification. Procedure Step 1 Check that cables are of correct types. Issue 04 (2020-06-05) Copyright © Huawei Technologies Co., Ltd. -
Page 64: Powering On The Chassis
Operating status indicator on each PSU ● Power indicator on the server front panel ----End 4.6.4 Checking Device Operating Status Procedure Step 1 Power on the chassis. For details, see 4.6.3 Powering On the Chassis. Issue 04 (2020-06-05) Copyright © Huawei Technologies Co., Ltd. - Page 65 Step 3 Check the server node operating status. The status indicator on each server node panel is steady green or blinking green. ----End Issue 04 (2020-06-05) Copyright © Huawei Technologies Co., Ltd.
-
Page 66: Configuring The X6000
X6000. Figure 5-1 Configuration process 5.2 Default Data To ensure system security, change your initial password upon the first login and change the password periodically. Issue 04 (2020-06-05) Copyright © Huawei Technologies Co., Ltd. -
Page 67: Configuring The Hmm
5.3.1.1 Logging In to the HMM CLI Through the Aggregation Network Port Procedure Step 1 Connect a PC to the aggregation network port. Connect the PC to the aggregation network port using a network cable. See Figure 5-2. Issue 04 (2020-06-05) Copyright © Huawei Technologies Co., Ltd. - Page 68 PC can properly communicate with the server. Step 3 Log in to the HMM CLI. On the PC, double-click PuTTY.exe. The PuTTY Configuration window is displayed, as shown in Figure 5-3. Issue 04 (2020-06-05) Copyright © Huawei Technologies Co., Ltd.
- Page 69 – If the account entered during server login is incorrect, reconnect PuTTY. Enter the user name and password. After login, the host name of the device is displayed on the left of the prompt. ----End Issue 04 (2020-06-05) Copyright © Huawei Technologies Co., Ltd.
-
Page 70: Logging In To The Hmm Cli Through The Management Network Port Of A Server Node
Step 3 Log in to the iBMC WebUI of the server node. For details, see 12.1 Logging In to the Server Node iBMC WebUI and CLI. Step 4 Enable transparent transmission. Issue 04 (2020-06-05) Copyright © Huawei Technologies Co., Ltd. - Page 71 Figure 5-5. Figure 5-5 Enabling transparent transmission Step 5 Log in to the HMM CLI. On the PC, double-click PuTTY.exe. The PuTTY Configuration window is displayed, as shown in Figure 5-6. Issue 04 (2020-06-05) Copyright © Huawei Technologies Co., Ltd.
- Page 72 Enter the user name and password. The command output is as follows: login as: Administrator huawei Using keyboard-interactive authentication. Password: Last login: Sat Oct 10 11:55:51 2015 from 172.31.1.135 Hello! Welcome to RTOS! Issue 04 (2020-06-05) Copyright © Huawei Technologies Co., Ltd.
-
Page 73: Changing The Initial Hmm User Password
Step 2 On the HMM CLI, run the ipmcset -d password -v ● Administrators can change the passwords of all users. ● Operators and common users can change their own passwords only. Issue 04 (2020-06-05) Copyright © Huawei Technologies Co., Ltd. -
Page 74: Configuring Basic Hmm Data
Specifies the subnet The value of this parameter is in mask of the network the data type of IPv4 and in the xxx.xxx.xxx.xxx. port to be configured. format of Issue 04 (2020-06-05) Copyright © Huawei Technologies Co., Ltd. -
Page 75: Configuring A Server Node
For details about how to configure other basic data for the HMM, see the X6000 Server HMM Command Reference ----End 5.4 Configuring a Server Node XR320 Server Node User For details about configuring a server node, see the Guide Issue 04 (2020-06-05) Copyright © Huawei Technologies Co., Ltd. -
Page 76: Software And Hardware Compatibility
TaiShan X6000 Server User Guide 6 Software and Hardware Compatibility Software and Hardware Compatibility For details about the software and hardware supported by the X6000, see .Intelligent Computing Compatibility Checker Issue 04 (2020-06-05) Copyright © Huawei Technologies Co., Ltd. -
Page 77: Internal Cabling
Signal cable for connecting the indicator board on the 04051340– right mounting ear to the backplane (J30) Signal cable for connecting the indicator board on the 04051340– left mounting ear to the backplane (J31) Issue 04 (2020-06-05) Copyright © Huawei Technologies Co., Ltd. - Page 78 Signal cable for connecting the aggregation module to the 040518 HMM (J6) Cabling from the Fan and PSU Backplanes to the HMM Figure 7-3 shows the cabling from the fan and PSU backplanes to the HMM. Issue 04 (2020-06-05) Copyright © Huawei Technologies Co., Ltd.
- Page 79 Signal cable for connecting a fan backplane (J6) to the 04051340– HMM (J11) Signal cable for connecting a fan backplane (J1) to the 04150626 HMM (J1) Hard Disk Backplane Cabling Figure 7-4 shows the cabling of the hard disk backplane Issue 04 (2020-06-05) Copyright © Huawei Technologies Co., Ltd.
- Page 80 (J24) Signal cable for connecting the hard disk backplane (J6) to 040518 the system backplane (J21) Signal cable for connecting the hard disk backplane (J39) to 040518 the system backplane (J18) Issue 04 (2020-06-05) Copyright © Huawei Technologies Co., Ltd.
-
Page 81: Troubleshooting
If a fault occurs on a server, collect logs for fault diagnosis. ● Fault diagnosis Fault diagnosis rules and tools help Huawei technical support engineers and maintenance engineers to analyze and rectify faults according to alarms and hardware fault symptoms. -
Page 82: Electrostatic Discharge
Use heel straps, toe straps, or boot straps in standing workplaces. Wear the straps on both feet when standing on conductive floors or dissipating floor mats. ● Use conductive maintenance tools. ● Use a portable maintenance kit with a folding static-dissipating work mat. Issue 04 (2020-06-05) Copyright © Huawei Technologies Co., Ltd. -
Page 83: Warranty And Safety
The warranty terms and conditions may vary by country, and some services and/or parts may not be available in all countries. For details about warranty services in your country, contact Huawei technical support or the local Huawei office. For more information, visit Maintenance &... -
Page 84: Product Specifications
● If the input power is between 200 V and 240 V, or 240 V HVDC, the working power of each PSU will increase to 1700 W. Fan modules Four fan modules in N+1 redundancy mode Issue 04 (2020-06-05) Copyright © Huawei Technologies Co., Ltd. -
Page 85: Server Node Specifications
● 2 x half-height half-length standard PCIe cards (standard PCIe card slot 1 available for a RAID controller card) 11.3 Power Specifications The X6000 provides two slots for installing PSUs. Table 11-3 describes PSUs and power consumption. Issue 04 (2020-06-05) Copyright © Huawei Technologies Co., Ltd. -
Page 86: Physical And Environmental Specifications
One cyclical sweep in each axial direction at the rate of 0.1 oct/ min, with a total of three axial directions 5 Hz to 10 Hz: 5 mm (0.20 in., peak-to-peak value) 10 Hz to 100 Hz: 1 m/s Issue 04 (2020-06-05) Copyright © Huawei Technologies Co., Ltd. - Page 87 You are advised to ask a professional organization to monitor particulate pollutants in the equipment room. ● There is no explosive, conductive, magnetic, or corrosive dust in the equipment room. Issue 04 (2020-06-05) Copyright © Huawei Technologies Co., Ltd.
-
Page 88: Common Operations
12.1.1 Logging In to the iBMC CLI or WebUI of a Server Node Through the iBMC Management Network Port Data ● IP address of the iBMC management network port on the server node ● User name and password of the server node iBMC Issue 04 (2020-06-05) Copyright © Huawei Technologies Co., Ltd. - Page 89 Connect the PC to the iBMC management network port on the server node using a network cable. See Figure 12-1. Figure 12-1 Connecting a cable to the management network port of a server node Issue 04 (2020-06-05) Copyright © Huawei Technologies Co., Ltd.
- Page 90 Change the default password when logging in to the iBMC for the first time. Step 4 Log in to the iBMC CLI of the server node. On the PC, double-click PuTTY.exe. The PuTTY Configuration window is displayed, as shown in Figure 12-3 Issue 04 (2020-06-05) Copyright © Huawei Technologies Co., Ltd.
- Page 91 – If the account entered during server node login is incorrect, reconnect PuTTY. Enter the user name and password. After login, the host name of the device is displayed on the left of the prompt. ----End Issue 04 (2020-06-05) Copyright © Huawei Technologies Co., Ltd.
-
Page 92: Logging In To The Ibmc Cli Or Webui Of A Server Node Through The Aggregation Network Port
Step 2 Connect the PC to the iBMC management network port of the server node. Connect the PC to the iBMC management network port on the server node using a network cable. See Figure 12-5. Issue 04 (2020-06-05) Copyright © Huawei Technologies Co., Ltd. - Page 93 Method 1: Enable network port aggregation on the iBMC WebUI. Log in to the iBMC WebUI, select Fixed as the network port mode on the NetWork Settings page, and select a network port under Aggregation Port. See Figure 12-6. Issue 04 (2020-06-05) Copyright © Huawei Technologies Co., Ltd.
- Page 94 Set active port successfully. ● Enable network port aggregation on the BIOS. When the screen shown in Figure 12-7 is displayed, press Delete or F4 to start the BIOS Setup Utility. Issue 04 (2020-06-05) Copyright © Huawei Technologies Co., Ltd.
- Page 95 Press F12 to boot from the network. Enter the password in the displayed dialog box. Choose Advanced > IPMI iBMC Configuration > iBMC Configuration and select iBMC NetWork Mode. See Figure 12-8 Figure 12-9. Issue 04 (2020-06-05) Copyright © Huawei Technologies Co., Ltd.
- Page 96 Press Enter. The following options are displayed: ▪ Dedicated: Use the dedicated port as the iBMC network port. ▪ OnBoard Shared: Use a service network port on the LAN on motherboard (LOM) as the iBMC network port. Issue 04 (2020-06-05) Copyright © Huawei Technologies Co., Ltd.
- Page 97 Figure 12-10 Logging in to the iBMC Change the default password when logging in to the iBMC for the first time. Step 6 Log in to the iBMC CLI of the server node. Issue 04 (2020-06-05) Copyright © Huawei Technologies Co., Ltd.
- Page 98 – If this is your first login to the server node, the PuTTY Security Alert dialog box is displayed. Click Yes to proceed. – If the account entered during server node login is incorrect, reconnect PuTTY. Enter the user name and password. Issue 04 (2020-06-05) Copyright © Huawei Technologies Co., Ltd.
-
Page 99: Logging In To A Server Using The Integrated Remote Console
The Remote Console page is displayed, as shown in Figure 12-12. Figure 12-12 Remote Console Step 3 Click Java Integrated Remote Console (Private), Java Integrated Remote Console (Shared), HTML5 Integrated Remote Console (Private), or HTML5 Integrated Remote Console (Shared). Issue 04 (2020-06-05) Copyright © Huawei Technologies Co., Ltd. - Page 100 ● HTML5 Integrated Remote Console (Shared): Two local users or five VNC users can concurrently connect to the server OS and perform operations on the server by using the iBMC. The users can see each other's operations. Figure 12-13 Real-time operation console (Java) Issue 04 (2020-06-05) Copyright © Huawei Technologies Co., Ltd.
-
Page 101: Logging In To A Server Node Using The Irc
The IP address configured and the iBMC management network port IP address must be on the same network segment. Step 2 Double-click KVM.exe. A dialog box similar to the one shown in Figure 12-15 is displayed. Issue 04 (2020-06-05) Copyright © Huawei Technologies Co., Ltd. - Page 102 The two users can see each other's operations. ● Private Mode: allows only one user to access and manage a server node at a time. Information shown in Figure 12-16 is displayed. Figure 12-16 Security risk information Issue 04 (2020-06-05) Copyright © Huawei Technologies Co., Ltd.
- Page 103 Step 3 Run the chmod 777 KVM.sh command to set the permission for the IRC. Step 4 Run ./KVM.sh to start the IRC. A dialog box similar to the one shown in Figure 12-18 is displayed. Issue 04 (2020-06-05) Copyright © Huawei Technologies Co., Ltd.
- Page 104 The two users can see each other's operations. ● Private Mode: allows only one user to access and manage a server node at a time. Information shown in Figure 12-19 is displayed. Figure 12-19 Security risk information Issue 04 (2020-06-05) Copyright © Huawei Technologies Co., Ltd.
- Page 105 Step 3 Run the chmod 777 KVM.sh command to set the permission for the IRC. Step 4 Run ./KVM.sh to start the IRC. A dialog box similar to the one shown in Figure 12-21 is displayed. Issue 04 (2020-06-05) Copyright © Huawei Technologies Co., Ltd.
- Page 106 The two users can see each other's operations. ● Private Mode: allows only one user to access and manage a server node at a time. Information shown in Figure 12-22 is displayed. Figure 12-22 Security risk information Issue 04 (2020-06-05) Copyright © Huawei Technologies Co., Ltd.
-
Page 107: Logging In To A Server Node Over A Network Port By Using Putty
HMM) command on the PC command-line interface (CLI) to check the communication between the PC and the server. Step 2 Double-click PuTTY.exe. The PuTTY Configuration window is displayed, as shown in Figure 12-24. Issue 04 (2020-06-05) Copyright © Huawei Technologies Co., Ltd. - Page 108 Saved Sessions to log in to the server in future. Step 4 Click Open. The PuTTY window and login as: are displayed, and you need to enter a user name. Issue 04 (2020-06-05) Copyright © Huawei Technologies Co., Ltd.
-
Page 109: Logging In To A Server Node Over A Serial Port By Using Putty
Configure Host Name (or IP address) and Saved Sessions, and click Save. You can double- click the saved record under Saved Sessions to log in to the server the next time. Issue 04 (2020-06-05) Copyright © Huawei Technologies Co., Ltd. - Page 110 ● If the entered user name is incorrect during server node login, you must connect to PuTTY again. Step 7 Enter a user name and password to log in. After login, the server host name is displayed to the left of the prompt. ----End Issue 04 (2020-06-05) Copyright © Huawei Technologies Co., Ltd.
-
Page 111: Support And Other Resources
Knowledge Base. Huawei Technical Support If a fault persists after taking the above measures, contact technical support at your local Huawei office. If a local Huawei office is not available, contact Huawei technical support as follows: ● Enterprise customers Issue 04 (2020-06-05) -
Page 112: Maintenance Tools
Carriers Send emails to support@huawei.com or visit Global TAC Information. 13.2 Maintenance Tools Table 13-1 lists the software tools required for routine maintenance of Huawei servers. Table 13-1 Software tools for routine maintenance Tool Server and Description Version FusionServer See the... -
Page 113: A Appendix
IEEE 802.3 standard. It is one of the most widely implemented LAN standards. Gigabit An extended and enhanced Ethernet standard against traditional Ethernet sharing media, which is compatible with 10M and 100M Ethernet and complies with the IEEE 802.3z standard. Issue 04 (2020-06-05) Copyright © Huawei Technologies Co., Ltd. -
Page 114: Acronyms And Abbreviations
(IEC) 60297-1 to measure the height of a rack, chassis, or subrack. 1U = 44.45 mm = 1.75 in. A.2 Acronyms and Abbreviations alternating current Advanced Encryption Standard New Instruction Set Address Resolution Protocol Issue 04 (2020-06-05) Copyright © Huawei Technologies Co., Ltd. - Page 115 Error Checking and Correcting ECMA European Computer Manufacturer Association execute disable bit European Efficiency Enterprise Resource Planning European Telecommunication Standards FB-DIMM fully buffered DIMM Fibre Channel Federal Communications Commission Issue 04 (2020-06-05) Copyright © Huawei Technologies Co., Ltd.
- Page 116 Internet Protocol Intelligent Power Capability IPMB Intelligent Platform Management Bus IPMI Intelligent Platform Management Interface keyboard, video, and mouse Lucent Connector LDIMM local dual in-line memory module Issue 04 (2020-06-05) Copyright © Huawei Technologies Co., Ltd.
- Page 117 Restriction of the Use of Certain Hazardous Substances in Electrical and Electronic Equipment Serial Attached Small Computer System Interface SATA Serial Advanced Technology Attachment Supply Chain Management SDDC Single-Device Data Correction Issue 04 (2020-06-05) Copyright © Huawei Technologies Co., Ltd.
- Page 118 Unified Extensible Firmware Interface unit identification light Underwriter Laboratories Inc. universal serial bus VCCI Voluntary Control Council for Interference by Information Technology Equipment Video Graphics Array VLAN virtual local area network Issue 04 (2020-06-05) Copyright © Huawei Technologies Co., Ltd.
-
Page 119: Sensor List
RAID Temp RAID controller card J157 temperature Disks Temp Highest disk temperature DISK0\DISK1\DISK2\DISK 3\DISK4\DISK5 RAID BBU Temp RAID capacitor J157 temperature RAID Card BBU BBU of the RAID J157 controller card Issue 04 (2020-06-05) Copyright © Huawei Technologies Co., Ltd. - Page 120 1 to 4. N F Status Fan module fault status N R Status Fan module fault status UID Button UID button status Rear panel RAID Presence RAID controller card J157 presence Issue 04 (2020-06-05) Copyright © Huawei Technologies Co., Ltd.
- Page 121 BMC startup events SEL Status SEL full or clearing events Op. Log Full Operation log full or clearing events Sec. Log Full Security log full or clearing events BMC Time Hopping Time hopping Issue 04 (2020-06-05) Copyright © Huawei Technologies Co., Ltd.
- Page 122 MOS Volt Drop Voltage drop before and after the MOS tube of the soft-start circuit Eth Heartbeat Heartbeat status ChassisMgmtCable Aggregation network Aggregation network port board backplane port board signal cable presence Issue 04 (2020-06-05) Copyright © Huawei Technologies Co., Ltd.