
Related Manuals for Huawei TaiShan 200 23280


Summary of Contents for Huawei TaiShan 200 23280
- Page 1 TaiShan 200 Server (Model 2280) User Guide Issue Date 2021-01-12 HUAWEI TECHNOLOGIES CO., LTD.
- Page 2 Notice The purchased products, services and features are stipulated by the contract made between Huawei and the customer. All or part of the products, services and features described in this document may not be within the purchase scope or the usage scope. Unless otherwise specified in the contract, all statements, information, and recommendations in this document are provided "AS IS"...
-
Page 3: About This Document
Indicates a hazard with a low level of risk which, if not avoided, could result in minor or moderate injury. Issue 09 (2021-01-12) Copyright © Huawei Technologies Co., Ltd. - Page 4 Kunpeng 920 5220 or 3210 processors. ● Added information about the WebUI of iBMC V561 and later versions. 2019-12-17 Added the server with 24 x 2.5" SAS/ SATA pass-through drives. Issue 09 (2021-01-12) Copyright © Huawei Technologies Co., Ltd.
- Page 5 User Guide About This Document Issue Date Description 2019-11-14 ● Changed the product name. ● Added the FlexIO card with four 25GE optical ports. 2019-07-01 This issue is the first official release. Issue 09 (2021-01-12) Copyright © Huawei Technologies Co., Ltd.
-
Page 6: Table Of Contents
5.3 ESD Protection..................................44 5.3.1 Operation Instructions..............................44 5.3.2 ESD Wrist Strap.................................. 45 5.4 Environmental Requirements............................45 5.4.1 Space and Airflow Requirements..........................45 5.4.2 Temperature and Humidity Requirements....................... 46 5.4.3 Cabinet Requirements..............................46 Issue 09 (2021-01-12) Copyright © Huawei Technologies Co., Ltd. - Page 7 5.12.2 Configuration Process..............................95 5.12.3 Querying the iBMC IP Address........................... 96 5.12.4 Logging In to the iBMC WebUI..........................97 5.12.5 Checking the Server............................... 99 5.12.6 Changing Initial Passwords............................103 5.12.7 Configuring RAID................................103 Issue 09 (2021-01-12) Copyright © Huawei Technologies Co., Ltd.
- Page 8 A.4 Acronyms and Abbreviations............................173 A.5 Sensor List (Server Configured with the Kunpeng 7260, 5250, 5230, 7265, or 5255 Processor)...176 A.6 Sensor List (Server Configured with the Kunpeng 920 5220 or 3210 Processor)........180 Issue 09 (2021-01-12) Copyright © Huawei Technologies Co., Ltd.
-
Page 9: Overview
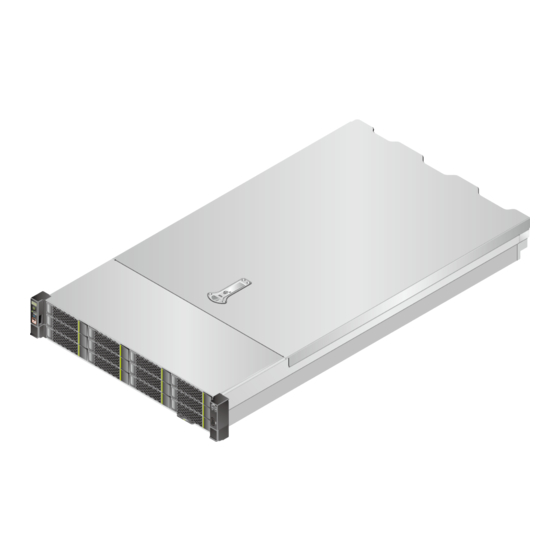
User Guide 1 Overview Overview The TaiShan 200 servers powered by HUAWEI Kunpeng 920 processors are dedicated for data centers. The 2280 balanced model (2280 for short, marked as K22R-02 on the nameplate) is a 2U 2-socket rack server. It features high-performance computing, large-capacity storage, low power consumption, easy management, and easy deployment and is ideal for Internet, distributed storage, cloud computing, Big Data, and enterprise services. -
Page 10: Physical Structure
FlexIO card 1 iBMC card FlexIO card 2 When configured with Kunpeng 920 5220 or 3210 processors, the server provides 16 DDR4 DIMM slots. Figure 1-3 shows the components of the server. Issue 09 (2021-01-12) Copyright © Huawei Technologies Co., Ltd. -
Page 11: Logical Structure
VGA port, management network port, and commissioning serial port. This document uses the Hi1710 card as an example. Figure 1-4 shows the logical structure of the 2280 equipped with Kunpeng 920 7260, 5250, 5230, 7265, or 5255 processors. Issue 09 (2021-01-12) Copyright © Huawei Technologies Co., Ltd. - Page 12 Figure 1-4 Logical structure of the server with Kunpeng 920 7260, 5250, 5230, 7265, or 5255 processors ● The 2280 supports two Huawei Kunpeng 920 7260, 5250, 5230, 7265, or 5255 processors (CPUs). Each processor supports 16 DDR4 DIMMs. ●...
- Page 13 Figure 1-5 Logical structure of the server with Kunpeng 920 5220 or 3210 processors ● The 2280 supports two Huawei Kunpeng 920 5220 or 3210 processors. Each processor supports 8 DDR4 DIMMs. ● The server can come with an Ethernet FlexIO card with four GE or 25GE ports, which are connected to the processors through the high-speed SerDes interface.
- Page 14 The screw-in RAID controller card connects to CPU 1 through PCIe buses, and to the drive backplanes through SAS signal cables. The server supports flexible drive configurations, depending on the drive backplanes used. Issue 09 (2021-01-12) Copyright © Huawei Technologies Co., Ltd.
-
Page 15: Components
12 x 3.5-inch drives. Figure 2-1 Components on the front panel of a server with 12 x 3.5-inch drives Drive VGA port Issue 09 (2021-01-12) Copyright © Huawei Technologies Co., Ltd. - Page 16 VGA port USB 3.0 port Label plate with an SN label ● Figure 2-4 shows the components on the front panel of a server with 24 x 2.5 SAS/SATA pass-through drives. Issue 09 (2021-01-12) Copyright © Huawei Technologies Co., Ltd.
- Page 17 USB 3.0 port VGA port Label plate with an SN label NO TE Servers with Kunpeng 920 5220 or 3210 processors do not support the configuration of 8 x 2.5-inch drives. Issue 09 (2021-01-12) Copyright © Huawei Technologies Co., Ltd.
- Page 18 You are advised to use the VGA port on the rear panel. The serial number (SN) on the label is a string that uniquely identifies a server. The SN is required when you contact Huawei technical support. Figure 2-6 shows the SN format.
-
Page 19: Front Panel Indicators And Buttons
Power button/ Fault diagnostic LED indicator FlexIO presence indicators (1 and 2) ● Figure 2-8 shows the indicators and buttons on the front panel of a server with 25 x 2.5-inch drives. Issue 09 (2021-01-12) Copyright © Huawei Technologies Co., Ltd. - Page 20 24 x 2.5-inch drives Figure 2-10 Indicators and buttons on the front panel of a server with 24 x 2.5-inch drives UID button/indicator Health indicator Power button/indicator Fault diagnostic LED Issue 09 (2021-01-12) Copyright © Huawei Technologies Co., Ltd.
- Page 21 Button Fault ● ---: The server is operating normally. diagnostic ● Error code: A server component is faulty. TaiShan Rack For details about error code, see the Server iBMC Alarm Handling Issue 09 (2021-01-12) Copyright © Huawei Technologies Co., Ltd.
- Page 22 ● 1 and 2: represent FlexIO cards 1 and 2 respectively. presence ● Steady green: The FlexIO card is installed and can be indicators identified. (1 and 2) ● Off: The FlexIO card is not installed or faulty. Issue 09 (2021-01-12) Copyright © Huawei Technologies Co., Ltd.
-
Page 23: Rear Panel Components
● FlexIO card 1 or 2 is not hot-swappable. If you need to replace it, power off the server. Table 2-4 Ports on the rear panel Port Type Quanti Description VGA port DB15 The VGA port is connected to a terminal, such as a monitor or physical KVM. Issue 09 (2021-01-12) Copyright © Huawei Technologies Co., Ltd. -
Page 24: Rear Panel Indicators
When one PSU is used, Predicted PSU Status cannot be set to Active/ Standby on the iBMC WebUI. 2.4 Rear Panel Indicators Figure 2-13 shows the indicators on the rear panel of the server. Issue 09 (2021-01-12) Copyright © Huawei Technologies Co., Ltd. - Page 25 ● Steady blue: The device is being located. NOTE You can turn on, turn off, or blink the UID indicator by pressing the UID button or remotely running a command on the iBMC CLI. Issue 09 (2021-01-12) Copyright © Huawei Technologies Co., Ltd.
-
Page 26: Flexio Cards
For details about FlexIO cards supported by the server, see the Computing Product Compatibility Checker. For details about the specifications and features of each FlexIO card, see the corresponding user guide. The following figures show the indicators on the FlexIO cards. Issue 09 (2021-01-12) Copyright © Huawei Technologies Co., Ltd. -
Page 27: Drive Slot Numbers And Indicators
● Steady green: The network port indicator/Data is properly connected. transmission status ● Blinking green: Data is being indicator transmitted. ● Off: The network port is not connected. 2.6 Drive Slot Numbers and Indicators Issue 09 (2021-01-12) Copyright © Huawei Technologies Co., Ltd. -
Page 28: Drive Slot Numbers
Figure 2-17 Server with 12 x 3.5-inch drives in pass-through mode ● Figure 2-18 shows the drive slot numbers of a server with 25 x 2.5-inch drives in Expander mode. Issue 09 (2021-01-12) Copyright © Huawei Technologies Co., Ltd. - Page 29 Figure 2-19 Server with 8 x 2.5-inch SAS/SATA drives and 12 x 2.5-inch NVMe SSDs ● Figure 2-20 shows the drive slot numbers of a server with 24 x 2.5 SAS/SATA passthrough drives. Issue 09 (2021-01-12) Copyright © Huawei Technologies Co., Ltd.
- Page 30 1. I/O module drive EXP SATA 2 (SAS/SATA 1: 3 (PCIe RAID configuration drives) drives) SSDs) controlle r card 2. I/O module 2. I/O module : 4 (NVMe 2: 3 (PCIe drives) SSDs) Issue 09 (2021-01-12) Copyright © Huawei Technologies Co., Ltd.
- Page 31 2. I/O module [1, 5] 2: 3 (PCIe SSDs) 8 x 2.5" drive 8 (SAS/ 1 x RAID I/O module 3 configuration SATA controlle 4 (NVMe drives) [1, 5] drives) r card Issue 09 (2021-01-12) Copyright © Huawei Technologies Co., Ltd.
-
Page 32: Sas/Sata Drive Indicators
The drive is being located by the RAID controller card. Blinking at 1 Hz Blinking at 1 Hz The data on the secondary drive is being rebuilt. Steady on A member drive in the RAID array is removed. Issue 09 (2021-01-12) Copyright © Huawei Technologies Co., Ltd. -
Page 33: Nvme Ssd Indicators
I/O module 1 or 2. It provides PCIe slots 1 to 3 when installed in I/O module 1 and PCIe slots 4 to 6 when installed in I/O module 2. Issue 09 (2021-01-12) Copyright © Huawei Technologies Co., Ltd. - Page 34 I/O module 1 or 2 in a server with 8 x 2.5-inch SAS/SATA drives and 12 x 2.5-inch NVMe SSDs. Ports A, B, and C are Slimline cable connectors. Issue 09 (2021-01-12) Copyright © Huawei Technologies Co., Ltd.
- Page 35 PCIe slots 1 to 3 and only slot 3 (x8) is available. When installed in I/O module 2, it occupies PCIe slots 4 to 6 and only slot 6 (x8) is available. Issue 09 (2021-01-12) Copyright © Huawei Technologies Co., Ltd.
- Page 36 PCIe slots 7 and 8. Figure 2-29 Riser card 6 (two x8 slots) (Board No.: BC82PRUF) ● When installed in I/O module 3, the riser card shown in Figure 2-30 provides PCIe slot 8. Issue 09 (2021-01-12) Copyright © Huawei Technologies Co., Ltd.
- Page 37 If I/O module 2 uses a 2-slot PCIe riser module, slot 4 is unavailable. ● If I/O module 3 uses a 1-slot PCIe riser module, slot 7 is unavailable. Table 2-12 describes specifications of the PCIe slots. Issue 09 (2021-01-12) Copyright © Huawei Technologies Co., Ltd.
- Page 38 Full- heigh t full- ● 3-slot PRM: lengt ● SAS PRM: Slot5 CPU2 PCIe x16 ● 2-slot PRM: Port4 80/04/ Full- heigh t full- ● 3-slot PRM: lengt ● SAS PRM: Issue 09 (2021-01-12) Copyright © Huawei Technologies Co., Ltd.
- Page 39 ● 2-slot PRM: half- lengt Slot8 CPU2 PCIe x16 ● Single-slot Port1 80/0C/ Full- PRM: x16 heigh ● 2-slot PRM: half- lengt RAID CPU1 PCIe Port8 00/08/ contr oller card Issue 09 (2021-01-12) Copyright © Huawei Technologies Co., Ltd.
- Page 40 Compatibility Checker. For PCIe cards not listed by the Computing Product Compatibility Checker, contact the local Huawei sales personnel to submit the compatibility test requirements. ● When two 2.5-inch drives are installed in I/O module 1 or 2, this module also supports a PCIe x16 riser card in slot 3 or 6.
-
Page 41: Product Specifications
2.6 GHz processors. ● The L3 cache is 32 MB. Kunpeng 920 7265 processor ● The server supports two 64- core 3.0 GHz processors. ● The L3 cache is 64 MB. Issue 09 (2021-01-12) Copyright © Huawei Technologies Co., Ltd. - Page 42 ● Four GE electrical ports, supporting PXE ● Four 25GE/10GE optical ports, supporting PXE NOTE Different optical modules can be used to support 25GE or 10GE optical port rate. Issue 09 (2021-01-12) Copyright © Huawei Technologies Co., Ltd.
- Page 43 – Two standard full-height half-length PCIe 4.0 x16 slots (width: PCIe 4.0 x8) – One standard full-height half-length PCIe 4.0 x16 slot ● The PCIe expansion slots fully support Huawei proprietary PCIe SSD cards, which bolster I/O performance for applications such as searching, caching, and download services.
-
Page 44: Environmental Specifications
● Storage humidity (≤ 72 hours): 5% to 95% (RH, ● Long-term storage humidity (> 72 hours): 30% to 69% non- ● Maximum change rate: 20%/h condensi ≥ 204 CFM volume Issue 09 (2021-01-12) Copyright © Huawei Technologies Co., Ltd. - Page 45 – LWAd: 5.64 Bels – LpAm: 41 dBA ● Operating: – LWAd: 6.24 Bels – LpAm: 46.6 dBA NOTE Actual sound levels generated during operation vary depending on server configuration, load, and ambient temperature. Issue 09 (2021-01-12) Copyright © Huawei Technologies Co., Ltd.
- Page 46 ● When powered by Kunpeng 920 5220 or 3210 processors, the server does not support 24 x 2.5" SAS/SATA pass-through drive configuration or 8 x 2.5" drive configuration. Issue 09 (2021-01-12) Copyright © Huawei Technologies Co., Ltd.
-
Page 47: Physical Specifications
● Cabinet depth: ≥ 1000 mm (39.37 in.) Requirements for guide rail installation: ● L-shaped guide rails: apply only to Huawei cabinets. ● Adjustable guide rails: apply to a cabinet with a distance of 543.5 mm to 848.5 mm (21.40 in. to 33.41 in.) between the front and rear mounting bars. - Page 48 ● If the input voltage ranges from 200 V to 220 V AC, the output power of the 2000 W AC platinum PSU decreases to 1800 W. Issue 09 (2021-01-12) Copyright © Huawei Technologies Co., Ltd.
-
Page 49: Software And Hardware Compatibility
NO TICE Do not use incompatible components. Otherwise, the server may fail to work properly. The technical support and warranty do not cover faults caused by incompatible components. Issue 09 (2021-01-12) Copyright © Huawei Technologies Co., Ltd. -
Page 50: Installation And Configuration
5.12 Initial Configuration (iBMC V3.01.00.00 or Later) 5.1 Tool Preparations Prepare the following tools: ● ESD wrist strap or ESD gloves ● M3 Phillips screwdriver ● Protective gloves ● ESD bag ● Flat-head screwdriver Issue 09 (2021-01-12) Copyright © Huawei Technologies Co., Ltd. -
Page 51: Safety Symbols On Devices
Do not touch This label indicates hazardous moving parts. Do not touch the fans when they are rotating. Warning This label indicates that at least two people are required for moving the device. Issue 09 (2021-01-12) Copyright © Huawei Technologies Co., Ltd. -
Page 52: Esd Protection
(or wrist strap), and remove any conductive objects (such as watches and jewelry). Figure 5-1 shows conductive objects that must be removed before you touch a device. Figure 5-1 Conductive objects to be removed Issue 09 (2021-01-12) Copyright © Huawei Technologies Co., Ltd. -
Page 53: Esd Wrist Strap
To facilitate heat dissipation and maintenance, keep a clearance of 800 mm (31.50 in.) between walls and the front and rear doors of the cabinet. ● Do not block the air intake vents. Otherwise, air intaking and heat dissipation will be affected. Issue 09 (2021-01-12) Copyright © Huawei Technologies Co., Ltd. -
Page 54: Temperature And Humidity Requirements
5ºC to 40ºC (41ºF to 104ºF) Humidity 8% RH to 90% RH (non-condensing) 5.4.3 Cabinet Requirements ● A standard 19-inch cabinet with a depth of more than 1000 mm (39.37 in.). Issue 09 (2021-01-12) Copyright © Huawei Technologies Co., Ltd. -
Page 55: Unpacking The Chassis
Server Maintenance and Service Guide (Model 2280) 5.7 Installing the Server on Guide Rails 5.7.1 Installing with L-Shaped Guide Rails L-shaped guide rails are designed for Huawei cabinets. The servers are stackable when L-shaped guide rails are used. Issue 09 (2021-01-12) - Page 56 Use a floating nut hook to pull the upper end of the floating nut, and fasten it to the upper edge of the square hole. See Figure 5-5. Figure 5-5 Installing a floating nut Issue 09 (2021-01-12) Copyright © Huawei Technologies Co., Ltd.
- Page 57 Step 3 Install the server. Lift the server. This task requires at least two people. Place the server on the guide rails and slide it into the cabinet. See (1) in Figure 5-7. Issue 09 (2021-01-12) Copyright © Huawei Technologies Co., Ltd.
-
Page 58: Installing With Adjustable Guide Rails
Position a guide rail horizontally in contact with the mounting bars and hook it onto the cabinet. See (1) in Figure 5-8. NO TE The three holes in each mounting ear of a guide rail should be within 1U boundary lines. Issue 09 (2021-01-12) Copyright © Huawei Technologies Co., Ltd. - Page 59 Step 2 Install the server. Lift the server. This task requires at least two people. Place the server on the guide rails and slide it into the cabinet. See (1) in Figure 5-9. Issue 09 (2021-01-12) Copyright © Huawei Technologies Co., Ltd.
-
Page 60: Connecting External Cables
30 mm (1.18 in.) when you lay out the cables in parallel. ● If you cannot identify cables according to the cable labels, attach an engineering label to each cable. Issue 09 (2021-01-12) Copyright © Huawei Technologies Co., Ltd. -
Page 61: Connecting Cables To A Mouse, Keyboard, And Vga Port
Step 3 Connect the connectors on the other end of the PS/2 cable to the keyboard and mouse. Step 4 Connect the DB15 connector on the VGA cable to the VGA port on the front or rear panel of the server and tighten the two screws. Issue 09 (2021-01-12) Copyright © Huawei Technologies Co., Ltd. -
Page 62: Connecting A Network Cable
You are advised to arrange new cables in the same way as existing cables. Ensure that cables are routed neatly and undamaged. Issue 09 (2021-01-12) Copyright © Huawei Technologies Co., Ltd. -
Page 63: Connecting A Cable To An Optical Port
You can connect an optical or SFP+ cable to an optical port. You need to determine the type of cable to be connected based on site requirements. Step 1 Wear an ESD wrist strap. For details, see 5.3 ESD Protection. Issue 09 (2021-01-12) Copyright © Huawei Technologies Co., Ltd. - Page 64 Insert the optical module into the optical port. See (1) in Figure 5-12. Close the latch on the optical module to secure it. See (2) in Figure 5-12. Insert the optical cable into the optical module. See (3) in Figure 5-12. Issue 09 (2021-01-12) Copyright © Huawei Technologies Co., Ltd.
- Page 65 Gently push the cable connector inwards and pull the latch out to remove the SFP+ cable. See Figure 5-13. NO TICE Do not directly pull out the latch. Figure 5-13 Removing an SFP+ cable Issue 09 (2021-01-12) Copyright © Huawei Technologies Co., Ltd.
-
Page 66: Connecting A Usb Device
5.8.5 Connecting a USB Device Step 1 Wear an ESD wrist strap. For details, see 5.3 ESD Protection. Step 2 Connect a USB device to a USB port on the server. See Figure 5-15. Issue 09 (2021-01-12) Copyright © Huawei Technologies Co., Ltd. -
Page 67: Connecting A Serial Cable
Procedure Step 1 Wear an ESD wrist strap. For details, see 5.3 ESD Protection. Step 2 Plug the connector into the serial port. See Figure 5-16. Issue 09 (2021-01-12) Copyright © Huawei Technologies Co., Ltd. -
Page 68: Connecting Power Cables
Step 2 Connect the power cable to the PSU. See Figure 5-17. Figure 5-17 Connecting a power cable Step 3 Secure the power cable using a velcro strap. See Figure 5-18. Issue 09 (2021-01-12) Copyright © Huawei Technologies Co., Ltd. -
Page 69: Connecting Dc Psu Cables
Put the OT terminal (for the ground cable) on the screw removed from the ground hole, install the screw on the ground hole, and tighten the screw. See (1) in Figure 5-19. Issue 09 (2021-01-12) Copyright © Huawei Technologies Co., Ltd. -
Page 70: Verifying Cable Connections
Power cables are correctly connected to the rear of the chassis. Network cable Network cables are connected correctly to the management network port or service ports on the rear panel of the chassis. Issue 09 (2021-01-12) Copyright © Huawei Technologies Co., Ltd. -
Page 71: Powering On The Server
9.2.1 Logging In to the Remote Virtual Console through the iBMC WebUI. On the KVM screen, click on the menu bar. iii. Choose Power On. A dialog box is displayed. Click Yes to power on the server. Issue 09 (2021-01-12) Copyright © Huawei Technologies Co., Ltd. -
Page 72: Powering Off The Server
For iBMC V561 and V3.01.00.00 or later, choose System > Power > Power Control. Click Power Off or Forced Power Off. In the displayed dialog box, click Yes to power off the server. Issue 09 (2021-01-12) Copyright © Huawei Technologies Co., Ltd. -
Page 73: Initial Configuration (Ibmc V250 Or Later)
VXXX . For example, 2.50 is also referred to as format, which is also referred to as V250. 5.11.1 Default Data NO TE iBMC V663 and later versions do not support U-boot. Issue 09 (2021-01-12) Copyright © Huawei Technologies Co., Ltd. -
Page 74: Configuration Process
User name ● User name: Administrator data ● Password: Admin@9000 password BIOS data Password Admin@9000 iBMC U-boot Password Admin@9000 data 5.11.2 Configuration Process Figure 5-20 Initial configuration process Issue 09 (2021-01-12) Copyright © Huawei Technologies Co., Ltd. -
Page 75: Querying The Ibmc Ip Address
Step 1 Access the BIOS. For details, see 5.11.8.1 Accessing the BIOS. Step 2 Choose Advanced > IPMI iBMC Configuration > iBMC Configuration, and press Enter. The iBMC Config screen is displayed. See Figure 5-21 Figure 5-22. Issue 09 (2021-01-12) Copyright © Huawei Technologies Co., Ltd. - Page 76 TaiShan 200 Server (Model 2280) User Guide 5 Installation and Configuration Figure 5-21 iBMC Config screen 1 Figure 5-22 iBMC Config screen 2 ----End Issue 09 (2021-01-12) Copyright © Huawei Technologies Co., Ltd.
-
Page 77: Logging In To The Ibmc Webui
● If the message "There is a problem with this website's security certificate" is displayed, click Continue to this website (not recommended). ● If the system displays the Security Alert dialog box indicating a certificate error, click Yes. Issue 09 (2021-01-12) Copyright © Huawei Technologies Co., Ltd. - Page 78 Step 5 On the login page, enter the user name and password. The default user name is Administrator, and the default password is Admin@9000. NO TE If the account is locked due to five consecutive failed attempts, try again in 5 minutes. Issue 09 (2021-01-12) Copyright © Huawei Technologies Co., Ltd.
-
Page 79: Checking The Server
Step 2 Check the server. ● Check the server using the iBMC WebUI. Log in to the iBMC over the WebUI. For details, see 5.11.4 Logging In to the iBMC WebUI. Issue 09 (2021-01-12) Copyright © Huawei Technologies Co., Ltd. - Page 80 Figure 5-28 Querying firmware information (iBMC V561 or later) Check the health status of the server. ▪ If the iBMC version is V549 or earlier, choose Information > Overview. The page shown in Figure 5-29 is displayed. Issue 09 (2021-01-12) Copyright © Huawei Technologies Co., Ltd.
- Page 81 Active Uboot Version: 2.1.13 (Dec 24 2018 - 20:23:20) Backup Uboot Version: 2.1.13 (Dec 24 2018 - 20:23:20) ----------------- Product INFO ----------------- Product ID: 0x0001 Product Name: XXXX iME Version: 0.66 BIOS Version: (U75)0.90 Issue 09 (2021-01-12) Copyright © Huawei Technologies Co., Ltd.
-
Page 82: Changing Initial Passwords
Clear alarms. For details, see the Handling ----End 5.11.6 Changing Initial Passwords Change the following initial user passwords: ● Initial password of the default iBMC user ● Initial password for the iBMC U-boot Issue 09 (2021-01-12) Copyright © Huawei Technologies Co., Ltd. - Page 83 Figure 5-32 Local Users page (iBMC V561 or later) Step 2 Modify user information. ● If the iBMC version is V549 or earlier, locate the user and click . The page shown in Figure 5-33 is displayed. Issue 09 (2021-01-12) Copyright © Huawei Technologies Co., Ltd.
- Page 84 Figure 5-34 Modifying user information (iBMC V561 or later) Step 3 Change the user password by following on-screen instructions. The password must meet the following complexity requirements: ● Contain 8 to 20 characters. Issue 09 (2021-01-12) Copyright © Huawei Technologies Co., Ltd.
- Page 85 NO TE The default password is Admin@9000. The following information is displayed: Enter new password: Step 8 Enter a new password. The following information is displayed: Enter the new password again: Issue 09 (2021-01-12) Copyright © Huawei Technologies Co., Ltd.
-
Page 86: Configuring Raid
Figure 5-36 RAID controller card information (iBMC V561 or later) NO TE The information shown in Figure 5-36 is for reference only. The actual information may differ. Step 3 Configure a RAID array. Issue 09 (2021-01-12) Copyright © Huawei Technologies Co., Ltd. -
Page 87: Configuring The Bios
Step 4 and go to Step NO TE ● Press F12 to boot from the network. ● Press F2 for boot options. ● Press F6 to enter the Smart Provisioning boot screen. Issue 09 (2021-01-12) Copyright © Huawei Technologies Co., Ltd. - Page 88 The Setup screen is displayed. ● For security purposes, change the administrator password periodically. ● By default, if you enter incorrect passwords for three consecutive times, the screen will be locked. Issue 09 (2021-01-12) Copyright © Huawei Technologies Co., Ltd.
- Page 89 NO TE The password must be a string of 8 to 16 characters, and contain at least three types of the following characters: special characters (mandatory), uppercase letters, lowercase letters, and digits. Issue 09 (2021-01-12) Copyright © Huawei Technologies Co., Ltd.
- Page 90 A dialog box is displayed, indicating that the new password is set successfully, as shown in Figure 5-42. Figure 5-42 Setting a new password Press Enter. The Input current password dialog box is displayed, as shown in Figure 5-43. Issue 09 (2021-01-12) Copyright © Huawei Technologies Co., Ltd.
-
Page 91: Setting The Server Boot Priority
5.11.8.2 Setting the Server Boot Priority Step 1 Access the BIOS. For details, see 5.11.8.1 Accessing the BIOS. Step 2 Press ← or → to switch to the Boot tab, as shown in Figure 5-45. Issue 09 (2021-01-12) Copyright © Huawei Technologies Co., Ltd. - Page 92 Step 3 Select Boot Type Order and press Enter. The Boot Type Order screen is displayed, as shown in Figure 5-46. NO TE The default boot sequence is as follows: Hard Disk Driver, CD/DVD-ROM Driver, PXE, and Others. Issue 09 (2021-01-12) Copyright © Huawei Technologies Co., Ltd.
-
Page 93: Configuring The Pxe Function Of An Nic
Configuring the LOM PXE Step 1 Access the BIOS. For details, see 5.11.8.1 Accessing the BIOS. Step 2 Press ← or → to switch to the Advanced screen shown in Figure 5-47. Issue 09 (2021-01-12) Copyright © Huawei Technologies Co., Ltd. - Page 94 Step 3 Choose LOM Configuration > PXE Configuration and press Enter. The PXE Configuration screen is displayed, as shown in Figure 5-48. NO TE The PXE Configuration screen may vary according to the server. Issue 09 (2021-01-12) Copyright © Huawei Technologies Co., Ltd.
- Page 95 Step 6 Press F10. The system displays the "Save configuration changes and exit?" dialog box. Step 7 Select Yes and press Enter. The server automatically restarts for the settings to take effect. ----End Issue 09 (2021-01-12) Copyright © Huawei Technologies Co., Ltd.
- Page 96 Step 2 Press ← or → to switch to the Advanced screen shown in Figure 5-49. Figure 5-49 Advanced screen Step 3 Select Network Device List and press Enter. The Network Device List screen is displayed, as shown in Figure 5-50. Issue 09 (2021-01-12) Copyright © Huawei Technologies Co., Ltd.
- Page 97 Figure 5-50 Network Device List screen Step 4 Select the network port (such as MAC:AC:8D:34:21:2B:60) of the external NIC, and press Enter. The Network Device MAC:AC:8D:34:21:2B:60 screen is displayed, as shown in Figure 5-51. Issue 09 (2021-01-12) Copyright © Huawei Technologies Co., Ltd.
- Page 98 TaiShan 200 Server (Model 2280) User Guide 5 Installation and Configuration Figure 5-51 Network Device MAC:AC:8D:34:21:2B:60 screen Step 5 Select Huawei (R) Intelligent Network Interface Card and press Enter. The Main Configuration Page screen is displayed, as shown in Figure 5-52.
-
Page 99: Setting The Bios Password
5.11.8.4 Setting the BIOS Password Step 1 Access the BIOS. For details, see 5.11.8.1 Accessing the BIOS. Step 2 Press ← or → to switch to the Security screen, as shown in Figure 5-53. Issue 09 (2021-01-12) Copyright © Huawei Technologies Co., Ltd. - Page 100 Step 5 Press F10. The system displays the "Save configuration changes and exit?" dialog box. Step 6 Select Yes and press Enter. The server automatically restarts for the settings to take effect. ----End Issue 09 (2021-01-12) Copyright © Huawei Technologies Co., Ltd.
-
Page 101: Setting The Bios Language
The server is compatible with different types of OSs. Use the Computing Product Compatibility Checker to check compatible OSs. The installation method varies according to the OS type. For details, see the installation guide of each OS. Issue 09 (2021-01-12) Copyright © Huawei Technologies Co., Ltd. -
Page 102: Upgrading The System
● IP address: 192.168.2.100 management and subnet ● Subnet mask: 255.255.255.0 network port masks data iBMC login User name ● User name: Administrator data ● Password: Admin@9000 password BIOS data Password Admin@9000 Issue 09 (2021-01-12) Copyright © Huawei Technologies Co., Ltd. -
Page 103: Configuration Process
● Check that the server version information is correct. ● Check that no alarm is generated for the server. Change the initial Change the iBMC user name and password for the server. passwords. Issue 09 (2021-01-12) Copyright © Huawei Technologies Co., Ltd. -
Page 104: Querying The Ibmc Ip Address
Step 2 Choose Advanced > IPMI iBMC Configuration > iBMC Configuration, and press Enter. The iBMC Config screen is displayed. See Figure 5-56 Figure 5-57. Figure 5-56 iBMC Config screen 1 Issue 09 (2021-01-12) Copyright © Huawei Technologies Co., Ltd. -
Page 105: Logging In To The Ibmc Webui
Step 1 Connect the local PC to the iBMC management network port on the server using a crossover cable or twisted pair cable. Figure 5-58 shows the network diagram. Figure 5-58 Network diagram Issue 09 (2021-01-12) Copyright © Huawei Technologies Co., Ltd. - Page 106 ● If the message "There is a problem with this website's security certificate" is displayed, click Continue to this website (not recommended). ● If the system displays the Security Alert dialog box indicating a certificate error, click Yes. Figure 5-59 Logging in to the iBMC Issue 09 (2021-01-12) Copyright © Huawei Technologies Co., Ltd.
-
Page 107: Checking The Server
Check the server in the sequence shown in Figure 5-60. The method to be used depends on the actual situation. TaiShan Rack Server iBMC User Guide For details about CLI commands, see Figure 5-60 Checking the server Issue 09 (2021-01-12) Copyright © Huawei Technologies Co., Ltd. - Page 108 Figure 5-61 Querying version information (WebUI) Check the server status on the upper right corner of the iBMC WebUI, as shown in Figure 5-62. Figure 5-62 Querying server health status (WebUI) Issue 09 (2021-01-12) Copyright © Huawei Technologies Co., Ltd.
- Page 109 5.0.80.0 (21:21:56 Feb 29 2020) Backup Uboot Version: 5.0.80.0 (21:21:56 Feb 29 2020) Active Secure Bootloader Version: 5.0.80.0 (21:21:55 Feb 29 2020) Backup Secure Bootloader Version: 5.0.80.0 (21:21:55 Feb 29 2020) Issue 09 (2021-01-12) Copyright © Huawei Technologies Co., Ltd.
- Page 110 | 2019-02-10 00:52:19 | Major | 0x28000001 | The SAS or PCIe cable to front disk backplane is incorrectly connected. TaiShan Rack Server iBMC Alarm Clear alarms. For details, see Handling ----End Issue 09 (2021-01-12) Copyright © Huawei Technologies Co., Ltd.
-
Page 111: Changing Initial Passwords
Step 2 Choose Systems on the menu bar and System Info in the navigation tree. Step 3 Click the Others tab and view the model of the RAID controller card. See Figure 5-64. Issue 09 (2021-01-12) Copyright © Huawei Technologies Co., Ltd. -
Page 112: Configuring The Bios
Step 4 and go to Step NO TE ● Press F12 to boot from the network. ● Press F2 for boot options. ● Press F6 to enter the Smart Provisioning boot screen. Issue 09 (2021-01-12) Copyright © Huawei Technologies Co., Ltd. - Page 113 The Setup screen is displayed. ● For security purposes, change the administrator password periodically. ● By default, if you enter incorrect passwords for three consecutive times, the screen will be locked. Issue 09 (2021-01-12) Copyright © Huawei Technologies Co., Ltd.
- Page 114 NO TE The password must be a string of 8 to 16 characters, and contain at least three types of the following characters: special characters (mandatory), uppercase letters, lowercase letters, and digits. Issue 09 (2021-01-12) Copyright © Huawei Technologies Co., Ltd.
- Page 115 A dialog box is displayed, indicating that the new password is set successfully, as shown in Figure 5-70. Figure 5-70 Setting a new password Press Enter. The Input current password dialog box is displayed, as shown in Figure 5-71. Issue 09 (2021-01-12) Copyright © Huawei Technologies Co., Ltd.
-
Page 116: Setting The Server Boot Priority
5.12.8.2 Setting the Server Boot Priority Step 1 Access the BIOS. For details, see 5.12.8.1 Accessing the BIOS. Step 2 Press ← or → to switch to the Boot tab, as shown in Figure 5-73. Issue 09 (2021-01-12) Copyright © Huawei Technologies Co., Ltd. - Page 117 Step 3 Select Boot Type Order and press Enter. The Boot Type Order screen is displayed, as shown in Figure 5-74. NO TE The default boot sequence is as follows: Hard Disk Driver, CD/DVD-ROM Driver, PXE, and Others. Issue 09 (2021-01-12) Copyright © Huawei Technologies Co., Ltd.
-
Page 118: Configuring The Pxe Function Of An Nic
Configuring the LOM PXE Step 1 Access the BIOS. For details, see 5.12.8.1 Accessing the BIOS. Step 2 Press ← or → to switch to the Advanced screen shown in Figure 5-75. Issue 09 (2021-01-12) Copyright © Huawei Technologies Co., Ltd. - Page 119 Step 3 Choose LOM Configuration > PXE Configuration and press Enter. The PXE Configuration screen is displayed, as shown in Figure 5-76. NO TE The PXE Configuration screen may vary according to the server. Issue 09 (2021-01-12) Copyright © Huawei Technologies Co., Ltd.
- Page 120 Step 6 Press F10. The system displays the "Save configuration changes and exit?" dialog box. Step 7 Select Yes and press Enter. The server automatically restarts for the settings to take effect. ----End Issue 09 (2021-01-12) Copyright © Huawei Technologies Co., Ltd.
- Page 121 Step 2 Press ← or → to switch to the Advanced screen shown in Figure 5-77. Figure 5-77 Advanced screen Step 3 Select Network Device List and press Enter. The Network Device List screen is displayed, as shown in Figure 5-78. Issue 09 (2021-01-12) Copyright © Huawei Technologies Co., Ltd.
- Page 122 Figure 5-78 Network Device List screen Step 4 Select the network port (such as MAC:AC:8D:34:21:2B:60) of the external NIC, and press Enter. The Network Device MAC:AC:8D:34:21:2B:60 screen is displayed, as shown in Figure 5-79. Issue 09 (2021-01-12) Copyright © Huawei Technologies Co., Ltd.
- Page 123 TaiShan 200 Server (Model 2280) User Guide 5 Installation and Configuration Figure 5-79 Network Device MAC:AC:8D:34:21:2B:60 screen Step 5 Select Huawei (R) Intelligent Network Interface Card and press Enter. The Main Configuration Page screen is displayed, as shown in Figure 5-80.
-
Page 124: Setting The Bios Password
5.12.8.4 Setting the BIOS Password Step 1 Access the BIOS. For details, see 5.12.8.1 Accessing the BIOS. Step 2 Press ← or → to switch to the Security screen, as shown in Figure 5-81. Issue 09 (2021-01-12) Copyright © Huawei Technologies Co., Ltd. - Page 125 Step 5 Press F10. The system displays the "Save configuration changes and exit?" dialog box. Step 6 Select Yes and press Enter. The server automatically restarts for the settings to take effect. ----End Issue 09 (2021-01-12) Copyright © Huawei Technologies Co., Ltd.
-
Page 126: Setting The Bios Language
The server is compatible with different types of OSs. Use the Computing Product Compatibility Checker to check compatible OSs. The installation method varies according to the OS type. For details, see the installation guide of each OS. Issue 09 (2021-01-12) Copyright © Huawei Technologies Co., Ltd. -
Page 127: Upgrading The System
If the existing driver versions on a server are inconsistent with those in the driver version mapping, install the drivers of required versions. Otherwise, the server may operate abnormally. For details, see the OS installation guide. Issue 09 (2021-01-12) Copyright © Huawei Technologies Co., Ltd. -
Page 128: Troubleshooting
If a fault occurs on a server, collect logs for fault diagnosis. ● Fault diagnosis Fault diagnosis rules and tools help Huawei technical support engineers and maintenance engineers to analyze and rectify faults according to alarms and hardware fault symptoms. -
Page 129: Warranty And Safety
7 Warranty and Safety Warranty and Safety 7.1 Maintenance and Warranty 7.2 Safety 7.1 Maintenance and Warranty For details, see Customer Support Service Maintenance Status. 7.2 Safety Huawei Server Safety Information For details, see Issue 09 (2021-01-12) Copyright © Huawei Technologies Co., Ltd. -
Page 130: Common Operations (Ibmc V250 Or Later)
● All Internet Explorer versions ● Safari 9.0 to 12.0 ● Microsoft Edge 12 to 18 ● Mozilla Firefox 45.0 to 62.0 ● Google Chrome 55.0 to 69.0 Issue 09 (2021-01-12) Copyright © Huawei Technologies Co., Ltd. - Page 131 AdoptOpenJDK 8u222 64-bit Mozilla Firefox 45.0 to AdoptOpenJDK 11.0.6 79.0 Google Chrome 55.0 to 84.0 Windows Server 2016 64- Internet Explorer 11.0 AdoptOpenJDK 8u222 Mozilla Firefox 45.0 to AdoptOpenJDK 11.0.6 79.0 Issue 09 (2021-01-12) Copyright © Huawei Technologies Co., Ltd.
-
Page 132: Logging In To The Remote Virtual Console
Step 1 Log in to the iBMC WebUI. For details, see 5.11.4 Logging In to the iBMC WebUI. Step 2 On the menu bar, choose Remote Console. The Remote Console page is displayed, as shown in Figure 8-1. Issue 09 (2021-01-12) Copyright © Huawei Technologies Co., Ltd. - Page 133 ● HTML5 Integrated Remote Console (Shared): allows two local users or five VNC users to access and manage the server at a time. The users can see each other's operations. Issue 09 (2021-01-12) Copyright © Huawei Technologies Co., Ltd.
- Page 134 TaiShan 200 Server (Model 2280) User Guide 8 Common Operations (iBMC V250 or Later) Figure 8-2 Real-time operation console (Java) Figure 8-3 Real-time operation console (HTML5) ----End Issue 09 (2021-01-12) Copyright © Huawei Technologies Co., Ltd.
- Page 135 ● HTML5 Integrated Remote Console (Shared): allows two local users or five VNC users to access and manage the server at a time. The users can see each other's operations. Issue 09 (2021-01-12) Copyright © Huawei Technologies Co., Ltd.
- Page 136 TaiShan 200 Server (Model 2280) User Guide 8 Common Operations (iBMC V250 or Later) Figure 8-5 Real-time operation console (Java) Figure 8-6 Real-time operation console (HTML5) ----End Issue 09 (2021-01-12) Copyright © Huawei Technologies Co., Ltd.
-
Page 137: Logging In To The Server Using The Irc
The network address can be in any of the following formats: iBMC management network port IP address (IPv4 or IPv6 address): Port ● number iBMC domain name address: Port number ● Issue 09 (2021-01-12) Copyright © Huawei Technologies Co., Ltd. - Page 138 Click Import CA to import the CA certificate (*.cer, *.crt, or *.pem). After the CA certificate is imported, the security risk dialog box will no longer be displayed. The IRC of the server is displayed, as shown in Figure 8-9. Issue 09 (2021-01-12) Copyright © Huawei Technologies Co., Ltd.
- Page 139 Step 3 Run the chmod 777 KVM.sh command to set the permission for the IRC. Step 4 Run ./KVM.sh to start the IRC. A dialog box similar to the one shown in Figure 8-10 is displayed. Issue 09 (2021-01-12) Copyright © Huawei Technologies Co., Ltd.
- Page 140 Figure 8-11 Security risk information Step 7 Perform any of the following operations based on the actual situation: ● Click Yes to open the IRC. ● Click No to return to the login interface. Issue 09 (2021-01-12) Copyright © Huawei Technologies Co., Ltd.
- Page 141 Step 3 Run the chmod 777 KVM.sh command to set the permission for the IRC. Step 4 Run ./KVM.sh to start the IRC. A dialog box similar to the one shown in Figure 8-13 is displayed. Issue 09 (2021-01-12) Copyright © Huawei Technologies Co., Ltd.
- Page 142 Private Mode: allows only one user to access and manage a server at a time. Information shown in Figure 8-14 is displayed. Figure 8-14 Security risk information Step 7 Perform any of the following operations based on the actual situation: Issue 09 (2021-01-12) Copyright © Huawei Technologies Co., Ltd.
-
Page 143: Logging In To The Ibmc Cli
Logging In over SSH Secure Shell (SSH) provides secure remote login and other network services on a non-secure network. A maximum of five users can log in over SSH at the same time. Issue 09 (2021-01-12) Copyright © Huawei Technologies Co., Ltd. - Page 144 To set the serial port through the iBMC CLI, do as follows: Log in to the iBMC CLI over SSH. Run the following command to change the serial port direction: <option> ipmcset -d serialdir -v Issue 09 (2021-01-12) Copyright © Huawei Technologies Co., Ltd.
- Page 145 To set the serial port by using a jumper, do as follows: Power off the server and remove the power cables. Place the jumper cap on COM_SW pins. For details about the jumper position, see Figure 8-16. Issue 09 (2021-01-12) Copyright © Huawei Technologies Co., Ltd.
- Page 146 Step 3 Open HyperTerminal and set the following parameters: ● Bits per second: 115200 ● Data bits: 8 ● Parity: None ● Stop bits: 1 ● Flow control: None Figure 8-17 shows the port settings. Issue 09 (2021-01-12) Copyright © Huawei Technologies Co., Ltd.
-
Page 147: Logging In To The Server Over A Serial Port Using Putty
● PuTTY of an earlier version may cause server login failures. You are advised to use PuTTY of the latest version. Procedure Step 1 Double-click PuTTY.exe. The PuTTY Configuration window is displayed. Step 2 In the navigation tree, choose Connection > Serial. Issue 09 (2021-01-12) Copyright © Huawei Technologies Co., Ltd. - Page 148 COM n indicates a serial port number, and its value is an integer. Figure 8-18 PuTTY Configuration - Serial Step 4 In the navigation tree, choose Session. Step 5 Select Serial under Connection type, as shown in Figure 8-19. Issue 09 (2021-01-12) Copyright © Huawei Technologies Co., Ltd.
-
Page 149: Logging In To The Server Over A Network Port Using Putty
The login method described in this chapter applies to components that support SSH access, for example, iBMC and OS. Use PuTTY to remotely log in to the server over a local area network (LAN) and configure and maintain the server. Issue 09 (2021-01-12) Copyright © Huawei Technologies Co., Ltd. - Page 150 Step 2 Double-click PuTTY.exe. The PuTTY Configuration window is displayed, as shown in Figure 8-20. Figure 8-20 PuTTY Configuration window Step 3 In the navigation tree, choose Session. Step 4 Set the login parameters. Issue 09 (2021-01-12) Copyright © Huawei Technologies Co., Ltd.
- Page 151 If an incorrect user name or password is entered, you must set up a new PuTTY session. Step 6 Enter the user name and password. If the login is successful, the server host name is displayed on the left of the prompt. ----End Issue 09 (2021-01-12) Copyright © Huawei Technologies Co., Ltd.
-
Page 152: Common Operations (Ibmc V3.01.00.00 Or Later)
● All Internet Explorer versions ● Safari 9.0 to 12.0 ● Microsoft Edge 12 to 18 ● Mozilla Firefox 45.0 to 62.0 ● Google Chrome 55.0 to 69.0 Issue 09 (2021-01-12) Copyright © Huawei Technologies Co., Ltd. - Page 153 AdoptOpenJDK 8u222 64-bit Mozilla Firefox 45.0 to AdoptOpenJDK 11.0.6 79.0 Google Chrome 55.0 to 84.0 Windows Server 2016 64- Internet Explorer 11.0 AdoptOpenJDK 8u222 Mozilla Firefox 45.0 to AdoptOpenJDK 11.0.6 79.0 Issue 09 (2021-01-12) Copyright © Huawei Technologies Co., Ltd.
-
Page 154: Logging In To The Remote Virtual Console
Step 1 Log in to the iBMC WebUI. For details, see 5.11.4 Logging In to the iBMC WebUI. Step 2 On the menu bar, choose Remote Console. The Remote Console page is displayed, as shown in Figure 9-1. Issue 09 (2021-01-12) Copyright © Huawei Technologies Co., Ltd. - Page 155 ● HTML5 Integrated Remote Console (Shared): allows two local users or five VNC users to access and manage the server at a time. The users can see each other's operations. Issue 09 (2021-01-12) Copyright © Huawei Technologies Co., Ltd.
- Page 156 TaiShan 200 Server (Model 2280) User Guide 9 Common Operations (iBMC V3.01.00.00 or Later) Figure 9-2 Real-time operation console (Java) Figure 9-3 Real-time operation console (HTML5) ----End Issue 09 (2021-01-12) Copyright © Huawei Technologies Co., Ltd.
- Page 157 ● HTML5 Integrated Remote Console (Shared): allows two local users or five VNC users to access and manage the server at a time. The users can see each other's operations. Issue 09 (2021-01-12) Copyright © Huawei Technologies Co., Ltd.
- Page 158 TaiShan 200 Server (Model 2280) User Guide 9 Common Operations (iBMC V3.01.00.00 or Later) Figure 9-5 Real-time operation console (Java) Figure 9-6 Real-time operation console (HTML5) ----End Issue 09 (2021-01-12) Copyright © Huawei Technologies Co., Ltd.
-
Page 159: Logging In To The Server Using The Irc
The network address can be in any of the following formats: iBMC management network port IP address (IPv4 or IPv6 address): Port ● number iBMC domain name address: Port number ● Issue 09 (2021-01-12) Copyright © Huawei Technologies Co., Ltd. - Page 160 Click Import CA to import the CA certificate (*.cer, *.crt, or *.pem). After the CA certificate is imported, the security risk dialog box will no longer be displayed. The IRC of the server is displayed, as shown in Figure 9-9. Issue 09 (2021-01-12) Copyright © Huawei Technologies Co., Ltd.
- Page 161 Step 3 Run the chmod 777 KVM.sh command to set the permission for the IRC. Step 4 Run ./KVM.sh to start the IRC. A dialog box similar to the one shown in Figure 9-10 is displayed. Issue 09 (2021-01-12) Copyright © Huawei Technologies Co., Ltd.
- Page 162 Figure 9-11 Security risk information Step 7 Perform any of the following operations based on the actual situation: ● Click Yes to open the IRC. ● Click No to return to the login interface. Issue 09 (2021-01-12) Copyright © Huawei Technologies Co., Ltd.
- Page 163 Step 3 Run the chmod 777 KVM.sh command to set the permission for the IRC. Step 4 Run ./KVM.sh to start the IRC. A dialog box similar to the one shown in Figure 9-13 is displayed. Issue 09 (2021-01-12) Copyright © Huawei Technologies Co., Ltd.
- Page 164 Private Mode: allows only one user to access and manage a server at a time. Information shown in Figure 9-14 is displayed. Figure 9-14 Security risk information Step 7 Perform any of the following operations based on the actual situation: Issue 09 (2021-01-12) Copyright © Huawei Technologies Co., Ltd.
-
Page 165: Logging In To The Ibmc Cli
Logging In over SSH Secure Shell (SSH) provides secure remote login and other network services on a non-secure network. A maximum of five users can log in over SSH at the same time. Issue 09 (2021-01-12) Copyright © Huawei Technologies Co., Ltd. - Page 166 To set the serial port through the iBMC CLI, do as follows: Log in to the iBMC CLI over SSH. Run the following command to change the serial port direction: <option> ipmcset -d serialdir -v Issue 09 (2021-01-12) Copyright © Huawei Technologies Co., Ltd.
- Page 167 Place a jumper cap on a COM_SW pin. For details about the jumper position, see Figure 9-16. The pins 1, 3, 5, and 7 are all COM_SW pins. You can place a jumper cap on any of them. Issue 09 (2021-01-12) Copyright © Huawei Technologies Co., Ltd.
- Page 168 Step 3 Open HyperTerminal and set the following parameters: ● Bits per second: 115200 ● Data bits: 8 ● Parity: None ● Stop bits: 1 ● Flow control: None Figure 9-17 shows the port settings. Issue 09 (2021-01-12) Copyright © Huawei Technologies Co., Ltd.
-
Page 169: Logging In To The Server Over A Serial Port Using Putty
● PuTTY of an earlier version may cause server login failures. You are advised to use PuTTY of the latest version. Procedure Step 1 Double-click PuTTY.exe. The PuTTY Configuration window is displayed. Step 2 In the navigation tree, choose Connection > Serial. Issue 09 (2021-01-12) Copyright © Huawei Technologies Co., Ltd. - Page 170 COM n indicates a serial port number, and its value is an integer. Figure 9-18 PuTTY Configuration - Serial Step 4 In the navigation tree, choose Session. Step 5 Select Serial under Connection type, as shown in Figure 9-19. Issue 09 (2021-01-12) Copyright © Huawei Technologies Co., Ltd.
-
Page 171: Logging In To The Server Over A Network Port Using Putty
The login method described in this chapter applies to components that support SSH access, for example, iBMC and OS. Use PuTTY to remotely log in to the server over a local area network (LAN) and configure and maintain the server. Issue 09 (2021-01-12) Copyright © Huawei Technologies Co., Ltd. - Page 172 Step 2 Double-click PuTTY.exe. The PuTTY Configuration window is displayed, as shown in Figure 9-20. Figure 9-20 PuTTY Configuration window Step 3 In the navigation tree, choose Session. Step 4 Set the login parameters. Issue 09 (2021-01-12) Copyright © Huawei Technologies Co., Ltd.
- Page 173 If an incorrect user name or password is entered, you must set up a new PuTTY session. Step 6 Enter the user name and password. If the login is successful, the server host name is displayed on the left of the prompt. ----End Issue 09 (2021-01-12) Copyright © Huawei Technologies Co., Ltd.
-
Page 174: More Information
TaiShan 200 Server (Model 2280) User Guide 10 More Information More Information 10.1 Technical Support 10.2 Maintenance Tools 10.1 Technical Support Huawei provides timely and efficient technical support through: ● Local branch offices ● Secondary technical support system ● Telephone technical support ●... -
Page 175: Maintenance Tools
– Call 400-830-2118 – Send emails to support@huawei.com. Telecom carriers outside China: visit Global_Service_Hotline. ● Contact the technical support personnel of your local Huawei office. 10.2 Maintenance Tools Table 10-1 Maintenance tools Resource Description How to Obtain FusionServer Tools SmartKit... - Page 176 Configuration Assistant is an online Memory Configuration application. The DIMM installation Assistant sequence in a graphical manner will be displayed after the product name, CPU quantity, and DIMM quantity are specified. Issue 09 (2021-01-12) Copyright © Huawei Technologies Co., Ltd.
-
Page 177: A Appendix
I/O and boot device, and finally boots the OS. The BIOS also supports the advanced configuration and power interface (ACPI) and hot swap setting. The BIOS of the Huawei Kunpeng 920 platform server is a patented BIOS product with independent intellectual property rights. It supports customization and provides a variety of in-band and out-of-band configuration functions as well as high scalability. -
Page 178: Ibmc
BIOS Parameter Reference (Kunpeng 920 Processor). For details, see the A.2 iBMC The iBMC is a Huawei proprietary intelligent management system that remotely manages servers. The iBMC complies with Intelligent Platform Management Interface (IPMI) standards. It provides various functions, including keyboard, video, and mouse (KVM) redirection, text console redirection, remote virtual media, and reliable hardware monitoring and management. -
Page 179: Glossary
GRE serves as a Layer 3 tunneling protocol, and provides a tunnel for transparently transmitting data packets. hot swap In a running system, insertion or removal of a component does not affect normal running of the system. Issue 09 (2021-01-12) Copyright © Huawei Technologies Co., Ltd. - Page 180 A special computer that provides various services for clients over a network. A unit defined in International Electrotechnical Commission (IEC) 60297-1 to measure the height of a cabinet, chassis, or subrack. 1 U = 44.45 mm = 1.75 in. Issue 09 (2021-01-12) Copyright © Huawei Technologies Co., Ltd.
-
Page 181: Acronyms And Abbreviations
Error Checking and Correcting Fibre Channel Federal Communications Commission File Transfer Protocol Gigabit Ethernet Graphics Processing Unit High Availability hard disk drive High Performance Computing Issue 09 (2021-01-12) Copyright © Huawei Technologies Co., Ltd. - Page 182 Media Access Control next business day NC-SI Network Controller Sideband Interface PCIe Peripheral Component Interconnect Express power distribution unit physical layer Preboot Execution Environment Quick Path Interconnect RAID redundant array of independent disks Issue 09 (2021-01-12) Copyright © Huawei Technologies Co., Ltd.
- Page 183 Trans Flash Module TFTP Trivial File Transfer Protocol Trusted Platform Module UEFI Unified Extensible Firmware Interface unit identification light Underwriter Laboratories Inc. universal serial bus Video Graphics Array VLAN virtual local area network Issue 09 (2021-01-12) Copyright © Huawei Technologies Co., Ltd.
-
Page 184: Sensor List (Server Configured With The Kunpeng 7260, 5250, 5230, 7265, Or 5255 Processor)
N indicates the PSU Power PSU input power PSU. number. The value is 1 or 2. N Status N indicates the CPU CPU status CPU. number. The value ranges from 1 to 2. Issue 09 (2021-01-12) Copyright © Huawei Technologies Co., Ltd. - Page 185 Sec. Log Full Security log full or clearing events CPU Usage CPU usage Memory Usage Memory usage BMC Time Hopping Time hopping NTP Sync Failed NTP synchronization failure and recovery events Issue 09 (2021-01-12) Copyright © Huawei Technologies Co., Ltd.
- Page 186 CPU VDDAVS voltage N HVCC CPU HVVC voltage N N_VDDAVS CPU N_VDDAVS voltage N VDDFIX CPU VDDFIX voltage SAS Cable Entity presence N VIN Input voltage PwrOk Sig. Drop Voltage dip status Issue 09 (2021-01-12) Copyright © Huawei Technologies Co., Ltd.
- Page 187 Network port link status of NIC 2 N 1. 2. 3. 4 ) System Notice Hot restart reminder and fault diagnosis program information collection System Error System suspension or restart. Check the background logs Issue 09 (2021-01-12) Copyright © Huawei Technologies Co., Ltd.
-
Page 188: Sensor List (Server Configured With The Kunpeng 920 5220 Or 3210 Processor)
N indicates the PSU Power PSU input power PSU. number. The value is 1 or 2. N Status N indicates the CPU CPU status CPU. number. The value is 1 or 2. Issue 09 (2021-01-12) Copyright © Huawei Technologies Co., Ltd. - Page 189 Sec. Log Full Security log full or clearing events CPU Usage CPU usage Memory Usage Memory usage BMC Time Hopping Time hopping NTP Sync Failed NTP synchronization failure and recovery events Issue 09 (2021-01-12) Copyright © Huawei Technologies Co., Ltd.
- Page 190 CPU VRD voltage N VDDAVS CPU VDDAVS voltage N VDDFIX CPU VDDFIX voltage SAS Cable Entity presence N VIN Input voltage PwrOk Sig. Drop Voltage dip status ACPI State ACPI status Issue 09 (2021-01-12) Copyright © Huawei Technologies Co., Ltd.
- Page 191 System Notice Hot restart reminder and fault diagnosis program information collection System Error System suspension or restart. Check the background logs Cert OverDue Certificate expiration check RTC time RTC clock status Issue 09 (2021-01-12) Copyright © Huawei Technologies Co., Ltd.