Table of Contents
Advertisement
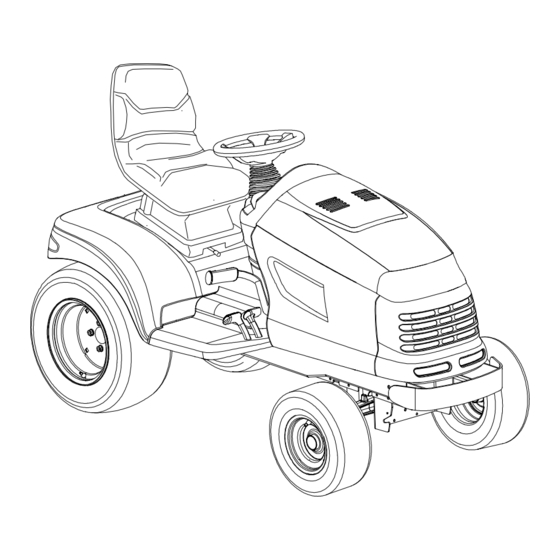
OPERATOR'S MANUAL
3000
TRACTOR
Model 3235
IMPORTANT: READ SAFETY RULES AND INSTRUCTIONS CAREFULLY
Warning
: This unit is equipped with an internal combustion engine and should not be used on or
near any unimproved forest-covered, brush-covered or grass-covered land unless the engine's
exhaust system is equipped with a spark arrester meeting applicable local or state laws (if any). If a
spark arrester is used, it should be maintained in effective working order by the operator. In the State
of California the above is required by law (Section 4442 of the California Public Resources Code).
Other states may have similar laws. Federal laws apply on federal lands. A spark arrester for the
muffler is available through your nearest engine authorized service dealer or contact the service
department, P.O. Box 361131 Cleveland, Ohio 44136-0019.
CUB CADET LLC P.O. BOX 361131 CLEVELAND, OHIO 44136-0019 [www.cubcadet.com]
ECO
FORM NO. 770-10520B
(1/03)
Advertisement
Table of Contents

Related Manuals for Cub Cadet 3235


Summary of Contents for Cub Cadet 3235
- Page 1 Other states may have similar laws. Federal laws apply on federal lands. A spark arrester for the muffler is available through your nearest engine authorized service dealer or contact the service department, P.O. Box 361131 Cleveland, Ohio 44136-0019. CUB CADET LLC P.O. BOX 361131 CLEVELAND, OHIO 44136-0019 [www.cubcadet.com] FORM NO. 770-10520B (1/03)
-
Page 2: Table Of Contents
TABLE OF CONTENTS TRACTOR PREPARTION ........2 IMPORTANT SAFE OPERATION PRACTICES . -
Page 3: Important Safe Operation Practices
As with any type of power equipment, carelessness or error on the part of the operator can result in serious injury. This lawn mower is capable of amputating hands and feet and throwing objects. Failure to observe the following safety instructions could result in serious injury or death. - Page 4 • Never leave a running machine unattended. Always turn off blade(s), place transmission in neutral, set park brake, stop engine and remove key before dismounting. • Turn off blade(s) when not mowing. • Stop engine and wait until blade(s) comes to a complete stop before (a) removing grass catcher...
- Page 5 • Use extra care with grass catchers or other attachments. These can change the stability of the machine. • Keep all movement on the slopes slow and gradual. Do not make sudden changes speed direction. Rapid engagement or braking could cause the front of the machine to lift and rapidly flip over backwards which...
- Page 6 • To reduce fire hazard, keep the machine free of grass, leaves or other debris build-up. Clean up oil or fuel spillage. Allow machine to cool at least 5 minutes before storing. • Before cleaning, repairing inspecting, make certain the blade and all moving parts have stopped.
-
Page 7: Calling Service Information
The information on the model plates is very important if you need help from your dealer or the Cub Cadet customer support department. Refer to Figure 1. -
Page 8: Safety Labels Found On Your Unit
ENGINE AND REMOVE KEY. READ OPERATOR'S MANUAL Running Board - Right WARNING TO ENSURE SAFE AND PROPER OPERATION OF TRANSMISSION, ONLY USE CUB CADET DRIVE SYSTEM FLUID PLUS. 737-3120 - 1 QUART 737-3121 - 1 GALLON READ OPERATOR'S MANUAL Rear Drawbar... -
Page 9: Controls
SECTION 6: CONTROLS Figure 3 Parking Brake Lever PTO Switch Brake Pedal Reverse Pedal Forward Pedal Center Lift Height Indicator Ignition/Light Switch Transmission Release Rod Transmission Oil Fill/Dipstick Fuel Fill Cap Removed For Clarity * Steering Wheel and Seat Differential Lock Pedal Cup Holder Deck Height Adjustment Knob Hydraulic Lift Lever... - Page 10 NOTE: References to LEFT and RIGHT indicate that side of the tractor when facing forward while seated in the drivers seat. Reference to FRONT indicates the grille end of the tractor; to REAR, the drawbar end. Steering Wheel The steering wheel, centered on the dash panel, is used to turn the tractor left or right while driving.
- Page 11 Ignition / Light Switch To prevent accidental starting and/or battery discharge, remove the key from the ignition switch when the tractor is not in use. The combination lights and ignition switch has four positions. Figure description of each position. On/Lights Start Figure 8 Transmission Release Rod...
- Page 12 Seat Adjustment Lever The seat adjustment lever is located below the seat. This lever is used to adjust the seat forward or backward. Differential Lock Pedal Located at the front of the left running board. Depressing the diff. lock pedal engages the transmission differential lock, which improves traction at the rear wheels when operating on uneven ter-...
- Page 13 If the oil level is within the operating range, and the light remains on, contact your Cub Cadet dealer. Low Fuel Indicator The Low Fuel indicator is part of the indicator light pod on the dash panel.
-
Page 14: Operation
This tractor is equipped with a safety interlock system for the protection of the operator. If the interlock system should ever malfunction, operate the tractor. Contact your authorized Cub Cadet Dealer. The safety interlock system prevents the engine from cranking starting unless brake pedal depressed, and the PTO is “OFF”. - Page 15 • Place the PTO switch in the “OFF” position. Place the throttle control lever between the “MID” and “FAST” positions. Then turn the ignition key to the “OFF” position and remove the key from the ignition switch. Driving The Tractor WARNING: Avoid sudden starts, excessive speed and...
- Page 16 This tractor can be equipped with one of Cub Cadet’s high quality mowing decks. The following information will be helpful when using a Cub Cadet mowing deck with your tractor.
-
Page 17: Adjustments
For best results it is recommended that the first two laps should be cut with the discharge thrown towards the center. After the first two laps, reverse the direc- tion to throw the discharge to the outside for the balance of cutting. This will give a better appearance to the lawn. - Page 18 For the comfort of the operator, this trac- tor is equipped with an adjustable tilt steering wheel. To adjust the steering wheel: push the steering wheel tilt lock lever downward, move the steering wheel to the desired position, and release the steering wheel tilt lock lever. Front Wheel Alignment Note: The left-hand ball joint is left-...
-
Page 19: Maintenance
Recheck the brake adjustment to ensure proper operation, and readjust as necessary. If brake adjustment does not correct the problem, see your authorized Cub Cadet dealer. SECTION 9: MAINTENANCE Maintenance Chart Operation to be performed Grease front wheel bearings... -
Page 20: Lubrication Illustration
LUBRICATION ILLUSTRATION Cub Cadet 251H EP Grease or equivalent No. 2 lithium grease Engine Oil: See Figure 27 on page 30 Transmission Oil - Cub Cadet Drive System Fluid Plus - ONLY Oil Can (High quality lubricating oil) - Page 21 Accessing Engine Compartment The engine compartment can be accessed by raising the hood as follows: • Lift the hood straight upward at the recessed notches of the side panels to disengage the internal hood latch. • Carefully pivot the hood forward to open.
- Page 22 immediately with clean cold water. If there is any further discomfort, seek prompt medical attention. • If acid spills on clothing, first dilute it with clean water, then neutralize with a solution of ammonia/water or baking soda/water. • Since battery acid is corrosive, do not pour it into any sink or drain.
- Page 23 Headlight Bulb Replacement Replace headlight bulbs as follows: (See Figure 20) After noting which wire connects to each terminal, unplug the wire harness leads from the headlight socket terminals. Rotate the socket assembly as follows remove from reflector housing: Socket Tab Terminals Socket Reflector Housing...
- Page 24 must be withdrawn and wiped clean, then fully reinserted before being withdrawn again for a true reading. Dipstick Reading Operating Range Transmission Oil Fill Tube/ Dipstick Figure 21 Adding Transmission Oil WARNING: The fluid for your transmission has been spe- cially formulated to ensure the safe and proper opera- tion of your tractor.
- Page 25 Oil Filter Transmission Drain Plug Figure 22 • Clean around the base of the trans- mission oil filter and remove the filter by turning it counterclockwise. • Apply a light coating of clean trans- mission oil to the gasket of the new filter.
- Page 26 Fuse Fuses are installed to protect the trac- tor’s electrical system from damage caused by excessive amperage. Always use the same capacity fuse for replacement. Refer to the Specifica- tions Chart. If the electrical system does not function, check the fuses. To replace a fuse, note the position of the fuse and pull the old fuse from the electical box.
-
Page 27: Engine Information
SECTION 10: ENGINE INFORMATION KOHLER CO. FEDERAL AND CALIFORNIA EMISSION CONTROL SYSTEMS LIMITED WARRANTY SMALL OFF-ROAD EQUIPMENT ENGINES The U.S. Environmental Protection Agency (EPA), the California Air Resources Board (CARB), and Kohler Co. are pleased to explain the Federal and California Emission Control Systems Warranty on your small off-road... - Page 28 LIMITATIONS This Emission Control System Warranty shall not cover any of the following: (a) repair or replacement required because of misuse or neglect, improper maintenance, repairs improperly performed or replacement not conforming to Kohler Co. specifications that adversely affect performance and/or durability, and alterations or modifications not recommended or approved in writing by Kohler Co.,...
- Page 29 Cleaning The Engine This tractor has an air-cooled engine. Air must be able to circulate freely around engine through flywheel screen, through the cooling shrouds and over the fins of the cylinder head and cylinder block. Keep these areas free of accumulated dirt and debris or the engine will overheat;...
- Page 30 Refer to Figure 27 for information regarding the proper type of oil to add to the crankcase. • Place the tractor on a level surface and engage the parking brake. Stop the tractor engine and remove the ignition key. • Clean the area around the oil filler cap to prevent debris from entering the crankcase.
- Page 31 • Attach the flexible tubing to the drain valve. Place an appropriate container below the open end of the tubing to collect the old oil. • To open the drain valve, push it slightly inward turn counterclockwise until it stops, then pull it outward.
- Page 32 WARNING: Operating engine with loose or dam- aged air cleaner components will allow unfiltered air into the carburetor, causing ex- tensive wear and eventual failure of the engine. Servicing The Precleaner Wash and re-oil the foam precleaner more often under extremely dusty or dirty conditions.
-
Page 33: Trouble Shooting
SECTION 11: TROUBLE SHOOTING Possible Cause Hard To Start No fuel in fuel tank or carburetor Fuel ine or carburetor clogged Fuel filter plugged Water in fuel Choked improperly. Flooded engine Defective ignition or loose wiring Defective battery Spark plug dirty or improperly gapped Engine Operates Irregularly or Knocks Engine incorrectly timed Spark plug dirty;... - Page 34 Possible Cause Fuel tank air vent clogged Air leakage between carburetor and engine Remove air cleaner. Tighten the carburetor Incorrect timing or faulty ignition Brake dragging Insufficient cooling air — dirt or debris clog- ging the: air intake screen • shrouds • cool- ing fins •...
-
Page 35: Optional Equipment
However, later you may wish to obtain optional equipment or accessories. These items and other allied equipment can be purchased from, and installed by, your authorized Cub Cadet dealer. This tractor can be used for many different types of work, and because it is called on to operate under many different conditions, a variety or equipment is available to adapt it to the requirements of the user. -
Page 36: Specifications
Transmission ........Hydrostatic Transmission Oil ....Cub Cadet Drive System Fluid Plus Transmission Oil Capacity . -
Page 37: Slope Gauge
SECTION 14: SLOPE GAUGE WARNING: Do not mow on inclines with a slope in excess of 15 degrees (a rise of approximately 2-1/2 feet every 10 feet). A riding mower could overturn and cause serious injury. If operating a walk- behind mower on such a slope, it is extremely difficult to maintain your footing and you could slip, resulting in serious injury. -
Page 39: Limited Warranty - Commercial Use
CUB CADET LLC MANUFACTURER’S ONE YEAR LIMITED WARRANTY (COMMERCIAL USE) The limited warranty set forth below is given by CUB CADET LLC (“CUB CADET”) with respect to new merchandise purchased and used in the United States, its possessions and territories. - Page 40 The provisions as set forth in this Warranty provide the sole and exclusive remedy arising from the sale. CUB CADET shall not be liable for incidental or consequential loss or damages including, without limitation, to any claim for loss of profits, loss of savings or revenue, loss of the use of the...
-
Page 41: Limited Warranty - Residential Use
(3) years for Series 2000 products manufactured after August 1, 1997 for residential users, commencing on the date of original purchase or lease and CUB CADET will, at its option, repair or replace, free of charge, any PTO clutch or mounting hardware found to be defective in material or workmanship provided this product has been operated and maintained as set forth above. - Page 42 CUB CADET. During the period of the Warranty, the exclusive remedy is repair or replacement of the product as set forth above.
-
Page 44: Quick Reference Parts
PTO Belt (set of 2) Part Number 737-3030A (10W30) 737-3049 (5W30) KH-47-083-03 KH-24-083-02 KH-12-050-08 759-3336 Cub Cadet Drive System Fluid Plus 737-3120 - Quart 737-3121 - Gallon 923-3014 44” Deck -759-3939 (3) 48” Deck -759-3826 (3) 54” Deck -759-3820 (3) 60”...