Table of Contents
Advertisement
Advertisement
Table of Contents
Troubleshooting

Subscribe to Our Youtube Channel
Related Manuals for Miller Legend 301 G


Summary of Contents for Miller Legend 301 G
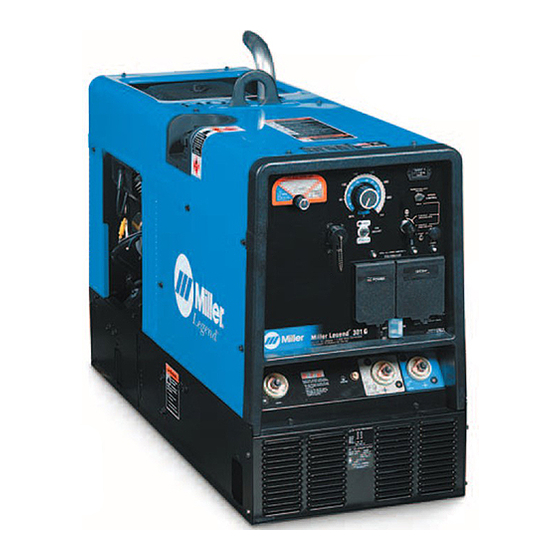
- Page 1 TM-4411A March 2003 Eff. w/Serial Number LC357086 Processes Stick (SMAW) Welding TIG (GTAW) Welding MIG (GMAW) Welding & Flux Cored (FCAW) Welding- With Voltage Sensing Feeder Description Engine Driven Welding Generator Miller Legend 301 G Visit our website at www.MillerWelds.com...
-
Page 2: Table Of Contents
TABLE OF CONTENTS SECTION 1 – SAFETY PRECAUTIONS FOR SERVICING ........1-1. - Page 3 TABLE OF CONTENTS SECTION 10 – TROUBLESHOOTING ........... . 10-1.
-
Page 5: Section 1 - Safety Precautions For Servicing
D Do not tip battery. shield during servicing. D Replace damaged battery. D Be careful not to short metal tools, parts, or D Flush eyes and skin immediately with water. wires together during testing and servicing. Miller Legend 301 G TM-4411 Page 1... -
Page 6: Emf Information
About Pacemakers: welding or cutting. To reduce magnetic fields in the workplace, use the following Pacemaker wearers consult your doctor first. If cleared by your doctor, procedures: then following the above procedures is recommended. TM-4411 Page 2 Miller Legend 301 G... -
Page 7: Section 2 - Definitions
Work Connection welding Receptacle Current Electrode Constant Wire Feed Electrode Negative Positive Voltage Notes Work like a Pro! Pros weld and cut safely. Read the safety rules at the beginning of this manual. Miller Legend 301 G TM-4411 Page 3... -
Page 8: Section 3 - Specifications
3-1/8 in (79 mm) ° 32-3/4 in (832 mm) ° ° 45-1/2 in (1156 mm) ° ° 13/32 in (10 mm) Dia. Engine End Engine End Weight 590 lb (267 kg) 800 426 803 129 TM-4411 Page 4 Miller Legend 301 G... -
Page 9: Fuel Consumption While Welding And Using Generator Power
DC WELD AMPERES AT 100% DUTY CYCLE 207 967 3-5. Generator Power Curve The ac generator power curve shows the generator power avail- able in amperes at the receptacles. AC AMPERES 207 969 Miller Legend 301 G TM-4411 Page 5... -
Page 10: Duty Cycle
Continuous Welding DC/CV DC/CC % DUTY CYCLE Ref. 207 925 Notes Work like a Pro! Pros weld and cut safely. Read the safety rules at the beginning of this manual. TM-4411 Page 6 Miller Legend 301 G... -
Page 11: Stick And Mig Mode Volt-Ampere Curves
Curves of other settings fall between the A. CC/DC Stick Mode curves shown. 3000 RPM 3600 RPM DC AMPERES B. CV/DC MIG Mode 3600 RPM 3000 RPM DC AMPERES 207 970 / 207 971 Miller Legend 301 G TM-4411 Page 7... -
Page 12: Dc Tig Mode Volt-Ampere Curves
Curves of other settings fall between the curves shown. DC AMPERES 204 930 Notes Work like a Pro! Pros weld and cut safely. Read the safety rules at the beginning of this manual. TM-4411 Page 8 Miller Legend 301 G... -
Page 13: Section 4 - Installation
18 in (460 mm) 18 in (460 mm) 18 in (460 mm) 18 in 18 in (460 mm) (460 mm) install2 11/02 – Ref. 800 652 / Ref. 800 477-A / 803 274 Miller Legend 301 G TM-4411 Page 9... -
Page 14: Engine Prestart Checks
(see maintenance label). To improve cold weather starting: Keep battery in good condition. Store battery in warm area off con- crete surface. Use correct grade oil for cold weather. Full Full Gasoline 803 129 TM-4411 Page 10 Miller Legend 301 G... -
Page 15: Activating The Dry Charge Battery (If Applicable)
When electrolyte is low, add only distilled water to cells to maintain proper level. 5 A For 30 Minutes Tools Needed: – rubbergloves 30 A For 12 Minutes glasses drybatt1 1/98 – S-0886 Miller Legend 301 G TM-4411 Page 11... -
Page 16: Connecting The Battery
Keep away from exhaust outlet. Point exhaust pipe in desired di- rection but always away from front panel and direction of travel. Tools Needed: 1/2 in 801 681 / Ref. 211 909 TM-4411 Page 12 Miller Legend 301 G... -
Page 17: Connecting To Weld Output Terminals
**Weld cable size (AWG) is based on either a 4 volts or less drop or a current density of at least 300 circular mils per ampere. ( ) = mm for metric use S-0007-E ***For distances longer than those shown in this guide, call a factory applications representative at 920-735-4505. Miller Legend 301 G TM-4411 Page 13... -
Page 18: Remote Receptacle Information
DC input command signal: 0 to +10 volts dc from feeder only. min. to max of remote control with front panel V/A control at max. Circuit common for 24 volt ac circuits. Chassis common. *The remaining sockets are not used. Notes TM-4411 Page 14 Miller Legend 301 G... -
Page 19: Adjusting Wire (Mig) Weld Puddle Consistency
27. Connect lead 27 to Wire/CV weld output terminal, reusing hardware. Insu- late lead 29 with sleeving removed from lead 27. Secure sleeving with cable ties. Reinstall side panel. Tools Needed: 3/8, 7/16 in Ref. 803 100 Miller Legend 301 G TM-4411 Page 15... -
Page 20: Section 5 - Operating Welding Generator
SECTION 5 – OPERATING WELDING GENERATOR 5-1. Front Panel Controls Ref. 211 909 TM-4411 Page 16 Miller Legend 301 G... -
Page 21: Description Of Front Panel Controls
Load: 3000 rpm (Weld Speed) All AC Receptacles At 1800 rpm. At 3000 rpm, Output Available Speed Control Switch In Weld. Only At 2.4 kW/kVA 60-120 Hz Engine Control Switch in 3000/1800 RPM. AC Receptacle RC3 Miller Legend 301 G TM-4411 Page 17... -
Page 22: Process Switch
Electrode Hot – Wire MIG (GMAW) Electrode Hot Stick (SMAW), Electrode Hot – Stick Electrode Hot Air Carbon Arc (CAC-A) Cutting And Gouging Electrode Hot – Scratch Scratch Start TIG (GTAW) Electrode Hot Start TIG TM-4411 Page 18 Miller Legend 301 G... -
Page 23: Remote Amperage/Voltage Control
Max (180 A DC) Min (40 A DC) Adjust Remote Control (Stick Welding Only) This unit does not have remote con- tactor control. Output is always on. 803 128 / 211 909 / S-0769 / S-0774 Miller Legend 301 G TM-4411 Page 19... -
Page 24: Section 6 - Operating Auxiliary Equipment
3000 rpm: All AC Receptacles Load: 3000 rpm At 1800 rpm. 20 – 220 A (Weld Speed) At 3000 rpm, Output Available Only At 2.4 kW/kVA 60-120 Hz AC Receptacle RC3 Ref. 211 909 TM-4411 Page 20 Miller Legend 301 G... -
Page 25: Variable Frequency (Hz) Generator Power Receptacle Rc3
Load 2 (Brass) Terminal 120V 120V Ground (Green) Terminal V x A = Watts 240V Amperes Available using *One 240 V load or two 120 V loads. 120/240 V Plug Tools Needed: 240V 120 813-D Miller Legend 301 G TM-4411 Page 21... -
Page 26: Section 7 - Maintenance
Every 500 h Service welding generator Repair or brushes and slip rings. replace cracked Service more often in dirty cables. conditions.* Every 1000 h Blow out or vacuum inside. During heavy service, clean monthly. TM-4411 Page 22 Miller Legend 301 G... -
Page 27: Maintenance Label
Y Stop engine and let cool. Spark Arrestor Screen Clean and inspect screen. Replace spark arrestor if screen wires are broken or missing. Tools Needed: 1/4 in 803 127 / Ref. 211 909 Miller Legend 301 G TM-4411 Page 23... -
Page 28: Servicing Air Cleaner
Spread 1 tablespoon SAE 30 oil evenly into wrapper. Squeeze out excess oil. Element Replace element if damaged, dirty, or oily. aircleaner3 9/00 – 802 772 / Ref. 185 095-A / S-0759 TM-4411 Page 24 Miller Legend 301 G... -
Page 29: Changing Engine Oil, Oil Filter, And Fuel Filter
Install new filter. Wipe up any spilled fuel. Start engine, and check for fuel leaks. Y Stop engine, tighten connec- tions as necessary, and wipe up fuel. Tools Needed: 803 127 / S-0842 Miller Legend 301 G TM-4411 Page 25... -
Page 30: Overload Protection
If F6 opens, the engine will not crank. Replace fuse if open. If F6 continues to open, check Engine Control switch S2, and diode D1. 802 851-A / Ref. 211 909 TM-4411 Page 26 Miller Legend 301 G... - Page 31 18 Gauge (.050 in) 16 Gauge (.063 in) 14 Gauge (.078 in) 1/8 in (.125 in) 3/16 in (.188 in) 1/4 in (.25 in) 5/16 in (.313 in) 3/8 in (.375 in) 1/2 in (.5 in) Miller Legend 301 G TM-4411 Page 27...
-
Page 32: Section 8 - Theory Of Operation
11 Output Adjust Switch S3 Selects Panel or Remote voltage/ Mechanical Coupling amperage control. 12 V/A Control Magnetic Coupling Changes output of stator weld wind- ings by adjusting field current level in revolving field. Miller Legend 301 G TM-4411 Page 28... - Page 33 CB3, CB4 Stabilizer DC-Z HF Filter Board HF Filter Board CC Weld CV Weld Work Weld 240 V AC 120 V AC Output Output Output Receptacle Receptacles Terminal Terminal Terminal RC2, RC3 Electrode Work Miller Legend 301 G TM-4411 Page 29...
-
Page 34: Section 9 - Explanation Of Electrical Parts
(sometimes referred to as a wiper). Their primary purpose is to give the operator VARIABLE a way to adjust welding parameters such as wire speed, preflow time, voltage, inductance, etc. Miller Legend 301 G TM-4411 Page 30... - Page 35 When the inductor is placed in an AC circuit it is referred to as a reactor where it now acts to restrict the flow of current. A “tapped reactor” is used to create current ranges for welding. Miller Legend 301 G TM-4411 Page 31...
- Page 36 (Notice the “jumper link” connecting terminals A and B together.) SWITCH A mechanical device that completes or SPST SPDT breaks the path of the current or sends it over a different path. DPST DPDT Miller Legend 301 G TM-4411 Page 32...
- Page 37 Its main use in engine-driven equipment is to activate the “Automatic Idle” circuit by sensing welding current or auxiliary power current. Miller Legend 301 G TM-4411 Page 33...
-
Page 38: Section 10 - Troubleshooting
Check main rectifier SR1, and replace if necessary. Check current transducer LEM, and replace if necessary. Check remote receptacle RC4 for continuity and proper connections, and replace RC4 if necessary (see Section 4-8). TM-4411 Page 34 Miller Legend 301 G... - Page 39 Check cables and torch for cracked insulation or bad connection. Repair or replace necessary parts. Wandering arc – poor control of arc Use proper size tungsten. direction. Properly prepare tungsten. Reduce gas flow rate. Miller Legend 301 G TM-4411 Page 35...
- Page 40 Check control board PC2 and connections, and replace if necessary (see Section 10-7). LED3 on PC2 lights when PC2 is energized. Check generator power board PC7 and connections, and replace if necessary (see Section 10-9). TM-4411 Page 36 Miller Legend 301 G...
- Page 41 Engine stopped during normal Check fuel level (see Section 4-2). operation. Check oil level (see Section 4-2). Low oil pressure shutdown stops engine if oil pressure is too low. Check low oil pressure shutdown switch S5. Miller Legend 301 G TM-4411 Page 37...
- Page 42 (3000 or 3600 rpm). Insufficient load; increase weld load. Check current transformer CT1, and replace if necessary. Notes OHM'S LAW VOLTAGE = CURRENT X RESISTANCE CURRENT = VOLTAGE RESISTANCE RESISTANCE = VOLTAGE CURRENT TM-4411 Page 38 Miller Legend 301 G...
- Page 43 Notes Miller Legend 301 G TM-4411 Page 39...
-
Page 44: Troubleshooting Circuit Diagram For Welding Generator (Ac/Dc Models) (Use With Section 10-3)
Troubleshooting Circuit Diagram For Welding Generator (AC/DC Models) (Use With Section 10-3) Test Equipment Needed: Generator Power Control Relay CR2 (energized at 1800 rpm) V23, R13, V23, R13, See Section 10-7 for PC2 data Miller Legend 301 G TM-4411 Page 40... - Page 45 PC3 information See Section 10-4 for waveforms A, B, C, D, E, F, G, H V1, V2 A, B, C V3, V4 D, E, F See Section 8 for PC5 information 211 395-A Miller Legend 301 G TM-4411 Page 41...
-
Page 46: Troubleshooting Values For Circuit Diagram (Ac/Dc Models) (Use With Section 10-2)
200 A, 25 V Load, Stick Mode amps dc: 2.4 –– connector (orange–gray): 53 ohms; Pins 6 and 7 on 3 kW/240 V Gen. Pwr. Load amps dc: 2.6 –– –– –– Governor Module connector (brown–pink): 53 ohms TM-4411 Page 42 Miller Legend 301 G... - Page 47 Notes Work like a Pro! Pros weld and cut safely. Read the safety rules at the beginning of this manual. Miller Legend 301 G TM-4411 Page 43...
-
Page 48: Waveforms For Section 10-2
(Resistive Load) 2 ms 20 V 2 ms 20 V C. CV/DC Mode, DC Open-Circuit Voltage, D. CV/DC Mode, 20 Volts DC, 170 Amperes, V/A Control In Max Position At 3600 RPM (Resistive Load) Miller Legend 301 G TM-4411 Page 44... - Page 49 200 ms 2 V G. Pulse Width Modulation Signal Between H. Pulse Width Modulation Signal Between Weld Power Board PC1 And Generator Weld Power Board PC1 And Control Board Power Board PC7 Test Equipment Needed: Miller Legend 301 G TM-4411 Page 45...
-
Page 50: Power Board Pc1 Testing Information
Receptacle RC10 Receptacle RC12 Receptacle RC15 Receptacle RC16 Receptacle RC17 Receptacle RC19 Receptacle RC33 LED5 and LED6 on PC1 light when power board PC1 is energized. Test Equipment Needed: 803 483 / 211 277 TM-4411 Page 46 Miller Legend 301 G... -
Page 51: Power Board Pc1 Test Point Values
Not used Not used Not used Not used Not used Safety Shutdown: 0 volts dc input when safety circuit is not tripped, +14 volts dc input when safety circuit is tripped Not used Miller Legend 301 G TM-4411 Page 47... - Page 52 Auxiliary Voltage Feedback: 240 volts ac input at all speeds with respect to RC33-6 Notes Work like a Pro! Pros weld and cut safely. Read the safety rules at the beginning of this manual. TM-4411 Page 48 Miller Legend 301 G...
-
Page 53: Control Board Pc2 Testing Information
Receptacle RC24 Receptacle RC25 Receptacle RC27 Receptacle RC28 10 Receptacle RC29 LED3 on PC2 lights when the pulse width modulation (PWM) signal is present at PC2. Test Equipment Needed: 803 483 / 211 274 Miller Legend 301 G TM-4411 Page 49... -
Page 54: Control Board Pc2 Test Point Values
Engine Control switch S2 in any other position Circuit common Not used +15 volts dc input with Speed Control switch S4 in Weld position, 0 volts dc input with Speed Control switch S4 in Power (Gen. Lock) position TM-4411 Page 50 Miller Legend 301 G... - Page 55 Weld Voltage Feedback Input: same as voltage across output studs with respect to RC29-1 LEM Power Supply: +15 volts dc output LEM Power Supply: –15 volts dc output Circuit common LEM Feedback signal: 1 volt dc input per 100 Amps of weld output Miller Legend 301 G TM-4411 Page 51...
-
Page 56: Power Board Pc7 Testing Information
Same as V16 in Section 10-3 with respect to RC31-4 on PC7 Circuit common Exciter Winding: 143 volts ac input at all speeds with respect to RC31-9 on PC7 Exciter Winding: 143 volts ac input at all speeds with respect to RC31-8 on PC7 TM-4411 Page 52 Miller Legend 301 G... -
Page 57: Replacing Brushes And Cleaning Slip Rings
(see Section 11-2 for torque values). Reinstall side panels and cover. Tools Needed: 1/4 in (6.4 mm) Minimum Length 1/2 in (12.7 mm) New Length Replace Damaged Brushes 803 484 / S-0233-A Miller Legend 301 G TM-4411 Page 53... -
Page 58: Adjusting Electronic Governor
Tighten mounting screws to 2.5 N m (22 in lb). Reinstall air cleaner and top cover. See the engine manual for additional in- formation. Tools Needed: 5/16 in 803 444 TM-4411 Page 54 Miller Legend 301 G... -
Page 59: Checking Unit Output After Servicing
Check labels; replace labels that are unreadable or damaged (see Parts List). Check Fuel and oil (see Section 4-2). Check and correct any fluid leaks. Clean weld output and battery terminals. Tighten connections. Clean outside of entire unit. Tools Needed: 3/8 in 803 483 Miller Legend 301 G TM-4411 Page 55... -
Page 60: Section 11 - Disassembly And Reassembly
Remove engine and rotor by removing nuts remove engine/generator assembly. Disconnect battery cables, fuel line, choke from studs and separating stator from engine cable, and base ground cable. Remove adapter. Go to Section 11-2. TM-4411 Page 56 Miller Legend 301 G... -
Page 61: Disassembly Of Generator
Assemblies Shown) Reconnect fuel line, choke cable, and base Stator ground cable. Reinstall spark plugs, battery O-Ring Rotor Assembly and tray, panels, and cover. Reconnect battery Bearing 10 Endbell cables. Miller Legend 301 G TM-4411 Page 57... - Page 62 Notes Work like a Pro! Pros weld and cut safely. Read the safety rules at the beginning of this manual. TM-4411 Page 58 Miller Legend 301 G...
-
Page 63: Section 12 - Electrical Diagrams
The following is a list of all diagrams for models covered by this manual. Model Serial Or Style Number Circuit Diagram Wiring Diagram Miller Legend 301 G LC357086 And following 211 395-A See Table 12-1 Circuit Board PC1 LC357086 And following... - Page 64 Figure 12-1. Circuit Diagram For Miller Legend 301 G Eff w/ Serial No. LC357086 And Following Miller Legend 301 G TM-4411 Page 60...
- Page 65 211 395-A Miller Legend 301 G TM-4411 Page 61...
- Page 66 Figure 12-2. Circuit Diagram For Weld Power Board PC1 Eff w/ Serial No. LC357086 And Following (1 of 2) Miller Legend 301 G TM-4411 Page 62...
- Page 67 211 278-A Miller Legend 301 G TM-4411 Page 63...
- Page 68 Figure 12-3. Circuit Diagram For Weld Power Board PC1 Eff w/ Serial No. LC357086 And Following (2 of 2) Miller Legend 301 G TM-4411 Page 64...
- Page 69 211 278-A Miller Legend 301 G TM-4411 Page 65...
- Page 70 Figure 12-4. Circuit Diagram For Control Board PC2 Eff w/ Serial No. LC357086 And Following (1 Of 2) Miller Legend 301 G TM-4411 Page 66...
- Page 71 211 275-B Miller Legend 301 G TM-4411 Page 67...
- Page 72 Figure 12-5. Circuit Diagram For Control Board PC2 Eff w/ Serial No. LC357086 And Following (2 Of 2) Miller Legend 301 G TM-4411 Page 68...
- Page 73 211 275-B Miller Legend 301 G TM-4411 Page 69...
- Page 74 Figure 12-7. Circuit Diagram For HF Filter Board PC3 Effective With Serial No. LC357086 And Following 148 033-A Figure 12-8. Circuit Diagram For HF Filter Board PC5 Effective With Serial No. LC357086 And Following TM-4411 Page 70 Miller Legend 301 G...
- Page 75 Table 12-1. Lead List Summary For Miller Legend 301 G Models Eff w/ Serial No. LC357086 Table shows physical lead connections and should be used with circuit diagram (table replaces wiring diagram). Apply small amount of dielectric grade, nonconductive electric grease (Miller Part No. 146 557) to connectors where factory-applied grease had been present.
- Page 76 Table 12-1. Lead List Summary For Miller Legend 301 G Models Eff w/ Serial No. LC357086 (Continued) Lead Connections Lead Connections 0134A RC22 (1) TO COM BRUSH 0141B CR2 (A) TO SPLICE 0134B PLG 22 (1) TO PLUG 33 (7)
- Page 77 TIG (GTAW) Welding MIG (GMAW) Welding & Flux Cored (FCAW) Welding- With Voltage Sensing Feeder Description Engine Driven Welding Generator Miller Legend 301 G Eff w/LC357086 And Following For OM-4411 (207 283) Revisions A And B Visit our website at www.MillerWelds.com...
-
Page 78: Section 13 - Parts List For Lc357086 And Following
SECTION 13 – PARTS LIST FOR LC357086 AND FOLLOWING 803 340 Figure 13-1. Main Assembly TM-4411 Page 74 Miller Legend 301 G... - Page 79 ..........Miller Legend 301 G...
- Page 80 Replacement Parts. Model and serial number required when ordering parts from your local distributor. Notes Start Your Professional Over 80,000 trained 400 Trade Square East, Troy, Ohio 45373 Welding Career Now! since 1930! 1-800-332-9448 www.welding.org TM-4411 Page 76 Miller Legend 301 G...
- Page 81 Switch, Ignition 4 Position W/Out Handle ......Miller Legend 301 G TM-4411 Page 77...
- Page 82 Label Kit 207 019. To maintain the factory original performance of your equipment, use only Manufacturer’s Suggested Replacement Parts. Model and serial number required when ordering parts from your local distributor. TM-4411 Page 78 Miller Legend 301 G...
- Page 83 ....165437 Clip, Snap In .472 Bundle .250hole .020–.197 Thk ....Miller Legend 301 G TM-4411 Page 79...
- Page 84 To maintain the factory original performance of your equipment, use only Manufacturer’s Suggested Replacement Parts. Model and serial number required when ordering parts from your local distributor. Hardware is common and not available unless listed. 803 342 Figure 13-4. Generator TM-4411 Page 80 Miller Legend 301 G...
- Page 85 Notes...
- Page 86 Appleton, WI 54914 USA International Headquarters–USA USA Phone: 920-735-4505 Auto-Attended USA & Canada FAX: 920-735-4134 International FAX: 920-735-4125 European Headquarters – United Kingdom Phone: 44 (0) 1204-593493 FAX: 44 (0) 1204-598066 PRINTED IN USA 2003 Miller Electric Mfg. Co.
Need help?
Do you have a question about the Legend 301 G and is the answer not in the manual?
Questions and answers