Table of Contents
Advertisement
Quick Links
Advertisement
Table of Contents

Related Manuals for Mindray BeneFusion eSP Vet


Summary of Contents for Mindray BeneFusion eSP Vet
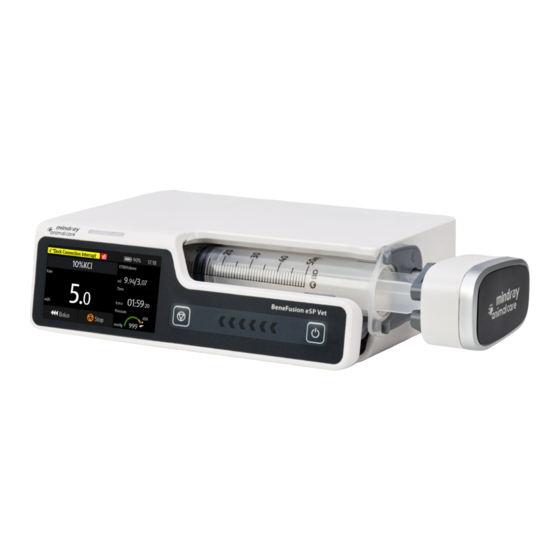
- Page 1 BeneFusion eSP Vet Veterinary Syringe Pump Operator’s Manual...
- Page 3 © Copyright 2021 Shenzhen Mindray Animal Medical Technology Co., LTD. All rights reserved. Release date: 2021-04 Revision: 1.0...
- Page 4 Animal Medical) owns the intellectual property rights to this product and this manual. This manual may refer to information protected by copyright or patents and does not convey any license under the patent rights or copyright of Mindray Animal Medical, or of others.
- Page 5 Mindray Animal Medical or repairs by people other than Mindray Animal Medical authorized personnel.
- Page 6 Preface Manual Purpose This manual contains the instructions necessary to operate the product safely and in accordance with its function and intended use. Observance of this manual is a prerequisite for proper product performance and correct operation and ensures patient and operator safety.
-
Page 7: Table Of Contents
Contents 1 Safety ............................1 - 1 1.1 Safety Information ............................1 - 1 1.1.1 Warnings ............................1 - 1 1.1.2 Cautions ............................1 - 2 1.1.3 Notes ..............................1 - 3 1.2 Equipment Symbols ............................1 - 3 2 Equipment Introduction ......................2 - 1 2.1 Intended Use ..............................2 - 1 2.2 Applied Part ..............................2 - 1 2.3 Main Unit .................................2 - 1 2.3.1 Front View ............................2 - 1... - Page 8 4.6.2 Automatic Bolus Infusion ......................4 - 6 4.6.3 Manual Bolus Infusion .........................4 - 6 4.6.4 Setting the Bolus Volume Unit ....................4 - 7 4.7 Changing the Infusion Parameters ......................4 - 7 4.8 Pausing the Infusion ............................4 - 7 4.9 Setting Keep Vein Open (KVO) Rate .......................4 - 7 4.10 Unloading a Syringe ..........................4 - 8 4.11 Viewing the Infused Volume ........................4 - 9 4.12 Entering the Standby Mode ........................
- Page 9 8.4 Micro-infusion Mode ...........................8 - 3 8.5 Sequential Mode ............................8 - 3 8.5.1 Adding/Deleting Sequences .....................8 - 3 8.5.2 Changing the Infusion Parameters ..................8 - 4 8.6 Intermittent Mode ............................8 - 4 8.7 Ramp Mode ..............................8 - 5 8.8 Dose Time Mode ............................8 - 5 9 Drug Library/Drug Info Library ....................9 - 1 9.1 Importing the Drug Library/Drug Info Library ...................9 - 1 9.2 Dose Error Reduction Systems (DERS) ....................9 - 2...
- Page 10 11.18 The Auto-Restart Setting ........................11 - 6 11.19 The Concentration Setting ........................ 11 - 7 11.20 Modify the Password ........................... 11 - 7 11.21 Import and Export ..........................11 - 7 12 Maintenance ...........................12 - 1 12.1 Maintenance Safety Information ....................... 12 - 1 12.2 Maintenance and Testing Schedule ....................
- Page 11 A.5.4 Interface Specifications ......................A - 3 A.5.5 Signal Output Specifications ....................A - 3 A.6 Wireless Network ............................A - 4 A.7 Infusion Specifications ..........................A - 4 A.8 Recommended Syringes .......................... A - 6 A.9 Occlusion Alarm Delay and Bolus Volume ..................A - 7 A.10 Infusion Accuracy Graphs ........................
- Page 12 This page intentionally left blank.
-
Page 13: Safety
Safety Safety Information WARNING • Indicates a potential hazard or unsafe practice that, if not avoided, could result in death, serious injury or damage to product/property. CAUTION • Indicates a potential hazard or unsafe practice that, if not avoided, could result in minor personal injury, product malfunction or damage to product/ property. -
Page 14: Cautions
• Do not place the equipment or accessories in any position that might cause it to fall on the patient. • Do not start an infusion unless the setup was verified to be correct. • To avoid inadvertent disconnection, route all cables in a way to prevent a stumbling hazard. -
Page 15: Notes
1.1.3 Notes NOTE • The software was developed in compliance with IEC62304. • The equipment provides power-down storage. Alarms limit setting and history record are saved and will be maintained if the equipment is powered down suddenly. The storage time is equals to the equipment’s service life. The alarm limit settings before power-down are reloaded when the equipment is restarted. - Page 16 THIS WAY UP Keep dry Fragile, handle with care STACKING LIMIT BY NUMBER CE mark Serial number General warning sign Stop Stand-by Non-ionizing electromagnetic radiation Temperature limitations Dispose of in accordance to your country’s requirements 1 - 4...
-
Page 17: Equipment Introduction
Equipment Introduction Intended Use The veterinary syringe pump is used in conjunction with the syringe to control the dose of liquid infused into the patient’s body. This veterinary syringe pump is expected to be used in institutes or units with healthcare capabilities. - Page 18 Display Stop key When an emergency happens during an infusion and unlocking the touchscreen fails, press this key to stop infusion. Power switch Battery LED • Green: the battery is being charged. • Flashing green: the pump runs on battery power. •...
- Page 19 Extension set holder Secures the extension set. Door Open the door to load or unload the syringe. Barrel Clamp Secures the barrel and the barrel flange to the pump and identifies the syringe barrel size. Flange Retainer Secures the barrel flange to the pump. 2 - 3...
-
Page 20: Rear View
2.3.2 Rear View Speaker Provides sound for audible alarms and reminder. Multifunctional connector • Connects the equipment to the hospital’s nurse call system through the nurse call cable. • Uses as a DC power input connector when the equipment is connected to the dock. -
Page 21: 2.3.3 Bottom View
2.3.3 Bottom View Product label Placement area for stacking pumps This area is for stacking the pumps with the handle. Placement area for pole clamp This area is for mounting the pump to a pole clamp. Screen Display The screen may look slightly different in different infusion modes. The following figure shows the infusion screen of the rate mode: System status information area Displays the alarm information, infusion mode, syringe brand, or bed number. -
Page 22: On-Screen Symbols
System status information area Displays the battery status, network status, relayed status, and system time. For more information, see 2.4.1 On-screen Symbols. Infusion status area Displays other infusion parameters and pressure status. Pressure status area Displays the real-time pressure status. •... -
Page 23: Menus
Symbol Description Symbol Description The battery has low power The battery has critically low and needs to be charge and needs to be charged. charged immediately. Otherwise, the equipment will automatically shut down. No battery is installed. Battery fault, battery communication fault, or battery charging fault. -
Page 24: Using The Touchscreen
Symbol Label Function Symbol Label Function Standby Enters Purge Initiate a Standby. purge. Volume Enters the Menu Enters the Volume Menu. menu. Exit Returns to the Bolus Initiate a main screen. Bolus infusion. Start Starts an Stop Pause an infusion. infusion. -
Page 25: Using The On-Screen Keyboard
2.4.5 Using the On-Screen Keyboard The on-screen keyboard enables you to enter information: ■ Enter the information by selecting one character after another. ■ Select the Backspace key to delete single characters. ■ Select the Caps Lock key to switch uppercase letters and lowercase letters. ■... - Page 26 This page intentionally left blank. 2 - 10...
-
Page 27: Equipment Preparation
Any personnel who connect devices to the equipment’s signal input/output port are responsible for providing evidence that the safety certification of the devices has been performed in accordance to the IEC 60601-1. If you have any questions, please contact Mindray Animal Medical. •... -
Page 28: Environmental Requirements
NOTE • Save the packing case and packaging material as they can be used if the equipment must be reshipped. Environmental Requirements The operating environment of the equipment must meet the requirements specified in this manual. The environment where the equipment is used shall be reasonably free from noises, vibration, dust, corrosive, flammable, and explosive substances. -
Page 29: Setting Up The Equipment
• A maximum of three pumps can be stacked together when used with the stack rack. Setting Up the Equipment Observance of this manual is a prerequisite for proper product performance and correct operation. It ensures patient and operator safety. 3.4.1 Connecting the AC Mains The equipment is powered by AC power supply. -
Page 30: Adjusting The Screen Brightness
the AC power. The battery can also be charged when the pump is in use with a Dock if the Dock is connected to the AC power. NOTE • The battery can only be charged by the pump or Dock. •... -
Page 31: Getting Started
Getting Started Quick Start Guide Press the power switch to turn on the pump. Load the syringe. For detailed information, see 4.3 Loading the Syringe. Set the infusion parameters. For detailed information, see 4.4 Starting Infusion. If required, purge the line. For detailed information, see 4.5 Purge. Connect the extension set to the patient access device. -
Page 32: Loading The Syringe
not working properly, or if it is mechanically damaged. Contact your service personnel or us. NOTE • Stay within 1 meter (39 inches) of the pump while setting it up and operating it, making sure that you have a clear view of the pump interface. •... - Page 33 Lift the syringe clamp (6) until it locks the syringe barrel (7). The driver head (8) automatically slides left until it reaches the plunger (9) end, and the plunger grip- pers (10) automatically squeezes the plunger flange (11). (11) (10) Place the extension line into the extension set holder (12) (12) Close the pump door.
-
Page 34: Starting Infusion
WARNING • Check that the syringe and the extension set are securely connected and there is no leakage. • It is recommended that standard, single-use extension sets and syringes with Luer lock connections are used. • We recommend you to use syringes of the types and brands stated in this manual. -
Page 35: Purge
Connect the infusion set to the patient access device. Check the following: ◆ Verify parameter settings according to the prescriber’s order. ◆ Verify that the displayed syringe brand and size correspond with the currently used syringe. Press to start infusion. WARNING •... -
Page 36: Setting The Bolus Rate
NOTE • The delivered bolus volume will be added to the total infusion volume and subtracted from the volume to be infused (VTBI). • The pump gives a beep every time a 0.5 ml bolus volume is infused. 4.6.1 Setting the Bolus Rate To set the bolus rate, follow this procedure: Swipe the touchscreen from top down →... -
Page 37: Setting The Bolus Volume Unit
4.6.4 Setting the Bolus Volume Unit To set the bolus volume, follow this procedure: Swipe the touchscreen from top down → select Menu → select User Maintenance → input the required password → select Select the Bolus Volume Unit: ◆ ml: the unit is ml in each infusion mode. -
Page 38: Unloading A Syringe
NOTE • If the KVO rate is greater than the infusion rate, the pump will continue to infuse at the set infusion rate. • The pump runs for 30 minutes at a KVO rate. At the completion of the KVO infusion, the pump stops infusion, and gives a KVO Finish alarm. -
Page 39: Viewing The Infused Volume
• To prevent free flow, make sure that the clamp has fully occluded the extension set before unloading a syringe. 4.11 Viewing the Infused Volume The Volume dialog allows you to review the infused volume of up to 24 hours. You can also view the infused volume of the configured time interval and time length. -
Page 40: Entering The Standby Mode
4.12 Entering the Standby Mode The standby mode is used to temperately stop an infusion without switching off the pump. To enter the standby mode, hold the power switch and select Standby. While the pump is in the standby mode, select to set the standby time. -
Page 41: Using The Dock
Using the Dock This equipment can be mounted to the BeneFusion eDS Vet Veterinary Infusion Supervision System, hereafter referred to as “Dock”. For how to use the Dock, see the BeneFusion eDS Vet Veterinary Infusion Supervision System Operator's Manual. Securing the Pump in the Dock To secure the pump in the Dock, firmly push the pump until you hear that the clip engages the pump bay. -
Page 42: Relay Infusion
Relay Infusion Multiple pumps can be combined to infuse at a preset sequence when used with the Dock. Pumps in a single Dock or pumps in the cascade Docks are all available for relay infusion. NOTE • Relay infusion is available for Rate Mode, Micro-infusion Mode, Time Mode, and Dose Mode. -
Page 43: Performing Day's Prescription
CAUTION • Removing a relay pump from the Dock cancels the relay infusion. • For a circular relay, initiating a middle pump cancels the relay. For a customized relay, initiating a middle pump removes the pumps before it from the relay. Performing Day’s Prescription The pump automatically receives the prescription from the BeneFusion eDS Vet Veterinary Infusion Supervision System when the system is in proper network... - Page 44 This page intentionally left blank. 5 - 4...
-
Page 45: Alarms
Alarms Alarm Safety Information WARNING • A potential hazard can exist if different alarm presets and default settings are used for the same or similar equipment in the same care area, for example an intensive care unit or cardiac operating room •... -
Page 46: Alarm Screen
Alarm Alarm Alarm Alarm Alarm Alarm Duty priority lamp lamp sound message priority Cycle color flashing interval indicator frequency High 2.0 ± 0.6 5s (±2s) White 20% to priority text or alarm symbol inside a red box Yellow 20s (±2s) Black text 100% priority... -
Page 47: Resetting Alarms
Resetting Alarms When an alarm occurs, press to acknowledge and reset the alarm. The alarm reset state has the following features: A √ appears before the alarm message, indicating that the alarm is ■ acknowledged. ■ The alarm sound is silenced, and the alarm screen disappears. ■... -
Page 48: Setting The Alarm Sound
Setting the Alarm Sound 6.5.1 Setting the Alarm Volume To change the alarm volume, follow this procedure: Swipe the touchscreen from top down → select Menu → select System Options. Set the Sound Volume. The sound volume can be set from 1 to 8, in which 1 is the minimum volume, and 8 is the maximum volume. -
Page 49: Alarm Solutions
◆ Continuous: the nurse call signal lasts until the alarm ends. That is to say the duration of a nurse call signal is equal to that of the alarm condition. Select Trigger Type to set the work mode of the nurse call relay. Select Alarm Level to set the priority of alarms sent to the nurse call system. - Page 50 Alarm Priority Causes Solutions Syringe Near The preset Time Near • The alarm is cleared when Empty End is reached. the infusion is completed. • End the infusion or replace the syringe. Battery High The battery is depleted. Connect the pump to the Depleted external power source.
- Page 51 Alarm Priority Causes Solutions Battery Error Battery fault, such as Contact your service personnel. battery over heat, charging failure, etc. CMS/eGW The pump is • Reconnect the pump with Disconnected disconnected from the the central station, the CMS, the wireless wireless network connection network connection symbol restores.
-
Page 52: Occlusion Alarm
NOTE • The pump stops infusion when a high priority alarm is triggered. • The pump continues infusion when a low priority alarm is triggered. • The pump stops infusion after the first Battery Depleted alarm occurs, and the shutdown delay is at least three minutes. •... -
Page 53: Menu Options
Menu Options Main Menu Options The main menu includes the following options: Menu Item Details General Option See 7.2 General Option. System Options See 7.3 System Options. Patient Management See 10 Managing Patient. Discharge Patient See 10 Managing Patient. Day's Prescription See 5.3 Performing Day’s Prescription. - Page 54 Menu Item Default Range Function Time Near 3min Off, 1, 2, 3, 4, 5, 6, Set for how long the Time Near End 7, 8, 9, 10, 15, 20, alarm is triggered since the infusion 25, 30 min is completed. The switch is turned off: the pump does not give the Time Near End alarm.
-
Page 55: System Options
Menu Item Default Range Function Common Rate Mode, Each infusion Check or uncheck the infusion mode. Mode Dose Mode mode The checked infusion mode will be and Dose displayed in the infusion mode list of Time Mode the infusion status area. Note:Rate Mode and the checked infusion mode in the infusion status area cannot be unchecked. - Page 56 Menu Item Default Function Night Mode Switch Set the night mode switch. The switch is turned on: The pump enters night mode when the set Start Time is reached. The switch is turned off: The night mode is not available for the pump. Start Time 18:00 Set the start time and end time of the...
-
Page 57: Infusion Modes
Infusion Modes The pump provide the following infusion modes: ■ Rate Mode ■ Dose Mode ■ Loading Dose Mode ■ Micro-infusion Mode ■ Time Mode ■ Sequential Mode ■ Intermittent Mode ■ Dose Time Mode ■ Ramp Mode Rate Mode/Time Mode In rate mode and time mode, the IV drug therapy continues to infuse at a set rate. -
Page 58: Dose Mode
Dose Mode Dose mode allows you to specify the drug amount, diluent volume or concentration for a therapy. Dose mode is typically used for body weight drugs. Rate and time are automatically calculated according to the following formulas: ■ Rate = Dose Rate* Weight/Conc. ■... -
Page 59: Micro-Infusion Mode
NOTE • If you do not configure the loading dose parameters, the pump infuses at the Primary Rate until the set VTBI is finished. Micro-infusion Mode Micro-infusion mode is typically use for low rate infusions for patients. Micro-infusion mode offers three parameters: rate, time and VTBI. When two of these parameters are entered, the third is calculated by the pump. -
Page 60: Changing The Infusion Parameters
Select a sequence (such as S1) from the parameter setup screen. In the popup dialog, make the following settings: ◆ Select Add Sequence Upward to add a sequence before the current sequence. ◆ Select Add Sequence Backward to add a sequence after the current sequence. -
Page 61: Ramp Mode
NOTE • Total VTBI and are optional parameters. If the Maintain Rate is Maintain Rate not set, infusion stops at the maintenance stage. If the Total VTBI is not set, the infusion stops when the syringe is empty. Ramp Mode In the ramp mode, the infusion is running at increasing or decreasing rates. - Page 62 You can change the concentration parameters (Drug Amt., Volume or Conc.) as needed. See 11 Password Protected Settings. You can change the units of drug amount, dose rate, and concentration before starting an infusion or when the infusion is paused. To do so, select the corresponding unit of Drug Amt., Dose Rate or Conc., and reconfigure in the popup dialog.
-
Page 63: Drug Library/Drug Info Library
Drug Library/Drug Info Library The pump can be configured with a drug library or a drug info library, which predefines drugs, concentrations, occlusion pressure levels and other infusion parameters. Using a drug library or drug info library simplifies the infusion operation, and reduces the risk of operation fault. -
Page 64: Dose Error Reduction Systems (Ders)
Select Import. The pump loads the predefined infusion parameters from the drug library or the drug info library after a drug has been selected. If the pump is connected to the CMS via the Dock and wireless LAN, the drug library and the drug info library can be imported to this pump via the CMS. -
Page 65: Managing Patient
Managing Patient 10.1 Discharging/Admitting a Patient Before admitting a new patient, discharge the previous patient. After the patient is discharged, all patient data are removed from the pump. After a patient is discharged, the pump automatically admit a new patient. The patient is automatically discharged in the following cases: ■... -
Page 66: Importing Patient Information
Select OK. Exporting the patient information automatically discharge the patient. 10.4 Importing Patient Information To import the patient information from the USB drive, follow this procedure: Connect the USB drive to the USB connector. Swipe the touchscreen from top down → select Menu → select Patient Manage- ment →... -
Page 67: Password Protected Settings
Password Protected Settings User maintenance enables you to customize your equipment to best meet your needs. Accessing the User Maintenance menu is password protected. This chapter describes the settings and functions in the User Maintenance menu. CAUTION • The maintenance settings can only be changed by authorized personnel. Contact your department manager or biomedical engineering department for the passwords used at your facility. -
Page 68: System Calibration
11.4 System Calibration Menu Item Default Setting Function Accuracy Contact your service personnel to perform the Calibration calibration as per the recommended frequency in 12.2 Maintenance and Testing Schedule. Pressure Contact your service personnel to perform the Calibration calibration as per the recommended frequency in 12.2 Maintenance and Testing Schedule. -
Page 69: The Central Station Setup
11.5.3 The Central Station Setup Menu Item Default Setting Function Central Station IP Sets 0.0.0.0 the central station IP address. Address 11.5.4 The Device Discover Settings Menu Item Default Setting Function Multicast TTL Multicast helps device discovery between pumps and between pumps and CMS. Devices in the Multicast 225.0.0.8 same multicast group can be mutually... -
Page 70: The Time And Language Settings
11.7 The Time and Language Settings Menu Item Default Setting Function Date 2018/1/1 Sets the current date. Time 0:00:00 Sets the current time. Date Format yyyy-mm-dd Sets the date format. 24 h Sets the time format. If you want to use the 12- hour mode, switch off 24 hour time. -
Page 71: 11.10 Viewing The Version Information
11.10 Viewing the Version Information Menu Item Default Setting Function Version Displays software version, compile time, driver Information software, power software, algorithm, etc. 11.11 The Alarm Settings Menu Item Default Setting Function Alarm Sound Sets the alarm sound mode. Sound2 CMS/eGW Sets whether the disconnection alarm will be Disconnected... -
Page 72: 11.14 The Purge Limit Settings
11.14 The Purge Limit Settings Menu Item Default Setting Function Purge Limit Sets the maximum volume of the purge. The purge stops when the set volume is reached. The setting range is 0.01 ml to 5 ml. 11.15 The Parameter Memory Setting Menu Item Default Setting Function... -
Page 73: 11.19 The Concentration Setting
11.19 The Concentration Setting Menu Item Default Setting Function Concentration Conc. Sets the concentration paramter for Dose Mode Config and Dose Time Mode. • Conc.: The concentration parameter is displayed as Conc. in the above mode. • Amount & Volume: The concentration parameter is displayed as Drug Amt. - Page 74 This page intentionally left blank. 11 - 8...
-
Page 75: Maintenance
Maintenance Regular maintenance is essential to ensure that the equipment functions properly. This chapter contains information on periodic testing and maintenance. 12.1 Maintenance Safety Information WARNING • To avoid electric shock, stop using the equipment if you find the housing of the equipment has signs of broken. -
Page 76: Maintenance And Testing Schedule
12.2 Maintenance and Testing Schedule Follow the maintenance and testing schedule or local regulations to perform testing and maintenance. Make sure to clean and disinfect the equipment before taking any tests and maintenance. The following table lists the maintenance and testing schedule: Test/Maintenance Item Recommended Frequency Performance Tests... -
Page 77: Performing Visual Inspection
■ Battery check If your equipment needs a safety test and performance test, contact the service personnel. 12.3.1 Performing Visual Inspection Visually inspect the equipment before it is first used every day. If you find any signs of damage, remove the equipment from use and contact the service personnel. Verify that the equipment meets the following requirements: ■... -
Page 78: Installing The Battery
Installing the Battery The battery must only be installed by service personnel trained and authorized by Mindray Animal Medical. To install the battery, contact your service personnel. The battery is installed when the equipment leaves the factory. Replace a battery in the following situations: ■... -
Page 79: Charging The Battery
■ The battery service life expires. CAUTION • Lithium batteries replaced by inadequately trained personnel could result in a hazard, such as excessive temperatures, fire or explosion. • Properly dispose of the battery according to local regulations. 12.4.3 Charging the Battery To optimize performance, a fully or nearly fully discharged battery should be charged as soon as possible.The battery is recharged automatically when the equipment is connected to AC mains power. -
Page 80: Checking Version Information
NOTE • If the battery is not conditioned for a prolonged time, its charge indication may not be accurate and you may wrongly evaluate the remaining battery runtime. • Do not use the pump for infusion during battery conditioning. • Do not interrupt battery conditioning. -
Page 81: Disposing Of The Equipment
Select Export History Record. 12.8 Disposing of the Equipment The service life of this equipment is ten years. Dispose of the equipment when its service life is reached. Follow local regulations regarding the disposal of such product. WARNING • For disposal of parts, batteries, packaging materials, and accessories, where not otherwise specified, follow local regulations regarding disposal of hospital waste. - Page 82 This page intentionally left blank. 12 - 8...
-
Page 83: Care And Cleaning
Care and Cleaning In this chapter we only describe cleaning and disinfection of the pump, pole clamp, and stack rack. For the cleaning and disinfection of other reusable accessories, refer to their instructions for use. 13.1 Care and Cleaning Safety Information WARNING •... -
Page 84: Cleaning The Equipment
• Dilute and use the cleaners or disinfectants according to the manufacturer's instructions. • Check the equipment after cleaning and disinfecting. If there is any sign of damage, remove it from use. 13.2 Cleaning the Equipment Clean the equipment on a regular basis. Before cleaning, consult your hospital’s regulations. - Page 85 Product Name Product Type Manufacturer Clorox Healthcare® Bleach Wipes Clorox professional products Germicidal Wipes company Clorox Healthcare® Hydrogen Wipes Clorox professional products Peroxide company Cleaner Disinfectant Wipes Diversey Oxivir® TB Wipes Diversey Inc Wipes Metrex CaviCide1™ Liquid, spray METERX® RESEARCH Metrex CaviWipes™...
- Page 86 Product Name Product Type Manufacturer DIAN’ERKANG Liquid Shanghai Likang Disinfectant Surface Disinfectant Hi-Tech Co., Ltd DIAN’ERKANG Liquid, spray Shanghai Likang Disinfectant Disinfectant Spray Hi-Tech Co., Ltd Clinell® Universal Wipes GAMA Healthcare Ltd Wipes Clinell ® Sporicidal Wipes GAMA Healthcare Ltd Wipes Tristel Duo™...
-
Page 87: Cleaning The Pole Clamp And Stack Rack
Product Name Product Type Manufacturer Hydrogen peroxide, 3% Liquid Rely+On™ Virkon® Powder Antec International Ltd High Level surface Disinfectant, 1-Propanol, 50% Liquid Descosept® forte Liquid Dr. Schumacher GmbH Descosept® AF Liquid Dr. Schumacher GmbH Dismozon® plus, 0.4% Powder BODE Chemie GmbH mikrozid®... -
Page 88: Sterilization
Product Name Product Type Manufacturer Perform® Classic Powder Schülke & Mayr GmbH Concentrate OXY, 0.5% Dismozon® plus, 0.4% Powder BODE Chemie GmbH Descosept® AF Liquid Dr. Schumacher GmbH Descosept® forte Liquid Dr. Schumacher GmbH mikrozid® AF Wipes Schülke & Mayr GmbH Wipes Rely+On™... -
Page 89: Accessories
Accessories The accessories listed in this chapter comply with the requirements of IEC 60601-1-2 when in use with the equipment. For details about the accessories, refer to the instructions for use provided with the accessory. WARNING • Use accessories specified in this chapter. Using other accessories may cause damage to the equipment or not meet the claimed specifications. - Page 90 Description 115-070532-00 Stack rack 115-074974-00 Quick install pole clamp 115-074975-00 Standard pole clamp 045-001434-00 Multi-pump bracket 14 - 2...
-
Page 91: A Product Specifications
Product Specifications Classifications The equipment is classified, according to IEC60601-1: Type of protection against CLASS I EQUIPMENT, equipment energized from an electrical shock internal electrical power source. Degree of protection against Defibrillation-proof type CF applied part (direct cardiac electrical shock application) Mode of operation Continuous... -
Page 92: Power Supply Specifications
Power Supply Specifications A.3.1 External Power Supply Specifications Item External AC Power Supply External DC Power Supply 100 VAC to 240 VAC 10 VDC to 16 VDC Voltage 0.5A to 0.21A 3 A to 1.88A Current 50/60 Hz Frequency A.3.2 Battery Battery Type Rechargeable lithium-ion... -
Page 93: Hardware Specifications
Hardware Specifications A.5.1 Displays Type Size (diagonal) Resolution ≥ 200x400 pixels Color TFT LCD 3.5 inches A.5.2 LEDs Alarm lamp 1 (two color coded: yellow and red) External power LED 1 (green) Battery LED 1 (green) A.5.3 Audio Indicator Speaker Gives alarm tones (sound pressure 50 to 65 dB). -
Page 94: Wireless Network
Wireless Network Standards IEEE 802.11a/b/g/n Modulation mode BPSK,QPSK, QAM Operating frequency 2.412GHz to 2.484GHz 5.18GHz to 5.24GHz 5.745GHz to 5.825GHz Data rate IEEE 802.11a: 6 to 54 Mbps IEEE 802.11b: 1 to 11 Mbps IEEE 802.11g: 6 to 54 Mbps IEEE 802.11n: 6.5 to 65 Mbps Transfer power <... - Page 95 Mechanical accuracy: ≤ ±0.5% Accuracy Infusion accuracy: ≤ ±1.8% (use Double-Dove and B.Braun Original Perfusor Syringe, under standard operating conditions, test in accordance with IEC60601- 2-24:2012) Bolus accuracy: ±2% or 0.05ml, whichever is greater (under standard operating conditions, test in accordance with IEC60601-2-24:2012) Set range of the infusion rate/ Range of rate:...
-
Page 96: Recommended Syringes
VTBI set range 0.01 to 9999.99 ml Resolution: 0.01ml Weight set range 0.1 to 499.0 kg/0.2 to1100.1 lb Drug Amt. set range 0.001 to 99999 Drug Amt. unit set range ng, μg, mg, g, mU, U, kU, EU, mmol, mol, mcal, cal, kcal, Volume 0.10 to 9999.99ml Conc. -
Page 97: Occlusion Alarm Delay And Bolus Volume
NOTE • The recommended extension set is B.Braun Original Perfusor Line (using IV- Standard-PE, and with Luer lock). Occlusion Alarm Delay and Bolus Volume Occlusion alarm delay time (hh: mm: ss) Syringe size (ml) Rate (ml/h) High occlusion alarm Low occlusion alarm pressure level pressure level <... -
Page 98: Infusion Accuracy Graphs
A.10 Infusion Accuracy Graphs A.10.1 Infusion Accuracy at 1 ml/h Trumpet Curve at 1ml/h (2nd hour) Ep(Max) Ep (Min) Overall percentage error Observation window(min) Start-up graph first 2 hours at 1ml/h Time(min) A - 8... -
Page 99: A.10.2 Infusion Accuracy At 5Ml/H
A.10.2 Infusion Accuracy at 5ml/h Trumpet Curve at 5ml/h (2nd hour) Ep(Max) Ep (Min) Overall percentage error Observation window(min) Start-up graph first 2 hours at 5ml/h Time(min) Test conditions: ■ Syringe brand: B.Braun Original Perfusor Syringe, B.Braun extension set ■ Syringe size: 50ml Test interval: △... - Page 100 This page intentionally left blank. A - 10...
-
Page 101: B Emc And Radio Regulatory Compliance
EMC and Radio Regulatory Compliance The device meets the requirements of IEC 60601-1-2: 2014. WARNING • Use of accessories, transducers and cables other than those specified or provided by the manufacturer of this device could result in increased electromagnetic emissions or decreased electromagnetic immunity of this device and result in improper operation. - Page 102 Guidance and Declaration - Electromagnetic Emissions The device is intended for use in the electromagnetic environment specified below. The customer or the user of the device should assure that it is used in such an environment. Emission test Compliance Electromagnetic environment - guidance Conducted and radiated RF Group 1...
- Page 103 If the device is operated within the electromagnetic environment listed in Table Guidance and Declaration —Electromagnetic Immunity, the system will remain safe and provide the following essential performance: ■ Operating mode ■ Accuracy ■ Function ■ Protection against UNINTENDED BOLUS volumes ■...
- Page 104 Guidance and Declaration - Electromagnetic Immunity The device is intended for use in the electromagnetic environment specified below. The customer or the user of the device should assure that it is used in such an environment. Immunity test IEC 60601 test Compliance level Electromagnetic level...
- Page 105 Guidance and Declaration - Electromagnetic Immunity The device is intended for use in the specified electromagnetic environment. The customer or the user of the device should assure that it is used in such an environment as described below. Immunity IEC 60601 Compliance Electromagnetic environment - test...
- Page 106 The ISM (industrial, scientific, and medical) bands between 150 kHz and 80 MHz are 6.765 MHz to 6.795 MHz; 13.553 MHz to 13.567 MHz; 26.957 MHz to 27.283 MHz; and 40.66 MHz to 40.70 MHz. The amateur radio bands between 0,15 MHz and 80 MHz are 1,8 MHz to 2,0 MHz, 3,5 MHz to 4,0 MHz, 5,3 MHz to 5,4 MHz, 7 MHz to 7,3 MHz, 10,1 MHz to 10,15 MHz, 14 MHz to 14,2 MHz, 18,07 MHz to 18,17 MHz, 21,0 MHz to 21,4 MHz, 24,89 MHz to 24,99 MHz, 28,0 MHz to 29,7 MHz and 50,0 MHz to 54,0 MHz.
-
Page 107: Radio Regulatory Compliance
Radio Regulatory Compliance The radio device used in this product is in compliance with the essential requirements and other relevant provisions of Directive 2014/53/EU. WARNING • Keep a distance of at least 20cm away from the equipment when Wi-Fi function is in use. B - 7... - Page 108 This page intentionally left blank. B - 8...
-
Page 109: C Abbreviations
Abbreviations Abbreviation In Full Alternating Current Anti-Bolus Anti-Bolus BOLUS Bolus CCU(CICU) Cardiac Intensive Care Unit Conformité Européenne CISPR International Special Committee on Radio Interference Central Processing Unit Direct Current DERS Dose Error Reduction Systems Dynamic Pressure System European Economic Community Electromagnetic Compatibility Electromagnetic Interference Ethylene oxide... - Page 110 Abbreviation In Full IEEE Institute of Electrical and Electronic Engineers International Organization for Standardization Intravenous Keep Vein Open Light Emitting Diode Maximum Medical Device Directive Minimum Magnetic Resonance Imaging Not Applied Operating Room Series Number Universal Serial Bus VTBI Volume To Be Infused C - 2...
-
Page 111: D Declaration Of Conformity
Declaration of Conformity D - 1... - Page 112 This page intentionally left blank. D - 2...
- Page 114 P/N: 046-021887-00(1.0)
Need help?
Do you have a question about the BeneFusion eSP Vet and is the answer not in the manual?
Questions and answers