Table of Contents
Advertisement
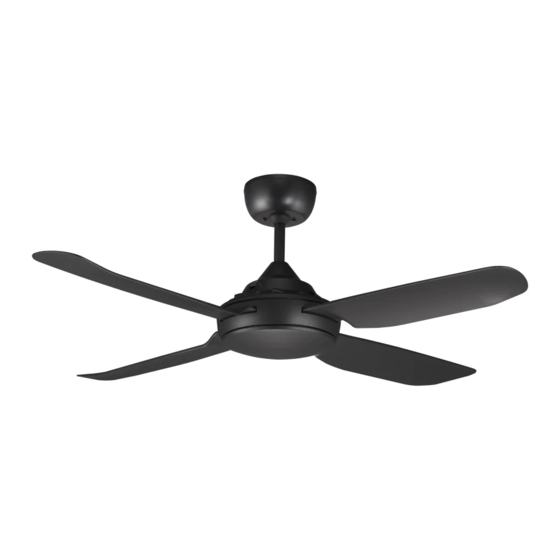
(This photo is for reference only; it does not mean you are purchasing an identical product.
Fan picture is for illustration purposes only. Styles may vary according to the model.)
CAUTION
Read Instructions Carefully
For Safe Installation and
Fan Operation
INSTRUCTION MANUAL
Ceiling Fan Installation Manual, Rev 1.0
SPINIKA SERIES
Models:
SPN1204WH
SPN1204TI
SPN1204BL
SPN1304WH
SPN1304TI
SPN1304BL
l INSTALLATION
l OPERATION
l MAINTENANCE
l WARRANTY
INFORMATION
SPN1204WH-L
SPN1204WH-L
SPN1204BL-L
SPN1304WH-L
SPN1304TI-L
SPN1304BL-L
1
Advertisement
Table of Contents

Related Manuals for Ventair SPINIKA Series


Summary of Contents for Ventair SPINIKA Series
- Page 1 (This photo is for reference only; it does not mean you are purchasing an identical product. Fan picture is for illustration purposes only. Styles may vary according to the model.) Ceiling Fan Installation Manual, Rev 1.0 SPINIKA SERIES Models: SPN1204WH...
-
Page 2: Safety Precautions
THANK YOU FOR PURCHASING Thank you for purchasing this quality Ventair ceiling fan. To ensure correct function and safety, please read all instructions before using the product and keep all instructions for future reference. SAFETY PRECAUTIONS The information contained in the following pages has been prepared to ensure you of trouble-free operation of your ceiling fan. -
Page 3: Specification
SPECIFICATION MODEL Light Wattage Fan Wattage Voltage Frequency Net Weight (Hz) (Kg) SPN1204WH SPN1204TI No Light 60 watts 220-240 V 50 Hz 7.35 kg SPN1204BL SPN1204WH-L SPN1204TI-L 20 watts 60 watts 220-240 V 50 Hz 7.45 kg SPN1204BL-L SPN1304WH SPN1304TI No Light 65 watts 220-240 V... -
Page 4: Parts List
PARTS LIST Unpack the fan and carefully identify the parts. Please refer to Fig 1 Fig. 1 Part 1.Motor Assembly 2.Blade Assembly Set 3.Down Rod 4.Lower Canopy 5.Upper Canopy 6.Speed Regulator 7.Fascia 8.Hang-Sure Set 9.LED light drive 10.LED light panel Note: Part List number 9 and 10 is for fan with light model. -
Page 5: Installing The Canopy
INSTALLING THE CANOPY Fit upper canopy about 5mm off the ceiling. To avoid unwanted noise, secure it into position with canopy screw. CHANGING THE LED LIGHT TEMPERATURE The LED on the fan with light models have a distinctive switch to change between three colour temperatures –... - Page 6 WITH REMOTE CONTROL Model: SPNRFR 1. Use Eco/Med/High buttons to alter the fan speed. 2. “OFF” button will turn the fan off only 3. Turn Light “ON/OFF” for light. 4. Press the “STEP DIM” button to transition through 75%, 50%, 25% then back to 100% of light output.
- Page 7 WIRING DIAGRAM FOR MOUNTING BRACKET TERMINAL & WALL CONTROL All pole disconnection switch must be included in the fixed wiring. WIRING DIAGRAM FOR ISOLATION SWITCH WITH REMOTE CONTROL All pole disconnection switch must be included in the fixed wiring. Step 1. Connect EARTH wire to the terminal port marked“ ” on the terminal block mounting bracket. Step 2.
-
Page 8: Replacing The Led Panel
REPLACING THE LED PANEL ATTACHING REMOTE RECEIVER SPNRFR Available as optional Extra. WARNING: FOR YOUR SAFETY, ENSURE THE MAINS SUPPLY IS SWITCHED OFF TO THE WIRING CIRCUIT BEFORE PERFORMING ANY ELECTRICAL TASK. -
Page 9: Installation Tips
INSTALLATION TIPS • Only use the included wall control plate - using other wall control plate will void warranty and may damage the fan. • Do not use a solid-state dimmer control. • Do not use the light switch (if included) to control the fan motor; •... - Page 10 Maintenace • Use this in a dry place, free of excessive humidity and water. • Keep the fan clean. Wipe away dirt with a clean soft cloth, ordinary soap and water, wipe dry. Do not use solvents, etc. (gasoline or petroleum.) •...
Need help?
Do you have a question about the SPINIKA Series and is the answer not in the manual?
Questions and answers