
Related Manuals for Samsung NV66H5737LB


Summary of Contents for Samsung NV66H5737LB
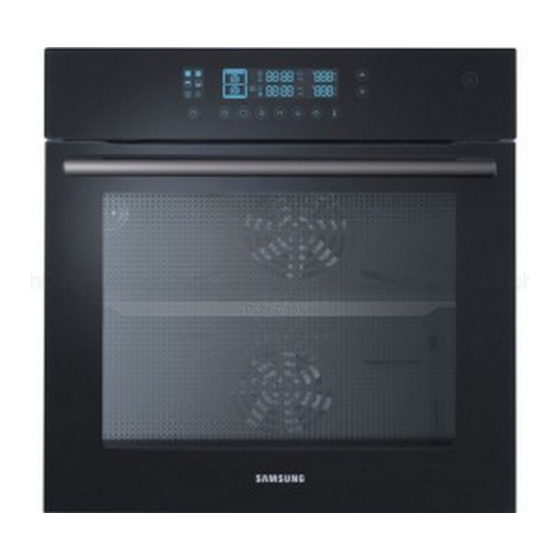
- Page 1 NV66H5737LB Built-in Oven user manual imagine the possibilities Thank you for purchasing this Samsung product. NV66H5737LB_EF_DG68-00533B-02_EN.indd 1 2017-03-29 5:50:16...
-
Page 2: Table Of Contents
contents USING THIS MANUAL Using this manual SAFETY INSTRUCTIONS Important safety precautions Correct Disposal of This Product (Waste Electrical & Electronic Equipment) Auto energy saving function Bulb exchange Door removal Door glass removal INSTALLATION 10 Installation OVEN CONTROLS 11 Oven controls ACCESSORIES 11 Accessories BEFORE YOU BEGIN... -
Page 3: Safety Instructions
Thank you for choosing SAMSUNG Built - In Oven. This user Manual contains important information on safety and instructions intended to assist you in the operation and maintenance of your appliance. Please take the time to read this Owner’s Manual before using your oven and keep this book for future reference. - Page 4 This Appliance should be allowed to disconnection from the supply after installation. The disconnection may be achieved by having the plug accessible or by incorporating a switch in the fixed wiring in accordance with the wiring rules. The method of fixing is not to depend on the use of adhesives since they are not considered to be a reliable fixing means.
- Page 5 The appliance and its accessible parts become hot during use. Care should be taken to avoid touching heating elements. Children less than 8 years of age shall be kept away unless continuously supervised. This appliance can be used by children aged from 8 years and above and persons with reduced physical, sensory or mental capabilities or lack of experience and knowledge if they have been given supervision...
- Page 6 In the event of a fault or damage to the appliance, do not attempt to operate it. Repairs should be performed by a licensed technician only. Improper repair may result in considerable danger to you and others. If your oven needs repair, contact a SAMSUNG Service center or your dealer.
-
Page 7: Correct Disposal Of This Product (Waste Electrical & Electronic Equipment)
Business users should contact their supplier and check the terms and conditions of the purchase contract. This product and its electronic accessories should not be mixed with other commercial wastes for disposal. For information on Samsung’s environmental commitments and product specific regulatory obligations e.g. REACH visit: samsung.com/uk/aboutsamsung/samsungelectronics/ corporatecitizenship/data_corner.html AUTO ENERGY SAVING FUNCTION •... - Page 8 Rear oven light 1. Remove cap by turning anti-clockwise and remove the metal ring, the sheet ring and clean the glass cap. If necessary, replace the bulb with a 25- 40 watt, 300 °C heat-resistant oven light bulb. 2. Clean the glass cap, the metal ring and the sheet ring if necessary.
-
Page 9: Door Removal
DOOR REMOVAL For normal use, the oven door must not be removed but if removal is necessary, for example, for cleaning purposes, follow these instructions. CAUTION: The oven door is heavy. 1. Open the door and flip 2. Close the door by 3. -
Page 10: Installation
If the oven is connected to the mains with a plug, this plug must remain accessible after the oven is installed. Samsung will take no responsibility for accidents that originate from a missing or faulty earth connection. -
Page 11: Oven Controls
oven controls Time/Temperature Control buttons Information Screen Power On/Off button Partition Select button Temperature button Auto Cook select button Clock button Cooking Mode Select button Kitchen Timer button Lamp button Cooking Time button Power On/Off button You can press the oven on or off. If you press the Power On/Off button, the lights for the buttons and the display panel are turned off. - Page 12 5. Divider, for the upper, lower and twin modes. Use inserted in level 3. There is a divider-sensing switch on the rear wall of the cooking compartment. Insert into the back completely. 6. Rotisserie spit (Optional), 2 prongs, a removable handle and a cradle, which fits into the 3rd shelf from the bottom.
-
Page 13: Before You Begin
before you begin SETTING THE CLOCK 1. Press the Clock button. The “ ” and 2. Press the Time/Temperature Control “12: ” will blink. buttons to set the hour of the day. Example: To set 1:30 Wait for about 10 seconds. The clock stops blinking and shows the set hour. -
Page 14: Initial Cleaning
INITIAL CLEANING Clean the oven thoroughly before using for the first time. Do not use sharp or abrasive cleaning materials. These could damage the oven surface. For ovens with enamel fronts, use commercially available cleaning agents. To clean the oven 1. -
Page 15: Oven Use
oven use SETTING THE DIVIDER MODE For upper, twin and lower modes, insert the divider. For single mode, remove the divider. And then press the Partition Select button to select the mode you want. For further details, see the table below. 1. - Page 16 Upper mode Only the upper heating element operates. The divider should be inserted. Convection Top Heat + Convection Large Grill Lower mode Only the lower heating element operates. The divider should be inserted. Convection Bottom Heat + Convection English - 16 NV66H5737LB_EF_DG68-00533B-02_EN.indd 16 2017-03-29 5:50:24...
- Page 17 Twin mode The upper and lower modes operate at the same time. It is possible to set which mode activates first. When one of the dishes has finished cooking in twin mode and you would like to change the cooking time or temperature of the other partition, press the Partition Select button to select the mode (upper or lower) that you would like to continue operating.
-
Page 18: Setting The Oven Temperature
Single mode Convection Top Heat + Convection Conventional Large Grill Small Grill Bottom Heat + Convection SETTING THE OVEN TEMPERATURE In single, upper and lower modes 1. Press the Temperature button. 2. Press the Time/Temperature Control buttons to adjust the temperature in increments of 5 °C. -
Page 19: Switching The Oven Off
The temperature may be adjusted during cooking. In the oven mode settings, the top and bottom heating elements cycle on and off in intervals through the cooking process to regulate and maintain the temperature. In twin mode 1. Press the Temperature button (upper 2. -
Page 20: Cook Time
COOK TIME You can set the cook time during cooking. In single, upper and lower modes 1. Press the Cook Time button. “ ” will 2. Press the Time/Temperature Control blink. buttons to set the desired cook time. 3. Press the Cook Time button. The oven operates with the selected cook time unless the Cook Time button is pressed within 5 seconds. -
Page 21: Kitchen Timer
3. Press the Cook Time button. The oven operates with the selected cook time unless the Cook Time button is pressed within 5 seconds. During cooking, you can adjust the previously set cook time with the Time/ Temperature Control buttons for better results. KITCHEN TIMER 1. -
Page 22: Child Safety Function
CHILD SAFETY FUNCTION 1. Press the Cooking Time button and 2. Press the Cooking Time button and Kitchen Timer button at the same Kitchen Timer button at the same time time and hold for 3 seconds. ( ) will and hold for 3 seconds again to unlock. appear in the display field. -
Page 23: Oven Functions
OVEN FUNCTIONS The features of this oven include the following functions. Oven Modes The following table represents the various oven modes and settings of your oven. Use the cooking guide tables for these modes in the following pages as guidelines for cooking. - Page 24 Conventional Suggested temperature: 200 °C The conventional function is ideal for baking and roasting foods arranged on one rack. Both the top and bottom heating elements operate to maintain the oven temperature. We recommend to preheat the oven in conventional mode. Shelf Food item Accessory...
- Page 25 Top Heat + Convection Suggested temperature: 190 °C The top heating element is in operation and the fan operates to constantly circulate the hot air. We recommend to preheat the oven with Top Heat + Convection mode. Shelf Food item Accessory Temp.
- Page 26 Convection Suggested temperature: 170 °C This function bakes foods placed on up to three shelves and is also appropriate for roasting. Cooking is achieved by the heating element on the rear wall and the fan distributes the heat. We recommend to preheat the oven in convection mode. Shelf Food item Accessory...
- Page 27 Large Grill Suggested temperature: 240 °C The large grill function grills large quantities of flat foods, such as steaks, schnitzels and fish. It is also suitable for toasting. Both the top heating element and the grill are on in this mode.
- Page 28 Bottom Heat + Convection Suggested temperature: 190 °C The Bottom Heat + Convection mode is for recipes calling for a moist topping and a crisp base, as with foods like pizzas, quiches lorraine, German-style open fruitcakes and cheesecakes. We recommend to preheat the oven in Bottom Heat + Convection mode. Shelf Time Food item...
-
Page 29: Test Dishes
TEST DISHES According to standard EN 60350 1. Baking The recommendations for baking refer to preheated oven. Cooking Cooking Temp. Type of food Dish & Notes Shelf level time mode (°C) (min.) Small Cakes Baking tray Conventional 160-180 15-25 Deep pan + Baking tray 1 + 4 Convection 150-170... -
Page 30: Automatic Cooking
automatic cooking In auto cook mode you can select 40 Auto Programmes for cooking, roasting and baking. For upper, twin and lower modes, insert the divider. 1. Press Auto Cook select button. 2. Select the desired function by pressing Cooking Mode Select button. (skip this step in single mode) 3. - Page 31 Shelf Food item Weight/kg Accessory Recommendation level Beef Steaks 0.3-0.6 Deep pan Put marinated beef steaks side by 0.6-0.8 with Wire side on the wire roast. Turn over roast as soon as the oven beeps. The first setting is for thin beef steaks, the second setting is for thick beef steaks.
- Page 32 Shelf Food item Weight/kg Accessory Recommendation level 16 Oven 0.4-0.5 Baking tray Rinse potatoes, cut potatoes into Potatoes 0.8-1.0 halves. Brush with olive oil, herbs and spices. Distribute on the tray evenly. The first setting is for small potatoes (each 100 g), the second setting is for large oven potatoes (each 200 g).
-
Page 33: Upper Oven Auto Cook Programmes
UPPER OVEN AUTO COOK PROGRAMMES The following table presents 5 Auto Programmes for Cooking, Roasting and Baking. It contains its quantities, weight ranges and appropriate recommendations. Cooking Modes and times have been pre-programmed for your convenience. You can refer to these guide lines for cooking. Always insert food in cold oven. Shelf Food item Weight/kg... -
Page 34: Lower Oven Auto Cook Programmes
LOWER OVEN AUTO COOK PROGRAMMES The following table presents 5 Auto Programmes for Cooking, Roasting and Baking. It contains its quantities, weight ranges and appropriate recommendations. Cooking Modes and times have been pre-programmed for your convenience. You can refer to these guide lines for cooking. Insert food in cold oven, unless it is recommended to preheat the oven. -
Page 35: Twin Oven Auto Cook Programmes
TWIN OVEN AUTO COOK PROGRAMMES Before using twin auto cook function insert the divider into the oven. The following table presents 5 Twin Auto Cook Programmes for Cooking, Roasting and Baking. Using those programmes you will be able to cook your main dish & side dish or main dish &... -
Page 36: Cleaning And Cares
cleaning and cares SELF CLEANING This mode for cleaning the oven automatically. This mode burns the leftover grease in the oven so that it can be wiped out when the oven cools down. The oven is heated up to around 500 °C. During the Self Cleaning (pyrolytic self-cleaning), oven door is locked automatically. -
Page 37: Steam Cleaning
STEAM CLEANING 1. Remove all accessories from the oven. 2. Pour approximately 400 ml (¾ pint) of water onto the bottom of the empty oven. Use normal water only, no distilled water. 3. Close the oven door. CAUTION: The steam cleaning system can be switched on only when the oven has cooled to room temperature completely. - Page 38 After deactivating the steam cleaning TIPS • Take care when opening the door before the end of the steam cleaning procedure; the water on the bottom is hot. • Never leave the residual water in the oven for any length of time, for example, overnight.
-
Page 39: Hand Cleaning
HAND CLEANING WARNING: Make sure the oven and accessories are cool before cleaning. Do not use abrasive cleaning agents, hard brushes, scouring pads or cloths, steel wool, knives or other abrasive materials. Oven Interior • For cleaning the interior of the oven, use a clean cloth and a mild cleaning agent or warm soapy water. -
Page 40: Side Runners (Optional)
SIDE RUNNERS (OPTIONAL) To clean the interior of the oven, the both side runners can be removed. Detaching the side runners 1. Press central part of the side runner top portion. 2. Rotate the side runner by approximately 45º. 3. Pull and remove the side runner from bottom two holes. -
Page 41: Troubleshooting
TROUBLESHOOTING PROBLEM CAUSE ACTION What should I do if the oven • The oven may not be • Switch the oven on. doesn’t heat up? switched on. • Check to see if the • A household fuse may required settings have have blown or a circuit been applied. -
Page 42: Information Codes
Clean the keys and check if there is water on the surface around key. Turn off the oven and try setting again. If it occurs again, call your local SAMSUNG Customer Care Centre. Divider use is incorrect. Insert divider for upper, twin and lower mode. -
Page 43: Product Data Sheet
PRODUCT DATA SHEET SAMSUNG SAMSUNG Model identification NV66H5737LB Cavity type Single Upper Lower Energy Efficiency Index per cavity 104.8 98.5 98.5 (EEI cavity Energy Efficiency Class per cavity Energy consumption required to heat a standardised load in a cavity of an 0.89 kWh/... - Page 44 815 56480 www.samsung.com/no/support PORTUGAL 808 20 7267 www.samsung.com/pt/support SPAIN 0034902172678 www.samsung.com/es/support SWEDEN 0771 726 786 www.samsung.com/se/support www.samsung.com/ch/support (German) SWITZERLAND 0800 726 78 64 (0800-SAMSUNG) www.samsung.com/ch_fr/support (French) 0330 SAMSUNG (7267864) www.samsung.com/uk/support IRELAND (EIRE) 0818 717100 www.samsung.com/ie/support DG68-00533B-02 NV66H5737LB_EF_DG68-00533B-02_EN.indd 44 2017-03-29 5:50:31...