Table of Contents
Advertisement
Quick Links
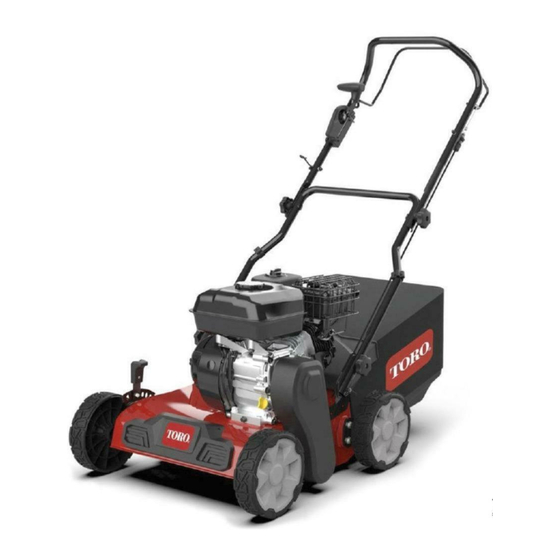
Scarifier
Model No. 54610—Serial No. 321000001 and Up
Introduction
This scarifier is intended to be used by residential
homeowners. It is designed primarily to loosen the
soil and to remove moss and weeds from the soil on
well-maintained lawns on residential properties. Using
this product for purposes other than its intended use
could prove dangerous to you and bystanders.
Read this information carefully to learn how to operate
and maintain your product properly and to avoid
injury and product damage. You are responsible for
operating the product properly and safely.
Visit www.Toro.com for more information, including
safety tips, training materials, accessory information,
help finding a dealer, or to register your product.
Whenever you need service, genuine Toro parts, or
additional information, contact an Authorized Service
Dealer or Toro Customer Service and have the model
and serial numbers of your product ready.
identifies the location of the model and serial numbers
on the product. Write the numbers in the space
provided.
Model No.
Serial No.
Important:
With your mobile device, you can
scan the QR code on the serial number decal (if
equipped) to access warranty, parts, and other
product information.
© 2021—The Toro® Company
8111 Lyndale Avenue South
Bloomington, MN 55420
Figure 1
This manual identifies potential hazards and has
safety messages identified by the safety-alert symbol
(Figure
serious injury or death if you do not follow the
recommended precautions.
This manual uses 2 words to highlight information.
Important calls attention to special mechanical
information and Note emphasizes general information
worthy of special attention.
This product complies with all relevant European
directives; for details, please see the separate product
specific Declaration of Conformity (DOC) sheet.
Do not tamper with or disable safety devices on the
machine, and check their proper operation regularly.
Do not attempt to adjust or tamper with the engine
speed control; doing so may create an unsafe
operating condition, resulting in personal injury.
Register at www.Toro.com.
Figure 1
1. Model and serial number location
2), which signals a hazard that may cause
Figure 2
Safety-alert symbol
Original Instructions (EN)
Printed in China
All Rights Reserved
Form No. 3442-842 Rev E
Operator's Manual
g340199
g000502
*3442-842*
Advertisement
Table of Contents

Related Manuals for Toro 54610


Summary of Contents for Toro 54610
-
Page 1: Introduction
Whenever you need service, genuine Toro parts, or additional information, contact an Authorized Service 1. Model and serial number location Dealer or Toro Customer Service and have the model and serial numbers of your product ready. Figure 1 This manual identifies potential hazards and has... -
Page 2: Table Of Contents
Contents Safety Introduction ............... 1 General Safety Safety ............... 2 General Safety ........... 2 This product is capable of amputating hands and Safety and Instructional Decals ......3 feet and of throwing objects. Always follow all safety Setup ................ 4 instructions to avoid serious personal injury or death. -
Page 3: Safety And Instructional Decals
Safety and Instructional Decals Safety decals and instructions are easily visible to the operator and are located near any area of potential danger. Replace any decal that is damaged or missing. decal134-5696 134-5696 1. Warning—read the 3. Thrown object Operator’s Manual; wear hazard—keep bystanders eye protection and hearing away. -
Page 4: Setup
Setup Important: Remove and discard the protective plastic sheet that covers the engine and any other plastic or wrapping on the machine. Assembling the Handle Parts needed for this procedure: Carriage bolt Lock knob g340201 Figure 3 Curved washer Shown installed at highest handle height Curved-head bolt 1. -
Page 5: Adding Oil To The Engine
Adding Oil to the Engine No Parts Required Procedure Important: If the oil level in the engine is too low or too high and you run the engine, you may damage the engine. g222533 Figure 5... -
Page 6: Assembling The Grass Bag
Assembling the Grass Bag No Parts Required Procedure g230447 Figure 6... -
Page 7: Product Overview
Contact your Authorized Service Dealer or authorized Toro distributor or go to www.Toro.com for a list of all approved attachments and accessories. To ensure optimum performance and continued safety certification of the machine, use only genuine Toro replacement parts and accessories. -
Page 8: Operation
Operation – Store fuel in an approved container and keep it out of the reach of children. • Fuel is harmful or fatal if swallowed. Long-term Note: Determine the left and right sides of the exposure to vapors can cause serious injury and machine from the normal operating position. -
Page 9: Checking The Engine-Oil Level
Checking the Engine-Oil Level Service Interval: Before each use or daily Important: If the oil level in the crankcase is too low or too high and you run the engine, you may damage the engine. g222533 Figure 9 Adjusting the Handle Height You may raise or lower the handle to a position comfortable for you. -
Page 10: Adjusting The Maximum Depth Of Cut
Adjusting the Maximum Depth of Cut DANGER Adjusting the depth-of-cut levers could bring your hands into contact with a moving blade and result in serious injury. • Shut off the engine, remove the ignition key (if equipped), and wait for all moving parts to stop before adjusting the depth of cut. - Page 11 g345149 Figure 11...
-
Page 12: During Operation
Check the grass catcher components and the hair and do not wear loose clothing or loose discharge chute frequently for any wear or jewelry. deterioration and replace them with genuine Toro • Use your full attention while operating the parts when necessary. -
Page 13: Starting The Engine
Starting the Engine Push up on the engine On/Off switch so it is in the O position. Move the fuel-valve lever to the O position. Move the choke lever to the C position. LOSED Note: A warm or hot engine may not require choking. -
Page 14: Engaging The Scarifier
Engaging the Scarifier When the scarifier engine is turned on, the roller begins to rotate. Slowly move the transport lever all the way forward to lower the roller into the ground (Figure 14). Note: If the scarifier does not penetrate the ground at the desired depth, adjust the max depth of cut;... -
Page 15: Bagging The Clippings
Bagging the Clippings Note: Install and remove the grass bag from the right side of the machine. Installing the Grass Bag Raise and hold up the rear deflector (A of Figure 15). Install the grass bag, ensuring that the pins on the bag rest in the notches on the handle (B of Figure 15). -
Page 16: After Operation
After Operation When no more debris come out, lower the machine, stop the water, and move the machine to a dry area. After Operation Safety Connect the spark plug wire and run the engine for a few minutes to dry the underside of the machine. -
Page 17: Maintenance
• To ensure optimum performance of the machine, use only genuine Toro replacement parts and accessories. Replacement parts and accessories made by other manufacturers could be dangerous, and such use could void the product warranty. -
Page 18: Preparing For Maintenance
Preparing for Maintenance Using the hex wrench, remove the 2 screws securing the bearing housing and the reel shaft Shut off the engine, wait for all moving parts to from the right side of the machine (Figure 19). stop, and allow the machine to cool. Note: Retain all removed parts for later Disconnect the spark-plug wire from the spark... -
Page 19: Servicing The Air Filter
Servicing the Air Filter Remove the foam and paper elements from the base. Service Interval: Before each use or daily—Check Remove the foam element from the paper the air filter and clean or replace it, element if necessary. Inspect the foam and paper elements and Every 50 hours—Clean the air filter;... -
Page 20: Changing The Engine Oil
Changing the Engine Oil machine prior to running out of fuel, use a hand fuel pump to remove the fuel. Service Interval: After the first 5 hours WARNING Every 50 hours Tipping the machine may cause the fuel Yearly to leak. Fuel is flammable, explosive, and Note: Run the engine a few minutes before changing can cause personal injury. -
Page 21: Inspecting The Blades
Service Interval: Before each use or daily Yearly Replace the blades when the machine hits a solid object or if the blades are damaged or bent. Use only genuine Toro replacement blades. Important: Always wear padded gloves when working with the blades. -
Page 22: Storage
Remove the Machine from Storage Storage Store the machine in a cool, clean, dry place. Check and tighten all fasteners. Remove the spark plug and spin the engine Storage Safety rapidly by pulling the recoil-start handle to blow the excess oil from the cylinder. Always shut off the machine, wait for all moving parts to stop, allow the machine to cool, and disconnect the Install the spark plug and tighten it with a torque... -
Page 23: Troubleshooting
Troubleshooting Problem Possible Cause Corrective Action The engine does not start. 1. The engine is under load. 1. Ensure that the transport lever is in the transport position so that the scarifier roller is not contacting the ground before starting. 2. - Page 24 The Toro Company (“Toro”) respects your privacy. When you purchase our products, we may collect certain personal information about you, either directly from you or through your local Toro company or dealer. Toro uses this information to fulfil contractual obligations - such as to register your warranty, process your warranty claim or to contact you in the event of a product recall - and for legitimate business purposes - such as to gauge customer satisfaction, improve our products or provide you with product information which may be of interest.