Table of Contents

Related Manuals for Zanussi ZXAN13EW0


Summary of Contents for Zanussi ZXAN13EW0
- Page 1 User Manual GETTING STARTED? EASY. ZXAN13EW0 DE Benutzerinformation Kühlschrank FR Notice d'utilisation Réfrigérateur Istruzioni per l’uso Frigorifero EN User Manual Refrigerator...
-
Page 2: Sicherheit Von Kindern Und Schutzbedürftigen Personen
BESUCHEN SIE UNSERE WEBSITE, UM: Anwendungshinweise, Prospekte, Fehlerbehebungs-, Service- und Reparatur-Informatio- nen zu erhalten: www.zanussi.com/support SICHERHEITSHINWEISE Lesen Sie vor der Montage und dem Gebrauch des Geräts zuerst die Bedienungsanleitung. Bei Verletzungen oder Schäden infolge nicht ordnungsgemäßer Montage oder Verwendung übernimmt der Hersteller keine Haftung. -
Page 3: Allgemeine Sicherheit
ALLGEMEINE SICHERHEIT Dieses Gerät ist für die Verwendung im Haushalt und ähnliche • Zwecke vorgesehen, wie z. B.: Bauernhöfe, Personalküchenbereiche in Geschäften, Büros – und anderen Arbeitsumfeldern; Für Gäste in Hotels, Motels, Pensionen und anderen – wohnungsähnlichen Räumlichkeiten. Um eine Kontaminierung von Lebensmitteln zu vermeiden, •... -
Page 4: Elektrischer Anschluss
Wenn das Netzkabel beschädigt ist, muss es vom Hersteller, • seinem autorisierten Kundenservice oder einer gleichermaßen qualifizierten Person ausgetauscht werden, um Gefahrenquellen zu vermeiden. SICHERHEITSANWEISUNGEN MONTAGE WARNUNG! Achten Sie bei der WARNUNG! Die Montage des Geräts Montage des Geräts darauf, dass das darf nur von einer qualifizierten Netzkabel nicht eingeklemmt oder Fachkraft durchgeführt werden. -
Page 5: Wartung
• Stellen Sie keine elektrischen Geräte (z. B. • Der Kältekreis des Gerätes enthält Eisbereiter) in das Gerät, wenn solche Geräte Kohlenwasserstoffe. Das Gerät muss von einer nicht ausdrücklich vom Hersteller für diesen qualifizierten Fachkraft gewartet und nachgefüllt Zweck zugelassen sind. werden. - Page 6 ABMESSUNGEN Gesamtabmessungen Platzbedarf im Betrieb 1) Höhe, Breite und Tiefe des Geräts einschließlich Griff und zuzüglich des notwendigen Freiraums für die Zirkulation der Kühlluft 1) Höhe, Breite und Tiefe des Geräts ohne Griff und Füße Platzbedarf insgesamt im Betrieb Platzbedarf im Betrieb...
- Page 7 Bei Fragen zum Aufstellungsort des Geräts wenden Sie sich an den Platzbedarf insgesamt im Betrieb Verkäufer, unseren Kundendienst oder nächstgelegenen autorisierten 1165 Kundendienst. 1) Höhe, Breite und Tiefe des Geräts einschließlich Wenn Sie das Gerät gegen eine Griff plus des notwendigen Freiraums für die Zirku- Wand stellen, verwenden Sie die lation der Kühlluft, zuzüglich des Platzes, der not- mitgelieferten Distanzstücke für die...
-
Page 8: Wechseln Des Türanschlags
4. Heben Sie die obere Abdeckung ab legen Sie sie auf eine weiche Oberfläche. 5. Lösen Sie die 4 Schrauben. 1. Kippen Sie das Gerät vorsichtig auf ein 6. Heben Sie das obere Scharnier ab und weiches Schaumstoffteil oder ähnliches bewahren Sie es zusammen mit den Material, um Schäden an der Rückseite des Schrauben an einem sicheren Ort auf. -
Page 9: Betrieb
Schrauben fest. Bringen Sie die Türausstattung an. Warten Sie mindestens 4 Stunden, bevor Sie das Gerät an das Stromnetz anschließen. 15. Schrauben Sie die restlichen 2 Schrauben an der Oberseite des Gerät auf der Seite ohne Scharniere fest. 16. Legen Sie die obere Abdeckung auf das Gerät und ziehen Sie die hinteren Schrauben fest. -
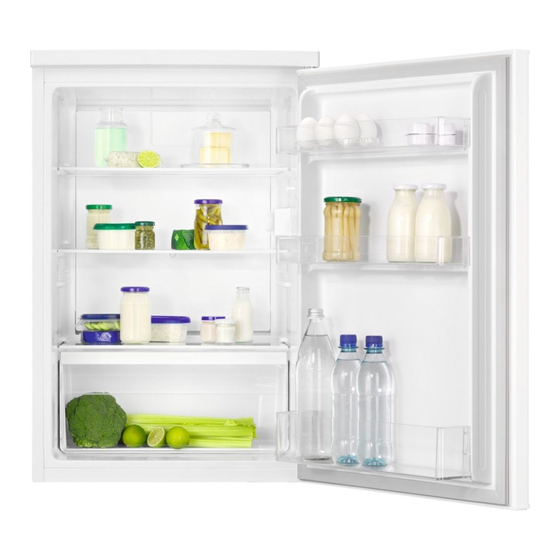
Page 10: Täglicher Gebrauch
TÄGLICHER GEBRAUCH VERSTELLBARE ABLAGEN WARNUNG! Siehe Kapitel Die Wände des Kühlraums sind mit einer Reihe von Sicherheitshinweise. Führungsschienen ausgestattet, die verschiedene Möglichkeiten für das Einsetzen der Ablagen AUS- UND EINBAUEN DER TÜRABLAGE bieten. Entfernen der Türablage: 1. Halten Sie die linke Seite der Ablage fest. 2. -
Page 11: Reinigung Und Pflege
• Es wird empfohlen Lebensmittel im Kühlschrank • Es wird empfohlen, exotische Früchte wie aufzutauen. Bananen, Mangos, Papayas usw. nicht im • Stellen Sie keine warmen Lebensmittel in das Kühlschrank aufzubewahren. Gerät. Vergewissern Sie sich, dass sie auf • Gemüse wie Tomaten, Kartoffeln, Zwiebeln und Raumtemperatur abgekühlt sind, bevor Sie sie Knoblauch sollten nicht im Kühlschrank einlegen. -
Page 12: Fehlersuche
FEHLERSUCHE WARNUNG! Siehe Kapitel Sicherheitshinweise. WAS TUN, WENN... Störung Mögliche Ursache Abhilfe Das Gerät funktioniert nicht. Das Gerät ist ausgeschaltet. Schalten Sie das Gerät ein. Der Netzstecker wurde nicht Stecken Sie den Netzstecker richtig in die Steckdose ge- korrekt in die Steckdose. steckt. - Page 13 Störung Mögliche Ursache Abhilfe Die Dichtung ist verzogen oder Siehe Abschnitt „Schließen der verschmutzt. Tür“. Die Lebensmittel sind nicht Verpacken Sie die Lebensmit- richtig verpackt. tel richtig. Die Temperatur wurde falsch Siehe Kapitel „Betrieb“. eingestellt. Das Gerät ist voll beladen und Stellen Sie eine höhere Tem- auf die niedrigste Temperatur peratur ein.
-
Page 14: Austauschen Der Lampe
Störung Mögliche Ursache Abhilfe Die Tür wurde zu häufig geöff- Öffnen Sie die Tür nur, wenn net. es notwendig ist. Die Kaltluft kann im Gerät nicht Kaltluftzirkulation im Gerät si- zirkulieren. cherstellen. Siehe Kapitel „Tipps und Hinweise“. SCHLIESSEN DER TÜR Bitte wenden Sie sich an den 1. -
Page 15: Technische Daten
TECHNISCHE DATEN Die technischen Daten befinden sich auf dem Typenschild innen im Gerät sowie auf der Spannung Frequenz Energieplakette. 220 - 240 V 50 Hz INFORMATIONEN FÜR PRÜFINSTITUTE Die Installation und die Vorbereitung des Geräts für müssen den Angaben in diesem Benutzerhandbuch eine eventuelle EcoDesign-Prüfung müssen mit EN in Kapitel 3 entsprechen. - Page 16 und elektronische Geräte. Entsorgen Sie Geräte Für die Schweiz: mit diesem Symbol nicht mit dem Hausmüll. Wohin mit den Altgeräten? Bringen Sie das Gerät zu Ihrer örtlichen Überall dort wo neue Geräte verkauft Sammelstelle oder wenden Sie sich an Ihr werden oder Abgabe bei den Gemeindeamt.
-
Page 17: Informations De Sécurité
VISITEZ NOTRE SITE WEB POUR : Obtenir des conseils d'utilisation, des brochures, un dépanneur, des informations sur le service et les réparations : www.zanussi.com/support INFORMATIONS DE SÉCURITÉ Avant d'installer et d'utiliser cet appareil, lisez soigneusement les instructions fournies. Le fabricant ne pourra être tenu pour responsable des blessures et dégâts résultant d'une mauvaise... - Page 18 bâtiments de ferme, cuisines réservées aux employés dans – les magasins, bureaux et autres lieux de travail ; l'utilisation par les clients des hôtels, motels, des – environnements du type chambres d’hôtes et autres environnements à caractère résidentiel. Pour éviter la contamination des aliments, respectez les •...
-
Page 19: Consignes De Sécurité
Si le câble d'alimentation est endommagé, il doit être remplacé • par le fabricant, son service après-vente agréé ou des personnes aux qualifications similaires afin d'éviter tout danger. CONSIGNES DE SÉCURITÉ INSTALLATION • L’appareil doit être relié à la terre. •... -
Page 20: Installation
• Ne touchez pas le compresseur ni le est bouché, l'eau provenant du dégivrage condenseur. Ils sont chauds. s'écoulera en bas de l'appareil. ÉCLAIRAGE INTÉRIEUR SERVICE • Pour réparer l'appareil, contactez un service AVERTISSEMENT! Risque après-vente agréé. Utilisez exclusivement des d'électrocution ! pièces d'origine. - Page 21 DIMENSIONS Dimensions générales Espace requis en service 1) hauteur, largeur et profondeur de l’appareil avec la poignée, plus l’espace nécessaire pour la libre circulation de l’air de refroidissement 1) hauteur, largeur et profondeur de l’appareil sans la poignée ni les pieds Espace total requis en service Espace requis en service...
-
Page 22: Branchement Électrique
Si vous placez l'appareil contre un mur, utilisez les entretoises arrière Espace total requis en service fournies ou laissez la distance minimale indiquée dans le paragraphe 1165 « Dimensions ». 1) hauteur, largeur et profondeur de l’appareil avec ATTENTION! Si vous installez la poignée, plus l’espace nécessaire pour la libre l'appareil à... -
Page 23: Inversion Du Sens D'ouverture De La Porte
5. Dévissez les 4 vis. 6. Soulevez la charnière supérieure et mettez-la en lieu sûr avec les vis. 1. Inclinez délicatement l’appareil sur un 7. Soulevez la porte et posez-la sur une surface emballage en mousse souple ou un élément souple. -
Page 24: Mise En Marche
la porte. Serrez les vis. Installez les équipements de la porte. Attendez au moins 4 heures avant de brancher l'appareil sur le secteur. 15. Vissez les 2 vis restantes sur le côté supérieur de l’appareil sans charnière. 16. Placez le couvercle supérieur sur l’appareil et serrez les vis à... -
Page 25: Utilisation Quotidienne
UTILISATION QUOTIDIENNE BALCONNETS AMOVIBLES AVERTISSEMENT! Reportez-vous Les parois du compartiment du réfrigérateur sont aux chapitres concernant la sécurité. équipées d'une série de glissières afin que les balconnets puissent être positionnés comme vous RETRAIT ET INSTALLATION DU BALCONNET le souhaitez. DE PORTE Pour retirer le balconnet de porte : 1. -
Page 26: Avertissements Généraux
• N'insérez pas d'aliments chauds dans l’appareil. • Les légumes tels que les tomates, les pommes Assurez-vous qu’ils ont refroidi à température de terre, les oignons et l’ail ne doivent pas être ambiante avant de les insérer. conservés dans le réfrigérateur. •... -
Page 27: Dépannage
DÉPANNAGE AVERTISSEMENT! Reportez-vous aux chapitres concernant la sécurité. QUE FAIRE SI… Problème Cause possible Solution L'appareil ne fonctionne pas. L'appareil est éteint. Allumez l’appareil. La fiche du câble d'alimenta- Branchez correctement la fiche tion n'est pas correctement in- du câble d'alimentation dans la sérée dans la prise de courant. - Page 28 Problème Cause possible Solution Les aliments ne sont pas cor- Emballez les produits de façon rectement emballés. plus adaptée. Il y a une erreur dans le réglage Reportez-vous au chapitre de la température. « Fonctionnement ». L'appareil est complètement Augmentez la température. Re- chargé...
-
Page 29: Remplacement De L'éclairage
Problème Cause possible Solution L'air froid ne circule pas dans Assurez-vous que de l'air froid l'appareil. circule dans l'appareil. Repor- tez-vous au chapitre « Con- seils ». service après-vente. Contactez votre service après- Si ces conseils n'apportent pas de vente agréé. solution à... -
Page 30: Données Techniques
DONNÉES TECHNIQUES Les informations techniques figurent sur la plaque signalétique sur le côté intérieur de l'appareil et sur Tension Fréquence l'étiquette énergétique. 220 ~ 240 V 50 Hz INFORMATIONS POUR LES INSTITUTS DE TEST L’installation et la préparation de l’appareil pour une indications du chapitre 3 de ce manuel d’utilisation. -
Page 31: En Matière De Protection De L'environnement
EN MATIÈRE DE PROTECTION DE L'ENVIRONNEMENT Recyclez les matériaux portant le symbole Pour la Suisse: Déposez les emballages dans les conteneurs Où aller avec les appareils usagés ? prévus à cet effet. Contribuez à la protection de Partout où des appareils neufs sont l'environnement et à... -
Page 32: Informazioni Di Sicurezza
VISITA IL NOSTRO SITO WEB PER: Ricevere consigli, scaricare i nostri opuscoli, eliminare eventuali anomalie, ottenere informa- zioni sull'assistenza e la riparazione: www.zanussi.com/support INFORMAZIONI DI SICUREZZA Leggere attentamente le istruzioni fornite prima di installare e utilizzare l'apparecchiatura. I produttori non sono responsabili di eventuali lesioni o danni derivanti da un'installazione o un uso scorretti. - Page 33 Case di campagna; cucine di negozi, uffici e altri ambienti di – lavoro; Clienti di hotel, motel, bed and breakfast e altri ambienti – residenziali. Per evitare la contaminazione degli alimenti rispettare le • seguenti istruzioni: non aprire la porta per lunghi periodi; –...
-
Page 34: Istruzioni Di Sicurezza
ISTRUZIONI DI SICUREZZA INSTALLAZIONE • Utilizzare sempre una presa elettrica con contatto di protezione correttamente installata. AVVERTENZA! L’installazione • Accertarsi di non danneggiare i componenti dell'apparecchiatura deve essere elettrici (ad es. la spina di alimentazione, il cavo eseguita da personale qualificato. di alimentazione, il compressore). -
Page 35: Assistenza Tecnica
lampade sono destinate a resistere a condizioni • Tenere presente che la riparazione autonoma o fisiche estreme negli elettrodomestici, come non professionale possono avere conseguenze temperatura, vibrazioni, umidità, o sono sulla sicurezza e potrebbero invalidare la destinate a segnalare informazioni sullo stato garanzia. - Page 36 DIMENSIONI Dimensioni complessive Spazio necessario durante l’uso 1) l'altezza, la larghezza e la profondità dell'appa- recchio, compresa la maniglia, più lo spazio neces- sario per la libera circolazione dell'aria di raffredda- mento 1) l'altezza, la larghezza e la profondità dell'appa- recchio senza l'impugnatura e i piedini Spazio complessivo necessario durante l’u- Spazio necessario durante l’uso...
- Page 37 In caso di dubbi sul luogo di Spazio complessivo necessario durante l’u- installazione dell'apparecchiatura, contattare il venditore, il nostro Centro di Assistenza o il rivenditore autorizzato più vicino. 1165 Se si posiziona l'apparecchiatura 1) l'altezza, la larghezza e la profondità dell'appa- contro la parete, utilizzare i recchiatura, compresa la maniglia, più...
-
Page 38: Possibilità Di Invertire La Porta
5. Rimuovere le 4 viti. 6. Sollevare la cerniera superiore e metterla in luogo sicuro insieme alle viti. 1. Inclinare l'apparecchiatura con cautela su un 7. Sollevare la porta e riporla su una superficie imballaggio di schiuma morbida o materiale morbida. -
Page 39: Funzionamento
Serrare le viti. Installare l'apparecchiatura della porta. Attendere almeno 4 ore prima di collegare l'apparecchiatura all'alimentazione. 15. Avvitare le 2 viti rimanenti sul lato superiore dell'apparecchio senza cerniera. 16. Posizionare il coperchio superiore sull'apparecchio e stringere le viti sul retro. FUNZIONAMENTO ACCENSIONE •... -
Page 40: Utilizzo Quotidiano
UTILIZZO QUOTIDIANO 2. Spingere due lati del ripiano verso il basso AVVERTENZA! Fare riferimento ai contemporaneamente, in modo che il ripiano si capitoli sulla sicurezza. adatti ad entrambi gli elementi di fissaggio. RIPIANI RIMOVIBILI RIMOZIONE E INSTALLAZIONE DEL RIPIANO DELLA PORTA Le guide presenti sugli scomparti del frigorifero permettono di posizionare i ripiani a diverse altezze. -
Page 41: Pulizia E Cura
• Per evitare lo spreco di cibo, la nuova scorta di • Le verdure come pomodori, patate, cipolle e cibo dovrebbe essere sempre collocata dietro a aglio non devono essere conservate in quella vecchia. frigorifero. • Burro e formaggio: riporli in un apposito CONSIGLI PER LA REFRIGERAZIONE DEI contenitore sottovuoto oppure avvolgerli in un CIBI... -
Page 42: Risoluzione Dei Problemi
RISOLUZIONE DEI PROBLEMI AVVERTENZA! Fare riferimento ai capitoli sulla sicurezza. COSA FARE SE... Problema Causa possibile Soluzione L'apparecchiatura non funzio- L'apparecchiatura è spenta. Accendere l’apparecchiatura. La spina non è inserita corret- Inserire correttamente la spina tamente nella presa di alimen- nella presa di alimentazione. - Page 43 Problema Causa possibile Soluzione La guarnizione è deformata o Vedere la sezione "Chiusura sporca. della porta". Gli alimenti non sono avvolti Avvolgere correttamente gli ali- correttamente. menti. La temperatura impostata non Fare riferimento al capitolo è corretta. "Funzionamento". L'apparecchiatura è completa- Impostare una temperatura su- mente carica ed è...
-
Page 44: Sostituzione Della Lampadina
Problema Causa possibile Soluzione Sono stati introdotti molti ali- Introdurre gli alimenti un poco menti contemporaneamente. alla volta. Il coperchio viene aperto fre- Aprire la porta solo se neces- quentemente. sario. L'aria fredda non circola corret- Adottare le misure necessarie tamente all'interno dell'appa- per garantire una corretta cir- recchio. -
Page 45: Dati Tecnici
RUMORI SSSRRR! BRRR! CLICK! HISSS! BLUBB! DATI TECNICI I dati tecnici sono riportati sulla targhetta dei dati applicata sul lato esterno dell'apparecchiatura e Tensione Frequenza sull'etichetta dei valori energetici. 220~240 V 50 Hz INFORMAZIONI PER GLI ISTITUTI DI PROVA L'installazione e la preparazione essere conformi a quanto indicato nel presente dell'apparecchiatura per qualsiasi verifica di manuale d'uso al capitolo 3. -
Page 46: Garanzia
GARANZIA Servizio clienti Servizio dopo vendita Industriestrasse 10 Le Trési 6 Via Violino 11 5506 Mägenwil 1028 Préverenges 6928 Manno Morgenstrasse 131 3018 Bern Langgasse 10 9008 St. Gallen Am Mattenhof 4a/b 6010 Kriens Schlossstrasse 1 4133 Pratteln Comercialstrasse 19 7000 Chur Vendita pezzi di ricambio Industriestrasse 10, fattura, del certificato di garanzia o dello scontrino... -
Page 47: Safety Information
VISIT OUR WEBSITE TO: Get usage advice, brochures, trouble shooter, service and repair information: www.zanussi.com/support SAFETY INFORMATION Before the installation and use of the appliance, carefully read the supplied instructions. The manufacturer is not responsible for any injuries or damage that are the result of incorrect installation or usage. -
Page 48: Safety Instructions
By clients in hotels, motels, bed and breakfast and other – residential type environments. To avoid contamination of food respect the following • instructions: do not open the door for long periods; – clean regularly surfaces that can come in contact with food –... -
Page 49: Electrical Connection
• Make sure the air can circulate around the appliance. The appliance contains flammable gas, • At first installation or after reversing the door isobutane (R600a), a natural gas with a high level wait at least 4 hours before connecting the of environmental compatibility. - Page 50 SERVICE • Disconnect the appliance from the mains supply. • To repair the appliance contact the Authorised • Cut off the mains cable and discard it. Service Centre. Use original spare parts only. • Remove the door to prevent children and pets to •...
- Page 51 It must be possible to disconnect the appliance from the mains power Overall dimensions supply. The plug must therefore be easily accessible after installation. POSITIONING This appliance is not intended to be used as a built- in appliance. This appliance should be installed in a dry, well 1) the height, width and depth of the appliance ventilated indoor position.
-
Page 52: Door Reversibility
RUBBER SUPPORTING PAD 3. Unscrew the screws on the back of the top cover. There is no need to install this additional equipment provided in a bag to your appliance during normal use. However, there is a risk the appliance become unstable when all food products are placed only on door shelves. -
Page 53: Operation
12. Install the rubber support on the side with no 16. Place the top cover on the appliance and hinge. tighten the screws on the back. 13. Fit the door on the lower hinge making sure the hinge pin enters the door bottom hole. 14. -
Page 54: Movable Shelves
2. Lift the right side of the shelf until it comes free from the fastener. To ensure correct air circulation, do not move the glass shelf above the vegetable drawer. 3. Lift the left side of the shelf and remove it. VEGETABLE DRAWER To put the shelf back in: There is a special drawer in the bottom part of the... -
Page 55: Care And Cleaning
• Butter and cheese: place in an airtight container • Always refer to the expiry date of the products or wrap in an aluminium foil or a polythene bag to know how long to keep them. to exclude as much air as possible. •... - Page 56 Problem Possible cause Solution The mains plug is not connec- Connect the mains plug to the ted to the mains socket cor- mains socket correctly. rectly. There is no voltage in the Connect a different electrical mains socket. appliance to the mains socket. Contact a qualified electrician.
-
Page 57: Replacing The Lamp
Problem Possible cause Solution Water flows on the rear plate During the automatic defrost- This is correct. Dry the water of the refrigerator. ing process, frost melts on the with a soft cloth. rear plate. There is too much condensed Door was opened too fre- Open the door only when nec- water on the rear wall of the re-... -
Page 58: Technical Data
NOISES SSSRRR! BRRR! CLICK! HISSS! BLUBB! TECHNICAL DATA The technical information is situated in the rating plate on the internal side of the appliance and on Voltage Frequency the energy label. 220~240 V 50 Hz INFORMATION FOR TEST INSTITUTES Installation and preparation of the appliance for any as stated in this User Manual at Chapter 3. -
Page 59: Environmental Concerns
GUARANTEE Customer Service Centres Point of Service Industriestrasse 10 Le Trési 6 Via Violino 11 5506 Mägenwil 1028 Préverenges 6928 Manno Morgenstrasse 131 3018 Bern Langgasse 10 9008 St. Gallen Am Mattenhof 4a/b 6010 Kriens Schlossstrasse 1 4133 Pratteln Comercialstrasse 19 7000 Chur Spare parts service Industriestrasse 10, 5506 covers the costs of materials, labour and travel. - Page 60 WWW.ZANUSSI.COM/SHOP...