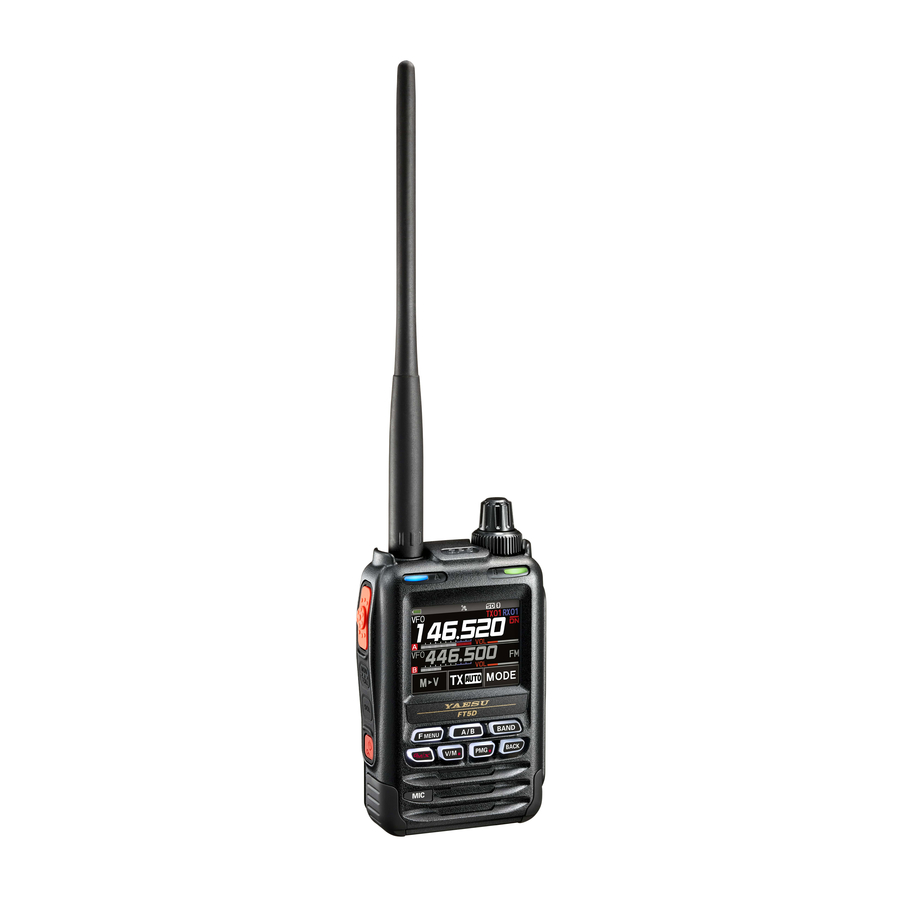
Yaesu FT5Dr Advance Manual
C4fm/fm 144/430mhz dual band digital transceiver
Hide thumbs
Also See for FT5Dr:
- Operating manual (80 pages) ,
- Instruction manual (63 pages) ,
- Instruction manual (78 pages)
Table of Contents
Advertisement
Quick Links
Advertisement
Table of Contents

Related Manuals for Yaesu FT5Dr


Summary of Contents for Yaesu FT5Dr
- Page 1 C4FM/FM 144/430MHz DUAL BAND DIGITAL TRANSCEIVER FT5D FT5D Advance Manual...
-
Page 2: Table Of Contents
Contents Digital Personal ID (DP-ID) feature ..........6 About the Digital Personal ID (DP-ID) feature ..........6 Registering the DP-ID of the other station ............ 6 Deleting the registered DP-ID ..............7 Communicating with specified other station in the Analog FM mode ... 9 Selecting the Squelch Type in the Analog FM Mode ........ - Page 3 Manually Transmitting the DTMF Code ............33 Using the Transceiver for Packet Communication ........34 Clone Operation ..................35 Connecting to a PC ..................36 Updating the FT5DR/DE firmware .............. 36 All Reset ....................... 37 Setup Menu Reset ..................37 Using Setup Menu ................38 Setup Menu Operation ................
- Page 4 TX/RX Menu ....................48 1 MODE ......................48 1 ANTENNA ATT ..................48 2 FM DEVIATION ..................48 3 RX MODE ....................48 2 DIGITAL ..................... 48 1 DIGITAL POPUP ..................48 2 LOCATION SERVICE ................49 3 STANDBY BEEP ..................49 4 DIGITAL VW ....................
- Page 5 GM Menu ...................... 57 WIRES-X Menu ..................... 57 CONFIG Menu ....................57 1 APO ......................57 2 BCLO ....................... 58 3 BEEP ....................... 58 4 BEEP LEVEL ................... 58 5 BUSY LED ....................59 6 CLOCK TYPE ..................59 7 GPS LOG ....................59 8 HOME VFO .....................
-
Page 6: Digital Personal Id (Dp-Id) Feature
• If the firmware is not compatible with the DG-ID function, update to the latest firmware to use the DG-ID function. The latest firmware is available on the YAESU website. Registering the DP-ID of the other station •... -
Page 7: Deleting The Registered Dp-Id
3. Touch [OK] to save the setting. • When registering in the DP-ID list is finished, “COMPLETED” is displayed for three seconds, then the display returns to the DP-ID list screen. • If not registering the DP-ID, press the [CANCEL]. •... - Page 8 2. Rotate the DIAL knob to select the call sign of the other W6DXC transceiver, then touch [DEL]. Confirmation screen “DELETE?” is displayed. DELETE? 3. Touch [OK] to delete. • When finished registering in the DP-ID list, “COMPLETED” is displayed for three seconds.
-
Page 9: Communicating With Specified Other Station In The Analog Fm Mode
300 Hz to 3000 Hz in steps of 100 Hz. Activates a new two-tone CTCSS pager function. When communicating with FT5DR/DE transceivers PAGER among friends, specify personal codes (each code is composed of two tones) so that only specific stations are called. -
Page 10: Tone Squelch Feature
*: Press and hold the [F ] key [SIGNALING] [10 SQL EXPANTION] set to MENU “ON”, “D CD”, “TONE-DCS” and “D CD-TONE SQL” setting values are activated. 3. Press the PTT switch to save the settings and return to normal operation. •... -
Page 11: Digital Code Squelch (Dcs) Feature
4. Press the [F ] key [CODE]. MENU The setting screen of the tone frequency is displayed. 5. Touch [SEARCH]. 12 TONE SQL FREQ • The transceiver begins searching for a matching TONE : 123.0 Hz tone frequency. • When a corresponding tone frequency is detected, a beep sound is emitted, and the detected tone frequency blinks. -
Page 12: Searching For The Dcs Code Used By The Other Station
DCS search function. Two-Tone CTCSS Pager Function When using FT5DR/DE transceivers with a group of friends, setting the Two-Tone CTCSS personal codes allows calling just the specific stations. Even when the person who is called is not near the transceiver, the information on the LCD indicates that a call was received. -
Page 13: Calling A Specific Station
3. Rotate the DIAL knob to select “CODE-RX”. 6 PAGER ANS-BACK: CODE-RX : CODE-TX : 4. Press the [F ] key to move the “u” icon to the first MENU 6 PAGER element of the code. ANS-BACK: Rotate the DIAL knob to select the first element of the CODE-RX : code from 01 to 50. -
Page 14: Receiving "Pager Code" Calls From A Remote Station (Standby Operation)
Receiving “pager code” calls from a Remote Station (Standby Operation) When the Pager function is activated, and a call is received with a corresponding Code, the audio is heard. When the PTT switch is pressed, the “ ” icon blinks and the other station's audio is heard regardless of whether the code matches or not. -
Page 15: User Programmed Reverse Ctcss Decoder
User Programmed Reverse CTCSS Decoder The tone signal frequency can be set at 100 Hz intervals between 300 Hz and 3000 Hz to mute the audio when receiving a signal containing a CTCSS tone matching the pro- grammed tone. 1. Press the [F ] key ... -
Page 16: Memory Function
3. Touch [ENT] to recall the selected memory channel and enter memory mode. The Memory Channel Only Mode The FT5DR/DE may be set to operated only in the registered memory channels. 1. While pressing the [V/M • ] key, press and hold the POWER switch to turn the transceiver ON. -
Page 17: Using Memory Banks
Using Memory Banks The transceiver allows using up to 24 memory banks to be recalled with the sorted mem- ory channels. One memory channel may also be registered in two or more memory banks according to the intended use. Example of registering memory channels to the memory banks: Memory channels Memory banks 145.000 MHz... -
Page 18: Open The Memory Bank Display
Open the Memory Bank display 1. Press the [V/M • ] key to enter the memory mode. Memory Bank Number 2. Press the [F ] key [BANK]. MENU Memory Channel Number If [BANK] is not displayed, touch [BACK ←] to display [BANK] and then touch it. -
Page 19: Assigning A Name To A Memory Bank
Assigning a Name to a Memory Bank A name can be assigned to a memory bank using up to 16 characters. The following types of characters can be entered: • Alphabetic characters (1 byte and 2 byte letters, uppercase and lowercase characters) •... -
Page 20: Split Memory
Split Memory Two different frequencies, one for receive and another for transmit, may be registered to a memory channel. 1. Register the receive frequency to a memory channel first. • For additional details on registering to a memory channel, refer to the “Registering to Memory Channels” in the Operating Manual. -
Page 21: Setting Skip Memory Channel And Specified Memory Channel
Setting Skip Memory Channel and Specified Memory Channel For efficient memory channel scanning, two types of memory channels may be designat- ed, “skip memory channels” and “specified memory channels”. Set “Skip Memory Chan- nels” will be skipped during the memory scanning; and only “Specified Memory Channels” will be scanned during specified memory channel scanning. -
Page 22: Skipping Unwanted Scan Frequencies (Skip Search Memory)
Skipping Unwanted Scan Frequencies (Skip Search Memory) During the VFO scan, an unwanted frequency may be skipped by registering it to the “skip search memory channels” in advance. z Set the temporary scan stop to the skip search memory 1. Press and hold the [V/M • ] key to temporarily stop the VFO scan. 2. -
Page 23: Memory Bank Scanning
• If the scanner halts on an incoming signal, the back light will turn ON and the decimal point between the “MHz” and “kHz” digits of the frequency display will blink. • Scanning will resume in about five seconds. 3. Touch [STOP] or press the PTT switch to cancel the scanning. In this state (displayed as “PMSP ££... -
Page 24: Dual Receive (D.rcv) Function
Dual Receive (D.RCV) Function The transceiver is equipped with the following 3 types of Dual Receive Functions: • VFO Dual Receive • Memory Channel Dual Receive • Home Channel Dual Receive The transceiver checks for signals on the frequency registered to the selected memory channel (Priority Memory Channel) once approximately every 5 seconds. -
Page 25: Activating The Dual Receive (D.rcv) Feature
Activating the Dual Receive (D.RCV) feature 1. Set the frequency and communication mode to monitor continually. The monitor frequency may be set on the VFO mode, the memory channel mode or the HOME channel mode. VFO Dual Receive VFO Priority Memory Channel Memory Channel Dual Receive Memory Channel ... -
Page 26: Using The Gps Function
Using the GPS Function The GPS Function GPS (Global Positioning System) is a space-based satellite navigation system that provides location and time information anywhere on the earth. It was developed by the U.S. Department of Defense as a military system. When the GPS receiver acquires 3 or more signals (of about 30) GPS satellites orbiting at an altitude of about 20,000 km, it can calculate and display its current position (latitude, longitude, and altitude) within a tolerance of several meters. - Page 27 About Positioning by GPS “Positioning” refers to calculation of your current position from the satellite orbit information and radio propagation time. At least 3 satellites need to be acquired for successful positioning. If positioning fails, move away from buildings as far as possible and stand in an area with open sky.
-
Page 28: Saving Gps Information (Gps Log Function)
Using the saved data, tracks can be displayed on commercially available map software*. * Technical support for the map software is not provided by YAESU. 1. See “Activating the GPS Function” on page 26, and activate the GPS function. -
Page 29: Gps Screen Information And Operation
GPS Screen Information and Operation Activating the GPS function displays the following information on the LCD. 1. In the normal operation screen, press the [F ] key touch [DISP]. MENU • If [D.RCV] is not displayed, touch [BACK ←] to display [D.RCV] and then touch it. •... -
Page 30: Smart Navigation Function
Smart Navigation Function There are 2 methods of navigation with the Smart Navigation function. • Real-time navigation function • Backtrack function Before using the smart navigation function, press and hold the [F ] key touch [APRS] MENU [1 TARGET LOCATION] , select “COMPASS”. Real-Time Navigation Function GPS position information and voice signals are simultaneously transmitted in the V/D mode of C4FM digital. - Page 31 3. Touch [MEM]. “★”, L1” and “L2” blink. H - UP 4. Touch one of the blinking indicators to which you want to register the position information. H - UP • The location information is registered with the selected indicator. 5.
-
Page 32: Functions To Use As Necessary
Functions to Use as Necessary AF-DUAL Receive Function The AF-DUAL Receive Function allows reception of a radio broadcast during standby reception of A-band or B-band frequency (or frequency registered to a memory channel). When standby reception is active, no audio is heard on the standby frequency, however if a voice signal is detected, the reception of the broadcast radio will be paused, and the receiver frequency will be heard. -
Page 33: Dtmf Operation
DTMF Operation DTMF (Dual Tone Multi Frequencies) are the tone signals sent to make telephone calls, or control repeaters and network links. Up to 10 registers of 16-digit DTMF tone codes can be stored as telephone numbers to make calls through the public telephone network using a phone patch or connect through the WIRES-X analog node station. -
Page 34: Using The Transceiver For Packet Communication
Using the Transceiver for Packet Communication You can perform packet communication with your transceiver by connecting a TNC (Ter- minal Node Controller) using an optional Microphone Adapter (CT-44). MIC/SP jack CT-44 10 F μ 2 kΩ After connecting the TNC to the transceiver, set the output signal level to the TNC by adjusting the sound volume level of the transceiver. -
Page 35: Clone Operation
Clone Operation Data and various settings saved in your transceiver can be copied to any other FT5DR/ DE transceiver. CT-168 (optional) DATA jack DATA jack 1. Turn OFF the power of both FT5DR/DE transceivers, then connect an optional clone cable (CT-168) to the DATA terminal of each transceiver. -
Page 36: Connecting To A Pc
To update the transceiver firmware, connect a PC to the DATA terminal of the FT5DR/DE with the supplied USB cable, as described below: When a new firmware update for the FT5DR/DE is available, download the data from the YAESU website to update the FT5DR/DE to the latest version. -
Page 37: All Reset
Caution When the All Reset function is performed, all data registered in the memory is deleted. Be sure to note the settings on paper or back up the data on a microSD memory card. For details on how to save data onto a microSD memory card, refer to “Setup Menu: SD CARD Menu Operations”. -
Page 38: Using Setup Menu
Using Setup Menu The Setup Menu permits configuring the various functions according to individual operat- ing needs and preferences. Setup Menu Operation 1. Press and hold the [F ] key. MENU The Setup Menu screen will be displayed. 2. Touch the desired item in Setup Menu. •... -
Page 39: Tables Of Setup Menu Operations
Tables of Setup Menu Operations Selectable options Setup Menu no. / Item Description (Options in bold are the default settings) DISPLAY 1 TARGET LOCATION Set what to display using the smart COMPASS / NUMERIC navigation function. 2 COMPASS Set the compass display of the smart HEADING UP / NORTH UP navigation function. - Page 40 Selectable options Setup Menu no. / Item Description (Options in bold are the default settings) MEMORY 1 BANK LINK Set the memory bank link. BANK1 to BANK24 BANK LINK ON / OFF 2 BANK NAME Assign a name to each memory bank. BANK1 to BANK24 3 MEMORY NAME Input the memory channel tag.
- Page 41 Selectable options Setup Menu no. / Item Description (Options in bold are the default settings) VFO : ALL / BAND 5 SCAN WIDTH Set the scan mode operation. MEMORY : ALL CH / BAND BANK LINK: ON / OFF ON / OFF 6 PRIORITY REVERT Turn the “Priority Channel Revert”...
- Page 42 Selectable options Setup Menu no. / Item Description (Options in bold are the default settings) 19 DATE & TIME ADJ Set the built-in clock. 20 TOT Set the timeout timer. OFF / 30sec to 10MIN 3 min 00 sec 21 VFO MODE Select the frequency selection range ALL / BAND in the VFO mode.
- Page 43 Selectable options Setup Menu no. / Item Description (Options in bold are the default settings) Mic-E : ON / OFF 10 APRS RINGER Set the bell ring on/off when a beacon POSITION : or message is received. ON / OFF WEATHER :...
- Page 44 25 MY SYMBOL Set your station symbol. 2(/b Bicycle) / 3(/> Car) / 4(YY Yaesu Radios) 26 POSITION COMMENT Set up the position comment function. Off Duty / En Route / In Service / Returning / Committed / Special / Priority / Custom 0 to 6 / EMERGENCY! STATUS :...
-
Page 45: Setup Menu Operations
Setup Menu Operations DISPLAY Menu 1 TARGET LOCATION Set what to display on the smart navigation screen. 1. Press and hold the [F ] key touch [DISPLAY] [1 TARGET LOCATION] MENU 2. Rotate the DIAL knob to select what is displayed on the screen. COMPASS Displays the compass. -
Page 46: Language
6. Rotate the DIAL knob to select the lighting status after the set illumination time elapses. After the illumination time selected for [KEY] elapses, the lights dim to [LEVEL 1] of the LCD dimmer setting. After the illumination time selected for [KEY] elapses, lights turn off. -
Page 47: Opening Message
8 OPENING MESSAGE You can select the message under the “YAESU” logo displayed when turning on the transceiver. 1. Press and hold the [F ] key touch [DISPLAY] [8 OPENING MESSAGE] MENU 2. Rotate the DIAL knob to select the desired message referring to the following table. -
Page 48: Tx/Rx Menu
TX/RX Menu 1 MODE 1 ANTENNA ATT If the signal from the remote station is too strong or, a strong signal exists nearby that interferes with reception, use the attenuator (ATT) function to reduce interference. ] key touch [TX/RX] [1 MODE] [1 ANTENNA ATTN] 1. -
Page 49: Location Service
2 LOCATION SERVICE Set whether or not to display your location in digital mode. ] key touch [TX/RX] [2 DIGITAL] [2 LOCATION SERVICE] 1. Press and hold the [F MENU 2. Rotate the DIAL knob to select the desired setting. Displays your location. -
Page 50: Audio
3 AUDIO 1 MIC GAIN You can adjust the input level of the built-in microphone or an optional external micro- phone. 1. Press and hold the [F ] key touch [TX/RX] [3 AUDIO] [1 MIC GAIN] MENU 2. -
Page 51: Vox
5 VOX Set the VOX function settings. Press and hold the [F ] key touch [TX/RX] [3 AUDIO] [5 VOX]. MENU For details, refer to “VOX Operation” in the Operating Manual. 6 RECORDING Set the Voice Recording function settings. Press and hold the [F ] key ... -
Page 52: Memory Skip
5 MEMORY SKIP You can set the scan method for scanning memory channels. 1. Press and hold the [F ] key touch [MEMORY] [5 MEMORY SKIP] MENU For details, see “Setting Skip Memory Channel and Specified Memory Channel” (page 21). -
Page 53: Dtmf Memory
5 DTMF MEMORY The maximum of 16 digit DTMF code can be registered for a telephone number to make a call through the public telephone line from a phone patch. ] key touch [SIGNALING] [5 DTMF MEMORY] 1. Press and hold the [F MENU For details, see “Setting the DTMF Memory”... -
Page 54: Sql Expantion
10 SQL EXPANSION You can add squelch types to [11 SQL TYPE] for transmit and receive, respectively. 1. Press and hold the [F ] key touch [SIGNALING] [10 SQL EXPANSION] MENU 2. Rotate the DIAL knob to select the desired setting. Add squelch types for transmit and receive, respectively. -
Page 55: Wx Aleat
14 WX ALERT Setting the weather Alert Feature, used for notifying storms and hurricanes, ON or OFF. ] key touch [SIGNALING] [14 WX ALERT] 1. Press and hold the [F MENU 2. Rotate the DIAL knob to select the desired setting. Enables the Weather Alert Feature. -
Page 56: Scan Width
5 SCAN WIDTH You can set the frequency range for scanning in VFO mode and Memory mode. ] key touch [SCAN] [5 SCAN WIDTH] 1. Press and hold the [F MENU 2. Rotate the DIAL knob to select [VFO], then press the [F ] key. -
Page 57: Priority Revert
Remark The default setting: OFF GM Menu For details on how to set each item, refer to “FT5DR/DE GM Function Instruction Manual” which is available on Yaesu website. WIRES-X Menu For details on how to set each item, refer to “FT5DR/DE WIRES-X Instruction Manual”... -
Page 58: Bclo
2 BCLO Preventing transmissions when the receive channel is busy. ] key touch [CONFIG] [2 BCLO] 1. Press and hold the [F MENU 2. Rotate the DIAL knob to select the desired setting. Permits starting a transmission while receiving a signal. Disables transmissions while receiving a signal. -
Page 59: Busy Led
• Data saved onto the microSD memory card is saved in GPSyymmddhhmmss.LOG format. • Saved data may be viewed by using OEM PC applications*. * Yaesu does not provide technical support for PC applications. 8 HOME VFO Set whether or not to permit tuning off of the home channel and transfer to the VFO. -
Page 60: Moni/T-Call
9 LOCK Select keys/DIAL knob to which you want to apply the lock function. ] key touch [CONFIG] [9 LOCK] 1. Press and hold the [F MENU 2. Rotate the DIAL knob to select the desired setting. KEY&DIAL Locks the DIAL knob and keys on the front side of the transceiver. -
Page 61: Password
12 PASSWORD A 4-digit password may be entered to prevent a third party from using the transceiver without permission. Once a password is set, the transceiver cannot be used unless the valid password is entered. 1. Press and hold the [F ] key ... -
Page 62: Rpt Ars
14 RPT ARS Enable or disable the automatic Repeater Shift operation ARS (Repeater operation is initiated by tuning to the repeater frequency). ] key touch [CONFIG] [14 RPT ARS] 1. Press and hold the [F MENU 2. Rotate the DIAL knob to select the desired setting. Enables the ARS function. -
Page 63: Step
For details, refer to “Changing the Frequency Step” in the Operating Manual. 19 DATE & TIME ADJ Set the date and time function of the built-in clock of the FT5DR/DE. In the factory settings, the date and time are automatically set when positioning the GPS signal, so in this case no manual setting is necessary. -
Page 64: Band Select
3. The VOL and DIAL knob functions are swapped. Remark The default setting: the upper knob is DIAL. APRS Menu Operations For details on setting each item, refer to “FT5DR/DE APRS Function Instruction Manual” which is available on Yaesu website. -
Page 65: Setup Menu: Sd Card Menu Operations
Setup Menu: SD CARD Menu Operations 1 BACKUP Settings information can be saved to a microSD memory card, also the saved information can be loaded to the transceiver. 1. Press and hold the [F ] key touch [SD CARD] [1 BACKUP] MENU 2. -
Page 66: Memory Info
3 MEMORY INFO Display information from SD Memory Card. ] key touch [SD CARD] [3 MEMORY INFO] 1. Press and hold the [F MENU The bar graph and the following information will be displayed. Used space: x,xxx MB Free space: x,xxx MB Capacity: x,xxx MB 4 FORMAT... -
Page 67: Device List
3 DEVICE LIST Displays a list of registered or searched Bluetooth devices. You can select and connect a Bluetooth headset. For details, refer to “Display device list” in the Operating Manual. 4 Bluetooth Audio Set whether received audio is heard from both the Bluetooth headset and the transceiver ®... -
Page 68: Appendix
Appendix The folder configuration of the micro-SD card A commercially available microSD memory card may be inserted into the FT5DR/DE to save various data files. The data of each function is stored in the following folders. (root) FT5D BACKUP: Various setting data (BACKUP.dat) GPSLOG: GPS Log data (yymmddhhmmss.log) -
Page 69: Preset Receiver Channel Lists
Preset receiver channel lists The preset receiver function presets the frequencies and memory tags (names) of 156 channels and various radio stations into the following three categories: • Weather Broadcast Stations (10 channels) • International VHF Marine Radio (57 channels) •... -
Page 70: International Vhf Marine Radio (57 Channels)
International VHF Marine Radio (57 channels) The frequencies used for international VHF (marine) radio are registered. Memory channel No. Frequency (MHz) Memory channel No. Frequency (MHz) 156.050 160.650* 156.025 160.625* 156.100 160.700* 156.075 160.675* 156.150 160.750* 156.125 160.725* 156.200 160.800* 156.175 160.775* 156.250... -
Page 71: International World Wide Broadcast (89 Channels)
International World Wide Broadcast (89 channels) The major shortwave broadcast stations around the world are registered. Frequency Broadcast Station Frequency Broadcast Station CH No. Name CH No. Name (MHz) Name (MHz) Name 6.030 11.910 SPAIN Spain 6.160 15.290 SPAIN Spain 9.760 6.055 NIKKEI... -
Page 72: In Case Of A Malfunction
The battery pack cannot be charged, or the battery power depletes immediately after charging. • Is the battery pack being charged with a charger specified by Yaesu? Charge the battery pack using the accessory battery charger (SAD-25) or the rapid charge cradle (CD-41). - Page 73 Copyright 2021 YAESU MUSEN CO., LTD. All rights reserved. No portion of this manual may be reproduced without the permission of YAESU MUSEN CO., LTD. YAESU MUSEN CO., LTD. Tennozu Parkside Building 2-5-8 Higashi-Shinagawa, Shinagawa-ku, Tokyo 140-0002 Japan YAESU USA 6125 Phyllis Drive, Cypress, CA 90630, U.S.A.
Need help?
Do you have a question about the FT5Dr and is the answer not in the manual?
Questions and answers