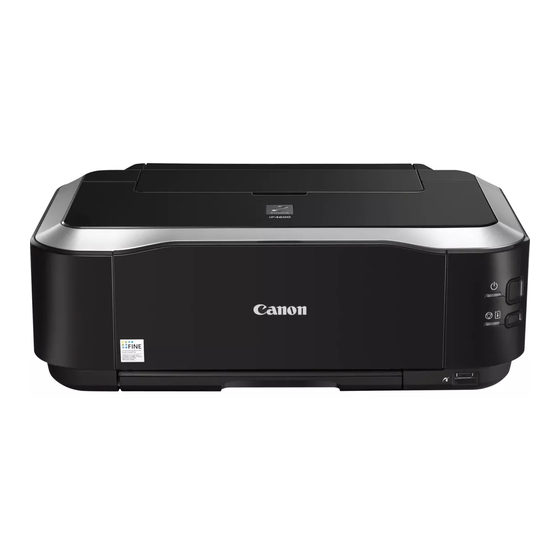
Canon PIXMA iP4600 Series Getting Started
Canon pixma ip4600: quick start
Hide thumbs
Also See for PIXMA iP4600 Series:
- Getting started (45 pages) ,
- Specifications (2 pages) ,
- Simplified service manual (21 pages)

Related Manuals for Canon PIXMA iP4600 Series


Summary of Contents for Canon PIXMA iP4600 Series
-
Page 1: Getting Started
Photo Printer iP4600 series Getting Started =Read Me First= Make sure to read this manual before using the printer. Please keep it in hand for future reference. -
Page 2: Check The Box Contents
Turn the Power On Install the Print Head Install the Ink Tanks Install the Software Loading Paper After Installing the Printer ■ Sy mb ol s The following symbols are used to mark important instructions. Observe these instructions. Instructions that, if ignored, could result in personal injury or material damage. - Page 3 Setup CD-ROM (containing the drivers, applications and on-screen manuals) • Warranty • MP-101 paper (for Automatic Print Head Alignment) • Before turning on the printer, remove all the protective sheets. • A USB cable is necessary to connect the printer with your computer. ink tank power cord...
- Page 4 • Do NOT connect the USB cable at this stage. Press the ON button (A) to turn on the printer. • The printer may make some operating noises. This is normal operation.
- Page 5 Raise the Print Head Lock Lever (D). • Firmly raise the Print Head Lock Lever until it stops. (The Print Head Lock Lever may feel heavy.) • If the Print Head Holder does not move, make sure that the printer is turned on.
- Page 6 Install the Print Head Remove the Print Head from Remove and discard the orange the silver package. protective cap. • There may be some transparent or light blue ink on the inside of the bag the Print Head comes in, or the inside of the protective cap - this has no effect on print quality.
- Page 7 Install the Ink Tanks • Do not handle the ink tanks roughly such as applying them excessive pressure or dropping them. • If the Print Head Holder moves to the right, close and reopen the Top Cover . • Be sure to use the supplied ink tanks . Pull the orange tape (1) in the While pressing down with your left thumb, twist direction of the arrow to peel off...
- Page 8 • Wait until the POWER lamp lights green (about 6 minutes) and go to the next step. • The printer may make some operating noises when preparing to print. This is normal operation. • If an Alarm lamp (C) fl ashes orange, make sure that the Print Head and the ink tanks are correctly installed.
- Page 9 Install the Software To use the printer by connecting it to a computer, software including the drivers need to be copied (installed) to the computer's hard disk. The screens below are based on Windows Vista operating system Ultimate Edition (hereafter referred to as " Windows Vista ") and Mac OS X v.10.5.x .
- Page 10 Press the ON button (A) to TURN OFF THE PRINTER. • Operating noise continues for about 30 seconds until the printer turns off. Make sure that the POWER lamp (B) stops flashing. Turn on the computer, then insert the Setup CD-ROM into the CD-ROM drive.
- Page 11 Windows Vista Windows Vista AutoPlay screen appears, click Run Msetup4.exe . User Account Control screen appears, click Continue . If the same screen reappears in subsequent steps, click Continue .
- Page 12 Windows Click Easy Install. The drivers, application software, and on-screen manuals are installed automatically. • If you want to select particular items to install, click Custom Install and follow the on-screen instructions to proceed with the installation. Click Install. Move the cursor over items to display explanations. Read the License Agreement screen carefully and click Yes.
- Page 13 When the Printer Connection screen appears, connect one end of the USB cable to the computer, the other to the printer, then TURN THE PRINTER ON. • It takes about 15 seconds for the POWER lamp to light green. •...
- Page 14 Windows A li g n the Pri nt H ead When the Print Head Alignment screen appears, load a sheet of supplied speciality paper (MP-101) in the Rear Tray (C). • Be sure to use the supplied speciality paper (MP-101) for Automatic Print Head Alignment. •...
- Page 15 When the Start Print Head Alignment screen appears, click Align Print Head . Click OK in the subsequent message. Printing of the pattern starts. • Wait until the pattern printing ends (about 7 minutes), and go to the next step. •...
- Page 16 Windows When the Load plain paper into the cassette screen appears, load plain paper in the Cassette (E) and click Next. • For details, refer to "6 Loading Paper" on page 22. Click Next. It may take a while for the next screen to appear. Click Next only once.
- Page 17 If connected to the Internet, the user registration page appears. Follow the on- screen instructions to register your product. You will need your product serial number, which is located on the inside of the printer. • Internet connection is required. (Connection fees apply.) •...
- Page 18 Macintosh Connect one end of the USB cable to the computer and the other to the printer. Make sure the printer is turned on. • The USB port is located on the right side at the back of the printer.
- Page 19 Click Easy Install . The drivers, application software, and on-screen manuals are installed automatically. • If you want to select particular items to install, click Custom Install and follow the on-screen instructions to proceed with the installation. Click Install . Read the License Agreement screen carefully and click Yes .
- Page 20 Macintosh When the Start Setup screen appears, click Execute . Click Restart . The Print Head Alignment screen appears after the computer has been restarted. Al i gn th e Print Head Load a sheet of supplied speciality paper ( MP-101 ) into the Rear Tray (A) .
- Page 21 Click Execute . When this screen appears, click OK . Printing of the pattern starts. • Wait until the pattern printing ends (about 7 minutes), and go to the next step. • Make sure that the Output Tray Extension (B) is extended.
- Page 22 Macintosh Make sure that the pattern shown is printed. Print Head Alignment is now complete. • When Print Head Alignment cannot be executed properly, the Alarm lamp will fl ash orange 11 times. In this case, refer to " When Printing Becomes Faint or Colors Are Incorrect "...
- Page 23 Click Next . If connected to the Internet, the user registration page appears. Follow the on- screen instructions to register your product. You will need your product serial number, which is located on the inside of the printer. • •...
- Page 24 Loading Paper This section explains how to load paper in the Cassette (A) and Rear Tray (B). Pull out the Cassette (A) and remove the Cover (E). The Cassette (A) supports plain paper (C) only. To print Photo Paper/Hagaki (D), be sure to load it in the Rear Tray (B).
- Page 25 Slide the Paper Guide (G) against Attach the Cover (E) and insert left edge of the paper. the Cassette into the printer until it clicks into place. Do not exceed the Load Limit Mark (I). •...
- Page 26 (L) against both edges of the paper. Do not exceed the Load Limit Mark (M). • For details on media sizes and types you can use, refer to "Loading Paper" in the on-screen manual: Basic Guide . Printer installation is now complete!
- Page 27 For proper use, read safety precautions before using the product. Describes how to set up and use your printer. Introduces the printer and its functions, the included manuals and application software. G e ttin g S ta rte d B as ic Gu id e...
- Page 28 Sol uti o n Men u is a g at ew ay t o f u nct ion s a n d in f o r m a ti o n th a t a ll ow yo u to...
- Page 29 Usi ng Yo u r Pr i nter This printer allows you to print in various ways using the printer driver and application software installed on the computer. For example, you can print borderless photos, and create your own calendar etc. easily.
- Page 30 Print Photos from a Computer Easy-PhotoPrint EX allows you to print photos easily. This section explains how to print borderless photos using 4" x 6" size Photo Paper Plus Glossy II. The screens are based on Windows Vista. In Solution Menu, click One- Select the image you want to print Click to Photo Print.
-
Page 31: About Consumables
SVGA 800 x 600 XGA 1024 x 768 • To upgrade from Windows XP to Windows Vista, first uninstall software bundled with the Canon inkjet printer. Additional System Requirements for the on-screen manuals Browser: Easy Guide Viewer Browser: Help Viewer Note: Microsoft Internet Explorer 6.0 or... -
Page 32: Getting Help From Canon
Order # CLI-221 Black 2946B001 CLI-221 Magenta 2948B001 CLI-221 Cyan 2947B001 PGI-220 Black 2945B001 CLI-221 Yellow 2949B001 Call 1-800-OK-CANON to locate a dealer near you, or visit the Canon eStore at www.canonestore.com www.usa.canon.com QT5-1617-V01 XXXXXXXX ©CANON INC.2008 PRINTED IN THAILAND...
Need help?
Do you have a question about the PIXMA iP4600 Series and is the answer not in the manual?
Questions and answers