
Related Manuals for Roborock S5 Max


Summary of Contents for Roborock S5 Max
- Page 1 Roborock Robot Vacuum Cleaner S5 Max User Manual Read this user manual carefully before using this product and store it properly for future reference.
- Page 2 floors easier than ever. All you need to do is set it and get on with living. Roborock is committed to putting advanced technologies to work for you, so that you can waste less time on chores and do more of the things you love.
-
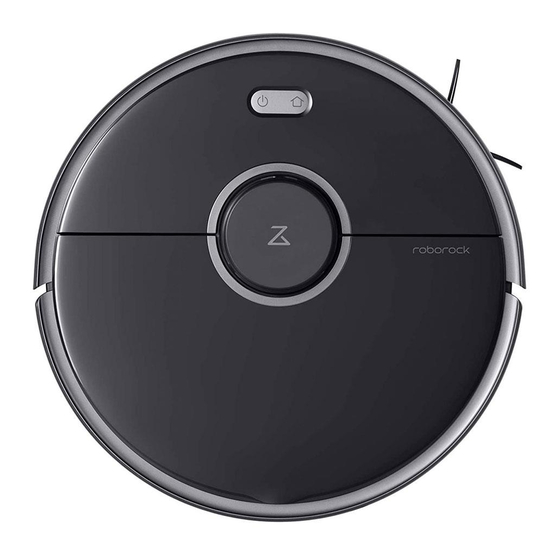
Page 3: Product Introduction
Product introduction Robot On/Off · Press to start cleaning · Press and hold to power on or off Power indicator · White: Battery level ≥ ��% · Red: Battery level < ��% · Flashing: Charging or starting up · Flashing red: Error Dock/Spot Clean ·... -
Page 4: Parts List
Product introduction Parts list Charging dock Moisture-proof mat Power cable Mop cloth mount Mop cloth ��... - Page 5 Product introduction Dustbin Robot Dustbin cover Dustbin latch WiFi indicator light · Off: WiFi disabled · Slow flashing: Waiting for connection Air filter · Fast flashing: Connecting · Steady: WiFi connected System reset Air vent Water tank latch Speaker ��...
- Page 6 Product introduction Machine and sensors Wall sensor Recharge sensor Cliff sensor Omnidirec- tional wheel Bumper Charging contact Laser distance Side brush sensor Main wheels Main brush cover latch Main brush ��...
-
Page 7: Charging Dock
Product introduction Mopping module Mop cloth att- achment slot Water tank stopper Mop cloth bra- cket Water filter Mop cloth bra- cket clip Water tank Mop cloth Water tank latch Attaching area Charging dock Charging dock power indicator Signal transmitting area Power socket Charging points Charging points... -
Page 8: Installation
Installation Using the robot �. Place the charging dock against the wall on a flat surface �. Secure the charging dock with the adhesive tape. and plug it into the mains power. Wipe the floor of the area where the charging dock will be placed with a dry cloth, then stick the enclosed double-sid- ed tape to the floor. - Page 9 Installation Using the robot �. Secure the moisture-proof mat. �. Power on and charge. After securing the charging dock, wipe the area where the Press and hold the button to turn on the robot. When moisture-proof mat will be placed with a dry cloth as the power indicator lights up, place the robot onto the shown.
- Page 10 ➀Download the Roborock app or Xiaomi home app added, it will be found in a list on the homepage. a. Search "Roborock" in the App Store or Google Play, Or Note: • Due to ongoing app development, the actual process may differ slightly scan the QR code below, then download and install the app.
- Page 11 Installation Using the robot �. Mopping Note: It is recommended that all floors are vacuumed at least three times before the first mopping session to reduce excessive dirt buildup on the mop. Remove the water tank Install the water tank �...
- Page 12 Installation Using the robot Attach the mop cloth bracket �. Remove the mop cloth bracket � To remove the mop cloth bracket, press the two clips Slide the mop cloth bracket under the water tank following inwards and pull the bracket backwards. the alignment marks, until you hear a click.
- Page 13 Installation On/Off Press and hold the button to turn on the robot. The power Note: indicator will turn on and the robot will enter Standby mode. · Cleaning cannot start if the battery level is too low. Allow the robot to charge before restarting cleanup.
-
Page 14: Spot Cleaning
Instructions for use Charging Spot Cleaning Auto: After cleaning, the robot will automatically return to the In the Standby or Pause mode, press and hold the button charging dock to recharge. to start spot cleaning. This mode is used to clean a �.�m x Manual: In Pause mode, press the button to send the �.�m square area centered on the robot. -
Page 15: Scheduled Cleaning
Instructions for use Selective Room Cleaning Pin n Go Use the APP to set a destination for the robot to go to. Select specific rooms for cleaning in the APP. In this mode, Cleaning mode the robot will only clean the selected rooms. Use the APP to choose from Quiet, Balanced, Strong, or MAX modes. - Page 16 Instructions for use No-go zones / Invisible Wall / Mopping More app functions No-Go Zone Real-Time Map Updates Carpet Boost Robot Location The app can be used to draw Virtual No-Go Zones and Walls, as well as Virtual No-Mop Zones and Walls to keep the robot Part Replacement Do Not Disturb Change Cleaning Mode...
-
Page 17: Routine Maintenance
Instructions for use Routine maintenance Charging dock Main brush * Clean weekly The charging dock should be plugged in and placed against �. Turn the robot over then unlatch and remove the main a wall on level ground, with more than �.�m (�.�ft) of clear- brush cover. - Page 18 Routine maintenance Using the main brush cleaning tool Use the main brush cleaning tool to remove any hair entan- �. Open the dustbin lid as indicated by the arrow and pour gled around the main brush. out the contents. Note: If there is a large amount of hair, or hair is tightly entangled, remove it carefully to avoid damage to the main brush.
- Page 19 Routine maintenance Clean the washable filter * Clean every two weeks �. Rinse repeatedly and tap the filter frame to remove as �. Fill the dustbin with clean water and close the cover. much dirt as possible. Gently shake the dustbin, then pour out the dirty water. �.
-
Page 20: Side Brush
Routine maintenance Side brush Mop cloth * Monthly cleaning recommended * Clean after use �. Turn the robot over and remove the screw holding the side brush. �. Remove the mop cloth from the mop cloth bracket. �. Remove and clean the side brush. �. -
Page 21: Restore Factory Settings
Routine maintenance Omnidirectional wheel Machine sensors * Frequent cleaning is recommended * Monthly cleaning recommended �. Turn the robot over. Use a soft dry cloth to wipe and clean all sensors, including: �. Use a small screwdriver to separate the axle and the tire. �. -
Page 22: Basic Parameters
To deactivate Holiday mode, press and hold "Recharge" for �� seconds until the LED indicator brightens. Basic parameters Robot Charging dock Name Parameters Name Parameters Model roborock S� Max Model CDZ��RR or CDZ��RR Dimensions ��������.�mm Dimensions ��������mm Battery ��.�V/����mAh lithium battery Rated power ��W... -
Page 23: Troubleshooting
Troubleshooting If an error occurs during cleanup, the power indicator will flash red quickly, and a voice alert will play. Refer to the table below for resolution options. Error Solution Error �: Rotate the laser head to check The LDS unit is jammed. Remove any items blocking it then move the robot to a new location that it turns freely. - Page 24 Malfunction due to an internal error. Reset the system. Note: A system reset may not resolve all problems. If the problem persists after using the recommendations in the table above, please email our after-sales service team: US/Non-Europe Support: support@roborock.com Europe Support: support@roborock-eu.com ��...
- Page 25 Unable to connect to WiFi The current device is not supported. You can find supported models inside the app. Unable to connect to WiFi. There may be an error with your router settings. Contact Roborock customer service for help with troubleshooting.
- Page 26 FAQs Problem Solution The battery level is too low. Scheduled cleaning can only begin when the battery level is above ��%. Scheduled cleaning is not working Please confirm whether the timed cleaning setting is set to “effective once”? Is power always being drawn when The robot will draw power while it is docked to maintain battery performance, but power consump- the robot is on the charging dock? tion is extremely low.
- Page 27 Address of Manufacturer: Floor �, Suite ����, ����, ����, Building C, Kangjian Baosheng Plaza, No.� Heiquan Road, Haidian District, Bejing, P.R.CHINA For more product information, visit our website: www.roborock.com For after-sales support, email our after-sales service team: US/Non-Europe Support: support@roborock.com...
Need help?
Do you have a question about the S5 Max and is the answer not in the manual?
Questions and answers