Table of Contents
Advertisement
Advertisement
Table of Contents

Related Manuals for Dahua DHI-VTO2202F-P-S2


Summary of Contents for Dahua DHI-VTO2202F-P-S2
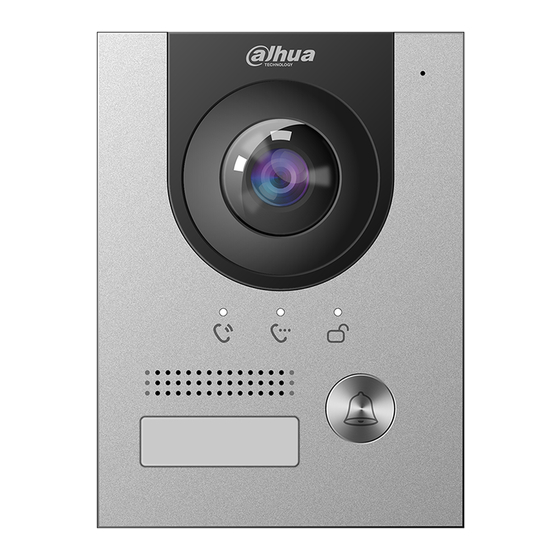
- Page 1 Two-wire Door Station User’s Manual V1.0.0...
- Page 2 Foreword General This manual introduces the web interface configuration of the door station (hereinafter referred to as "VTO"). Safety Instructions The following categorized signal words with defined meaning might appear in the Manual. Signal Words Meaning Indicates a potential risk which, if not avoided, could result in property damage, data loss, lower performance, or unpredictable CAUTION result.
- Page 3 occurring when using the device. If there is any uncertainty or controversy, we reserve the right of final explanation. ...
-
Page 4: Important Safeguards And Warnings
Important Safeguards and Warnings The following description is the correct application method of the device. Please read the manual carefully before use, in order to prevent danger and property loss. Strictly conform to the manual during application and keep it properly after reading. Operating Requirement ... -
Page 5: Table Of Contents
Table of Contents Foreword ..............................I Important Safeguards and Warnings ....................... III 1 Initialization ............................1 2 Login Interface ............................2 Logging In ............................. 2 Resetting Password ........................2 3 Main Interface............................4 4 Local Setting ............................ -
Page 6: Initialization
Initialization For first time login or after the VTO being reset, you need to initialize it on the web interface. The default IP address of the VTO is 192.168.1.1108 and make sure the PC is in the same network segment as the VTO. Power on the VTO. -
Page 7: Login Interface
Login Interface Logging In Before login, make sure that the PC is in the same network segment as the VTO. Go to the VTO IP address in the browser. Login interface Enter "admin" as username, then the password you set during initialization, and then click Login. - Page 8 The security code will be valid only for 24 hours upon receipt. If you enter the wrong security code for 5 consecutive times, your account will be locked for 5 minutes. Enter and confirm the new password, and then click OK.
-
Page 9: Main Interface
Main Interface Log in to the web interface of the VTO. Main interface Table 3-1 Main interface introduction Function Description : Change the password and your Email address. : Go to the main interface. : Log out, restart the VTO or restore the VTO to factory settings. -
Page 10: Local Setting
Local Setting This chapter introduces detailed configuration to the VTO. Basic Select Local Setting > Basic. Basic Configure the parameters. Table 4-1 Basic parameter description... - Page 11 Parameter Description...
- Page 12 Building and unit number are available only when other servers work as the SIP server. See "6.2 UPnP When the VTO works as the SIP server, you can configure the UPnP function to allow WAN devices to log in to the VTO. Prerequisites ...
-
Page 13: Video & Audio
The default number is 888888, and you can set it to any number with up to 9 Centre Call No. digits. Device Name — Call Centre Period Time period in which you are allowed to call the management centre. Used to differentiate each VTO, and we recommend setting it according to unit or building number, and then you can add VTOs to the SIP server with their numbers. -
Page 14: Access Control Settings
Parameter Description get clearer image of the dark areas on the target. Wide dynamic: The system dims bright areas and compensates dark areas to ensure the overall clarity. Inhibition: the system constrains bright areas and reduces halo size to dim the overall brightness. Sensor Larger value for higher sensitivity. -
Page 15: Rs-485
Local Configure the parameters. Table 4-4 Local access control parameter description Parameter Description Unlock Responding The interval between two unlocks. Interval Unlock Period The time for which the lock stays unlocked. Enable it, and the door will not be locked until the door sensors contact each other. -
Page 16: Password Management
Lock connected through the RS-485 port Password Management Click Add, and then you can add a username and password used to unlock the door. Password management System Configure time-related format, NTP server, and more. Select Local Setting > System. - Page 17 System Configure the parameters. Table 4-5 System parameter description Parameter Description Date Format — Time Format — System Time Changing system time might cause problems on video searching and information publication. Turn off video recording and auto snapshot before changing it. —...
-
Page 18: Security
Enable it for fault analysis and repair. Emergency Maintenance This function will occupy 8088 and 8087 ports. Click Save. Security Select Local Setting > Security. Security Configure the parameters. - Page 19 Table 4-6 Security parameter description Parameter Description Enable the use of CGI command. CGI Enable We recommend turning it off. Otherwise, the VTO might be exposed to security risks and data leakage. Send information to the app on the smartphone. Mobile Push Notification The VTO might be exposed to security risks and data leakage.
-
Page 20: Wiegand
Security Mode (recommended): Support logging in with Digest authentication. Compatible Mode: Use the old login method. Authentication Mode We recommend security mode. Compatible mode might expose the VTO to security risks and data leakage. Click Save to save. Wiegand Configure the parameters as needed when connected to other devices through the Wiegand port. Wiegand Onvif User Add accounts for devices to monitor the VTO through the onvif protocol. -
Page 21: Upload File
Add an onvif user account Enter the information, and then click Save. Onvif devices can now monitor the VTO using the account. See the corresponding manual for details. Upload File Upload audio file to change the sound when calling, unlocking the door, and more. Select Local Settings >... -
Page 22: Household Setting
Household Setting This chapter is applicable when the VTO works as the SIP server, and introduces how to add, modify, and delete VTO, indoor monitor ("VTH"), VTS, and IPC devices, and how to send messages from the SIP server to other VTOs and VTHs. If you are using other servers as the SIP server, see the corresponding manual for details. -
Page 23: Vth Management
Add VTO Configure the parameters. The SIP server must be added. Table 5-1 Add VTO configuration Parameter Description Rec No. The VTO number you configured. See Table 4-1 for details. Register Password Keep it default. Build No. Available only when other servers work as the SIP server. Unit No. - Page 24 Log in to the web interface of the SIP server, and then select Household Setting > VTH Management. Room number management Click the Add. Add a room number Configure the parameters. Table 5-2 Room information Parameter Description First Name Last Name Enter the information you need to differentiate each room.
-
Page 25: Issuing Access Card
5.2.2 Issuing Access Card Issue access card to unlock the door of a room. To use this function, the VTO must have a card reader. When adding or modifying a room number, click Issue Card. Countdown notice Swipe the card on the VTO. Issue card Enter the username, click Save, and then click Confirm Send Card. -
Page 26: Vts Management
Enter a username, assign unlock permission as needed, and then click Save. Press your fingerprint on the fingerprint scanner. VTS Management You can add a VTS to the SIP server, and then it can be used as the management center. It can also manage, call, or receive calls from all the VTOs and VTHs in the network. -
Page 27: Ipc Setting
Add VTS Configure the parameters. Table 5-3 Add VTS configuration Parameter Description VTS No. — Register Password Keep it default. IP Address VTS IP address. Click Save. IPC Setting You can add IPC and NVR to the SIP server, and then all the connected VTH can monitor them. Interfaces may vary with different products. - Page 28 Add IPC Configure the parameters. Table 5-4 Add IPC configuration Parameter Description IPC Name — IP Address — Username Web interface login use.rname and password of the device. Password Port Keep it default. Protocol Select from Local or Onvif. Main: Better video quality but require more bandwidth. Stream Type Extra1: Smoother video with worse quality, but require less bandwidth.
-
Page 29: Status
Status You can view the online status and IP address of all the connected devices. Log in to the web interface of the SIP server, and then select Household Setting > Status. Status Publish Information You can send messages from the SIP server to VTH devices, and view message history. Interfaces may vary with different products. - Page 30 Log in to the web interface of the SIP server, select Household Setting > Publish Information > History Info. History information...
-
Page 31: Network Setting
Network Setting This chapter introduces how to configure the network parameters. Basic 6.1.1 TCP/IP You can modify the IP address, subnet mask, default gateway, and DNS of the VTO. Select Network Setting > Basic. TCP/IP and port Configure the parameters, and then click Save. The VTO will restart, and you need to modify the IP address of your PC to the same network segment as the VTO to log in again. -
Page 32: P2P
Parameter Description Enable it and click Save. You can now enter "https://VTO IP address:HTTPS HTTPS Port Port" to log in to the VTO. TCP/UDP Port Used for accessing the VTO with devices in other networks. If it is your first time using the VTO or you have changed the IP address of the VTO, you need to go through this process, because this certificate is the unique digital identification of VTO for the SSL protocol. -
Page 33: Adding Upnp Services
6.2.2 Adding UPnP Services Select Network > UPnP. Click Add. Configure the parameters as needed. Add a UPnP service Table 6-2 Parameter description Parameter Description Service Name Enter the information as needed. Service Type Protocol Select TCP or UDP as needed. Internal Port Use port number 1024 to 5000. - Page 34 SIP Server Select a server type as needed. The VTO you have logged in as the SIP server: Enable SIP Server, and click Save, and then the VTO will restart. You can add VTOs and VTHs to this VTO. See the details in "0...
-
Page 35: Firewall
Household Setting". If the VTO you have logged in will not be the SIP server, do not enable SIP Server; otherwise the connection will fail. If another VTO works as the SIP server: Select Server Type to VTO, and then configure the parameters. Table 6-3 SIP server configuration Parameter Description... -
Page 36: Log Management
Log Management Select Search Log, and then you can view call history, alarm records, unlock records, and various system logs, and export them to your PC as needed. If storage is full, the oldest records will be overwritten. Back up the records as needed. -
Page 37: Cybersecurity Recommendations
Cybersecurity Recommendations Cybersecurity is more than just a buzzword: it’s something that pertains to every device that is connected to the internet. IP video surveillance is not immune to cyber risks, but taking basic steps toward protecting and strengthening networks and networked appliances will make them less susceptible to attacks. - Page 38 Enable HTTPS We suggest you to enable HTTPS, so that you visit Web service through a secure communication channel. MAC Address Binding We recommend you to bind the IP and MAC address of the gateway to the device, thus reducing the risk of ARP spoofing.
Need help?
Do you have a question about the DHI-VTO2202F-P-S2 and is the answer not in the manual?
Questions and answers