Table of Contents
Advertisement
Advertisement
Table of Contents

Related Manuals for Gardenline SM-003


Summary of Contents for Gardenline SM-003
- Page 1 Assembly Instructions SMOKER BBQ...
-
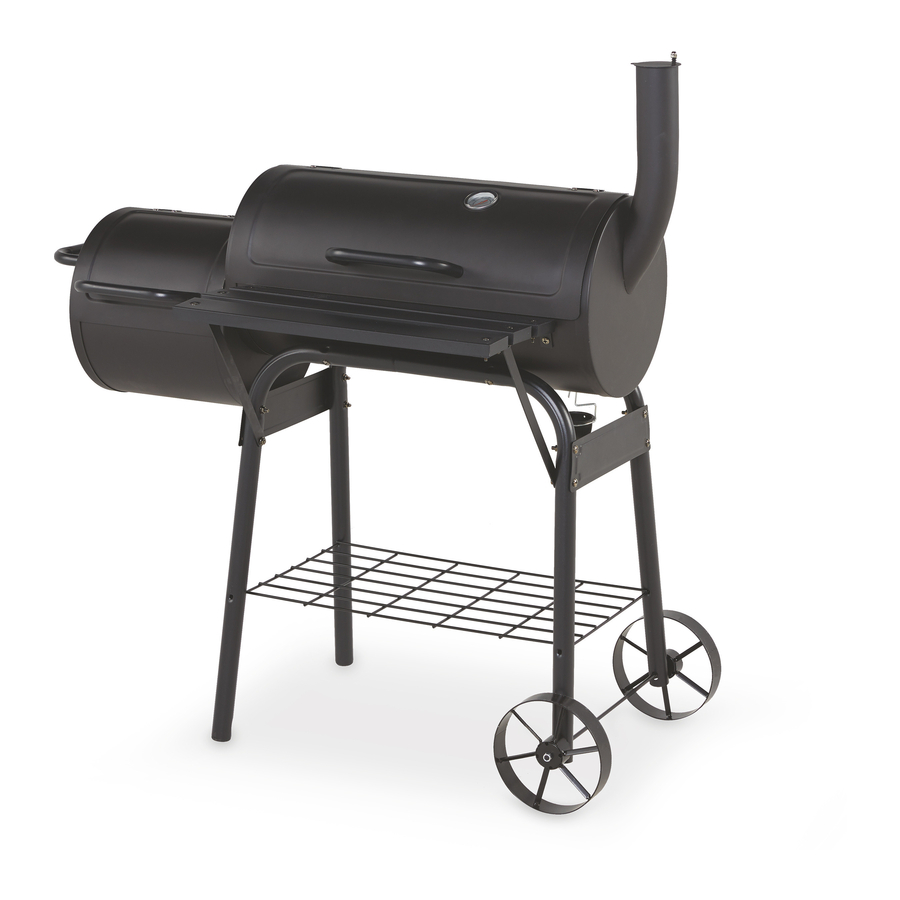
Page 2: Overview
Overview... -
Page 3: Scope Of Delivery/Product Components
Scope of delivery/product components Scope of delivery/product components Before starting to assemble, please check that all parts mentioned on the parts list are in the packaging. Unwrap all packaging materials and place components on top of carton box or on a clean floor to prevent it from scratching. When assembling, tighten bolts loosely and after assembly is completed, tighten them fully. -
Page 4: Table Of Contents
Table of content Table of content Overview........................2 Scope of delivery/product components..............3 General information....................5 Reading and storing the assembly instructions............5 Intended use........................5 Explanation of symbols.....................5 Safety........................6 Safety notes........................6 Assembly instruction....................8 Step 1: Assemble the legs....................9 Step 2: Mount the large chamber..................9 Step 3: Mount connecting plates and wheels.............. -
Page 5: General Information
General information General information Reading and storing the assembly instructions These assembly instructions are a part of the Smoker BBQ (hereinafter simply called "product"). They contain important information about assembly and use. Read the assembly instructions carefully, in particular the safety instructions, before using the product. -
Page 6: Safety
Safety Safety WARNING! Do not use the barbecue in a confined and/or habitable space e.g. houses, tents, caravans, motor homes, boats. Danger of carbon monoxide poisoning fatality. The following signal words are used in these assembly instructions. This signal symbol/word denotes a hazard with WARNING! an average risk level that could lead to death or severe injury if it is not avoided. - Page 7 Safety Never dump hot charcoal or ashes where it might be stepped on or be a fire hazard. Never dump ashes or charcoal before they are fully extinguished. Allow the barbecue to cool down completely before cleaning it. During use, the screw connections can loosen and adversely affect the stability of the barbecue.
-
Page 8: Assembly Instruction
Safety After approx. 30 minutes the charcoal is fully lit when it is covered with a coating of grey ash. Then spread the charcoal evenly across the charcoal grid. Do not cook before the charcoal has a coating of ash. Assembly instruction CAUTION! Risk of injury! -
Page 9: Step 1: Assemble The Legs
Assembly instruction Step 1: Assemble the legs Connect the short legs and the long legs 2. Connect the legs with the steel slot Step 2: Mount the large chamber Place the large chamber on the legs. 2. Attach the large chamber to each leg. Connectors: 4 × M6×40 bolt, washer and nuts... -
Page 10: Step 3: Mount Connecting Plates And Wheels
Assembly instruction Step 3: Mount connecting plates and wheels Attach the connecting plates and the table supports to the legs. Connectors: 6 × M6×40 bolt, washer and nut , 2 × M6×45 bolt, washer and nut 2. Insert the axle through the holes at the end of the short legs. -
Page 11: Step 5: Mount Lids And Chimney
Assembly instruction Step 5: Mount lids and chimney Pay attention to the mounting direction of the hinges as labeled. Attach the hinges to the small chamber and the large chamber. Connectors: 8 × M5×10 bolt, washer and nut 2. Attach the lid for small chamber to the hinges on the small chamber. -
Page 12: Step 6: Mount Handles And Thermometer
Assembly instruction Step 6: Mount handles and thermometer Attach the steel handle to the small chamber. Connectors: 2 × M6×15 bolt and washer 2. Attach the steel handle to the lid for small chamber. Connectors: 2 × M6×15 bolt and washer 3. -
Page 13: Step 7: Assemble Front Shelf And Install Barbecue Grids
Assembly instruction Step 7: Assemble front shelf and install barbecue grids Attach the supports for front shelf to the table supports . Connectors: 2 × M6×12 bolt, washer and nut 2. Attach the front shelf batten to the supports for front shelf. Connectors: 6 × M5×30 bolt, washer and nut 3. -
Page 14: Use
WARNING! Risk of burns This barbecue will become very hot! Touching may cause burn injuries. - Use heat-resistant barbecue mitts or gloves (conforming to EN 407, Contact Heat rating level 2 or greater) while cooking, adjusting air vents (dampers), adding charcoal, and handling thermometer or lid. -
Page 15: The First Time You Grill
The first time you grill Before first use clean all parts to come into contact with foodstuffs especially the cooking grids , according to chapter “Cleaning”. 2. Before you can use your barbecue in all its functions, it must be burnt in. Use seasoned wood from trees to make a fire in both chambers and let this burn for up to 2 hours. -
Page 16: American Barbecue
Indirect grilling Charcoal is lit in the small chamber. The products for grilling in the large chamber are not directly above the glowing coals. Temperatures between 160 and 250 °C. Lighting the barbecue for grilling If you use lighting blocks, place 3 or 4 pieces on the centre of the charcoal grid. Pile the charcoal in pyramid formation on the charcoal grid. -
Page 17: Cleaning
Cleaning Cleaning WARNING! Risk of burns This barbecue will become very hot! Touching may cause burn injuries. - Allow the barbecue to cool completely before cleaning! Clean the cooled barbecue after each use. Discoloration on the air vents, the lid, the charcoal grate and other parts are normal signs of use and are neither hygienically questionable nor a defect. -
Page 18: Storage
4. Clean the barbecue and allow it to dry completely before covering. 5. Store the barbecue at a dry place protected from the elements. Technical data Model: SM-003 Dimensions (W × D × H): 107.5 × 67 × 110 cm Weight:... - Page 19 ALDI STORES LTD. PO BOX 26, ATHERSTONE WARWICKSHIRE, CV9 2SH. ALDI STORES (IRELAND) LTD. PO BOX 726, NAAS, CO. KILDARE. Visit us at www.aldi.com AFTER SALES SUPPORT 701430 0121 36 80 339 01 50 60 684 www.bestbuyingsupport.com YEAR MODEL: WARRANTY SM-003 04/2020...
Need help?
Do you have a question about the SM-003 and is the answer not in the manual?
Questions and answers