Table of Contents
Advertisement
Quick Links
Advertisement
Table of Contents

Related Manuals for Van Der Valk ValkPro+ L10 East-West


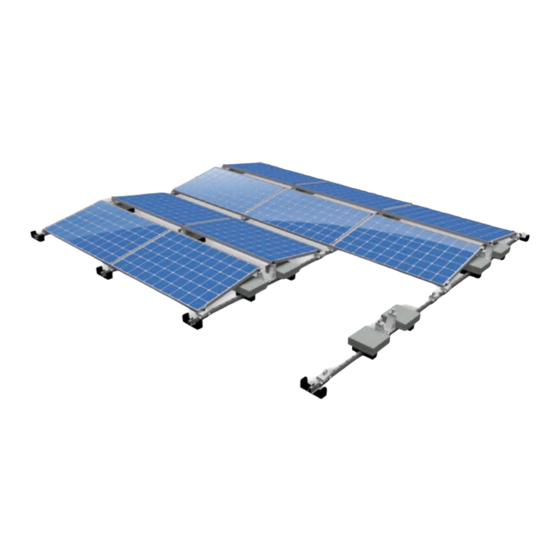
Summary of Contents for Van Der Valk ValkPro+ L10 East-West
-
Page 2: Disclaimer
This installation manuals needs to be used in conjunction with a project specific “Project report”. This project report is the result of the use of the online calculation tool of Van der Valk Solar Systems B.V., called the “ValkPVplanner”, which project report shows you specific information about your project such as, amongst other, a project drawing and ballast plan for flat roofs (the “Project Report”). -
Page 3: Table Of Contents
Page 24 Sedum/Green roofs Page 25 ValkPro+ as a field system Page 26 Console fixation (ValkSolarFix) Page 27 Ballast wing Page 28 Extra panel support Page 29-31 Van der Valk Solar Systems BV Installation manual – ValkPro+ L10 [East-West] v1.2.0... -
Page 4: Placement Conditions
ValkPVplanner and is corresponding with the roof height in the project report. For installations on roofs higher than 25 meters, please contact Van der Valk Solar Systems. - Check prior to installation if the roof membrane and/or insulation is suitable for the loads and thermal expansion of the PV-system. -
Page 5: Recommended Tools For Installing Valkpro
Cordless drill 743000 Socket 13 mm Adjustable alignment set for roof carriers Wrench 13 mm 743220 Torx bit T-30 (789530) Measuring tape Alignment key for roof carriers 739010 Van der Valk Solar Systems BV Installation manual – ValkPro+ L10 [East-West] v1.2.0... -
Page 6: Required Materials For Valkpro+ L10 [East-West]
Front foot side 724661 Tile carrier 729622 - for bitumen / TPO / EPDM roof 729623 - for PVC roof For the ‘optional’ materials, see next page. Van der Valk Solar Systems BV Installation manual – ValkPro+ L10 [East-West] v1.2.0... - Page 7 Elevation block for gravel roofs Multi-wire / connector clip for roof carrier 729627 732012 Mass block (750520) Ballast wing 725150 Stainless steel bolt M8 x 65 mm (774065) Van der Valk Solar Systems BV Installation manual – ValkPro+ L10 [East-West] v1.2.0...
- Page 8 Panel support - Front foot 724710 Panel support - Base plate small 724720 Panel support - Upright 724730 Van der Valk Solar Systems BV Installation manual – ValkPro+ L10 [East-West] v1.2.0...
-
Page 9: Pre-Assembly Of Roof Carriers Sets
“L” is visible on top of the roof carrier. The rubber tile carriers are placed in the second rectangular hole in front of the aluminium back foot. Side view Van der Valk Solar Systems BV Installation manual – ValkPro+ L10 [East-West] v1.2.0... -
Page 10: Placing Roof Carrier Rows
The coupled system has to be dilatated after certain measurements, this needs to be done because of the thermal expansion/contraction. For the South-North direction this is 60 meters, for the East-West direction this is 30 meters. Van der Valk Solar Systems BV Installation manual – ValkPro+ L10 [East-West] v1.2.0... - Page 11 Alignment set ValkPro+ (art. 743220) The alignment set can be used to make sure the roof carrier rows are placed at the correct pitch beside each other. Van der Valk Solar Systems BV Installation manual – ValkPro+ L10 [East-West] v1.2.0...
-
Page 12: Placing Ballast
The ballast can be placed on the rubber tile carriers or on the mass carriers (only when necessary). Check the ValkPVplanner project report for the required ballast weight per panel. Max. no. of tiles on rubber tile carriers: 2,5 tiles (22,5 kg) Van der Valk Solar Systems BV Installation manual – ValkPro+ L10 [East-West] v1.2.0... - Page 13 The mass carriers are placed on both sides of the rubber tile carrier. The mass carriers provide the support for the tiles (see image 2.2). Max. no. of tiles on mass carriers: 10 tiles (90 kg) Van der Valk Solar Systems BV Installation manual – ValkPro+ L10 [East-West] v1.2.0...
- Page 14 Art. 742615 (2180 mm) – Max. 46,4 kg Art. 742618 (2380 mm) – Max. 50,7 kg In the calculation above a gravel density of 1500 kg/m3 is used. Van der Valk Solar Systems BV Installation manual – ValkPro+ L10 [East-West] v1.2.0...
- Page 15 Therefore the middle row of the system doesn’t have any ballast (see red line). If possible there may be ballast placed on those foundation points as well. Van der Valk Solar Systems BV Installation manual – ValkPro+ L10 [East-West] v1.2.0...
- Page 16 The numbers in the image below represent the order of the pressure dividers when using 1, 2 or 3 pieces. For more information, please refer to the datasheet. Van der Valk Solar Systems BV Installation manual – ValkPro+ L10 [East-West] v1.2.0...
-
Page 17: Mounting Side Plates
Roof height is 25m or higher Each side plate is fixed to the sides of the aluminium feet using three thread forming bolts M6 x 10 mm. (see image 3.1) Van der Valk Solar Systems BV Installation manual – ValkPro+ L10 [East-West] v1.2.0... -
Page 18: Placing Solar Panels
The clamps must have an overlap of at least 6,3 mm with each panel frame, in order to ensure full clamping force. Van der Valk Solar Systems BV Installation manual – ValkPro+ L10 [East-West] v1.2.0... - Page 19 X. The ValkPro+ system will then still apply enough clamping force on the panels. Van der Valk Solar Systems BV Installation manual – ValkPro+ L10 [East-West] v1.2.0...
-
Page 20: Mounting Micro Invertor Clamps
Mounting micro-invertors Micro-invertors can be mounted on the roof carrier using a coupling set (Art. 774221). Van der Valk Solar Systems BV Installation manual – ValkPro+ L10 [East-West] v1.2.0... -
Page 21: Dilatations
For pitch 2500mm or larger, the outer PV-panels are automatically ‘exposed’. Dimension C (distance between the frames of the PV-panels): Min. 350 mm and max. 500 mm Van der Valk Solar Systems BV Installation manual – ValkPro+ L10 [East-West] v1.2.0... -
Page 22: Cable Management
This clip can be placed over the roof carrier in any desired location. It has multiple options to hold various MC4 connectors and cables: 2 x MC4 connector holder 2 x Cable holder Ø12 mm (DC/AC) 12 x Cable holder Ø6 mm Van der Valk Solar Systems BV Installation manual – ValkPro+ L10 [East-West] v1.2.0... - Page 23 Please note: in case mass carriers are used, it is not possible to place the 50 x 60 mm cable baskets in the inside position (under the PV-panel) next to the roof carrier. Van der Valk Solar Systems BV Installation manual – ValkPro+ L10 [East-West] v1.2.0...
- Page 24 This wire can be placed in the cable clamps and the length can absorb the thermal expansion of the coupled system. The electrical cables can be fixed to the wire using tie-wraps. This keeps the cables free from the roof surface. Van der Valk Solar Systems BV Installation manual – ValkPro+ L10 [East-West] v1.2.0...
-
Page 25: Gravel Roofs
(Art. 729627). It is important to ensure the distance between the gravel and the lowest part of the PV-panel is always between 95,5 - 115,5 mm. Min. 95,5 mm - Max. 115,5 mm Gravel roof Van der Valk Solar Systems BV Installation manual – ValkPro+ L10 [East-West] v1.2.0... -
Page 26: Sedum/Green Roofs
It is important to ensure the distance between the sedum and the lowest part of the PV-panel is always between 95,5 - 115,5 mm. Min. 95,5 mm - Max. 115,5 mm Sedum / green roof Van der Valk Solar Systems BV Installation manual – ValkPro+ L10 [East-West] v1.2.0... -
Page 27: Valkpro+ As A Field System
M8 x 65 mm bolt and washer (Art. 774065 + 774009). ValkPro+ as a field system cannot be calculated with the ValkPVplanner software. Please contact Van der Valk Solar Systems to calculate your project. Van der Valk Solar Systems BV... -
Page 28: Console Fixation (Valksolarfix)
- Roof screw for fixation in aerated concrete For the detailed mounting of a specific ValkSolarFix anchor, please refer to the manuals that can be downloaded from our website: http://www.valksolarsystems.com. Van der Valk Solar Systems BV Installation manual – ValkPro+ L10 [East-West] v1.2.0... -
Page 29: Ballast Wing
On the rubber tile carrier with ballast wings 3,5 standard tiles can be placed. The ballast wing is mounted by placing it over the roof carrier above a free hole an push it downwards. Van der Valk Solar Systems BV Installation manual – ValkPro+ L10 [East-West] v1.2.0... -
Page 30: Extra Panel Support
The base plate of the back foot can be mounted in both directions, depending on the preference of the installer. Position 1 is for panel width 977 – 1050 mm Position 2 is for panel width 1051 – 1135 mm Van der Valk Solar Systems BV Installation manual – ValkPro+ L10 [East-West] v1.2.0... - Page 31 Orientation of the base plate can be in both directions: Van der Valk Solar Systems BV Installation manual – ValkPro+ L10 [East-West] v1.2.0...
- Page 32 The mounted backfoot can now be placed below the high side of the panel and the clamp can be fixed to the panel frame. The front foot can be fastened to the panel frame on the low side of the panel. Van der Valk Solar Systems BV Installation manual – ValkPro+ L10 [East-West] v1.2.0...
- Page 33 Van der Valk Solar Systems BV Installation manual – ValkPro+ L10 [East-West] v1.2.0...
Need help?
Do you have a question about the ValkPro+ L10 East-West and is the answer not in the manual?
Questions and answers