
Related Manuals for ABB CP600-eCo


Summary of Contents for ABB CP600-eCo
- Page 1 — O P E R AT I N G I N S T R U C T I O N Control Panels CP600-eCo CP604(-B), CP607(-B), CP610(-B)
-
Page 2: Table Of Contents
Table of contents Table of contents Introduction Safety guide Product overview Standards and approvals Technical specifications Technical data Dimensions Installation environment Installation procedure Connections Serial port Ethernet port Power supply, grounding and shielding Cleaning faceplates Getting started System settings Touchscreen calibration Unpacking and packing Instructions... -
Page 3: Introduction
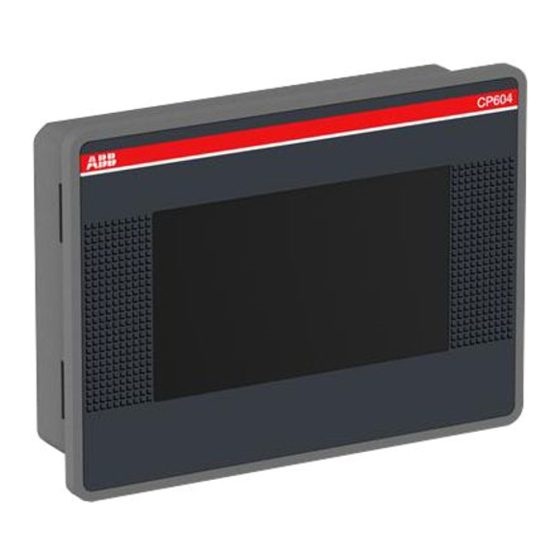
Introduction Introduction The operational guidelines describe below is information on device technical data, installation, transpor- tation, storage, assembly, use and maintenance. The Manual refers to the following models: CP604 Control panel with TFT color 4.3” widescreen display touchscreen CP607 Control panel with TFT color 7” widescreen display touchscreen CP610 Control panel with TFT color 10.1”... -
Page 4: Safety Guide
Safety guide Safety guide The manual contains safety standards that must be respected for the personal safety and to avoid damage. Indications of attention are divided into three levels of severity: DANGER: indicates a failure to observe safety rules and such failure may cause death or serious injuries. DANGER ATTENTION: indicates a failure to observe safety rules and that deficiency may cause damage. -
Page 5: Product Overview
Product overview 1 Product overview The CP600-eCo control panels combine state-of-the-art features and top performance with an oustanding design. They have been designed to offer an outstanding price/performance ratio for challenging applications. They are the ideal choice for CP600 applications including factory and building automation. -
Page 6: Standards And Approvals
Standards and approvals 2 Standards and approvals The products have been designed for use in an industrial environment in compliance with the 2014/30/ EU EMC Directive. The products have been designed in compliance with: EN 61000-6-4 EN 55011 Class A EN 61000-6-2 EN 61000-4-2 EN 61000-4-3... -
Page 7: Technical Specifications
Standards and approvals 3 Technical specifications Touchscreen technology Resistive RTC backup Supercapacitor Fuse Automatic Serial Port RS-232, RS-485, RS-422 software configurable Recipe memory Flash Hardware clock Clock/Calendar with back-up supercapacitor Accuracy RTC (at 25°C) <100ppm Environmental conditions Operating temperature (surrounding 0 ÷... - Page 8 100% duration: 1 cycle and 250 cycles (50Hz); 40% duration: 10 cycles (50Hz); 70% duration: 25 cycles (50Hz); Phase: 0°-180° Test executed on the 230Vac side of the ABB Power Supply EN 61000-4-11 Durability information Backlight service life 20000 Hrs. or more...
-
Page 9: Technical Data
Technical data 4 Technical data Model CP604 CP607 Display / Backlight TFT Color / LED TFT Color / LED Colors Resolution 480X272 800X480 Diagonal (inches) 4.3” widescreen 7” widescreen Dimming User memory 60 MB Flash 60 MB Flash 256 MB DDR 256 MB DDR RS-232,RS-485, RS-422 RS-232,RS-485, RS-422 DB9... - Page 10 Technical data Model CP610 Display / Backlight TFT Color / LED Colors Resolution 1024X600 Diagonal (inches) 10.1” widescreen Dimming User memory 60MB Flash 512 MB DDR RS-232,RS-485, RS-422 Serial Port software configurable Ethernet port 10/100 Mbit Host interface V2.0 USB port max.
-
Page 11: Dimensions
Technical data 4.1 Dimensions Cut out Fig. 4.1 MODEL CP604 136mm/5.35” 96mm/3.78” 147mm/5.78” 107mm/4.21” 29mm/1.14” 5mm/0.19”... - Page 12 Technical data Cut out Fig. 4.2 MODEL CP607 176mm/6.90” 136mm/5.35” 187mm/7.36” 147mm/5.79” 29mm/1.14” 5mm/0.19”...
- Page 13 Technical data Cut out Fig. 4.3 MODEL CP610 271mm/10.66” 186mm/7.32” 282mm/11.10” 197mm/7.75” 29mm/1.14” 6mm/0.23”...
-
Page 14: Installation Environment
Technical data 4.2 Installation environment In order to meet the front panel protection classifications, proper installation procedure must be followed: • the borders of the cutout must be flat • screw up each fixing screw until the plastic bezel corner get in contact with the panel. •... -
Page 15: Installation Procedure
Technical data 4.3 Installation procedure Place the fixing brackets as shown in figure. Fig. 4.5 CAUTION Screw each fixing screw until the bezel corner gets in contact with the panel. Tightening torque: 75 Ncm... -
Page 16: Connections
Connections 5 Connections CP604 Fig. 5.1 1. Serial Port 2. Ethernet Port 3. USB Port 4. Power Supply... - Page 17 Connections CP607 Fig. 5.2 1. Serial Port 2. Ethernet Port 3. USB Port 4. Power Supply...
- Page 18 Connections CP610 Fig. 5.3 1. Serial Port 2. Ethernet Port 3. USB Port 4. Power Supply...
-
Page 19: Serial Port
Connections 5.1 Serial port The serial port is used to communicate with the PLC or with another type of controller. Standards available for the signals in the PLC port connector are: RS-232, RS-422, RS-485. The serial port is software programmable. Make sure you select the appropriate interface in the programming software. -
Page 20: Ethernet Port
Connections 5.2 Ethernet port The Ethernet port have two LED indicators for status. Please see description below. GREEN YELLOW LED indicators Green Yellow No LAN cable connected BLINK (link active) LAN cable connected with 100Mbit/s link BLINK (link active) LAN cable connected with 10Mbit/s link... -
Page 21: Power Supply, Grounding And Shielding
Power supply, grounding and shielding 6 Power supply, grounding and shielding The power supply terminal block is shown in figure. Fig. 6.1 DC Power Connector - AWG24 wire size - R/C Terminal Blocks (XCFR2), Female pitch 5.08mm, torque 50Ncm Note: Ensure that the power supply has enough power capacity for the operation of the equipment. The unit must always be grounded to earth. -
Page 22: Cleaning Faceplates
The equipment must be cleaned only with a soft cloth and neutral soap product. Do not use solvents. 8 Getting started CP600-eCo control panels must be programmed with the software PB610-B. PB610 Panel Builder 600 is a software tool that must be properly installed on a computer running Microsoft Windows. -
Page 23: System Settings
System settings 9 System settings CP600-eCo control panels have a system settings interface to allow configuration of system options. The user interface of System Settings is based on HTML pages accessible locally on CP600 or in remote using a Web browser Chrome v44 or higher on port 443 (https://IP/machine_config). Default username is “admin”, default password is “admin”. - Page 24 System settings Activation of System Settings in User Mode: PB610-B runtime not running Press “System Setting” button on the CP600 screen PB610-B runtime running Recall context menu and select “System Settings”. To recall the context menu click and hold any unused area of the touchscreen for a few seconds.
-
Page 25: Touchscreen Calibration
Touchscreen calibration / Unpacking and packing instructions Touchscreen calibration CP600-eCo control panels support calibration of the interface. To start calibration proceed as follow: Use the “tap-tap” procedure at boot (this procedure consists in tapping the surface of the touchscreen during the device power-up phase. Tapping frequency must be high. - Page 26 With regard to purchase orders, the agreed particulars shall prevail. ABB AG does not accept any responsibility whatsoever for potential errors or possible lack of information in this document. We reserve all rights in this document and in the subject matter and illustrations contained therein.