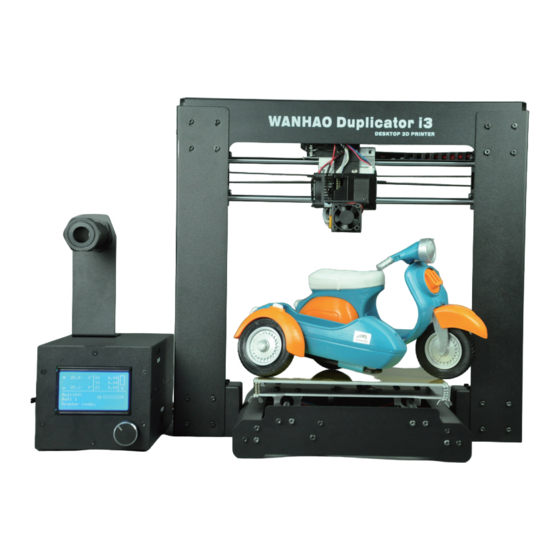
WANHAO Duplicator i3 Software User Manual
Cura edition
Hide thumbs
Also See for Duplicator i3:
- User manual (16 pages) ,
- Step by step installation instructions (12 pages) ,
- First run experience (12 pages)
Advertisement
Advertisement
Table of Contents

Related Manuals for WANHAO Duplicator i3


Summary of Contents for WANHAO Duplicator i3
- Page 1 CURA WANHAO EDITION USER MANUEL...
-
Page 2: Installing Cura
Download Cura From our website and run the exe file The very First screen you will get is to choose the file location choose the location and press next as shown below: CURA WANHAO EDITION USER MANUEL REV.B 1 / 23... - Page 3 After pressing next the next screen will ask you to choose the component and the formats you would like to open in Cura. Make the selection as below and press next. Now press next to complete the installation. Now Press Finish button to finish the process: CURA WANHAO EDITION USER MANUEL REV.B 2 / 23...
- Page 4 Now you will see the Front screen of Cura with all the options as shown below: Now to print with our machine go to Machine option in the header and select add new machine option. CURA WANHAO EDITION USER MANUEL REV.B 3 / 23...
- Page 5 Now select the radio button with the option as follows: Other (Ex: RepRap, MakerBot, Witbox) and press next button. Then Choose Pursa Mendel i3 and click next. Now press Finish and you will be redirected to the below screen: CURA WANHAO EDITION USER MANUEL REV.B 4 / 23...
-
Page 6: Quick Print Settings
Fast Quality Designed for the fast prints, where overall model finish is not of concern. Most commonly used for quick iteration of designs found in rapid prototyping. Material Selection CURA WANHAO EDITION USER MANUEL REV.B 5 / 23... - Page 7 PLA, that should be used in your first print. Printing Support Material The Wanhao 3D printer is able to print models that have angles and overhangs, even without support material depending on the overhang distance and angle. Turn this option on if your model could benefit from support material.
- Page 8 X Y and Z axes to be scaled by the same amount when you make a change to any of them. To disable this, select the lock in the lower section of the scaling window. CURA WANHAO EDITION USER MANUEL REV.B 7 / 23...
-
Page 9: View Options
Overhang mode shows where your model may need support material. InFig. 1.6, page 16 the red highlighted areas show overhangs and more severe angles and areas where support material is recommended. CURA WANHAO EDITION USER MANUEL REV.B 8 / 23... - Page 10 To view the tool path of your print head and to ensure no skipped layers or gaps use this option. Use the slide bar on the right hand side of the window to move up and down through the tool path layers. CURA WANHAO EDITION USER MANUEL REV.B 9 / 23...
-
Page 11: Starting Your First Print
Then you can print from SD card. Figure 1.11: Viewing Save button 1.4.2 To print from computer Turn on the printer and connect the printer and computer through USB cable. The computer will CURA WANHAO EDITION USER MANUEL REV.B 10 / 23... - Page 12 Navigate CURA to Machine—Machine settings Figure 1.13: Machine setting button view Define the head size as below. Choose the connection port, such as Com9. Choose Baudrate: 115200 After setting, click OK. Figure 1.14: Machine setting CURA WANHAO EDITION USER MANUEL REV.B 11 / 23...
-
Page 13: Removing Your First Print
In order to have more control of your slicing and Gcode generation, switch to Full Settings. Select Expert > Switch to full settings. The following tabs will now be available: Basic, Advanced, Plugins, and Start/End-Gcode. You will also have access to the Expert Settings. CURA WANHAO EDITION USER MANUEL REV.B 12 / 23... -
Page 14: Basic Tab Options
Larger layer heights are better for bridging and overhangs. Smaller layer heights will also increase print time, as it will take more layers to complete the object. Figure 1.18: Differences in Layer Height Shell Thickness CURA WANHAO EDITION USER MANUEL REV.B 13 / 23... - Page 15 This causes the support material to build up between the heated bed and the object. The red example is Touching Build plate. Everywhere This prints support material between the heated bed and object as well as between the object and itself. The green example is Support Everywhere. CURA WANHAO EDITION USER MANUEL REV.B 14 / 23...
- Page 16 This controls how much filament your printer is extruding in relation to speed. This setting is mainly used to adjust for filament density variations. Leave this value at 100% as changing it can lead to surface quality issues Advanced Tab Options CURA WANHAO EDITION USER MANUEL REV.B 15 / 23...
- Page 17 This will control how thick your first printed layer height is printed onto the heated bed. Having a larger initial layer height will help prevent your part from popping off the plate. Your Wanhao Duplicator i3 auto leveling system could be affected if you change this from the standard profiles. Adjust at your own risk.
- Page 18 Cura are Tweak at Z, and Pause at Height. More plugins and information can be found here: http://wiki.ultimaker.com/Category:CuraPlugin To activate one of these highlight the desired plugin and click the drop-down arrow directly below the Plugins box. Figure 1.20: View of Plugins Tweak at Z CURA WANHAO EDITION USER MANUEL REV.B 17 / 23...
- Page 19 Retraction pulls filament out of your nozzle when it is not extruding to prevent your print head from dripping on your object. This section is where you will control how your extruder retracts its CURA WANHAO EDITION USER MANUEL REV.B 18 / 23...
- Page 20 Especially helpful with high temperature retaining filaments such as PLA. This will be scaled between 0%, and your minimum fan speed based upon layer height; with it being disabled for the CURA WANHAO EDITION USER MANUEL REV.B 19 / 23...
- Page 21 Outer Contour This causes your Z axis to be constantly moving upward as printing your single outer wall shell. The results are no layer change lines, giving a much smoother surface. This setting is typically only used for artistic objects as they will be fragile. CURA WANHAO EDITION USER MANUEL REV.B 20 / 23...
- Page 22 This will determine how wide the top layers of the platform will be. Ingeneral, you can keep this set to your nozzle size, as surface quality of the removable raft is not important. CURA WANHAO EDITION USER MANUEL REV.B 21 / 23...
-
Page 23: Printer Support
The latest version of this information guide is also available at http://www.wanhao3dprinter.com.You can also find more information including images, videos, and updated versions of this manual in the software section of www.wanhao3dprinter.com. 3.2 Community CURA WANHAO EDITION USER MANUEL REV.B 22 / 23... -
Page 24: Contact Information
3.3 Websites www.wanhao3dprinter.com Revision: A. Finish on 15 May 2015. B. Adding the 1.4.1 print through micro SD card. 1.4.2 To print from computer. Grammar correction. Finish on 14 Oct 2015. CURA WANHAO EDITION USER MANUEL REV.B 23 / 23...
Need help?
Do you have a question about the Duplicator i3 and is the answer not in the manual?
Questions and answers