
Related Manuals for Motorola solutions BC300D


Summary of Contents for Motorola solutions BC300D
- Page 1 PROFESSIONAL DIGITAL TWO-WAY RADIO USER GUIDE BC300D User Guide SEPTEMBER 2019 MN006027A01-AA 2019 Motorola Solutions, Inc. All rights reserved ©...
-
Page 2: Table Of Contents
English Contents Removing the Universal Connector Cover..13 Turning the Radio On........14 Turning the Radio Off........14 Chapter 1: Read Me First..........4 Adjusting the Volume.........15 What Your Dealer/System Administrator Can Tell You............... 4 Chapter 4: Time-Out Timer.......... 16 Chapter 2: Radio Overview.......... - Page 3 English Monitoring Channels..........23 Chapter 10: Scan............24 Turning Scan On or Off ........24 Responding to Transmissions During Scanning............25 Deleting Nuisance Channels......25 Chapter 11: Enabling Transmission from Another Radio................26 Chapter 12: Disabling Transmission from Another Radio................27 Chapter 13: Authorized Accessories List..... 28 Legal and Compliance Statement........
-
Page 4: Chapter 1: Read Me First
English Read Me First This user guide covers the basic operation of the two-way radio. Your dealer or system administrator can customize your radio for your specific needs. Check with your dealer or system administrator for more information. What Your Dealer/System Administrator Can Tell You You can consult your dealer or system administrator about the following:... -
Page 5: Chapter 2: Radio Overview
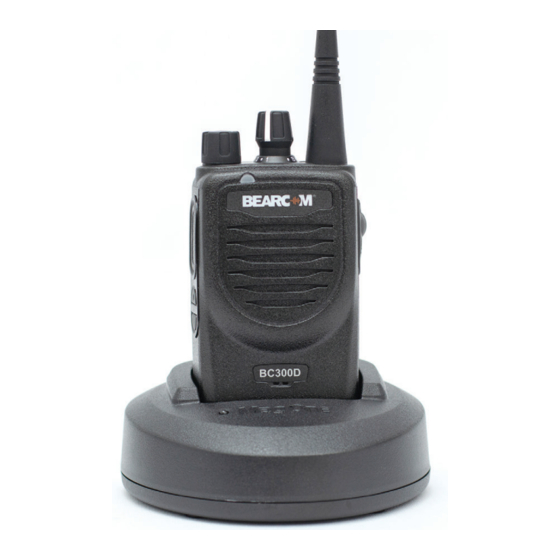
English Radio Overview Description Antenna Channel Selector Knob On/Off/Volume Control Knob LED Indicator Push-to-Talk (PTT) Button Programmable Side Button 1 Programmable Side Button 2 Microphone Speaker Programming Port Accessory Connector... -
Page 6: Programmable Buttons
English Programmable Buttons Table 2: Assignable Radio Functions Function Description You can program the programmable buttons as shortcuts to radio functions or preset channels or groups. All Alert Tones Allows you to toggle all tones and On/Off alerts on or off. Depending on the duration of a button press, the programmable buttons function differently. -
Page 7: Led Indications
English Function Description Indication Status Repeater/Talk- Allows you to toggle between us- Solid Yel- The radio is scanning for activity. around ing a repeater and communicat- ing directly with another radio. Solid The radio is receiving transmission. Scan On/Off Allows you to toggle scan on or Green off. -
Page 8: Chapter 3: Getting Started
English Getting Started This chapter provides instructions to prepare your radio for use. Charging the Battery Your radio is powered by a Lithium-Ion (Li-Ion) battery. Turn off your radio when charging. • To comply with warranty terms and avoid damages, charge the battery using an authorized charger. -
Page 9: Attaching And Removing The Battery
English Attaching and Removing the Battery Attaching the Battery 1 Align the battery with the rails on the back of the radio. 2 Press the battery firmly, and slide it upwards until the latch snaps into place. Removing the Battery 1 Turn off your radio. -
Page 10: Attaching And Removing The Antenna
English Attaching and Removing the Antenna Attaching the Antenna NOTICE: Fastening the antenna blocks water and dust 1 Set the antenna in the receptacle. from entering the radio. 2 Turn the antenna clockwise. -
Page 11: Removing The Antenna
English Removing the Antenna Attaching and Removing the Belt Clip 1 Turn the antenna counterclockwise. Attaching the Belt Clip 2 Remove the antenna from the receptacle. Align the grooves on the clip with the grooves on the battery and press it downwards until it clicks. -
Page 12: Removing The Belt Clip
English 2 Slide the clip upwards and away from the radio. Removing the Belt Clip 1 To remove the clip, press the belt clip tab away from the battery. -
Page 13: Attaching The Universal Connector Cover
English Attaching the Universal Connector Cover The universal connector is located beside the antenna. You can connect authorized accessories to the radio through the universal connector. Replace the universal connector cover or dust cover when the universal connector is not in use. 1 Insert the slanted end of the cover into the slots above the universal connector. -
Page 14: Turning The Radio On
English Turning the Radio On Rotate the On/Off/Volume Control knob clockwise until it clicks. If successful, your radio shows the following indications: • A tone sounds. NOTICE: If the Tones/Alerts function is disabled, there is no tone upon powering up. •... -
Page 15: Adjusting The Volume
English Adjusting the Volume To adjust the volume of your radio, perform one of the following actions: • To increase the volume, turn the On/Off/Volume Control knob clockwise. • To decrease the volume, turn the On/Off/Volume Control knob counterclockwise. NOTICE: Your radio can be programmed to have a minimum volume offset where the volume level cannot be lowered past the... -
Page 16: Chapter 4: Time-Out Timer
English Time-Out Timer Time-Out Timer sets a fixed duration for a transmission. Your system administrator can set the time-out time for a channel through the radio software. Before your radio reaches the time-out time, a ten-second warning beep sounds. When your radio reaches the time-out time, your radio stops transmitting and shows the following indications: •... -
Page 17: Chapter 5: Selecting Channels
English Selecting Channels Your radio supports up to 16 channels. Each channel can be programmed with different features that support different groups of users. Select channels by toggling the Channel Selector knob. Your radio indicates the channel number through voice announcement. If the channel is not programmed, an error tone sounds. -
Page 18: Chapter 6: Calls
English Calls 4 To listen, release the PTT button. If your radio does not detect voice activity for a predetermined period, the call ends. Depending on the type of call, you can make, receive, and respond to calls in both Conventional Analog and Digital mode. -
Page 19: Private Calls
English Private Calls Responding to Private Calls Private Calls are calls from an individual radio to another When you receive Private Calls, your radio shows the individual radio. following indications: • The green LED illuminates. Making Private Calls • Your radio unmutes and the incoming call sounds through the speaker. -
Page 20: Making All Calls
English important announcements.The recipients on the channel cannot respond to All Calls. When you receive All Calls, your radio shows the following indications: • A tone sounds. • The green LED illuminates. • Your radio unmutes and the incoming call sounds through the speaker. -
Page 21: Chapter 7: Call Alert Operation
English Call Alert Operation Call Alert paging enables you to alert a specific radio user to call you back. Making Call Alerts Press the programmed One Touch Access button. If the call alert acknowledgment is received, a positive tone sounds. If the call alert acknowledgment is not received, a negative tone sounds. -
Page 22: Chapter 8: Talkaround
English Talkaround This feature allows you to continue communicating when your repeater is non-operational, or when your radio is out of range from the repeater but within the talk range of other radios. The talkaround setting is retained even after powering down. -
Page 23: Chapter 9: Monitor Feature
English Monitor Feature The feature allows you to make sure that a channel is free before transmitting. Monitoring Channels Press the programmed Monitor button and hold the button to continue monitoring the channel. If the channel is in use, your radio shows the following indications: •... -
Page 24: Chapter 10: Scan
English Scan Type Description channel where scan was Your radio cycles through the programmed scan list for the initiated. current channel looking for voice activity when you start a Auto Scan (Automatic) Your radio automatically scan. starts scanning when you Your radio also performs dual-mode scan. -
Page 25: Responding To Transmissions During Scanning
English Responding to Transmissions 2 Release the programmed Nuisance Channel Delete button. During Scanning During scanning, your radio stops on a channel or group where activity is detected. The radio stays on that channel for a programmed duration known as hang time. 1 Press the PTT button. -
Page 26: Chapter 11: Enabling Transmission From Another Radio
English Enabling Transmission from Another Radio 1 Select the channel with the subscriber ID that you want to enable transmission from. 2 Short press Side Button 1. Your radio shows the following indications: • A tone sounds. • The red LED blinks once. The receiving radio shows the following indications: •... -
Page 27: Chapter 12: Disabling Transmission From Another Radio
English Disabling Transmission from Another Radio 1 Select the channel with the subscriber ID that you want to disable transmission from. 2 Short press Side Button 2. Your radio shows the following indications: • A tone sounds. • The red LED blinks once. The receving radio shows the following indications: •... -
Page 28: Chapter 13: Authorized Accessories List
English Authorized Accessories List Table 8: Carry Device Part Number Description Table 5: Antennas RLN5644_ Belt Clip for 2 in. Belt Width Part Number Description Table 9: Charger PMAE4020_ Mag One, UHF, 450–470 MHz, Stubby Antenna Part Number Description PMAE4104_ Mag One, UHF, 403–470 MHz, Wi- PMPN4171_ Mag One Single-Unit Charger... - Page 29 English Table 11: Headset and Headset Accessory Part Number Description PMLN6542_ Mag One Ultra-Lightweight Headset with Boom Microphone and In-Line PTT Switch Table 12: Remote Speaker Microphone Part Number Description PMMN4092_ Mag One Remote Speaker Micro- phone...
-
Page 30: Legal And Compliance Statement
Motorola Solutions. MOTOROLA SOLUTIONS, the Stylized M Logo, BEARCOM, and BC300D are registered in the U.S. Patent 2019 Motorola Solutions, Inc. All Rights Reserved. © and Trademark Office. All other products and service No part of this document may be reproduced, transmitted, names are the property of their respective owners. -
Page 31: Computer Software Copyrights
Technology is explicitly prohibited from attempting to decompile, reverse engineer, or disassemble the Object The Motorola Solutions products described in this manual Code, or in any other way convert the Object Code into a may include copyrighted Motorola Solutions computer human-readable form. - Page 32 1 This device may not cause harmful interference, and 2 This device must accept any interference received, including interference that may cause undesired op- eration. Responsible Party Name: Motorola Solutions, Inc. Address: 1303 East Algonquin Road, Schaumburg, IL 60196-1078, U.S.A. Phone Number: 1-800-927-2744 Hereby declares that the product:...
-
Page 33: Important Safety Information
Regulations. • Reorient or relocate the receiving antenna. • Increase the separation between the Any modification to this device, not expressly authorized by equipment and receiver. Motorola Solutions, may void the user's authority to operate this device. -
Page 34: Notice To Users (Fcc And Industry Canada)
Changes or modifications made to this device, not users, the antenna type and its gain should be so chosen expressly approved by Motorola Solutions, could void that the equivalent isotropically radiated power (e.i.r.p.) is the authority of the user to operate this equipment. - Page 35 Nom : Motorola Solutions, Inc. Adresse : 1303 East Algonquin Road, Schaumburg, IL 60196-1078, É.-U. Numéro de téléphone : 1 800 927-2744 Déclare par les présentes que le produit : Nom du modèle : BC300D est conforme aux réglementations suivantes :...
- Page 36 Français (Canada) AVIS: • Augmenter la distance entre l’équipement Cet équipement a fait l’objet de tests et a été et le récepteur. déclaré conforme aux limites établies pour un • Brancher l’appareil dans une autre prise appareil numérique de classe B, sur un circuit différent de celui du conformément à...
- Page 37 Visitez le site Web suivant pour obtenir la liste des antennes, des batteries et des autres accessoires approuvés par Motorola Solutions : http://www.motorolasolutions.com Toute modification effectuée à cet appareil sans l’autorisation explicite de Motorola Solutions peut annuler l’autorisation d’utiliser cet appareil.
- Page 38 Cet appareil ne doit pas causer d’interférence nuisible. • Cet appareil doit accepter toute interférence reçue, y compris les interférences pouvant entraîner un fonctionnement indésirable. • Toute modification effectuée à cet appareil sans l’autorisation explicite de Motorola Solutions peut annuler l’autorisation d’utiliser cet appareil.
Need help?
Do you have a question about the BC300D and is the answer not in the manual?
Questions and answers