Table of Contents

Related Manuals for Evil Mad Scientist AxiDraw V3


Summary of Contents for Evil Mad Scientist AxiDraw V3
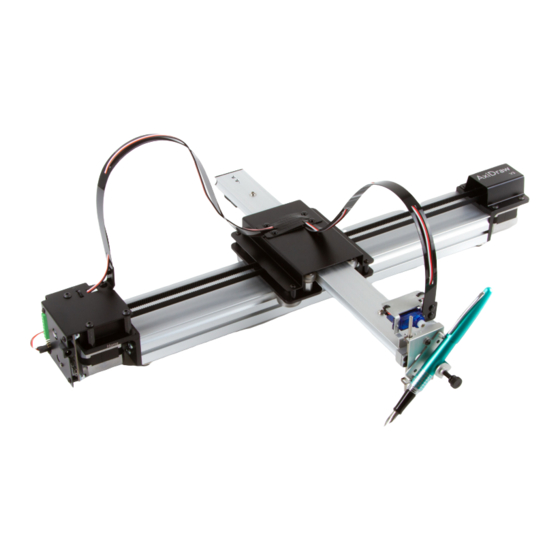
- Page 1 AxiDraw ® High Performance Writing and Drawing Machines User Guide Models: AxiDraw V3 (Model 2510), AxiDraw V3/A3 (Model 2520), AxiDraw SE/A3 (Model 2530), AxiDraw V3 XLX (Model 2550) Version 4.0 Last updated: June 16, 2019...
-
Page 2: Preliminaries
Preliminaries 0.1 Welcome to AxiDraw! This is the user guide for the AxiDraw V3 family of high-performance personal writing and drawing machines. This guide is here to help you get started. There is a lot here — covering how you set up and use the machine, tips for operation, details about the software, and pointers to additional resources. -
Page 3: Table Of Contents
Contents Preliminaries ................2 0.1 Welcome to AxiDraw! ............2 0.2 This guide is updated from time to time......2 0.3 Copyright notice .............2 1. Introducing the AxiDraw ............7 1.1 Credits and History ............7 2. Checking out your AxiDraw ..........9 2.1 Parts and accessories ............9 2.2 AxiDraw anatomy .............10 2.3 Unboxing AxiDraw ............12... - Page 4 6.4 Using multiple Clip Easels ..........27 6.5 Moving beyond the Clip Easel ........27 6.6 Magnetic easel accessories ..........27 7. In detail: Power and USB ............28 8. In detail: Setting up pen and paper ........29 8.1 Pen choices ...............29 8.2 Setting the pen angle ............29 8.3 Inserting a pen ..............30 8.4 Pen up and pen down positions ........31...
- Page 5 9.7.3 Default option: No reordering ........50 9.7.4 Reorder but preserve groups ......... 50 9.7.5 Full reordering ..............50 9.7.6 Optimization tips and an example ......... 51 9.8 Manual Controls ..............53 9.8.1 Walk Carriage (X), or (Y) ..........53 9.8.2 Raise the Pen, Lower the Pen ........53 9.8.3 Enable Motors, Disable Motors ........
- Page 6 11.7 Hershey Text ..............69 11.8 Hershey Advanced and AxiDraw Merge ......70 11.8.1 Hershey Advanced ............70 11.8.2 AxiDraw Merge ............... 70 11.9 Capturing signatures and handwriting ......71 11.10 Aside: Tracing of scanned handwriting .......71 11.11 Filling shapes and text ............72 11.12 Vectorizing images ............74 12.
-
Page 7: Introducing The Axidraw
Delrin plastic. It had two independent timing belts, one driven by a stepper motor on the base, and the other by a stepper motor on the moving carriage. For software, it used a modified version of the WaterColorBot driver developed at Evil Mad Scientist. - Page 8 (machined or stamped and fold- ed), and the new pen holder could be mounted vertically or at 45° to the paper. AxiDraw V3 The third generation, the AxiDraw V3 family, is a full redesign of the machine for higher performance. AxiDraw V3 While previous models had steel shafts and linear ball bearing slides, this new version features custom aluminum extrusions with rolling wheels.
-
Page 9: Checking Out Your Axidraw
2.1 Parts and accessories Here are the parts that come with AxiDraw: 1. The AxiDraw itself 2. Clip Easel and binder clips (4 on AxiDraw V3, 8 on larger models) 3. Plug-in power supply 4. USB cable 5. Hex drivers and wrenches Sizes include 2 mm, 2.5 mm, and 3 mm hex drivers, and low-profile 8 mm... -
Page 10: Axidraw Anatomy
Let us look at the different parts of the AxiDraw. We will refer to these parts by name throughout this guide. These features are common to each model of AxiDraw, though appearances may vary slightly. For example, the AxiDraw V3/ A3 and SE/A3 have extended “outrigger” feet, and the AxiDraw SE/A3 base is colored black and covers the two motors. - Page 11 Detail: Left side of base Power Jack Home Position Label Cover Rubber Feet USB Port Stepper motor Pause Button “EBB” Control board Detail: Pen holder Y Carriage Vertical slide Pen Clip Screws Pen-lift servo motor Thumbscrew Vertical shafts Pen Clip Note: AxiDraw ships with its pen clip disconnected;...
-
Page 12: Unboxing Axidraw
2.3 Unboxing AxiDraw The pen-lift motor cable and the pen clip are disconnected for shipping. Your first two steps, out of the box, are to re-attach these parts. Locate the disconnected cable end on the left hand side of the base. The cable has three wires: Black, red, and white. - Page 13 The pen clip is also disconnected for shipping. Vertical slide Pen clip 2 mm ball-end hex wrench Thumbscrew M3 Screws Thread the black plastic thumbscrew into the pen clip. Attach the pen clip to the vertical slide with the two small black M3 screws, using the 2 mm hex wrench, which has a ball end for easier access.
- Page 14 Aside: If you have an older AxiDraw... First-generation AxiDraw V3 units had four threaded holes on the vertical slide and two holes in the pen clip (rather than two threaded holes and four holes on the pen clip.) If you have one of these machines, it looks a little different, but you...
-
Page 15: Safe Handling Of The Axidraw
2.4 Safe handling of the AxiDraw 1). Lifting: Lift AxiDraw by the central strut of the base, or by the stepper motors if necessary. Do not lift by the cables, cable guides, carriages, or pen holder. The AxiDraw SE/A3 has a handle milled into the back of the central strut, to provide an additional lifting point in the middle of the machine. -
Page 16: Software For Axidraw
3. Software for AxiDraw 3.1 Installing software You will need to install software on your computer to operate the AxiDraw. Current instructions and download links are available at: http://axidraw.com/sw From there, follow the directions specific for your operating system: • For Mac and Windows, there are easy installers that you can download. •... -
Page 17: Aside: Alternative Software, Cli, And Apis
3.3 Aside: Alternative software, CLI, and APIs The AxiDraw software is available in two alternate versions that may be helpful for developers or for anyone who would to control the machine programatically rather than through Inkscape. There is a stand-alone command-line interface (CLI) tool, as well as a full-featured python library. -
Page 18: Quick Start: Making Your First Plot
4. Quick start: Making your first plot In this section, we will briefly walk through the steps to make your first plot. After this section, we will discuss each part of this process in additional depth. As you get started, please make sure that you have gone through §2.3 Unboxing AxiDraw, on page 12 (so that you have connected the pen-lift cable and in- stalled the pen clip) and §3.1 Installing software, on page 16. -
Page 19: Connect Power And Usb
Once you have identified the Home Corner, slide the carriage there by hand. You can move the carriage by the solid block of metal behind the vertical slide of the pen hold- er. (Do not push the vertical slide itself or the pen clip directly.) If the carriage does not move easily, you may need to turn off the motors. -
Page 20: Check Pen-Up And Pen-Down Positions
4.4 Check pen-up and pen-down positions Within Inkscape, open up AxiDraw Control: Extensions > AxiDraw Control. Then, select the Setup tab: Select the Toggle pen between UP, DOWN option, and click the Apply button. If everything is hooked up correctly, the pen lift motor should alternately move the vertical slide to the pen-up or pen-down positions each time that you press Apply. -
Page 21: Insert Your Pen
4.5 Insert your pen Starting with the AxiDraw in the pen-up position, insert your pen into the pen clip, just above the paper, and tighten it in place with the thumbscrew. The vertical position of your pen should be approximately 1/8 to 1/4 inch (3 - 6 mm) above the surface of the paper. -
Page 22: Open A Document And Print It
4.7 Open a document and print it Download the set of AxiDraw example files from http://axidraw.com/ex The download is a small zip archive of example files. Open (unzip) the archive. Then, within Inkscape, open up the file called AxiDraw_First.svg. Once open, the document should look approximately like this: If you cannot see the full page outline when you first open the file, select from the menu View >... -
Page 23: Recap: Setting Up A Print
One final tip as you get started: By default, the travel limits set in the software are those for the AxiDraw V3. If you are using an AxiDraw with larger travel, such as the AxiDraw V3/A3 or AxiDraw SE/A3, be sure to select your AxiDraw model in the Config tab of AxiDraw Control. -
Page 24: In Detail: The Home Corner
5. In detail: The Home Corner Before you start plotting, the carriage must be moved to the Home Corner. This is as far left and as far back as it will go: where the pen holder is closest to the left side of the base, that is when the pen holder is closes to the engraved label “Home”, and the USB port. -
Page 25: In Detail: Workholding
AxiDraw. The AxiDraw V3 Clip Easel is 9 × 12 inches (about 23 x 30 cm) in size, with rub- ber feet and small binder clips. (Larger easels are included with the larger-sized AxiDraw models.) You can mount different sizes of to it, including US letter size... -
Page 26: Document Orientation
§6.2, Workholding with the Clip Easel, continued The examples shown above are: A) A certificate to be filled out (Letter size, landscape orientation) B) Mailing address (#10 envelope, landscape orientation) C) A formal invitation (6 ⅜ × 8 ⅞ inch, portrait orientation) D) A page of mixed text and drawing (Letter size, portrait orientation) In every case, line up the corner of the paper with the upper left corner of the Clip Easel, such that the corner of the paper is closest to the Home Corner. -
Page 27: Using Multiple Clip Easels
AxiDraw, or if you are plotting two side-by-side letter (A4) size pages with the AxiDraw V3/A3 or AxiDraw V3 XLX. Using two small easels side by side, you can designate one “A” and one “B”, and alternate plotting on the “A” or “B”... -
Page 28: In Detail: Power And Usb
7. In detail: Power and USB Power Adapter Cable USB Cable The power and USB cables connect to the AxiDraw as shown above. Connect the USB cable to any available USB port on your computer. All AxiDraw models currently ship with a USB A to Micro-B cable. You can switch this out for other types of high-quality USB micro cables (e.g., USB C to Micro-B) as needed. -
Page 29: In Detail: Setting Up Pen And Paper
8. In detail: Setting up pen and paper In this section we will discuss different types of pens, configuring the pen angle, the pen-up and pen-down positions, setting the pen height, and how to set the paper position relative to the pen. 8.1 Pen choices The pen holder included with the AxiDraw fits pens up to ⅝... -
Page 30: Inserting A Pen
The 45° angle position is ideal for use with fountain pens, but will work well with most rollerball and fine point markers. The vertical position is more suited to markers with fatter tips or writing instruments that require more downward pres- sure. -
Page 31: Pen Up And Pen Down Positions
8.4 Pen up and pen down positions In this step we will check the pen-up and pen-down positions. Within Inkscape, open up AxiDraw Control: Extensions > AxiDraw Control. Then, select the Setup tab: Select the Toggle pen between UP, DOWN action, and click the Apply button. If everything is hooked up correctly, the pen lift motor should alternately move to the pen-up or pen-down positions each time that you press Apply. - Page 32 If there is no movement, double check that you have power and USB connected as given in the previous section. If it still does not move, also check that you have correctly hooked up the pen-lift motor cable. (See section “2.3 Unboxing AxiDraw”...
- Page 33 Once you are familiar with the process of inserting the pen and setting the height, this whole process is described by two quick steps: 1) Raise the pen holder to the pen-up position. 2) Insert your pen, just above the paper. The pen-up and pen-down heights in the Setup tab may each be adjusted be- tween 0 and 100% to suit your needs.
-
Page 34: Positioning Your Paper
8.5 Positioning your paper With your pen at the Home Corner, and the pen at an appropriate height, it is time to position the paper with respect to the AxiDraw. The printable area starts at the Home Corner, and extends down and to the right from that point. Plotting on large surfaces (where the AxiDraw sits directly on the surface): Position the AxiDraw such that the pen tip is at the upper left corner of the area that you intend to plot upon. - Page 35 Plotting on everything else (letters, envelopes, invitations, and smaller items): Position the paper with its upper-left corner directly underneath the tip of the pen. Square the paper up so that its top edge is parallel to the X-Shafts of the AxiDraw.
-
Page 36: Working With Axidraw Control
9. Working with AxiDraw Control In this section we will introduce the features and options in AxiDraw Control, the primary interface to the AxiDraw. It can be found within your Inkscape menu at Extensions > AxiDraw Control AxiDraw Control has a tabbed interface, where the different tabs contain differ- ent settings or control different functions. -
Page 37: Number Of Copies
§9.1 Plotting one or more copies, continued 9.1.1 Number of copies Enter the number of copies that you would like to plot in the Copies to Plot box. The default value, 1 copy, will only plot the page once. As a special case (and noted as a “Tip” on the Plot tab), setting the number of copies to 0 (zero) will cause the AxiDraw to plot continuously, with the given delay between pages, until you press the physical pause button on the left side of the AxiDraw. -
Page 38: Pausing, Resuming, And Canceling Plots
9.2 Pausing, resuming, and canceling plots To stop a plot in progress, press the pause button: the raised silver-colored button located on the left hand side of the AxiDraw. (See the pictures on page 11.) The AxiDraw will stop plotting and raise the pen after finishing the current line segment. -
Page 39: Canceling A Plot
9.2.3 Canceling a plot It is not necessary to take any action to cancel a plot that has already been paused. However, if you wish to start a new plot, you do still need to return the carriage to Home before beginning a new plot. You can return the carriage home using the Resume tab (as described above) or manually. -
Page 40: The Layers Tab In Axidraw Control
9.3.2 The Layers tab in AxiDraw Control A second method of using plotting specific layers is to use the Layers tab of AxiDraw Control: The Layers tab of AxiDraw Control has a single numeric input field, labeled Plot only layers beginning with. When you click Apply with the Layers tab active, the AxiDraw will plot only the layer or layers that have a name beginning with the number entered in that field. -
Page 41: An Example With Multiple Colors
9.3.3 An example with multiple colors The set of layers shown in the Layers panel here page corresponds to the example below: A birth- day party invitation with six colors and six layers. We have used the layer numbering scheme from the previous section. -
Page 42: Multiple Copies From The Layers Tab
9.3.4 Multiple copies from the layers tab The Copies to Plot and Seconds of delay between copies parameters in the Plot tab do apply when you plot from the Layers tab. That means that you can plot the same layer or set of layers multiple times, in the same fashion as plotting multiple copies from the Plot tab. -
Page 43: The Timing Tab
9.4 The Timing tab The Timing tab of AxiDraw control lets you set the basic movement speeds for the AxiDraw. The three parameters at the top under Movement speeds set the speed limits and acceleration rates used for the horizontal (XY) carriage motion. The first item in the list, Writing/Drawing speed, sets the maximum speed that will be developed when the pen is down. -
Page 44: Suggested Starting Speeds
9.4.1 Suggested starting speeds Everyday use: Most of our sample drawings and tests are made with a medium speed that is a compromise between speed and precision. This is a good balance for fine- point permanent markers and wide-nibbed fountain pens: Writing/Drawing speed: 30% Pen-up movement speed: 75% Acceleration: Standard... -
Page 45: Pen Lift Speeds
9.4.2 Pen lift speeds The lower half of the Timing tab has a heading Pen lift and lowering speeds. These parameters control the vertical motion between the heights that are set in the Setup tab (page 31). The pen raising and lowering speeds can each be selected from a pop-up menu, with options Maximum, Standard, Slow, or Very slow. -
Page 46: Advanced Options
9.5 Advanced options The Options tab of AxiDraw Control has several useful settings and options. Auto-rotate page when printing (Default: on) Documents taller than wide (those in portrait orientation) are normally rotated sideways when plotted. (See §6.3 Document orientation, on page 26 for ex- amples.) To force documents to always print in the same orientation as on your screen, uncheck this box. -
Page 47: Preview Mode
Motor resolution (Default: ~2870 DPI) The two options are for native resolution of about 1435 or 2870 steps per inch (56 or 113 steps per mm). Both options are finer than what can be resolved with pens. The 1435 DPI option is slightly faster, while the 2870 DPI option is slightly smoother, giving a neater plot. - Page 48 Here is how the example file AxiDraw_First.svg renders when you click Apply from the Plot tab with preview mode enabled and the All movement preview mode rendering option selected: The pen-down movement is shown in blue, and the pen-up movement is shown in light red.
-
Page 49: Plot Order And Optimization
9.7 Plot order and optimization The Plot optimization option in the Options tab can re-order elements in your document to reduce pen-up travel, and thereby reduce total plotting time. 9.7.1 How plot order is determined In normal use, and by default, elements within a document are plotted in the same order in which they appear in the file. -
Page 50: Default Option: No Reordering
The optimization routine is layer-aware: It will only re-order objects within layers. That makes it safe to use on multicolor plots where colors are separated by layers. (See §9.3 Plotting with multiple layers and colors, on page 39.) Any changes made to the order of elements in the file by the Plot optimization feature are ephemeral. -
Page 51: Optimization Tips And An Example
9.7.6 Optimization tips and an example When managing complex plots, it may be helpful to use preview mode (see §The two options are for native resolution of about 1435 or 2870 steps per inch (56 or 113 steps per mm). Both options are finer than what can be resolved with pens. - Page 52 The time report from this plot reads as follows: Estimated print time: 37:14 (minutes, seconds) Length of path to draw: 16.26 m. Pen-up travel distance: 253.35 m. Total movement distance: 269.61 m. As you can see by the numbers and the pen-up travel (shown in red), this plot is dominated by pen-up travel.
-
Page 53: Manual Controls
9.8 Manual Controls The Manual tab of AxiDraw Control allows you to manually execute select, ba- sic commands and utilities. Select the operation to perform with the Command drop-down list, and then click the Apply button. For the two motor walking com- mands, you can also specify the distance to move the AxiDraw carriage. -
Page 54: Enable Motors, Disable Motors
9.8.3 Enable Motors, Disable Motors These two commands either energize the two stepper motors or turn power off to them. The carriage can be moved by hand only when the power to these mo- tors is off. 9.8.4 Enter EBB Bootloader Mode Command the EBB to enter “bootloader”... -
Page 55: The Config Tab
9.9 The Config tab The Config tab of AxiDraw Control allows you to specify which model of AxiDraw hardware you are using, specify which particular AxiDraw to plot to (if you are managing multiple machines), and check for software updates. 9.9.1 Selecting your AxiDraw model Use the AxiDraw model pop-up menu to select which AxiDraw model you are using. -
Page 56: Machine Selection
9.9.2 Machine selection There are two additional controls in the Version tab that are useful when working with multiple AxiDraw machines: the Machine selection pop-up menu and the AxiDraw name or port text input box. The Machine selection pop-up menu has three options: •... -
Page 57: Check For Updates
9.9.3 Check for updates If you click Apply with the Config tab selected, it will query and report both the versions of the AxiDraw software and the version of the Axidraw “EBB” firmware. Additionally, this function will check online to see if newer software versions are available. -
Page 58: Axidraw Utilities
10. AxiDraw Utilities In addition to AxiDraw Control, there are several additional utilities available in the menu under Extensions > AxiDraw Utilities. 10.1 AxiDraw Naming The AxiDraw Naming utility allows you to assign a USB nickname to a specific AxiDraw. A USB nickname is a semipermanent label, stored in the AxiDraw’s flash memory, that may be used to identify and address it. -
Page 59: Read Axidraw Name
10.1.1 Read AxiDraw Name If you click Apply with the “Read AxiDraw Name” tab selected, it will search for all attached AxiDraw units and list them you. AxiDraw machines will be listed by their USB nickname or by their USB port enumeration, if no nickname has been assigned. -
Page 60: Disable Xy Motors
10.2 Disable XY Motors This is a single-purpose “shortcut” command that turns off power to the pair of motors that controls the XY position of the AxiDraw carriage. This motor power is off by default at power up. It is often useful to turn off power to the XY motors so that the carriage can be manually moved to the home corner, prior to plotting. - Page 61 There are three options available for how groups should be handled: • Reorder within groups • Preserve groups • Break apart groups The first option, Reorder within groups will re-order objects and groups within each layer of your document. Grouped objects will remain grouped. But, objects (and other groups) within any given group will be re-ordered.
-
Page 62: Designing For Axidraw
11. Designing for AxiDraw 11.1 General considerations The AxiDraw is a pen potter, which is fundamentally a single function device. Its sole function is to guide a pen (or other implement mounted in the pen holder) along the set of vector lines, curves, and paths that you ask it to follow. All oth- er things that the machine is ultimately capable of –... -
Page 63: Templates
11.2 Templates When designing in Inkscape, it is recommended to create new documents by using an template, for example an A4 or US Letter sized document. You can cre- ate a basic document from a template by selecting File > New from Template, selecting Page from the left-hand list and then select your page size. -
Page 64: Visualizing Paths In Your Document
11.3 Visualizing paths in your document To see all of the paths in your document, select all in your drawing (From the menu: Edit > Select all in all layers). Then, open the Fill and Stroke panel (Object > Fill and stroke). In the Fill tab, select “No paint”... -
Page 65: Fonts, Characters, And Languages
11.4 Fonts, characters, and languages To reiterate, the AxiDraw is designed to trace the vector paths that you provide to it. The document that you prepare may include any number and variety of different text and graphical elements, so long as they are converted to paths before you plot them. -
Page 66: About Outline Fonts
11.5 About outline fonts All standard computer fonts — those found in formats including TrueType, Post- Script, and OpenType — are outline fonts. In outline fonts, each character in the font file describes a vector outline shape, which will be filled in by tiny pixels when displayed on your screen or rendered by an inkjet or laser printer. -
Page 67: Handwriting-Like Output With Outline Fonts
11.5.1 Handwriting-like output with outline fonts When trying to achieve output close to that of natural handwriting, an “outlined” effect is generally not desirable. To mitigate it, pick handwriting-like fonts that have a thin and consistent stroke width. If a font is available in multiple weights, you’ll want to pick the lightest (thinnest) one available. -
Page 68: Stroke Fonts
11.6 Stroke fonts In addition to regular computer fonts (outline fonts), pen plotters like the Axi- Draw can in some cases make use of a second class of specialized fonts, called stroke fonts, or engraving fonts. In stroke fonts, each visible character is defined by strokes of non-zero width, as opposed to the area within an outline. -
Page 69: Hershey Text
11.7 Hershey Text Inkscape includes a special application that we developed called Hershey Text, which is capable of typesetting text in a small number of included stroke-based fonts. When you use Hershey Text, it takes editable text (that is, text that you type) and replaces it with rendered stroke-font text: a set of vector paths that the pen can follow. -
Page 70: Hershey Advanced And Axidraw Merge
In addition to rendering text, you can use the Utilities tab of Hershey Text to gen- erate a table of the single-stroke font faces that are available to use. A full user guide for Hershey Text is available at: https://wiki.evilmadscientist.com/hershey 11.8 Hershey Advanced and AxiDraw Merge Two commercial software tools are available at no added cost to AxiDraw own- ers. -
Page 71: Capturing Signatures And Handwriting
11.9 Capturing signatures and handwriting The best way to transform some handwritten text – whether a signature or a full page of text — into something that the AxiDraw can plot is to use direct hand - writing capture, or what you might refer to as “real-time” capture. In direct capture, you use your computer to record each stroke as it is written, and then save the resulting set of paths as a vector artwork file. -
Page 72: Filling Shapes And Text
11.11 Filling shapes and text The AxiDraw follows the actual vector paths in your documents, and thus nor- mally ignores any “fill” inside shapes, since fills do not consist of vector paths. A special utility is included with the AxiDraw software that can fill shapes with vector paths –... - Page 73 Here are some examples of how different settings can be used in Hatch Fill. Each of the following are examples are shown actual size, with a 0.016 inch (0.4 mm) stroke width, similar to that of a fine rollerball pen. The Tolerance parameter was set to 1.0.
-
Page 74: Vectorizing Images
11.12 Vectorizing images The process of turning images (JPG, PNG, photoshop files, etc) into vector art- work is generally outside the scope of the AxiDraw software. That said, how to do so is a frequently asked question so we are including some notes on the subject. The process of converting a photograph into a piece of pen-ready vector line art can most accurately be described by the word “sketching.”... - Page 75 The portrait above on the left is a stipple drawing, made with thousands of tiny circles of different sizes, as generated by StippleGen: http://wiki.evilmadscientist.com/stipplegen The portrait above on the right consists of a single wandering line. Plots like this can potentially print quickly because there is no pen up/pen down movement. This one was generated with an experimental program called ScribbleDraw, avail- able upon request: https://shop.evilmadscientist.com/contact...
-
Page 76: Maintenance And Troubleshooting
12. Maintenance and troubleshooting AxiDraw V3 family plotters should not require any regular maintenance under normal conditions. 12.1 Troubleshooting plot area If you should find that the AxiDraw does not appear to have access to the full plotting area of the machine, double check that you have selected the correct model of AxiDraw in §, on page 55. -
Page 77: Wiring
12.7 Wiring If your motor wires should become disconnected at some point, the correct wire order is as follows: Left motor: “Motor 2” locations, yellow, red, green, gray (from top to bottom). Right motor: Motor 1 (same order). Servo cable: B1 (lowest three pins on left hand side), with black wire towards the edge of the board. -
Page 78: Axidraw Tips And Tricks
13. AxiDraw Tips and Tricks It is often possible to get better print quality on top of a small stack of paper (say, 5-10 sheets) which gives a little cushion to your writing. 2. High quality paper – especially paper designed for use with pens – tends to give dramatically better results with pens than does cheap copy/laser paper. - Page 79 12. A single rubber band can be looped loosely around the pen holder as shown, to add a small amount of additional pressure for use with ball-point pens, or for operating the AxiDraw in other orientations (where gravity is not readily available to pull the pen to the surface).
- Page 80 Extended online documentation & resources for AxiDraw: axidraw.com/docs Blog: www.evilmadscientist.com Store: shop.evilmadscientist.com Docs: wiki.evilmadscientist.com Forum: www.evilmadscientist.com/forums Humans: shop.evilmadscientist.com/contact...
Need help?
Do you have a question about the AxiDraw V3 and is the answer not in the manual?
Questions and answers