Fronius TransSteel 2700c Operating Instructions Manual
Mig/mag power source
Hide thumbs
Also See for TransSteel 2700c:
- Operating instructions manual (120 pages) ,
- Operating instructions manual (156 pages)
Table of Contents
Advertisement
Quick Links
Advertisement
Table of Contents
Troubleshooting

Related Manuals for Fronius TransSteel 2700c


Summary of Contents for Fronius TransSteel 2700c
- Page 1 / Perfect Charging / Perfect Welding / Solar Energy Operating instructions TransSteel 2700c TransSteel 2700c MV MIG/MAG power source TransSteel 3500c 42,0426,0107,EN 040-22012021 Fronius prints on elemental chlorine free paper (ECF) sourced from certified sustainable forests (FSC).
-
Page 3: Table Of Contents
Contents Safety rules Explanation of safety notices General Proper use Environmental conditions Obligations of the operator Obligations of personnel Mains connection Protecting yourself and others Danger from toxic gases and vapours Danger from flying sparks Risks from mains current and welding current Meandering welding currents EMC Device Classifications EMC measures... - Page 4 MIG/MAG welding, water-cooled Manual metal arc welding Before installation and commissioning Safety Utilisation for intended purpose only Setup regulations Mains connection Connecting the mains cable General Stipulated mains cables and strain-relief devices Safety Connecting the mains cable Fitting the strain-relief device, TSt 2700c, single-phase operation Fitting the strain-relief device, TSt 2700c Fitting the strain-relief device, TSt 2700c MV Fitting the strain-relief device, TSt 3500c...
- Page 5 Corrections during welding MMA welding Safety Preparation MMA welding Corrections during welding HotStart function Anti-stick function Saving and retrieving operating points General Storing EasyJob operating points Retrieving EasyJob operating points Deleting EasyJob operating points Retrieving operating points on the Up/Down welding torch Setup settings Setup menu General remarks...
- Page 6 Quick reference TSt 2700c welding program table TSt 2700c USA welding program table TransSteel 3500 Euro welding program tables TransSteel 3500 US welding program tables...
-
Page 7: Safety Rules
Safety rules Explanation of DANGER! safety notices Indicates immediate danger. ▶ If not avoided, death or serious injury will result. WARNING! Indicates a potentially hazardous situation. ▶ If not avoided, death or serious injury may result. CAUTION! Indicates a situation where damage or injury could occur. ▶... -
Page 8: Environmental Conditions
The device is intended solely for the welding processes specified on the rating plate. Any use above and beyond this purpose is deemed improper. The manufacturer shall not be held liable for any damage arising from such usage. Proper use includes: carefully reading and following all the instructions given in the operating instructions studying and obeying all safety and danger notices carefully performing all stipulated inspection and maintenance work. -
Page 9: Protecting Yourself And Others
This may affect a number device types in terms of: Connection restrictions Criteria with regard to the maximum permissible mains impedance Criteria with regard to the minimum short-circuit power requirement at the interface with the public grid see "Technical data" In this case, the plant operator or the person using the device should check whether the device may be connected, where appropriate by discussing the matter with the power supply company. -
Page 10: Danger From Flying Sparks
Fumes and hazardous gases must not be breathed in must be extracted from the working area using appropriate methods. Ensure an adequate supply of fresh air. Ensure that there is a ventilation rate of at least 20 m³ per hour at all times. Otherwise, a welding helmet with an air supply must be worn. -
Page 11: Meandering Welding Currents
Make sure that you and others are protected with an adequately insulated, dry base or cover for the earth or ground potential. This base or cover must extend over the entire area between the body and the earth or ground potential. All cables and leads must be secured, undamaged, insulated and adequately dimen- sioned. -
Page 12: Emc Device Classifications
Position the device with sufficient insulation against electrically conductive environments, e.g. Insulation against conductive floor or insulation to conductive racks. If distribution boards, twin-head mounts, etc., are being used, note the following: The electrode of the welding torch / electrode holder that is not used is also live. Make sure that the welding torch / electrode holder that is not used is kept sufficiently insulated. -
Page 13: Emf Measures
EMF measures Electromagnetic fields may pose as yet unknown risks to health: effects on the health of others in the vicinity, e.g. wearers of pacemakers and hear- ing aids wearers of pacemakers must seek advice from their doctor before approaching the device or any welding that is in progress for safety reasons, keep distances between the welding cables and the welder's head/torso as large as possible... -
Page 14: Requirement For The Shielding Gas
If the wire-feed unit is attached to a crane holder during welding, always use a suitable, insulated wirefeeder hoisting attachment (MIG/MAG and TIG devices). If the device has a carrying strap or handle, this is intended solely for carrying by hand. The carrying strap is not to be used if transporting with a crane, counterbalanced lift truck or other mechanical hoist. -
Page 15: Danger From Escaping Shielding Gas
Danger from Risk of suffocation from the uncontrolled escape of shielding gas escaping shield- Shielding gas is colourless and odourless and, in the event of a leak, can displace the ing gas oxygen in the ambient air. Ensure an adequate supply of fresh air with a ventilation rate of at least 20 m³/hour. Observe safety and maintenance instructions on the shielding gas cylinder or the main gas supply. -
Page 16: Safety Inspection
(e.g. relevant product standards of the EN 60 974 series). Fronius International GmbH hereby declares that the device is compliant with Directive 2014/53/EU. The full text on the EU Declaration of Conformity can be found at the follow- ing address: http://www.fronius.com... -
Page 17: Copyright
Copyright Copyright of these operating instructions remains with the manufacturer. The text and illustrations are all technically correct at the time of printing. We reserve the right to make changes. The contents of the operating instructions shall not provide the basis for any claims whatsoever on the part of the purchaser. -
Page 19: General Information
General information... -
Page 21: General
General Device concept The TransSteel (TSt) 2700c and 3500c power sources are completely digitised, microprocessor-controlled inverter power sources. The modular design and potential for sys- tem add-ons ensure a high degree of flex- ibility. The devices are designed for the welding of steel. -
Page 22: Warning Notices On The Device
Warning notices Warning notices and safety symbols are affixed to the power sources. These warning on the device notices and safety symbols must not be removed or painted over. They warn against operating the device incorrectly, as this may result in serious injury and damage. 40,0006,3035 inside Welding is dangerous. -
Page 23: System Components
System components General The power sources can be operated with various system components and options. This makes it possible to optimise procedures and to simplify machine handling and opera- tion, as necessitated by the particular field of application in which the power source is to be used. - Page 24 TSt 3500c Welding torch Gas cylinder holder stabiliser Power source Cooling unit TSt 3500c only Trolley and gas cylinder holder Grounding (earthing) cable and electrode cable...
-
Page 25: Options
Options VRD: safety func- A Voltage Reduction Device (VRD) is an optional safety device for reducing the voltage. tion It is recommended for environments in which the risk of an electric shock or electrical accident is increased considerably during arc welding: Due to a low human body resistance of the welder If the welder is exposed to a clear risk of touching the workpiece or other parts of the welding circuit... - Page 26 VRD is active again The output voltage is limited to 35 V once more...
-
Page 27: Control Elements And Connections
Control elements and connections... -
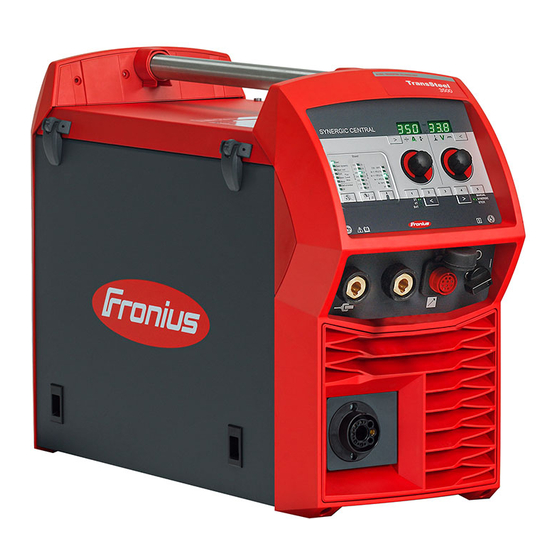
Page 29: Synergic Central Control Panel
Synergic Central control panel General The functions on the control panel are all arranged in a logical way. The individual para- meters required for welding can be selected easily using buttons altered using buttons or the adjusting dial displayed on the digital display during welding The power source uses the Synergic control panel and certain general items of data such as sheet thickness, filler metal, wire diameter and shielding gas to calculate the best welding parameters. -
Page 30: Synergic Control Panel
Synergic control panel (14) (15) (13) (11) (12) (10) "Parameter selection" button (right) for selecting the following welding parameters and for changing parameters in the Setup menu The relevant symbol lights up when a welding parameter is selected. Arc length correction for correcting the arc length Welding voltage in V *) Before the start of welding, the system automatically displays a... - Page 31 "Parameter selection" button (left) for selecting the following welding parameters and for changing parameters in the Setup menu. The relevant symbol lights up when a welding parameter is selected. Sheet thickness in mm or in. If the welding current to be selected is not known it is sufficient to enter the sheet thickness.
-
Page 32: Service-Parameter
(11) "Gas-test" button to set the required gas flow rate at the pressure regulator. Tap button once: shielding gas flows out Tap button again: shielding gas flow stops If the "Gas-test" button is not tapped again, the shielding gas flow will stop after 30 s. -
Page 33: Keylock
Select the required setup parameter using the "Mode" and "Pro- cess" buttons or the left-hand adjusting dial Available parameters Example: 1.00 | 4.21 Firmware version Example: 2 | 491 Welding program configuration Example: r 2 | 290 Number of the currently selected welding program Example: iFd | 0.0 Motor current for wire drive in A The value changes as soon as the motor is running. -
Page 34: Connections, Switches And Mechanical Components
Connections, switches and mechanical compon- ents Front and rear sides, TSt 2700c TSt 2700c Welding torch connection for connecting the welding torch (-) - Current socket with bayonet latch used for connecting the grounding (earthing) cable during MIG/MAG welding connecting the electrode cable or grounding (earthing) cable during MMA welding (depending on the type of electrode used) LocalNet connection Standardised connection for remote control... -
Page 35: Front And Rear Sides, Tst 3500C
Front and rear (3) (4) (5) sides, TSt 3500c TSt 3500c Welding torch connection for connecting the welding torch (-) - Current socket with bayonet latch used for connecting the grounding (earthing) cable during MIG/MAG welding connecting the electrode cable or grounding (earthing) cable during MMA welding (depending on the type of electrode used) (+) - Current socket with bayonet latch used for... -
Page 36: Side View
Side view Wirespool holder with brake for holding standard wirespools with a max. diameter of 300 mm (11.81 in.) and a max. weight of up to 19 kg (41.89 lbs.) 4-roller drive LED wirespool interior lighting (TSt 2700c only) with the setup parameter LED the turn-off time is adjustable... -
Page 37: Installation And Commissioning
Installation and commissioning... -
Page 39: Minimum Equipment Needed For Welding Task
Minimum equipment needed for welding task General Depending on which welding process you intend to use, a certain minimum equipment level will be needed in order to work with the power source. The welding processes and the minimum equipment levels required for the welding task are then described. -
Page 40: Before Installation And Commissioning
Before installation and commissioning Safety WARNING! Operating the equipment incorrectly can cause serious injury and damage. ▶ Do not use the functions described here until you have read and completely under- stood these Operating Instructions. ▶ Do not use the functions described here until you have fully read and understood all of the Operating Instructions for the system components, in particular the safety rules. -
Page 41: Mains Connection
The venting duct is a very important safety device. When choosing the installation loca- tion, ensure that the cooling air can enter and exit unhindered through the air ducts on the front and back of the device. Electroconductive metallic dust (e.g. from grinding work) must not be allowed to get sucked into the device. -
Page 42: Connecting The Mains Cable
Connecting the mains cable General A strain-relief device for the following cable cross-sections is fitted to the power source: Power source Cable cross-section Canada / US Europe TSt 2700c AWG 14 to AWG 6 *) 4G2.5 TSt 3500c AWG 12 *) 4G2.5 Canada / US cable type: Extra-hard usage Strain-relief devices for other cable cross-sections must be designed accordingly. -
Page 43: Connecting The Mains Cable
Connecting the If no mains cable is connected, a mains cable that is suitable for the connection voltage mains cable must be fitted before commissioning. The ground conductor should be approx. 10 - 15 mm (0.4 - 0.6 in.) longer than the phase conductors. -
Page 44: Fitting The Strain-Relief Device, Tst 2700C
IMPORTANT! Tie the phase conductors near the strain-relief device using cable ties. Fitting the strain- relief device, TSt 2700c 1,2 Nm... -
Page 45: Fitting The Strain-Relief Device, Tst 2700C Mv
IMPORTANT! Tie the phase conductors near the strain-relief device using cable ties. Fitting the strain- relief device, TSt 3,5 Nm 2700c MV... -
Page 46: Fitting The Strain-Relief Device, Tst 3500C
IMPORTANT! Tie the phase conductors near the strain-relief device using cable ties. Fitting the strain- relief device, TSt 3500c 1,2 Nm IMPORTANT! Tie the phase conductors near the luster terminal using cable ties. -
Page 47: Fitting The Canada / U S Strain-Relief Device, Tst 3500C
Fitting the Canada / U S strain-relief device, TSt 3500c IMPORTANT! Tie the phase conductors near the luster terminal using cable ties. -
Page 48: Generator-Powered Operation
Generator-powered operation Generator- The power source is generator-compatible. powered opera- tion The maximum apparent power S of the power source must be known in order to 1max select the correct generator output. The maximum apparent power S of the power source is calculated as follows: 1max 3-phase devices: S x √3... -
Page 49: Single-Phase Operation
Single-phase operation Single-phase As an alternative to three-phase operation, the multivoltage variant (MV) of the power operation source enables a welding operation with limited power or duration from just a single- phase supply. The maximum possible welding power is limited due to the dimensioning of the mains fuse protection, upon which the safety cut-out of the power source is dependant. -
Page 50: Explanation Of The Term „Duty Cycle" In Single-Phase Operation
In single-phase operation a safety cut-out function prevents a triggering of the fuse at higher welding power values. The safety cut-out function is active at fuse values of 15 A, 16 A and 20 A and determines the possible welding time, without triggering of the fuse. If a cut-out of the welding current results due to exceeding the pre-calculated welding time, the service code „toF“... - Page 51 t (min) I2 (A) (1) Mains fuse protection 10 A (2) Mains fuse protection 13 A (3) Mains fuse protection 15 A (4) Mains fuse protection 16 A (5) Mains fuse protection 20 A...
-
Page 52: Fitting/Connecting The System Components
Fitting/connecting the system components Information on The steps and activities described below include references to various system compon- system compon- ents, such as ents Trolley Cooling units (TSt 3500c only) Welding torches, etc. For more detailed information about installing and connecting the system components, please refer to the appropriate operating instructions. -
Page 53: Connecting A Mig/Mag Welding Torch
TSt 2700c TSt 3500c Secure the gas cylinder with a belt Briefly open the gas cylinder valve to remove any dust or dirt Check the seal on the pressure regulator NOTE! US devices (TSt 3500c only) are supplied with an adapter for the gas hose: ▶... -
Page 54: Establishing A Ground (Earth) Connection
Establishing a ground (earth) connection Inserting/repla- CAUTION! cing feed rollers Risk of injury if the feed roller holders fly upwards. ▶ When unlocking the lever, keep fingers away from the area to the left and right of the lever. In order to achieve optimum wire electrode feed, the feed rollers must be suitable for the diameter and alloy of the wire being welded. -
Page 55: Inserting The Wirespool/Basket-Type Spool
Inserting the CAUTION! wirespool/basket- type spool Risk of injury from springiness of spooled wire electrode. ▶ When inserting the wirespool / basket-type spool, hold the end of the wire electrode firmly to avoid injuries caused by the wire electrode springing back. CAUTION! Risk of injury from falling wirespool/basket-type spool. -
Page 56: Feeding In The Wire Electrode
Inserting the wirespool NOTE! When working with basket-type spools, only use the basket-type spool adapter included in the scope of supply. Inserting the basket-type spool Feeding in the CAUTION! wire electrode Risk of injury from springiness of spooled wire electrode. ▶... - Page 57 CAUTION! Risk of injury from wire electrode emerging at speed. ▶ When pressing the "Wire threading" button or the torch trigger, keep the welding torch away from your face and body, and wear suitable protective goggles. IMPORTANT! To facilitate wire threading, the following sequences are possible when the "Wire threading"...
-
Page 58: Setting The Contact Pressure
CAUTION! Risk of injury and damage from electric shock and from the wire electrode emer- ging from the torch.. When pressing the torch trigger ▶ keep the welding torch away from your face and body ▶ wear suitable protective goggles ▶... -
Page 59: Adjusting The Brake
Standard values for the U-groove rollers: Steel: 4 - 5 CrNi: 4 - 5 Tubular cored electrodes: 2 - 3 Adjusting the NOTE! brake After releasing the torch trigger the wirespool must stop unreeling. If it continues unreeling, readjust the brake. STOP STOP... -
Page 60: Design Of The Brake
Design of the WARNING! brake Danger from incorrect installation. This can result in severe personal injury and damage to property. ▶ Do not dismantle the brake. ▶ Maintenance and servicing of brakes is to be carried out by trained, quali- fied personnel only. -
Page 61: Start-Up
Start-up General WARNING! Operating the equipment incorrectly can cause serious injury and damage. ▶ Do not use the functions described here until you have read and completely under- stood these Operating Instructions. ▶ Do not use the functions described here until you have fully read and understood all of the Operating Instructions for the system components, in particular the safety rules. -
Page 63: Welding
Welding... -
Page 65: Power Limitation
Power limitation Safety function "Power limitation" is a safety function for MIG/MAG welding. This means that the power source can be operated at the power limit whilst maintaining process safety. Wire speed is a determining parameter for welding power. If it is too high, the arc gets smaller and smaller and may be extinguished. -
Page 66: Mig/Mag Modes
MIG/MAG modes General WARNING! Operating the equipment incorrectly can cause serious injury and damage. ▶ Do not use the functions described here until you have read and completely under- stood these Operating Instructions. ▶ Do not use the functions described here until you have fully read and understood all of the Operating Instructions for the system components, in particular the safety rules. -
Page 67: Special 4-Step Mode
"4-step mode" is suitable for longer weld seams. Special 4-step mode Special 4-step mode allows the starting and final current to be configured in addition to the advantages of 4-step mode. Spot welding The "Spot welding" mode is suitable for welded joints on overlapped sheets. -
Page 68: 2-Step Stitch Welding
2-step stitch welding 2-step stitch welding The "2-step stitch welding" mode is suitable for welding short weld seams on thin sheets, to prevent the weld seams from dropping through the base material. 4-step stitch welding 4-step stitch welding The "4-step stitch welding" mode is suitable for welding longer weld seams on thin sheets, to prevent the weld seams from dropping through the base material. -
Page 69: Mig/Mag Welding
MIG/MAG welding Safety WARNING! Operating the equipment incorrectly can cause serious injury and damage. ▶ Do not use the functions described here until you have read and completely under- stood these Operating Instructions. ▶ Do not use the functions described here until you have fully read and understood all of the Operating Instructions for the system components, in particular the safety rules. -
Page 70: Mig/Mag Standard Synergic Welding
MIG/MAG standard synergic welding MIG/MAG stand- Press the "Material" button to select the filler metal to be used. ard synergic Press the "Wire diameter" button to select the diameter of the wire electrode used. welding Press the "Shielding gas" button to select the shielding gas to be used. The assignment of the SP position is in the welding program tables in the appendix. -
Page 71: Corrections During Welding
CAUTION! Risk of injury and damage from electric shock and from the wire electrode emer- ging from the torch. When pressing the torch trigger ▶ keep the welding torch away from your face and body ▶ wear suitable protective goggles ▶... -
Page 72: Mig/Mag Standard Manual Welding
MIG/MAG standard manual welding General The MIG/MAG standard manual welding process is a MIG/MAG welding process with no synergic function. Changing one parameter does not result in any automatic adjustments to the other para- meters. All of the variable parameters must therefore be adjusted individually, as dictated by the welding process in question. -
Page 73: Corrections During Welding
All welding parameter set values remain stored until the next time they are changed. This applies even if the power source is switched off and on again. To display the actual welding current during welding, select the welding current para- meter. -
Page 74: Mma Welding
MMA welding Safety WARNING! Operating the equipment incorrectly can cause serious injury and damage. ▶ Do not use the functions described here until you have read and completely under- stood these Operating Instructions. ▶ Do not use the functions described here until you have fully read and understood all of the Operating Instructions for the system components, in particular the safety rules. -
Page 75: Corrections During Welding
All welding parameter set values remain stored until the next time they are changed. This applies even if the power source is switched off and on again in the meantime. Start welding To display the actual welding current during welding: Press the "Parameter selection"... -
Page 76: Anti-Stick Function
Anti-stick func- As the arc becomes shorter, the welding voltage may drop so far that the rod electrode tion will tend to "stick". This may also cause "burn-out" of the rod electrode. Electrode burn-out is prevented by activating the anti-stick function. If the rod electrode begins to stick, the power source immediately switches the welding current off. -
Page 77: Saving And Retrieving Operating Points
Saving and retrieving operating points General The "Save" buttons allow up to 5 EasyJob operating points to be saved. Every operating point matches the settings on the control panel. EasyJobs can be stored for each welding process. IMPORTANT! Setup parameters are not saved at this time. Storing EasyJob Press and hold one of the "Save"... - Page 78 Number 2 Number 3 Number 4 Number 5...
-
Page 79: Setup Settings
Setup settings... -
Page 81: Setup Menu
Setup menu General remarks The Setup menu provides simple access to expert knowledge in the power source and to additional functions. The Setup menu can be used to make simple adjustments of the parameters to suit the various job settings. Configuring the Configuring the setup parameters is described here with reference to the "MIG/MAG setup parameters... -
Page 82: Setup Parameters For Mig/Mag Standard Manual Welding
Setup parameters "Min." and "max." are used for setting ranges that differ according to power source, weld- for MIG/MAG ing program, etc. standard manual Gas pre-flow time welding Unit: s Setting range: 0 - 9.9 Factory setting: 0.1 Gas post-flow time Unit: s Setting range: 0 - 9.9 Factory setting: 0.5... -
Page 83: Setup Parameters For Mig/Mag Standard Synergic Welding
Factory setting: 2T (2-step) Reset power source to factory settings Press and hold down one of the "Parameter selection" buttons for 2 s to restore the factory settings - when "PrG" appears on the digital display, the power source has been reset IMPORTANT! When the power source is reset, all personal settings in the Setup menu are lost. -
Page 84: Setup Parameters For Mma Welding
Factory setting: 10 (393.7) burn-back time correction - Burn back effect due to wire withdrawal at end of welding Unit: s Setting range: Aut, 0 - 0.3 Factory setting: Aut Ignition time-out function - Length of wire that is fed before the safety cut- out is triggered Unit: mm (in.) Setting range: Off, 5 - 100 (Off, 0.2 - 3.94) - Page 85 Factory setting: 150 Hot-current time Unit: s Setting range: 0 - 2.0 Factory setting: 0.5 Anti-Stick Unit: - Setting range: On, OFF Factory setting: OFF Factory - Reset power source to factory setting Press and hold down one of the "Parameter selection" buttons for 2 s to restore the factory settings - when "PrG"...
-
Page 86: Setup Menu - Level 2
Setup menu - Level 2 Restrictions In conjunction with the level 2 of the Setup menu, the following restrictions occur: Level 2 of the Setup menu cannot be selected: during welding if the "Gas test" function is active if the "Wire threading" function is active if the "Wire withdrawal"... - Page 87 Changing welding parameters Use the "Mode" and "Process" buttons or the left-hand adjusting dial to select the required setup parameter Change the value of the setup parameter using the "Parameter selection" buttons or the right-hand adjusting dial Exiting the Level 2 Setup menu Press and hold the "Mode"...
- Page 88 Cooling Time (only with connected cooling unit) Time from when flow monitoring is triggered until the "no | H2O" service code is output. For example, if there are air bubbles in the cooling system, the cool- ing unit will not cut out until the end of this preset time. Unit: s Setting range: 5 - 25 Factory setting: 10...
-
Page 89: Parameters For Manual Metal Arc (Mma) Welding In The Setup Menu Level
Parameters for r (resistance) - welding circuit resistance (in mOhm) manual metal arc See "Measuring welding circuit resistance r" from page 90. (MMA) welding in the Setup menu L (inductivity) - welding circuit inductivity (in microhenry) level 2 see "Displaying welding circuit inductivity L" from page 92. -
Page 90: Measuring Welding Circuit Resistance R
Measuring welding circuit resistance r General Measuring the welding circuit resistance makes it possible to have a consistent welding result at all times, even with hosepacks of different lengths. The welding voltage at the arc is then always precisely regulated, regardless of the length and cross-sectional area of the hosepack. - Page 91 Fit the gas nozzle back onto the welding torch...
-
Page 92: Displaying Welding Circuit Inductivity L
Displaying welding circuit inductivity L General Laying of the hosepacks has a significant effect on welding circuit inductivity and there- fore affects the welding process. It is important to lay the hosepacks correctly in order to obtain the best possible welding result. Displaying weld- The setup parameter "L"... -
Page 93: Troubleshooting And Maintenance
Troubleshooting and maintenance... -
Page 95: Troubleshooting
Troubleshooting General The devices are equipped with an intelligent safety system. This means that to a large extent it has been possible to dispense with melting-type fuses. Melting-type fuses there- fore no longer need to be replaced. After a possible malfunction has been remedied, the device is ready for use again. - Page 96 Power source does not function Mains switch is on, but indicators are not lit up Cause: There is a break in the mains lead; the mains plug is not plugged in Remedy: Check the mains lead, ensure that the mains plug is plugged in Cause: Mains socket or mains plug faulty Remedy:...
- Page 97 No welding current Mains switch is ON and indicators are lit up Cause: Grounding (earthing) connection is incorrect Remedy: Check the grounding (earthing) connection for correct polarity Cause: There is a break in the power cable in the welding torch Remedy: Replace the welding torch No protective gas shield...
-
Page 98: Displayed Service Codes
Welding torch becomes very hot Cause: The specification of the welding torch is inadequate Remedy: Observe the duty cycle and loading limits Cause: Only on water-cooled systems: Inadequate coolant flow Remedy: Check coolant level, coolant flow, for coolant contamination, etc. For further information refer to the cooling unit operating instructions. - Page 99 ----- Cause: An invalid welding process was called up on the robot interface (no. 37) or an empty flag was selected (no. 32) Remedy: Call up a valid welding process or select assigned "Save" button ELn | 8 Cause: The connected wire-feed unit is not supported Remedy: Connect supported wire-feed unit ELn | 12...
- Page 100 no | UrL Cause: The VRD option has tripped too early. Remedy: Check whether all welding power-leads and control lines are connected. Switch off the power source Wait 10 seconds and switch the power source back on again If the error occurs again - contact After Sales Service. E-Stop Cause: "External stop"...
- Page 101 EFd | 81, EFd | 83 Cause: Fault in the wire feed system (overcurrent in wire-feed unit drive) Remedy: Arrange the hosepack in as straight a line as possible; check that there are no kinks or dirt in the inner liner; check the contact pressure on the 4 roller drive Cause: Wire-feed unit motor is sticking or defective...
- Page 102 to7 | xxx Note: xxx stands for a temperature value Cause: Overtemperature in the power source Remedy: Allow power source to cool down, check air filter and clean if necessary, check whether the fan is running toF | xxx Cause: With the TSt 2700c MV power source operating in single-phase mode, the power source safety cut-out has tripped in order to prevent the mains fuse from tripping.
- Page 103 tu7 | xxx Note: xxx stands for a temperature value Cause: Undertemperature in the power source Remedy: Place power source in a heated room and allow it to warm up no | H2O Cause: Coolant flow rate too low Remedy: Check coolant flow rate and cooling unit, including cooling circuit (for min- imum coolant flow, see "Technical Data"...
-
Page 104: Care, Maintenance And Disposal
Care, maintenance and disposal General Under normal operating conditions, the welding system requires only a minimum of care and maintenance. However, it is vital to observe some important points to ensure the welding system remains in a usable condition for many years. Safety WARNING! An electric shock can be fatal. -
Page 105: Every 6 Months
Every 6 months CAUTION! Danger due to the effect of compressed air. This can result in damage to property. ▶ Do not bring the air nozzle too close to electronic components. Dismantle device side panels and clean inside of device with dry, reduced com- pressed air If a lot of dust has accumulated, clean the cooling air ducts WARNING! -
Page 106: Average Consumption Values During Welding
Average consumption values during welding Average wire Average wire electrode consumption at a wire speed of 5 m/min electrode con- 1.0 mm wire 1.2 mm wire 1.6 mm wire sumption during electrode dia- electrode dia- electrode dia- MIG/MAG welding meter meter meter Steel wire electrode... -
Page 107: Technical Data
Technical data Special voltages For devices designed for special voltages, the technical data on the rating plate applies. For all machines with a permitted mains voltage of up to 460 V: The standard mains plug allows the user to operate with a mains voltage of up to 400 V. For mains voltages up to 460 V fit a mains plug permitted for such use or install the mains supply directly. - Page 108 Mains fuse 16 A slow-blow Mains voltage (U 3 x 400 V Max. effective primary current (I 6.6 A 1eff Max. primary current (I 12.5 A 1max Mains fuse 16 A slow-blow Mains voltage (U 3 x 460 V Max. effective primary current (I 5.8 A 1eff Max.
-
Page 109: Tst 2700C Mv
Wirespool diameter max. 300 mm max. 11.81 in. Wirespool weight max. 19.0 kg max. 41.9 lbs Idle state power consumption at 400 V 38.3 W Power source efficiency at 270 A / 30.8 V 89 % Interface to a 230 / 400 V, 50 Hz public grid TSt 2700c MV Mains voltage (U 3 x 200 V... - Page 110 Max. primary current (I 22.3 A 1max Mains fuse protection 16 A slow-blow Apparent power 5.13 kVA Mains voltage (U 1 x 240 V Max. effective primary current (I 15.0 A 1eff Max. primary current (I 23.9 A 1max Mains fuse protection 15 A slow-blow Apparent power 5.74 kVA...
-
Page 111: Tst 3500C
Welding current in single-phase operation at 100 % 40 % 10 min / 40 °C (104 °F) 160 A 220 A = 240 V, Fuse 30 A Output voltage range according to standard character- istic (U 14,5 - 34,3 V MIG/MAG 20.4 - 34.3 V Rod electrode... - Page 112 747 x 300 x 497 mm 29.4 x 11.8 x 19.6 in. Weight 36 kg 79.4 lb. Max. shielding gas pressure 5 bar 72.52 psi Coolant Original Fronius Wire feed speed 1 - 25 m/min 40 - 980 ipm Wire drive 4-roller drive...
-
Page 113: Overview With Critical Raw Materials, Year Of Production Of The Device
An overview of which critical raw materials are contained in this device can be found at materials, year of the following Internet address. production of the www.fronius.com/en/about-fronius/sustainability. device To calculate the year of production of the device: Each device is provided with a serial number... -
Page 114: Appendix
Appendix Quick reference... - Page 116 TSt 2700c weld- Welding program database: ing program table TSt 2700c Pos. VAT ID 3474 Pos. Standard Programs Material Diameter 0,8 mm 0,9 mm 1,0 mm 1,2 mm 1,4 mm 1,6 mm Pos. Pos. .030‘‘ .035‘‘ .040‘‘ .045‘‘ .052‘‘ 1/16‘‘ Steel 100 % CO2 2290...
- Page 117 TSt 2700c USA Welding program database: welding program TSt 2700c USA Pos. table VAT ID 3475 Pos. Standard Programs Material Diameter 0,8 mm 0,9 mm 1,0 mm 1,2 mm 1,4 mm 1,6 mm Pos. Pos. .030‘‘ .035‘‘ .040‘‘ .045‘‘ .052‘‘ 1/16‘‘...
- Page 118 TransSteel 3500 Welding program database: Euro welding pro- TransSteel 3500 Euro Pos. gram tables VAT ID 3431 Pos. Standard Programs Material Diameter 0,8 mm 0,9 mm 1,0 mm 1,2 mm 1,4 mm 1,6 mm Pos. Pos. .030‘‘ .035‘‘ .040‘‘ .045‘‘ .052‘‘...
- Page 119 TransSteel 3500 Welding program database: US welding pro- TransSteel 3500 US Pos. gram tables VAT ID 3431 Pos. Standard Programs Material Diameter 0,8 mm 0,9 mm 1,0 mm 1,2 mm 1,4 mm 1,6 mm Pos. Pos. .030‘‘ .035‘‘ .040‘‘ .045‘‘ .052‘‘...
- Page 120 FRONIUS INTERNATIONAL GMBH Froniusstraße 1 A-4643 Pettenbach AUSTRIA contact@fronius.com www.fronius.com Under www.fronius.com/contact you will find the addresses of all Fronius Sales & Service Partners and locations...
Need help?
Do you have a question about the TransSteel 2700c and is the answer not in the manual?
Questions and answers