Table of Contents
Advertisement
Advertisement
Table of Contents

Related Manuals for TC Electronic G-MAJOR 2


Summary of Contents for TC Electronic G-MAJOR 2
- Page 1 G•MAJOR 2 GUITAR EFFECTS PROCESSOR User’s Manual...
-
Page 2: Important Safety Instructions
IMPORTANT SAFETY INSTRUCTIONS The lightning flash with an arrowhead The exclamation point within an symbol within an equilateral triangle is equilateral triangle is intended to alert intended to alert the user to the presence the user to the presence of important of uninsulated “dangerous voltage”... - Page 3 – if not installed G-Major 2 – Guitar Effects Processor and used in accordance with the instructions – may cause harmful interference to radio communications. However, there is no –...
-
Page 4: Table Of Contents
Panner ......34 Compressor Compressor .....35 TC Electronic, Sindalsvej 34, DK-8240 Risskov Multilingual Version Rev 1 – SW – V 1... -
Page 5: Introduction
If you are used to working with several serially connected pedal effects (“stomp boxes”), you might want to use G-Major 2 for a similar setup and enjoy its high quality effects. To do so, simply connect a MIDI pedal capable of sending MIDI Control Change messages to G-Major 2. Make some basic settings, and you can use this setup just like a bunch of regular stomp boxes where you simply turn effects on and off as required. - Page 6 INTRODUCTION G-Major vs. G-Major 2 – what’s the deal? Well – why not make a great product even better? With an even easier to operate front panel and a bunch of new effects, it made good sense for TC to relaunch one of our most successful products as G-Major 2.
-
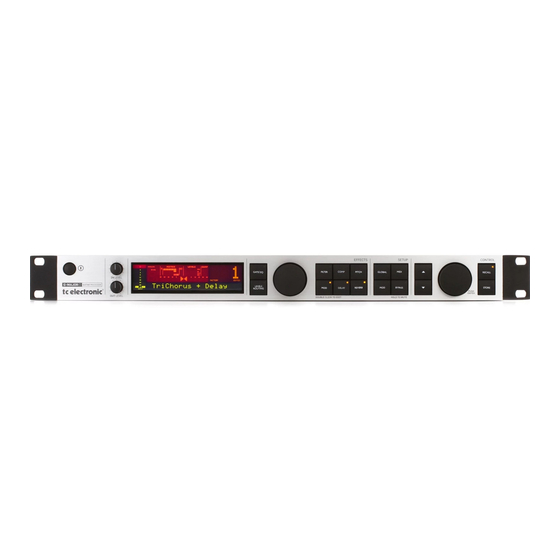
Page 7: Front Panel Overview
When the digits are lit steadily, 8 – TUNER they represent the currently The tuner of G-Major 2 is always recalled preset. When active. When the played note is previewing/scrolling through in tune, both arrows will be lit. - Page 8 FRONT PANEL OVERVIEW Effect Block Keys 29/30 – UP/DOWN keys – General information Up/down keys for navigation in Pressing an Effect Block key the display menus. once will activate/deactivate 31 – ADJUST & ENTER the effect. By pressing a key Wheel twice in short succession Use this wheel to set the value...
-
Page 9: Rear Panel Overview
MIDI Cable Balanced vs. regular Audio Cables The analog input and output connectors DIN CONNECTOR DIN CONNECTOR on G-Major 2 are balanced ¼" jacks. To 5POLE – MALE 5POLE – MALE 45 degrees 45 degrees achieve the best possible connection to SHIELDED CABLE (3 or 5 wires + screen) -
Page 10: Signal Flow Diagram
SIGNAL FLOW DIAGRAM... -
Page 11: Basic Setups
There are numerous ways of hooking up guitar rigs. On the following pages, we present some of the most commonly used setups. We recommend using serial setups, where the entire signal passes through G-Major 2. This will give you the maximum benefit from all effect algorithms. Serial setup with preamp and power amp •... - Page 12 (first) effect pedal. Connect the output of the (last) effect pedal to the input of the combo as usual. • If you wish to switch presets on G-Major 2 (which may include switching the channels of your preamp/combo), you should also connect a MIDI pedal to G-Major 2 and use the Relay Switching function.
-
Page 13: The Display
Serial 2 e.g. your preamp. This will probably be a clean sound. • Adjust the input level on G-Major 2 so that the -3 dB LED flashes frequently and the -0 dB LED flashes only at the very highest levels. -
Page 14: Recall
Factory Presets (ROM) G-Major 2 holds 100 Factory presets. Factory Preset Number presets can be edited and stored in any User When the digits are lit steadily, they represent location. -
Page 15: Preset Backup Via Midi
Simply connect the MIDI OUT jack of the device you are dumping from to the MIDI IN jack of • Press ENTER twice to confirm the storage your G-Major 2. If you want to use a User bank operation. that you have previously dumped to a... -
Page 16: Global Menu
4. Move the pedal to its minimum position (“toe If, however, you intend to use G-Major 2 in a up”) and press ENTER. parallel setup or in a parallel loop, its Kill Dry Your pedal has been calibrated. - Page 17 Coarse Out level, you must decide how you would like This is a slightly less accurate mode, allowing G-Major 2 to respond to the position of the for fast results in a live situation. expression pedal when you are recalling Tuner Range another preset.
- Page 18 Adjusts the LCD display backlight for better viewing comfort. Input Range Settings: Pro/Consumer Defines the sensitivity of G-Major 2 input. The default setting is “Pro”, which will match most preamps. Output Range Settings: 2 dBu, 8 dBu, 14 dBu, 20 dBu Defines the maximum gain range of the analog output stage.
-
Page 19: Midi
MIDI-related parameters of G-Major 2. What is MIDI Mapping? MIDI Channel With G-Major 2 it is possible to use an Settings: Off / 1 to 16 / Omni incoming MIDI program change message (with Defines the responding MIDI channel of a value from 1 to 128) to recall any Factory or G-Major 2. -
Page 20: Mod Menu
LED status on your foot controller unit from your MIDI board and expression (given that the MIDI Out jack of G-Major 2 is pedals. connected to the MIDI In jack on your foot controller). -
Page 21: External Control
MOD MENU External Control EQ On/Off Use this setting to toggle the EQ of G-Major 2 We will now take a look at how external on or off remotely (using an external controller). controllers can be assigned to G-Major 2 parameters in the MOD menu. - Page 22 UP/DOWN keys and select MOD 1 using the input is at the medium position. ADJUST wheel. MaxOut G-Major 2 must be calibrated to the This parameter determines the Out level of the connected expression pedal. This is Modifier when the expression pedal/Modifier done in the Global menu.
-
Page 23: The Tuner
THE TUNER Example The Tuner is always on. It is displayed in the Setting up G-Major 2 to mute for tuning when LC display. receiving a MIDI Control Change from your MIDI pedal. • Connect your MIDI pedal to G-Major 2. - Page 24 If, however, you intend to use G-Major 2 in a parallel setup or a parallel loop, its Kill Dry Preset Out Level function will come in handy.
-
Page 25: Relays
• Recall G-Major 2 preset that you want to use for channel switching. • Press the LEVELS/ROUTING key. • Now select Relay 1 (“Rly1”) or Relay 2 (“Rly2”) using the UP/DOWN keys and use... - Page 26 RELAYS to amp. Experiment and note down the settings that apply to your particular amp. • Store the preset by pressing the STORE key twice (see the section “Preset Handling” for more info on storing presets).
-
Page 27: Routings
Routing menu Semi Parallel The Semi Parallel routing still connects the first You can route the effect blocks of G-Major 2 in five effect blocks serially, but the Reverb and four different ways: Serial, Serial 2, Semi Delay blocks are now connected in parallel. -
Page 28: Getting Started / "How To
We assume that you are using G-Major 2 in a How to bypass an Effect Block in a Preset serial setup, where the entire signal is routed Simply press the key corresponding to the through G-Major 2. - Page 29 • Connect the MIDI OUT jack of your sequencer (or another device sending out the MIDI Clock you wish to use as a tempo reference for G-Major 2) to the MIDI IN jack of G-Major 2. • Press the MIDI key to enter the MIDI menu.
-
Page 30: Introduction
Optimum settings will vary depending on the the block is still present in the routing, it does signal present on the input of G-Major 2, so you not affect the audio signal in any way. will most likely need different settings for Clean The settings of all blocks –... -
Page 31: Noise Gate
GATE/EQ key and use the UP/DOWN keys to navigate to the EQ parameters. The EQ of G-Major 2 is a three-band parametric equalizer. We have predefined three frequency areas that we find excellent as starting points for EQing a guitar setup, but you can use the “Freq”... -
Page 32: Filter
FILTER Wah Wah Touch Wah With this effect type, you can create the same The Wah effect occurs when a relatively narrow effect as with a dedicated Wah pedal, which frequency area is boosted and swept through a you can control manually. All you need to do is frequency range. -
Page 33: Auto Wah
FILTER Auto Wah Resonance Filter The Wah effect occurs when a relatively narrow The Resonance filter is basically a high-cut filter frequency area is boosted and swept through a with adjustable Q-factor (Resonance). frequency range. The sweep is controlled by a With increased Resonance values, the filter low frequency oscillator (LFO). -
Page 34: Touch Resonance Filter
A Tremolo is basically a change of the signal similar to a Touch Wah. The sweep through a level controlled by an LFO. G-Major 2 offers frequency range is controlled via the dynamics several variations of this effect; ranging from of the input signal. -
Page 35: Panner
FILTER Panner a full sine wave, whilst 0 % and 100 % would yield a crest-to-peak and peak-to crest curve, Introduction respectively. The Panner simply pans the signal between the Pulsewidth left and the right channel. Use this for extreme stereo perspective effects. -
Page 36: Compressor
To find out what compression can do for you, The Release time is the time it takes for the try out G-Major 2 presets that employ the Compressor to release the gain reduction of the Compressor block both with lead and rhythm signal after the input signal drops below the sounds. -
Page 37: Pitch
PITCH Detune Whammy A Detune effect is similar to the classic Chorus The Whammy effect gives you the opportunity effect: The source signal is split, and a to control the pitch of an added voice with an specified amount of the signal is detuned by a external MIDI expression pedal. -
Page 38: Octaver
PITCH Octaver The Octaver gives you an additional voice with a fixed pitch distance of either one or two octaves above or below the Input note. Dir – Direction Settings: Up/Down This parameter sets whether the added voice should be above or below the input note. Range Settings: 1 Octaves / 2 Octaves This parameter sets the interval of the added... -
Page 39: Pitch Shifter
Pitch Shifter Level 1 Range: -100 to 0 dB With the Pitch Shifter of G-Major 2, you can Defines the level for voice 1. add two voices, each with a fixed pitch within ± one octave from the input note. G-Major 2... -
Page 40: Intelligent Pitch Shifter
PITCH Intelligent Pitch Shifter Pan Position 1 / Pan Position 2 Range: -50 to +50 The Intelligent Pitch Shifter is a 2-voice pitch Controls the panning position of each of the two shifter that allows you to play harmonies within voices. -
Page 41: Modulation
MODULATION Chorus Advanced Chorus Two types of Chorus are available: the simple In additional to the parameters of the Classic Classic Chorus and the Advanced type that Chorus, the Advanced Chorus offers the includes a couple of extra parameters. following settings: The basic idea of a chorus effect is to split the Cho Dl –... -
Page 42: Tri-Chorus Normal
MODULATION Tri-Chorus Norm/Asym Phase Reverse Settings: Off/On The Tri-Chorus is a variation of the regular Setting this parameter to “On” reverses the Chorus that uses three stereo chorus modules phase of the processed signal in the right with various offsets for the Depth, Speed, channel. -
Page 43: Classic Flanger
MODULATION Flanger – Introduction feedback, resulting in a squealing noise that in most cases is unwanted in flanging effects. Be The Flanger belongs to the same “family” of aware of this side-effect when experimenting at modulation effects as the Chorus effect. The high volumes. -
Page 44: Advanced Flanger
MODULATION Advanced Flanger Through Zero Flanger – Negative/Positive In addition to the parameters of the Classic Flanger, the Advanced Flanger offers the The TZF Mode Flanger emulates the original following settings: way of creating a flange effect where two Fla Dl – Flanger Delay identical pieces of audio material were played Range: 0 to 50 ms back simultaneously on two tape decks and... -
Page 45: Vibrato
MODULATION Vibrato A Vibrato effect modulates the pitch of the incoming signal. The result is similar to the vibrato technique used by vocalists. As opposed to a chorus effect, no direct signal is combined with this pitch-modulated signal. Speed Depth Speed Range: 0.050 Hz to 19.95 Hz The speed of the Vibrato, also known as Rate. -
Page 46: Vintage Phaser
MODULATION Vintage Phaser & Phase Reverse Smooth Phaser Settings: On/Off When set to “On”, this parameter introduces a These are two effective types of Phaser that small delay in one of the waveform starting sound just great. The Vintage Phaser will give points, resulting in an LFO phase change. -
Page 47: Vintage Univibe
MODULATION Vintage Univibe Select Settings: Speed 1 / Speed 2 The Vintage Univibe is an emulation of the Use this parameter to specify whether Speed 1 classic rotary speaker effect. The effects that or Speed 2 is the default setting for the effect. If can be achieved with it range from a “phasey”, you assign a Modifier to this parameter, you can thick chorus to lush vibrato. -
Page 48: Delay
DELAY Common Parameters – Delay The Feedback High-Cut parameter attenuates the frequencies over the set frequency, The following parameters are identical for all resulting in a more “analog” sound that in many Delay types. Parameters specific to certain cases that will blend in better with the overall delays are described in the relevant sections. -
Page 49: Dynamic
DELAY Dynamic Delay Dual Delay The Dynamic Delay is a feature that was This true Dual Delay lets you set two initially introduced in the well-recognized TC independent delay taps, each with its own 2290. It allows the dynamics of the Input level Tempo parameter, High and Low cut filter, as to actively alter the Delay Output level, which well as a “Pan”... -
Page 50: Reverb
REVERB Reverb Types Common Reverb Parameters G-Major 2 features four different Reverb Decay classics. All types have the same editable Range: 0.1 to 20 seconds parameters, but the reverbs’ characteristics The Decay parameter determines the length of vary. the Reverb’s so-called diffuse field. The length... - Page 51 REVERB HiFact & LoFact – (High Factor/Low Factor) Range: -25 to 25 Use these parameters to emphasize or attenuate the selected Hi and Lo Color types. RoomLv – Room Level Range: -100 to 0 dB This parameter sets the level of the reverb’s initial reflections (early reflections).
-
Page 52: Midi Implementation
MIDI IMPLEMENTATION CHART Guitar Effects Processor G-Major 2 – February 2009 Function Transmitted Recognized Remarks Basic Channel Default Changed 1 to 16 1 to 16 Mode Default Messages Altered Note Number True Voice Velocity Note ON Note OFF After Touch Keys Ch’s... -
Page 53: Technical Specifications
TECHNICAL SPECIFICATIONS Analog inputs Connectors: ¼" phone jack, balanced Impedance, Bal./Unbal.: 21 kOhm / 13 kOhm Max. Input Level: +24 dBu Min. Input Level for 0 dBFS: 0 dBu Sensitivity: @ 12 dB headroom: -12 dBu to +12 dBu A to D Conversion: 24 Bit, 128 x oversampling bitstream A to D Delay: 0.70ms @ 48 kHz... -
Page 54: Frequently Asked Questions
2. You will find this parameter in the I/O menu. instructions provided with the upload application. How do I set up a G-Major 2 with a MIDI- controllable preamp? I could not update the software of G-Major 2 G-Major 2 is easily set up for usage with a MIDI –... - Page 55 To sum it up: G-Major 2 will work with both serial and parallel loops, but for the reasons mentioned above, we recommend using G- Parallel loops offer two paths from the preamp Major 2 in a true serial loop/setup if technically to the power amp.
Need help?
Do you have a question about the G-MAJOR 2 and is the answer not in the manual?
Questions and answers