
Related Manuals for Prowise PW.1.17055.0001


Summary of Contents for Prowise PW.1.17055.0001
- Page 1 This user manual applies to the Prowise Touchscreens with the following model numbers: 55": PW.1.17055.0001 65": PW.1.17065.0001 75": PW.1.17075.0001 86": PW.1.17086.0001 ...
-
Page 2: Table Of Contents
5.2. Starting your device for the first time 28 5.3. Connecting to a network 29 Ethernet 29 Wi-Fi connection 29 5.4. Adjusting the volume 30 6. Prowise Central 31 6.1. Prowise Central home 31 www.prowise.com 2 / 44 ... - Page 3 10.1.2 VGA 39 10.1.3 DP 39 10.1.4 AV 39 10.1.5 USB-C 39 10.2. Connecting the Prowise touchscreen to audio equipment 40 10.2.1. Connecting headphones 40 10.2.2. Connecting an amplifier 41 10.2.3. Connecting using the HDMI port (ARC) 42 10.2.4. Connecting using the HDMI port (CEC) 43 ...
-
Page 4: Important Safety Instructions
2.2. Placement ● We recommend not to install the touchscreen yourself or by a third party. Let Prowise or a certified Prowise partner install or mount the touchscreen to avoid possible damage. Prowise can not be held responsible for any damage or injury caused by incorrect installation by third parties. Damage due to ... -
Page 5: Repair
This can cause injuries or damage to yourself and/or the touchscreen. Always contact Prowise or a certified partner in case of a defect, to avoid damage. Contact information can be found at: w ww.prowise.com/en/contact . ... -
Page 6: Recycling And Disposal
3. Installation A Prowise certified mechanic will install the Prowise touchscreen on delivery and will ensure the screen is ready for use. We do not recommend it, but if you or someone else wants to install the screen, then please follow the ... -
Page 7: Place Of Installation
The Prowise touchscreen can be used at an ambient temperature from 0 °C to +38 °C (32 °F to 100,4 °F) and relative humidity from 10% to 90% (without condensation). ... -
Page 8: Wi-Fi Module
are not sure about the power supply at the installation location, consult your energy company. 3.3. Wi-Fi module The Prowise touchscreen is equipped with a Wi-Fi module. Follow the steps below to successfully install the Wi-Fi module. ... -
Page 9: Install The Ops Pc Module
WARNING! Please make sure the power cable of the Prowise touchscreen is disconnected before installation. 3.4 Install the OPS PC module Follow the steps below to install the OPS PC module: (Please note the OPS PC module is optional) ... - Page 10 2. Remove the cover plate 3. Insert the OPS PC module into the slot www.prowise.com 10 / 44 ...
-
Page 11: Becoming Familiar With Your Product
4. Becoming familiar with your product We recommend not to install the touchscreen yourself or by a third party. Have Prowise or a certified partner install or mount your touchscreen to avoid possible damage. Always adjust the screen to the correct height before use. Avoid standing in a stooped or bent posture and ... -
Page 12: Product Specifications
Refresh rate 60Hz PC module slot Yes, OPS module Touch type Type ProWrite with InGlass™ Technology Multi-touch Yes (40 points) Multi-writing Yes (16 points) Auto-calibration Yes Resistant to sunlight Yes www.prowise.com 12 / 44 ... - Page 13 ProWrite Number of pens 2 Simultaneous writing with multiple colours Yes Simultaneous writing with multiple line Yes thicknesses Windows Ink support Yes Prowise Central Android version Android 8.0 Storage 32GB Memory 4GB www.prowise.com 13 / 44 ...
- Page 14 USB 2.0 (connection with lift system) 1 USB 3.0 1 Wi-Fi+BT Module Yes, 1x Wi-Fi 6 : 2.400 GHz ~ 2.4835 GHz (2.4GHz ISM Band) 802.11ax 2T2R WiFi a/b/g/n/ac/ax Bluetooth: 5.0 www.prowise.com 14 / 44 ...
- Page 15 Nominal power consumption (without modules) 140W Energy consumption in ECO mode 72W Energy consumption in on mode 120W Energy consumption in standby mode ≤ 0,5 Watt Gross weight 55 kg 121.2 lbs www.prowise.com 15 / 44 ...
- Page 16 VESA 100 x 100 mm Certification CE: EMC + LVD / FCC-IC / RoHS / UL + CB, RCM and Energy Star Warranty 5 years standard warranty (up to 8 years) www.prowise.com 16 / 44 ...
-
Page 17: In The Box
4.2. In the box www.prowise.com 17 / 44 ... - Page 18 Wi-Fi antenna (2x) ProWrite® pen with double writing functionality (2x) NFC card (2x) Pen tips (4x) 10. Cable box: 11. Safety instructions Prowise touchscreen 12. User manual Wi-Fi module 13. Power cord 14. USB touch cable 15. HDMI cable ...
-
Page 19: Product Overview
USB 3.0 Type B (Touch port) Display port 1.2 (DP 1.2) USB 3.0 Type B (Touch port) HDMI 2.0 Type A (HDCP2.2 CEC & ARC) USB 3.0 Type B (Touch port) LAN-IN port (RJ45) www.prowise.com 19 / 44 ... - Page 20 RS232 Serial Port USB 2.0 Type A USB 3.0 Type A H. AC input and Main Power Switch (front) AC input Main switch I. Ports (right) USB 3.0 Type A www.prowise.com 20 / 44 ...
-
Page 21: Touchscreen Control
4.4. Touchscreen control The Prowise touchscreen is fitted with 32-points multi-touch. The screen recognises up to 32 simultaneous touch points. This allows you to use the touchscreen with multiple people at once. To click on a part of the screen, gently tap with one ... -
Page 22: The Control Button
The LED inside the control button indicates the touchscreen’s status. ● The touchscreen is switched on: White ● Background lighting is disabled: White ● Sleep mode: Flashing red (every 2 seconds) Standby mode: Red ● www.prowise.com 22 / 44 ... -
Page 23: Microphone
The light sensor that determines the brightness of the screen is located here (if enabled). ● Two motion sensors in the bottom-left and bottom-right corners. ● PLEASE NOTE! To log in with an NFC card, the card must first be configured using the Prowise Central settings menu. ... -
Page 24: Prowrite® Technology
4.9. ProWrite® technology The Prowise Touchscreen Ten is equipped with two pens. These are conveniently located at the front of the screen and will automatically click into place when you hold a pen in front of the docking location. ... -
Page 25: Cleaning
Clean the screen with a dry, lint-free, microfibre cloth. Ensure this cloth is free of impurities. If you wish to use a cleaning agent, always use one recommended by Prowise. Do not use any aggressive cleansers as these can cause damage to the screen. ... -
Page 26: Getting Started
There are a few different options to turn on the touchscreen once activated: Press the control button located in the middle of the speaker bar of the touchscreen ● ● Press the on/off button on the supplied remote control www.prowise.com 26 / 44 ... -
Page 27: Disable
When no active input source has been detected in a specific input channel, a notification will appear after 1 minute to shut down the touchscreen. This notification will be automatically accepted after 15 seconds by the system and the touchscreen will be shut down. www.prowise.com 27 / 44 ... -
Page 28: Starting Your Device For The First Time
The welcome screen will appear and the Prowise Central environment will open right after that. Open the Prowise Central menu to get started on your touchscreen. Open the menu by placing 5 fingers of one hand on the screen for at least 2 seconds, by pressing the menu icon or by using the ... -
Page 29: Connecting To A Network
Make sure the Wi-Fi module is installed correctly Open the Central menu by clicking on the hamburger menu icon in the quick menu. Open the sidebar to access the settings menu www.prowise.com 29 / 44 ... -
Page 30: Adjusting The Volume
● With the Central menu: Adjust the volume with this feature of the Prowise Central menu. Drag the dot to the right to increase the volume and to the left to decrease the volume. Click on the mute button to ... -
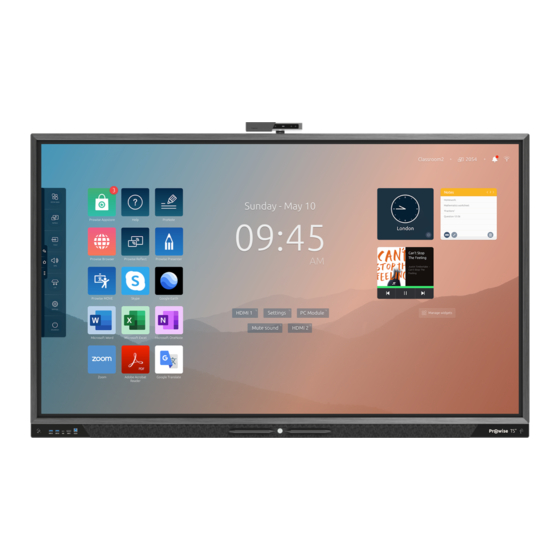
Page 31: Prowise Central
6. Prowise Central PLEASE NOTE! In the future, extra features will be added to Prowise Central. The updates for Central will be installed on the touchscreen via OTA updates. More information about OTA updates can be found in “OTA (Over-The-Air) updates”. ... -
Page 32: The Prowise Central Menu
Three dots: open the Prowise Central menu The Prowise Central menu unfolds on the left-hand side of the Prowise touchscreen. You can open the Prowise Central menu in three ways. Press the three stripes on the left-hand side of the screen ... -
Page 33: Changing The Settings
● Power button 7. Changing the settings The Central settings menu is located in the menu. Here you can adjust multiple settings of your Prowise touchscreen, such as: display and audio settings, connectivity, NFC and other settings. For more information about adjusting the settings in Prowise Central, please read the Prowise Central manual. ... -
Page 34: Remote Control
9. Remote control 9.1. Schematic overview and explanation of the buttons www.prowise.com 34 / 44 ... - Page 35 6 Navigation button – Down 7 Ok Confirm selection. 8 If an input other than Prowise Central home is active, this button can be used to return to Prowise Central home. 9 Freeze display. 10 Open input source Prowise Central. ...
-
Page 36: Angle At Which To Use The Remote Control
CAUTION! Any obstacles between the remote control and the receiver of the touchscreen can obstruct the signal and cause the remote control to not work properly. www.prowise.com 36 / 44 ... -
Page 37: Replacing The Batteries Of The Remote Control
The leaking chemicals are toxic and must never come into contact with the mouth, skin or eyes. PLEASE NOTE! Only use 1.5 V AAA batteries. Insert them as shown by the instructions on the remote control. www.prowise.com 37 / 44 ... -
Page 38: Connecting Auxiliary Equipment
HDMI source. PLEASE NOTE! W e recommend using a cable that is as short as possible for the best connection quality and is no longer than 3 metres. www.prowise.com 38 / 44 ... -
Page 39: Vga
The composite video signal is a signal that emits transmits both video and audio. You can connect the composite video with the Prowise Touchscreen with a 3.5mm Jack plug (Male with 3 rings) in the AV in port (Audio L, Audio ... -
Page 40: Connecting The Prowise Touchscreen To Audio Equipment
10.2. Connecting the Prowise touchscreen to audio equipment 10.2.1. Connecting headphones Connect headphones by plugging them into the analogue audio output “headphones”. Use the touchscreen’s volume control to adjust the headphones volume. ... -
Page 41: Connecting An Amplifier
If you connect an external audio device to the touchscreen and only wish to use this audio device, press the “Mute” button on the remote control or in the Central menu to turn off the touchscreen’s internal speakers. www.prowise.com 41 / 44 ... -
Page 42: Connecting Using The Hdmi Port (Arc)
HDMI cable into the touchscreen’s HDMI port with ARC support (3) and the other end in the external audio device’s HDMI port. www.prowise.com 42 / 44 ... -
Page 43: Connecting Using The Hdmi Port (Cec)
CEC. This allows these devices to be controlled via the touchscreen’s remote control. Connect a device via CEC by inserting an HDMI cable in the touchscreen’s HDMI port (3). www.prowise.com 43 / 44 ... -
Page 44: Appendix
This appendix describes the hardware interface specification and software protocols of RS232 interface communication between the touchscreen and the connected PC or other control unit with RS232 protocol. The RS232 code list can be found on www.prowise.com. Pin2 is TXD Pin3 is RXD. Pin to Pin connection as below. ...
Need help?
Do you have a question about the PW.1.17055.0001 and is the answer not in the manual?
Questions and answers
Hello, We are having some trouble with the lift of one of our ProWise TS screens. The screen is installed on a wall-mounted lift system with a foot pedal. But when we try to change the height of the screen, we only hear a beep but the screen doesn't move. We have tried to disconnect the power to the lift, but this doesn't seem possible since the cables just go into the wall and there is no apparent switch or plug we can unplug. So a reset of the lift is not possible as far as we can see. Is there any other way to reset the lift system without disconnecting the power to the lift?