
Related Manuals for Prowise ProLine Plus


Summary of Contents for Prowise ProLine Plus
- Page 1 Luchthavenweg 1B, 6021 PX Budel, The Netherlands | +31 (0) 495 49 71 10 | info@prowise.com | www.prowise.com KvK: 52893766 | BTW: NL850652443B01 | IBAN : NL73 INGB 0006113198 | BIC : INGBNL2A ...
- Page 2 2 4 6. Getting started 2 4 6.1. Turn the touchscreen on and off 2 4 6.2. Starting your device for the first time 2 6 6.3. Connect to a network 2 8 6.4. Adjust volume 2 9 7. Prowise Central 3 0 7.1.Prowise Central home 3 0 7.2.The Prowise Central menu 3 1 8. Adjust settings 3 2 ...
- Page 3 8.1. Display 3 2 8.2. Audio 3 3 8.3.Connectivity 3 3 8.4. General settings 3 5 8.5. Input 3 7 8.6.On/Off 3 8 9.OTA (Over The Air) updates 3 9 10. Remote control 4 0 10.1. Schematic view and explanation of the buttons 4 0 10.2. Angle at which remote control is used 4 2 10.3. Inserting the batteries ...
-
Page 4: Important Safety Instructions
touchscreen. 2.2.Placement We recommend you don’t install the touchscreen yourself or by a third party. Let Prowise or a ... - Page 5 hot air can escape. ● Only connect the touchscreen to an earthed electrical socket. 2.3.Repair Never repair the touchscreen yourself! WARNING! W arning for electrified parts! Never open the housing of the touchscreen! You can get an electric shock, cause a short circuit or even a fire. This can cause injuries or damage to yourself and/or the touchscreen. Always contact Prowise or a certified partner in case of a defect, to avoid damage. 2.4.Environment ● Unplug the power cable if the screen will not be used for an extended period. ● The power consumption in standby mode is <0.5 watts. When the touchscreen is no longer usable, it can be disposed of at a designated collection point. ● PLEASE NOTE! W hen WOL and WOS are activated, the power consumption in standby mode will increase! ...
-
Page 6: Recycling And Disposal
2.5.Recycling and disposal If you have questions about the correct disposal of your touchscreen, please contact Prowise or a certified partner. Packaging ... -
Page 7: Place Of Installation
3. Installation A Prowise certified mechanic will install the Pro Line+ Multi-touchscreen on delivery and will ensure the screen is ready for use. We do not recommend it, however if you want to install the screen yourself or by ... - Page 8 sustaining damage as a result of power surges or lightning strikes. 3.2.Cabling Only use the power cable supplied by Prowise to connect the ProLine+ Multi-touchscreen to the mains ...
-
Page 9: At First Glance
4. At first glance We recommend you not to install the touchscreen yourself or by a third party. Have Prowise or a certified ... - Page 10 Multi-touch 20-points touch Multi-writing 10 points Auto-calibration Yes Resistant to sunlight Yes Speakers 10W (front/tweeter) x 2 + 10W (Bass spk) x 2 Microphone Yes, wide-area ProWrite Ink pen Yes, Wide-area ProWrite Ink technology EMR Pressure sensitivity 2048 levels Hoover function Yes Hand-palm rejection Yes Power supply ProWrite Ink pen charging station (through induction) PC module slot Yes, OPS WiFi Yes Connectivity Intel AC-8265 (802.11ac, Dual Band 2.4 GHz & 5 GHz) WiFi band a/b/g/n/ac Bluetooth Bluetooth 4.2 Chipset Rockchip ARM Cortex A53 Quad Core and A72 Dual Core CPU 64-bit GPU Quad Core Mali-T860 (MP4) RAM capacity ...
-
Page 11: Package Contents
4.2. Package contents Manual ProLine+ 11 ... - Page 12 1. ProLine+ Multi-touchscreen 2. Welcome box: 3. Quick Start Guide 4. Safety instructions 5. Remote control 6. NFC card (2x) 7. 1.5V AAA batteries (2x) 8. WiFi antenna (2x) 9. ProWrite Ink pen box: 10. ProWrite® Ink pen 11. pentips (3x) 12. Pen tip removal tool 13. Cardboard box: 14. Power cable ~EU, UK, US and/or AUS WARNING! K eep the packaging material, such as plastic foil, out of reach from children. ...
-
Page 13: Product Overview
4.3. Product overview A. USB 3.0 (for webcam) B. OPS slot C. External inputs D. AC-IN and Power switch E. Control panel and charging station F. IR sensor For remote control/led status light/NFC card reader G. External inputs/outputs Manual ProLine+ 13 ... - Page 14 1. Wifi antenna ports 2. LAN port 3. USB-B port 4. HDMI 2.0 input ports (4K @ 60 Hz) 5. HDMI with ARC input (4K @ 60 Hz) 6. Displayport 1.2 (4K @ 60 Hz) 7. Power switch 8. AC IN 9. USB 2.0 (lift connection and service) 10. Analogue output headphones (audio) 11. Analogue audio output (L/R) 12. Digital Coax 13. RS232 Manual ProLine+ 14 ...
-
Page 15: Touchscreen Control
14. On/Off button 15. Prowise Central home button 16. USB 3.0 17. Status LED charging station 18. Charging station ProWrite Ink pen 4.4. Touchscreen control The ProLine+ Multi-touchscreen is fitted with 20-points multi-touch. The screen recognises up to 20 ... -
Page 16: Control Panel Buttons
Open Prowise Place five fingers of one hand on the screen for at Central menu least 2 seconds. The menu will appear. Right-click Tap and hold one finger on the screen for a few (context-menu) seconds for the right click function. (PC module) Slide one finger across the screen in the desired Scroll direction. The touchscreen can also be controlled by using a computer mouse or with the supplied remote control. ... - Page 17 Prowise Central button Press this button to navigate from a different input source back to the Prowise Central home ● environment. 4.6. Microphone The ProLine+ Multi-touchscreen has a wide area microphone. Use the microphone if a PC module is ...
- Page 18 4.8. Install the PC module Follow the steps below to install the PC module CAUTION! P lease ensure the power cable is not connected to the main power supply when installing the PC module. 1.
- Page 19 3. Insert the PC module into the slot 4. Tighten the lock screw of the PC module 5. Secure the WiFI antennas on the PC module Manual ProLine+ 19 ...
- Page 20 4.9. Cleaning Clean the screen with a dry, lint-free, microfibre cloth. Ensure this cloth is free of impurities. If you wish to use a cleanser, always use a cleanser recommended by Prowise. Do not use any aggressive ...
- Page 21 WARNING! I n the unlikely event that the touchscreen gets wet, do not turn the power on and do not insert the power cable into the electrical outlet. This can result in an electric ...
- Page 22 5.1. De ProWrite® Ink pen 1. Erase 2. Right mouse button 3. Palm rejection 4. Pressure-sensitive tip The charging station is a safe storage location for the ProWrite® Ink pen. The ProWrite® Ink pen will ...
- Page 23 5.2. ProWrite® Ink pen charging station The ProWrite® Ink pen charging station is located on the right-hand side of the touchscreen. Place the pen in the charging station to charge it. The LED indicator light at the top of the charging station indicates the ...
-
Page 24: Getting Started
5.3. ProWrite® Ink technology necessities Hardware: ● Prowise ProLine+ Multi-touchscreen ● Prowise ProWrite® Ink pen Operating system: ● Prowise Central Windows 10 ● ● Windows 7 and 8 (limited support) PLEASE NOTE! P rowise Central and Windows 10 support all the ProWrite Ink pen ... - Page 25 Turn off Using the on/off button of the control panel 1. Press the on/off button of the control panel. 2. The notification ‘The system will shut down in 15 seconds’ will appear. 3. Select ‘Shut down’ if you wish to turn off ...
-
Page 26: Starting Your Device For The First Time
Using Prowise Central 1. Launch the Prowise Central Menu by placing five fingers of one hand on the screen. 2. Open the sidebar. 3. Select the ‘power’ icon. 4. The notification ‘The system will shut down in 15 seconds’ will appear. 5. Select ‘Shutdown’ to shut the touchscreen down immediately, or wait 15 seconds for the ... - Page 27 5. Follow the steps of the setup guide to complete the setup. 6. Once you are connected to the internet the touchscreen will automatically check for updates. 7. The welcome screen will appear and the Prowise Central environment will open right after that. 8. Open the Prowise Central menu to get started with your touchscreen. Open the menu by placing 5 ...
-
Page 28: Connect To A Network
detect the network and connect to it as soon as ‘Ethernet’ has been activated in the settings menu. Follow the steps below to view the specifications of the network: 1. Place five fingers on the screen for at least 2 seconds to launch the Prowise Central menu. 2. Open the sidebar to access the settings menu. 3. Select the submenu ‘Connectivity’. 4. Select ‘Ethernet’ by activating the toggle. 5. The network specifications will be displayed. Manual ProLine+ 28 ... -
Page 29: Adjust Volume
6.4. Adjust volume The volume of the touchscreen can be adjusted in different ways: With the remote control: ● ○ Use the volume buttons to adjust the volume. ● With the Central Menu: 1. Place five fingers of one hand on the screen for at least 2 seconds to launch the Prowise ... - Page 30 Prowise Central. I n the future, extra functionalities will be added to Central. The updates ...
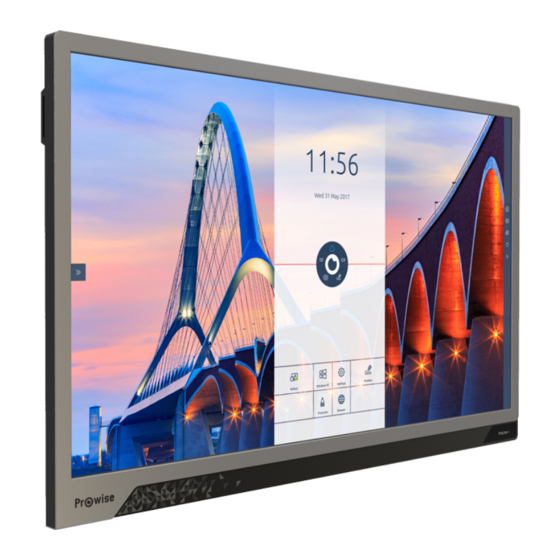
- Page 31 7.2.The Prowise Central menu Easily adjust the settings of the touchscreen and open ProNote and other applications in the Prowise Central menu. Change the position of the Prowise Central menu by dragging the circle over the screen and dropping it at your preferred position. The position of the sidebar can also be changed by selecting the arrows at the side of the screen. The sidebar will be displayed when opening the Prowise Central menu. Launch Prowise Central menu You can launch the Prowise Central menu in different ways: ● Place five fingers of one hand on the screen for at least 2 seconds. Press the Prowise Central menu button on the remote control. ● Manual ProLine+ 31 ...
-
Page 32: Adjust Settings
Close down the Prowise Central menu Click on the middle of the eye (inside circle of the Central menu) to close down the Prowise Central menu or press the “back” button on the remote control. The sidebar will close down as well. 8. Adjust settings The settings menu of Central is located in the sidebar. Here you can adjust multiple settings of your ... - Page 33 Choose from pre-installed colour settings or adjust the colour temperature. Depending on the chosen input source (PC, laptop, etc.), it is also possible to adjust the aspect ratio. 8.2. Audio To adjust the volume settings, select the “Audio” tab in the “Settings” menu. In this tab, use the sliders to ...
- Page 34 Ethernet It is also possible to connect to the Internet using a network cable. To do so, connect the network cable to ...
-
Page 35: General Settings
automatic updates. PLEASE NOTE! M ake sure the date and time in Prowise Central are set correctly to make ... - Page 36 Date and time The date and time can be edited in this submenu. For example, it is possible to choose between a 12-hour ...
- Page 37 module (OPS) or an external input source, such as an external PC or laptop. The touchscreen offers the choice between the following inputs: Prowise Central home ● ● PC (the PC module) ● HDMI 1 input (HDMI 2.0 (4K @ 60 Hz)) HDMI 2 input (HDMI 2.0 (4K @ 60 Hz)) ● ● HDMI 3 input (HDMI ARC 2.0 (4K @ 60 Hz)) ● DP input (Displayport 1.2 (4K @ 60 Hz)) The touchscreen displays a message if there is no active signal coming from the chosen input source. In ...
- Page 38 8.6.On/Off The On/Off button in the menu can be used to turn off the touchscreen. All activated programs will be ...
- Page 39 the touchscreen. The only thing required for OTA updates is a connection to the Internet with Prowise ...
-
Page 40: Remote Control
10. Remote control 10.1. Schematic view and explanation of the buttons Manual ProLine+ 40 ... - Page 41 Space button (PC module). 5 Alt-Tab Navigate between programs (PC module). 6 Alt-F4 Closes the current program (PC module). 7 Numeric keys (0-9) numeric selection buttons. 8 Freeze Pauses or resumes the current frame on the screen. The freeze function can also be disabled by touching the screen. 9 Display This button has been reserved for future updates. 10 Input Opens the Prowise Central input settings. 11 If an input other than Prowise Central home is active, this button can be used to return to Prowise Central home. 12 Opens the Prowise Central menu. 13 Coloured buttons (red, green, yellow These buttons are reserved for future updates. and blue) 14 Temporarily disables the screen. This is depicted in the form of a black screen. 15 Close the Prowise Central menu. ...
- Page 42 21 These buttons are reserved for future updates. 22 Opens the Prowise Central settings menu. 23 i These buttons are reserved for future updates. 24 ? These buttons are reserved for future updates. 25 These buttons are reserved for future updates. 26 VOL+ ; VOL- Adjust the volume 27 F1 - F12 Function keys (PC module). 10.2. Angle at which remote control is used To use the remote control, point it to the IR receiver of the touchscreen. The remote control has a range ...
-
Page 43: Inserting The Batteries
CAUTION! I f any obstacles are situated between the remote control and the receiver of the touchscreen, the remote control may not work properly. 10.3. Inserting the batteries Before using the remote control for the first time, you must insert the two (1.5V AAA) batteries, supplied with the remote control. Once the batteries are running out and the remote control is no longer working properly, you must change the batteries. You can do this as follows: 1. Carefully remove the cover plate on the reverse side of the remote control. 2. -
Page 44: Connect Peripherals
PLEASE NOTE! O nly use 1.5 V AAA batteries. Insert them as shown by the instructions on the remote control. 11.Connect peripherals 11.1.Connect the ProLine+ Multi-touchscreen to an external PC 11.1.1.Connect using a HDMI cable ... - Page 45 4. Once the touchscreen and the external PC have booted up, navigate in the Central menu to ‘Input’ and select the correct HDMI source. PLEASE NOTE! W e recommend using a cable that is as short as possible and is no longer ...
- Page 46 11.2.Connecting the ProLine+ Multi-touchscreen to audio equipment 11.2.1.Connecting headphones: Connect headphones by plugging them into the analogue output headphones (10). Use the touchscreen’s volume control to adjust the headphones volume. Manual ProLine+ ...
- Page 47 11.2.2.Connecting an amplifier Connect an amplifier by plugging it into the analogue audio output (11) or the digital Coax port (12). Use the amplifier’s volume control to adjust the amplifier’s volume. ...
- Page 48 11.2.3.Connecting using the HDMI port (ARC): It is possible to connect an external audio device using an ARC (Audio Return Channel) connection. This allows the external audio device to be controlled via the touchscreen. To connect an audio device via ARC, ...
- Page 49 11.2.4.Connecting using the HDMI port (CEC) CEC (Consumer Electronics Control) is a functionality that works via HDMI. The devices that are connected to each other in this way communicate via CEC. This allows these devices to be controlled via the ...
- Page 50 Appendix RS232 Protocol and Code list This appendix describes the hardware interface specification and software protocols of RS232 interface communication between the touchscreen and the connected PC or other control unit with RS232 protocol. Pin2 is TXD Pin3 is RXD. Pin to Pin connection as below. Serial Port Settings Items Value Baud Rate 9600bps (fixed) Data Bits 8 (fixed) Stop Bits 1 (fixed) Parity None (fixed) Stream Control None (fixed) Manual ProLine+ 50 ...
-
Page 51: Protocol Description
Power Power off AA BB CC 01 01 00 02 DD EE FF HDMI 1 AA BB CC 02 06 00 08 DD EE FF HDMI 2 AA BB CC 02 07 00 09 DD EE FF HDMI 3 AA BB CC 02 05 00 07 DD EE FF Source DP AA BB CC 02 09 00 0B DD EE FF PC AA BB CC 02 08 00 0A DD EE FF Prowise Central(Android) AA BB CC 02 0A 00 0C DD EE FF Volume AA BB CC 03 00 xx ** DD EE FF Range : 0 ~ 100 Mute AA BB CC 03 01 00 04 DD EE FF Unmute AA BB CC 03 01 01 05 DD EE FF Bass AA BB CC 03 07 xx ** DD EE FF Range : 0 ~ 100 Treble AA BB CC 03 08 xx ** DD EE FF Range : 0 ~ 100 Audio Balance ... - Page 52 User menu : Both AA BB CC 38 03 03 3E DD EE FF TBD(App) Key lock : Off AA BB CC 38 04 00 3C DD EE FF Key lock : On AA BB CC 38 04 01 3D DD EE FF IR lock : Off AA BB CC 38 05 00 3D DD EE FF IR lock : On AA BB CC 38 05 01 3E DD EE FF Touch : Off AA BB CC 38 07 00 3F DD EE FF Touch : On AA BB CC 38 07 01 40 DD EE FF RS232 : Off AA BB CC 38 08 00 40 DD EE FF RS232 : On N/A PC Power ON AA BB CC 09 01 00 0A DD EE FF PC PC Power OFF AA BB CC 09 00 00 09 DD EE FF WIN AA BB CC 07 0B 00 12 DD EE FF Space AA BB CC 07 46 00 4D DD EE FF Alt+Tab AA BB CC 07 1D 00 24 DD EE FF Alt+F4 AA BB CC 07 1F 00 26 DD EE FF ...
- Page 53 AA BB CC 80 01 00 81 DD EE FF Stand-by AA BB CC 81 06 00 87 DD EE FF HDMI 1 AA BB CC 81 07 00 88 DD EE FF HDMI 2 AA BB CC 81 05 00 86 DD EE FF HDMI 3 Source Obtain Input AA BB CC 02 00 00 02 DD EE FF AA BB CC 81 09 00 8A DD EE FF DP AA BB CC 81 08 00 89 DD EE FF PC Prowise AA BB CC 81 0A 00 8B DD EE FF Central(Android) Obtain Volume AA BB CC 03 02 00 05 DD EE FF AA BB CC 82 00 xx ** DD EE FF Volume Level Obtain Mute AA BB CC 03 03 00 06 DD EE FF AA BB CC 82 01 00 83 DD EE FF Muted AA BB CC 82 01 01 84 DD EE FF Unmuted Obtain Bass AA BB CC 39 08 00 41 DD EE FF AA BB CC 40 08 xx ** DD EE FF Bass Level Obtain Treble AA BB CC 39 09 00 42 DD EE FF AA BB CC 40 09 xx ** DD EE FF Treble Level Audio ...
Need help?
Do you have a question about the ProLine Plus and is the answer not in the manual?
Questions and answers