Advertisement
1. MOUNTING THE DOCK:
Voyager Pro's dock is made to be bolted to the vehicle. Use the
mounting hardware included in your kit or any AMPs style mount
from RAM Mounts rammount.com. Voyager Pro snaps in and out
of the dock for quick removal when not in use.
·
Voyager Pro can be locked to the dock using the included 1.5mm
Allen wrench. Turn either way to lock, set to center to unlock.
·
Add dielectric grease to the dock's pins to increase lifespan and
add protection against water.
2. VEHICLE SENSORS:
The vehicle power connection must be installed. Install the
ignition sensor to enable tach features. Install the engine temp
sensor to enable engine temp features. Voyager Pro comes set
default to "GPS speed." Optional wheel speed sensors can be
found at trailtech.net.
3. DC POWER:
·
DC power required.
Do not connect Voyager Pro to AC power
except when using the AC wall charger. Connect to a switched
12V DC power source to ensure power to Voyager Pro is cut
when the vehicle is turned off (protects against a dead battery.)
·
When wired behind the key switch and set to CHARGE-ALWAYS,
charging will begin immediately. Or, use the tach ignition sensor with
the CHARGE-WHEN-RUNNING vehicle profile setting.
·
Voyager Pro will run approximately one hour on a full battery charge
without external power. Remove it from the vehicle for route planning
and file uploading at your computer.
·
The below menu options need to be changed when Voyager Pro is
used without a connection to vehicle power:
1. Vehicle Profile > Wake Detection, Speed Source, Charge Mode
2. Maps and GPS Setup > AutoLog Source
·
NOTE: On some bikes, erratic tach readings can be fixed by wiring the
power directly to the battery instead of behind the key switch.
4. USER MANUAL:
The user manual is embedded in Voyager Pro.
Open the user manual by pressing the "?" icon.
Look for "User's Guide" at the bottom of the
main menu or go online to trailtech.net.
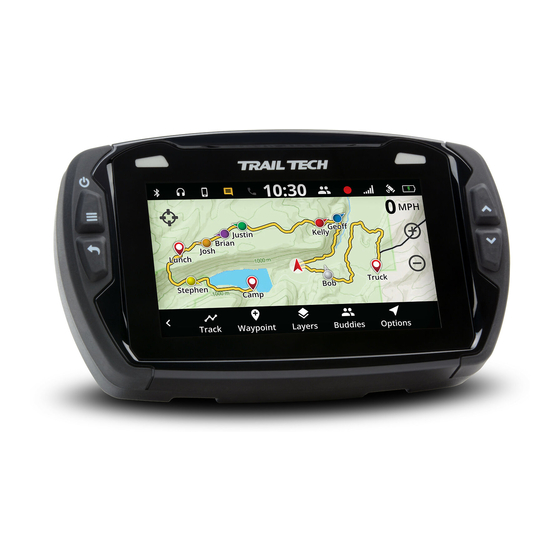
5. MAIN SCREENS:
Voyager Pro has several main screens. Press UP and DOWN on the
buttons to move between screens. Press the menu button to open the
main menu. On some screens, like the map screen, press the back button to open a sub-menu with screen-specific options.
6. ENABLE SCREENS:
Voyager Pro has a series of main information screens. Screens can be enabled/disabled in the settings menu. By default, the stop watch and
satellite screens are hidden. Available screens include: the gauge cluster screen with a large speedometer, the tach screen with an animated
tach graph, the map screen, the user definable screen, Bluetooth media screen, the stop watch screen, and the GPS satellites screen.
QUICK-START
MicroSD
Card Slot
Press Here on
Map Screen to
Open the
Slideout Menu
Tech Support: (844) 378-8143
technicalservice@apexproductgroup.com
Press Button to Release
Voyager Pro From Dock
Hydrophobic Vent
Allen Wrench
Locking Slot
010-ELV-192
GPS Antenna Port
Sensor
Buddy Tracking
Wires
Antenna Port
Advertisement
Table of Contents

Related Manuals for Trail Tech VOYAGER PRO


Summary of Contents for Trail Tech VOYAGER PRO
- Page 1 6. ENABLE SCREENS: Voyager Pro has a series of main information screens. Screens can be enabled/disabled in the settings menu. By default, the stop watch and satellite screens are hidden. Available screens include: the gauge cluster screen with a large speedometer, the tach screen with an animated...
-
Page 2: Quick Start
QUICK-START 7. MICROSD CARD SLOT: A MicroSD card (not included in kits) enables transfer of tracks between Voyager Pro and a PC. During operation, make sure the card slot cover is properly seated to keep debris out. Tracks saved as GPX files on your computer can be placed on the MicroSD card, then imported onto Voyager Pro for viewing and route following. -
Page 3: Power Connection
Vehicles with AC Power: Use the Voyager Pro AC wall charger, or upgrade to a DC electrical system. Most carbureted MX bikes put out AC power, but Voyager Pro requires DC power. -
Page 4: Temperature Sensors
TEMPERATURE SENSORS AND ANTENNAS INSTALLS TEMPERATURE SENSORS: Most Voyager Pro kits contain a model-specific temperature sensor. Installing the temperature sensor Radiator Fin enables temperature readouts on Voyager Pro’s gauge screens. Alternative sensors are available. Sensor Installation: Vehicles cooled with water use sensors to measure the fluid temperature, while air-cooled machines take Confirm correct size. -
Page 5: Mounting Options
Pro dock. Included in 9200-1000 Voyager Pro kits. UTV ROPS MOUNT: RAM mount for mounting Voyager Pro to a steering column or UTV HANDLEBAR roll cage. Safely conceals the strap clamp in a compact housing, so CENTER you won’t have to worry about exposed sharp edges or unwanted MOUNT: loosening.
Need help?
Do you have a question about the VOYAGER PRO and is the answer not in the manual?
Questions and answers