Whirlpool RBD277PD Use And Care Manual
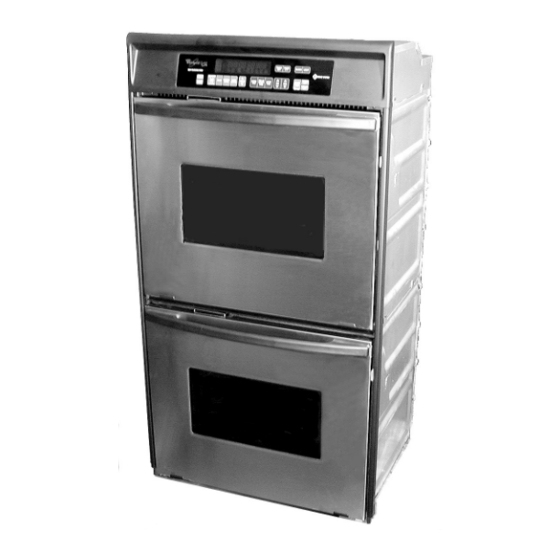
Electric built-in thermal-convection ovens
Hide thumbs
Also See for RBD277PD:
- Use and care manual (52 pages) ,
- Use and care manual (52 pages) ,
- Manual (59 pages)
Table of Contents
Advertisement
Quick Links
Download this manual
See also:
Manual
TKitil
01
4a
UseAndCare
Table of Contents
(complete) . . . . . . . . . . . . . . . . . . . 2
A Note to You . . . . . . . . . . . . . . . . . 3
Oven Safety . . . . . . . . . . . . . . . . . . . . 4
Your Oven . . . . . . . . . . . . . . . . . . . . . . 6
Using Your Oven . . . . . . . . . . . 7
Self-Cleaning Cycle . . . . . 33
Caring for
Your Oven . . . . . . . . . . . . . . . . . . . . 41
. . . . . . . . . . 43
or Service . . . . . . . . . . . . . . . . . . . . . 45
Index . . . . . . . . . . . . . . . . . . . . . . . . . . . . . 47
Warranty . . . . . . . . . . . . . . . . . . . . . . . 46
1-800-253-1301
In the U.S.A., call us with
questions
or comments.
ELECTRIC BUILT-IN THERMAL-CONVECTION
OVENS
PART NO. 4449366
MODELS
RBS277PD
RBS307PD
RBD277PD
RBD307PD
5195
Advertisement
Table of Contents

Related Manuals for Whirlpool RBD277PD


Summary of Contents for Whirlpool RBD277PD
-
Page 1: Table Of Contents
Warranty ..... . . 46 1-800-253-1301 In the U.S.A., call us with questions or comments. OVENS RBS307PD RBD277PD ..43 RBD307PD 5195... - Page 2 Table of Contents A Note to You ... 3 Oven Safety ... 4 Getting to Know Your Oven ... 6 Using Your Oven ... 7 Positioning racks and pans ... 7 For best air circulation Using aluminum foil for baking ... 8 The electronic oven control ...
-
Page 3: A Note To You
A Note to You Thank you for buying a WHIRLPOOL* Because your life is getting busier and more complicated, use, save time, and help you manage your home better. To ensure that you enjoy years of trouble-free operation, we developed this Use and Care Guide. It is full of valuable information about how to operate and maintain your appliance properly and safely. -
Page 4: Oven Safety
Oven Safety Your safety is important to us. This guide contains safety statements under warning symbols. Please pay special attention to these symbols and follow any instructions given. Here is a brief explana- tion of the use of the symbol. IMPORTANT SAFETY General... - Page 5 ADO not heat unopened containers. They could explode. The hot contents could cause burns and container particles could cause injury. @Use only utensils approved for oven use. Follow utensil manu- facturer’s instructions, especially when using glass or plastic utensils. @Do not store flammable materials on or near the oven.
-
Page 6: Getting To Know Your Oven
This section tells you what features your oven has and where they are located. Please review this information before using your oven. To help you find information on specific parts or features quickly, page references are included. Feature locations (Models RBD277PD and RBD307PD II _ .! Oven lock latch III I Convection... -
Page 7: Using Your Oven
Using Your Oven To obtain the best cooking results possible, you must operate your oven properly. This section gives you important information for efficient and safe use of your oven. Positioning racks and pans For baking/roasting with one rack, the rack so the top of the food will be centered in the oven. -
Page 8: Using Aluminum Foil For Baking
The electronic oven control (Models RBD277PD and RBD307PD NOTE: Displays shown are from single/upper ovens. In some cases, lower oven displays and single oven command pads may look differ- ent than those shown. -
Page 9: Starting A Function
When showing the time of day, display will show the hour and minutes. When you are using the Minute Timer, the display will show hours, minutes, and seconds in the following sequence: - For settings from 1-59 minutes, display will count down each second (minutes and seconds displayed). -
Page 10: Canceling A Function
Canceling a function The Off/Cancel padwill cancel any function except for the Clock . . . and Timer Set func- ’ tions. When you press ’ the Off/Cancel pad, lllll the display will show (single ldouble the time of day or if ovens) ovens) Minute Timer is also... - Page 11 1, Press Timer Set pad. 2. Set time. Press the “up” (A) or “down” (V) pad(s) until the correct time shows on the display. 3. Start Minute Timer. The Minute Timer will begin counting down immediately after the timer is started.
-
Page 12: Audible Signals
Audible signals Audible signals tell you if a function is entered correctly or not. They also tell you when a cycle is completed. To shut off all signals except for error tones and the hidden function signal: Press and hold the Stop Time pad for 5 seconds. -
Page 13: Oven Settings
Oven settings This chart tells you when to use each setting. It also explains what elements heat up for each setting. SElTING DIAGRAM BAKE Use this setting for baking and heating casseroles. BROIL Use this setting for broiling regular-sized and smaller cuts of meat, poultry, and fish. - Page 14 1. Position racks. For more information, see “Positioning racks and pans” on page 7. NOTE: When roasting, use the roasting rack that comes with your oven. Place it on the broiler pan (that also comes with your oven). (The roasting rack rests on the broiler pan, not inside it.) The long side of the rack should be parallel with the oven door for best heat distribution...
- Page 15 5. Press the Start/Enter pad. A preheat time will count down on the display. The oven control automatically sets preheat times depending on the oven temperature you select: Single ovens: TEMPERATURE PREHEAT TIME [in “F) tin min. and sec.) b-325 5:45 7:30 1 325-375...
-
Page 16: Convection Baking Tips
7. After cooking, turn off oven. Convection baking (convection pad) Do not use aluminum foil when convection baking. Aluminum foil may block airflow. Reduce recommended recipe oven temperature by approximately 25°F. See recipe adaption chart in the convection oven cookbook for recommended tem- peratures. - Page 17 1. Press and hold Bake pad for Set new offset temperature. Press A to raise the temperature or V to lower the temperature in 10°F amounts. You can set the temperature change to as low as -30°F or as high as +3O”F. A minus (-) sign will appear before the number when decreasing the tempera- ture setting to show the oven will be...
-
Page 18: Broiling
Broiling Displays shown are from single/upper NOTE: ovens. Command pads shown are from double ovens. In some cases, lower oven displays and single oven command pads may look different than those shown. 1. Position rack. See “Broiling rack position chart” on page 19. - Page 19 To custom broil at a lower If food is cooking too fast, press the Custom Broil pad and press the V Temp pad until “325°F” shows on the small display. Press the Start/Enter pad. NOTE: If the Temp pads are held down the temperature will change faster.
-
Page 20: Broiling Tips
Broiling tips the broiler pan and grid for broiling. They are designed to drain excess liquid and grease away from the cooking surface to help prevent spatter, smoke, or fire. After broiling, remove the broiler pan from the oven when you remove the food. Drippings will bake on the pan if you leave it in the heated oven. - Page 21 To start baking/roasting now and stop automatically: Method l-Using Cook Time: 1. Prepare oven. Position the oven rack(s) properly and put food in the oven. For correct rack placement, see “Positioning racks and pans” on page 7. 2. Choose setting. NOTE: On single/upper ovens, you can...
- Page 22 6. Start oven. NOTES: @YOU can change the temperature time settings any time after pressing the Start/Enter pad by repeating Steps 2 through 6. @The display will show “door” and the heating elements will not heat if the door is open when you try to bake/ roast.
- Page 23 Method 2-Using Stop Time: 1. Prepare oven. Position the oven rack(s) properly and put food in the oven. For correct rack placement, see “Positioning racks and pans” on page 7. 2. Choose setting. NOTE: On single/upper ovens, you can set the oven for convection baking by pressing CONVECT instead of BAKE.
- Page 24 6. Start oven. 2 through 6. The display will show “door” and the heating elements will not heat if the door is open when you try to bake/ roast. When you press the Start/Enter pad, the display will count down the baking/ roasting time in hours and minutes (if cook time is more than one hour) or in minutes and seconds (if cook time is...
- Page 25 To delay start and stop automatically: Method l-Using Cook Time and Delay Start Time: 1. Prepare oven. Position the oven rack(s) properly and put food in the oven. For correct rack placement, see “Positioning racks and pans” on page 7. 2.
- Page 26 6. Press Delav Start Time pad. 7. Set start time. time plus the set cook time). 8. Complete entry. NOTES: You can change the temperature or time settings any time after pressing the Stat-t/Enter Dad by repeating Steps 2 through 6. ’...
- Page 27 11. Turn off oven. NOTE: You can do this step any time to cancel the MEALTIMER* control setting. Method 2-Using Delay Start Time and Stop Time: 1. Prepare oven. Position the oven rack(s) properly and put food in the oven. For correct rack placement, see “Positioning racks and pans”...
- Page 28 5. Set start time. Press the “up” (A) or “down” (V) pad(s) until the correct time shows on the display. Example at right shows a desired start time of 2 o’clock. 6. Press Stop Time pad. 7. Set stop time. 30iminute cook time (the difference between the start and stop times).
- Page 29 10. When baking/roasting is done: The oven will turn off automatically beep four times. You will also hear four 1 -second tones every minute until you press the Off/Cancel pad. NOTE: To disable reminder tones, press and hold the Cook Time pad for 5 seconds.
- Page 30 3. Set temperature (optional). Do this step if you want to set a tempera- ture other than 350°F. Press A to raise the temperature or V to lower the temperature in 5°F amounts. Use these pads until the desired temperature shows on the small display.
- Page 31 8. Complete entrv. 2 through 8. The display will show “door” and the heating elements will not heat if the door is open when you try to bake/roast. 9. When start time is reached: A 1 -second tone will sound. The display will count down the baking/roasting in hours and minutes (if cook time is more than one hour) or in minutes and...
-
Page 32: The Oven Vent(S)
To avoid sickness and food waste when using the MEALTIMER’ control: Do not let most UNFROZEN food stand for more than two hours before cooking starts. Do not allow food to remain in oven for more than two hours after the end of cooking cycle. -
Page 33: Using The Self-Cleaning Cycle
Using the Self-Cleaning Cycle The Self-Cleaning cycle saves you from the toil and mess that often come with hand-cleaning the oven interior. Like the other functions of your oven, you operate the Self-Cleaning with the easy-to-use electronic control. Please review the instructions your oven spotless. -
Page 34: Before Setting The Controls
Before setting the controls @Make sure clock is set to correct time of day. (See “Setting the clock” on page 10.) l Make sure the oven door is completely closed. Setting the controls NOTE: Displays shown are from single/ upper ovens. Command pads shown are from double ovens. - Page 35 3. Start oven. NOTE: The display will show “door” and a tone will sound once every 5 seconds if the door is not closed. 4. After Self-Cleaning cycle starts: LOCKED lights up on the display. The door cannot be opened when LOCKED is on.
- Page 36 To delay start using stop time: 2. Set cleaning time (optional). If you want a Self-Cleaning cycle longer or shorter than 3’/2 hours, use the Hour pad to set the desired cleaning time. Press the “up” (A) or “down” (V) pad(s) until a time between 21/2-41/2 hours shows on the display.
- Page 37 6. After Self-Cleaning cycle starts: LOCKED lights up on the display. The door cannot be opened when LOCKED is on. 7. After Self-Cleaning cycle ends: YOU SEE YOU SEE (example for 5:30 stop time) YOU SEE...
- Page 38 To delay start using delay 1. Press Auto Clean pad. A 3’/2-hour Self-Cleaning cycle will be set automatically. 2. Set cleaning time (optional). If you want a Self-Cleaning cycle longer or shorter than 3’/2 hours, use the Hour pad to set the desired cleaning time. Press the “up”...
- Page 39 6. After Self-Cleaning cycle starts: LOCKED lights up on the display. The door cannot be opened when LOCKED is on. 7. After Self-Cleaning cycle ends: NOTES: .The stop time will be the start time plus the cleaning time. *The fan may stay on after the Self- Cleaning cycle ends, until the oven cavity reaches a certain temperature.
-
Page 40: Special Tips
Special tips Keep the kitchen well ventilated during the Self-Cleaning cycle to help get rid of heat, odors, and smoke. After the oven is cool, wipe up any residue or ash with a damp cloth or sponge. If any spots remain, clean with a mild abrasive cleanser or cleaning sponge. -
Page 41: Caring For Your Oven
Caring for Your Oven Your oven is designed for easy care. You can do most cleaning with items found around your home. Cleaning your oven whenever spills or soiling occurs will help to keep it looking and operating like new. Cleaning chart Use the following table to help you clean your oven. -
Page 42: The Oven Lights
PART WHAT TO USE Oven door glass Paper towel and spray glass cleaner Warm, soapy water and a nonabrasive, scrubbing pad Oven cavity Self-Cleaning cycle The oven lights The oven lights will come on when you open the oven door. To turn the lights on when the oven door is closed, press the Oven Light Pad non the control panel. -
Page 43: Troubleshooting
Troubleshooting Most cooking problems often are caused by little things you can find and fix without tools of any kind. Check the lists below and on the next page before calling for assistance or service. If you still need help, see “Requesting If nothing operates, check... -
Page 44: Requesting
PROBLEM CAUSE Cooking results are not The oven is not level. (See Installation what you expected The oven temperature “Adjusting the oven temperature control” on page 16 to adjust oven temperature. You did not preheat the oven before baking (if called for in recipe). -
Page 45: Requesting Assistance Or Service
WHIRLPOOL To locate FSP replacement area, refer to Step 2 or call the Whirlpool Consumer Assistance Center number in Step 1. 4. If you are not satisfied... - Page 46 In Canada: lnglis Limited** Consumer Direct service branches: BRITISH COLUMBIA Vancouver Vlctorla ALBERTA Calgary Edmonton ONTARIO Toronto (Mlsslssauga) Toronto (Markham) Ottawa SASKATCHEWAN Reglna Saskatoon MANITOBA Wlnnlpeg QUEBEC Montreal (Laval) Brossard Quebec City Sherbrwke (Rock Forest) NOVA SCOTIA Dartmouth For service in areas other than those listed, contact your Appliance Appliance Service Service...
-
Page 47: Index
Index This index is alphabetical. It contains all the topics included in this manual, along with the page(s) on which you can find each topic. TOPIC ASSISTANCE.. BAKING Aluminum foil..Pans ... Setting cycle ... BROILING Grid ... Pan..Rack position chart.. -
Page 48: Warranty
WHIRLPOOL* Electric Built-In Oven Warranty 1 LENGTH OF WARRANTY 1 WHIRLPOOL WILL PAY FOR FULL ONE-YEAR FSP’ replacement parts and repair labor to correct defects WARRANTY in materials or workmanship. From Date of Purchase an authorized Whirlpool service company. WHIRLPOOL WILL NOT PAY FOR Service calls to: 1 .Correct the installation of your built-in oven.