Table of Contents
Advertisement
Available languages
Available languages
Advertisement
Chapters
Table of Contents

Related Manuals for Tchibo Cafissimo LATTE HD8603


Summary of Contents for Tchibo Cafissimo LATTE HD8603
-
Page 7: Table Of Contents
HD8603 TC. No.: 301239 TC. No.: 300082 TC. No.: 300079 TC. No.: 301241 TC. No.: 300084 TC. No.: 300081 BEDIENUNGSANLEITUNG DIE BEDIENUNGSANLEITUNG IST AUFMERKSAM ZU LESEN Inhalt WICHTIG ................2 Aufgeschäumte Milch ................. 8 Einstellung Menge aufgeschäumte Milch in der Tasse ......... 9 Sicherheitshinweise .................. -
Page 8: Wichtig
• 2 • • Lassen Sie das Gerät während des Betriebs WICHTIG nie unbeaufsichtigt. sicherheitshinweise • Das Gerät ist mit rutschfesten Füßen aus- Das Gerät ist mit Sicherheitsvorrichtungen aus- gestattet. Die Arbeitsflächen sind mit ei- gestattet. Lesen Sie trotzdem aufmerksam die Si- ner Vielfalt von Lacken und Kunststoffen beschichtet und werden mit verschiedens- cherheitshinweise, um eventuelle Personen- und... -
Page 9: Hinweise
Heizgeräten oder ähnlichen Wärmequel- Dieses Gerät entspricht den Vorgaben der len. Europäischen Richtlinie 2012/19/EU für • Legen Sie ausschließlich Tchibo Cafissimo Elektro- und Elektronik-Altgeräte und der Kapseln in das Kapselfach ein. Werden an- Europäischen Richtlinie 2011/65/UE zur Be- dere Dinge hineingesteckt, kann das Gerät schränkung der Verwendung bestimmter... -
Page 10: Gesamtansicht Des Geräts
• 4 • GesaMtansicht des Geräts Taste ON/OFF (grün) Ausgabetaste Espresso Ausgabetaste Cappuccino (weiß) (weiß) Ausgabetaste Caffè Crema Ausgabetaste Aufgeschäumte Milch (gelb) (weiß) Ausgabetaste Filterkaffee Taste Spülung Milchsystem (blau) (orange) Hinweis-Lampe (orange) Deckel Wassertank Öffnungshebel Kapselfach Herausnehmbarer Wassertank Kapselfach Dampfaustrittsöffnungen Milchkaraffe Anschluss Milchkaraffe Deckel Milchkaraffe... -
Page 11: Aufstellung
• 5 • aufstellunG 1- Den Wassertank ausspülen und mit frischem Trinkwasser füllen. Vorbereitung 2- Einen Becher unter den Kaffeeauslauf Das Gerät aus der Verpackung nehmen und an einem geeigne- stellen, wie in der Abbildung gezeigt. ten Ort aufstellen. erste inbetriebnahme 3- Die Taste Caffè... -
Page 12: Kaffeezubereitung
• 6 • Tasse für Filterkaffee oder Cappucci- : Kaffeeauslauf oben und Abtropf- schale in äußerer Position. abb. 1 abb. 2 abb. 3 Glas für aufgeschäumte Milch : Kaffee- 1- Eine Espressotasse, eine Tasse oder ein Glas unter den Kaffee- auslauf oben und Abtropfschale in innerer auslauf stellen, wie im Abschnitt “Einstellung der Ausgabehöhe”... -
Page 13: Zurücksetzung Auf Voreingestellte Mengen
• 7 • füllung der Karaffe Bei jedem Druck der Taste Espresso , Caffè Crema oder Filterkaffee gibt das Gerät eine programmierte Kaffeemenge aus. Vor dem Gebrauch muss die Karaffe unter fließendem Wasser gereinigt werden. Espresso etwa 40ml Caffè Crema etwa 125ml Für einen Cappuccino guter Qualität sollte kalte milch Filterkaffee etwa 125ml (~5°C / 41°F) mit einem Fettgehalt von mindestens... -
Page 14: Cappuccino / Aufgeschäumte Milch / Latte Macchiato
• 8 • caPPuccinO / aufGeschäuMte 1- Die Kapsel Espresso in das entsprechende Fach einlegen. Milch / latte MacchiatO 2- Setzen Sie die Karaffe in das Gerät ein und überprüfen Sie, dass ausreichend Milch eingefüllt ist, sicherstellen, dass der Füllstand achtung! Beim start können heiße Wasserspritzer aus- über der Anzeige MIN liegt. -
Page 15: Einstellung Menge Aufgeschäumte Milch In Der Tasse
• 9 • 3- Ein Glas unter den Milchauslauf stellen. Sekunden lang gedrückt, wenn sich das Gerät in Standby befindet. Zur Bestätigung blinken alle Tasten zwei Mal. 4- KEINE Kapsel in das Kapselfach einlegen. 5- Die Taste Aufgeschäumte Milch drücken . latte Macchiato 6- Die Taste Aufgeschäumte Milch blinkt;... -
Page 16: Spülung Milchsystem
• 10 • abtropfschale und auffangbehälter für leere 13- Den Hebel nach oben führen, um die leere Kapsel in den ent- sprechenden Auffangbehälter für leere Kapseln auszuwerfen. Kapseln 14- Die Tasse oder das Glas vom Abtropfgitter nehmen. Nach ca. 8-10 Kaffeezubereitungen muss der Auffangbehälter für leere Kapseln geleert werden. -
Page 17: Wassertank
• 11 • Wöchentliche reinigung Milchkaraffe 8- Nachdem alle Teile gereinigt und getrocknet wurden, wird Die Milchkaraffe muss, wenn sie benutzt wurde, wöchentlich Auffangbehälter für leere Kapseln gereinigt werden. Diese Reinigung muss zusätzlich zur normalen wieder eingesetzt. Spülung nach der Ausgabe der einzelnen Produkte mit Milch vorgenommen werden. -
Page 18: Monatliche Reinigung Milchkaraffe
• 12 • Monatliche reinigung Milchkaraffe 10- Den Auslauf aus dem Anschlussstück herausziehen. Um die Ablagerung von Milchrückständen im gesamten System zu vermeiden und die optimale Leistung der Karaffe langfristig zu gewährleisten, empfehlen wir, monatlich einen Reinigungszyklus mit dem separat erhältlichen „Saeco Milk Circuit Cleaner“... -
Page 19: Entkalken
• 13 • das Gerät darf keiner Temperatur unter 0 °C ausge- Espresso (weiß) leuchtet dauerhaft auf, um die erste Phase setzt werden, da das Wasser in den systemen gefrie- des Entkalkens anzuzeigen. ren kann (auch wenn der Tank geleert wurde). Während des entkalkens wird die Funktion der Taste On/Off (grün) unterdrückt. -
Page 20: Anzeigen Des Geräts
• 14 • anZeiGen des Geräts entsOrGunG - Langsam blinkend Gemäß der richtlinie 2012/19/eU über elektro- und elektro- Gerät in Aufheizphase. nik-altgeräte (eeaG), und insbesondere anhang IX: Das Symbol mit dem durchgestrichenen Mülleimer auf dem Gerät oder auf seiner Verpackung gibt an, dass das Produkt zum Ende seines Betriebslebens getrennt vom Hausmüll entsorgt werden muss. -
Page 21: Problemlösung
• 15 • PrOBleMlösunG Verhalten Ursachen abhilfe Das Gerät schaltet sich nicht ein. Das Gerät ist nicht an das Stromnetz angeschlossen. Netzstecker in die Steckdose stecken. Wenden Sie sich an die Cafissimo-Hotline.. Das Gerät braucht sehr viel Zeit zum Aufheizen. Das Gerät weist starke Kalkablagerungen auf. -
Page 22: Kundendienstzentren Und Garantie
Material- oder Herstellfehler. Voraussetzung für die jeweils inkl. gesetzl. USt.) Gewährung der Garantie ist die Vorlage eines Kaufbelegs von Tchibo oder eines von SAECO autorisierten Vertriebspartners. Montag – Sonntag Montag – Sonntag Sollte sich wider Erwarten ein Mangel herausstellen, rufen... - Page 23 Just press a button and your Cafissimo LATTE by Saeco will take care of the rest. Tchibo and Saeco teams of experts have partnered to optimally harmonise the machine and capsules to bring out the full aroma of your coffee.
- Page 24 Caffè Crema Blue cup / Filter Coffee The Cafissimo aroma capsules You will find the unique Tchibo Arabica quality The advantages of the capsules: in each and every Cafissimo aroma capsule. • the airtight seal ensures aromatic, fresh Sealed airtight, they preserve their full aroma coffee until they are brewed.
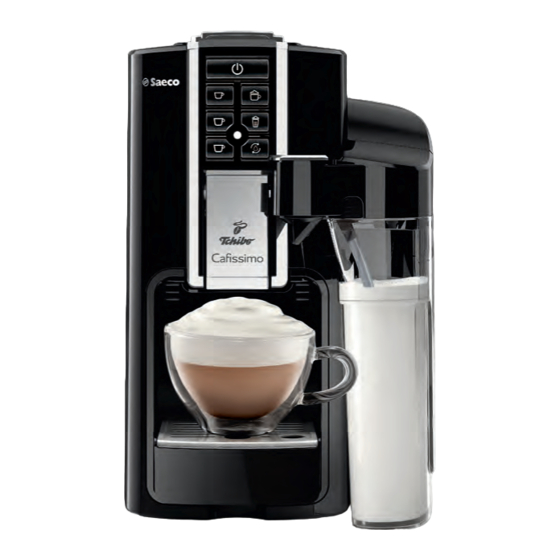
- Page 25 The features of your Cafissimo LATTE at a glance Easy to use Coffee specialties at the touch of a button - quick and easy operation. Height-adjustable coffee spout Movable drip tray and adjustable coffee spout for optimal preparation. Capsule container With automatic capsule ejection for convenient capsule disposal.
- Page 26 At a glance Control panel in detail - function of buttons Cappuccino Espresso Caffè Crema Frothed Milk Rinse milk circuit Filter coffee Warning indicator Capsule compartment Control panel Removable water tank Adjustable coffee spout Inside: Used capsule drawer Removable milk carafe Adjustable - and removable Ideal for storing in the drip tray...
- Page 27 HD8603 TC. No.: 301239 TC. No.: 300082 TC. No.: 300079 TC. No.: 301241 TC. No.: 300084 TC. No.: 300081 OPERATING INSTRUCTIONS READ THE INSTRUCTIONS CAREFULLY table of contents ImPOrTanT..............18 Frothed milk ....................24 Adjusting the amount of frothed milk ............25 Safety instructions ..................
-
Page 28: Important
• 18 • or plastic finishes and are treated with a ImPOrTanT variety of substances. Some of these prod- safety instructions ucts may contain substances that react This machine is equipped with safety features. adversely with the rubber feet and soften Nevertheless, read the safety instructions care- them. -
Page 29: Caution
• Only insert Tchibo Cafissimo capsules into the capsule compartment. Other objects may damage the machine if inserted. In this case, repair is not covered by your guarantee! •... -
Page 30: Product Overview
• 20 • PrOduct OVerVieW On/Off button (Green) Espresso button Cappuccino button (White) (White) Caffè crema button Frothed milk button (Yellow) (White) Filter coffee button Rinse milk circuit button (Blue) (Orange) Warning indicator light (Orange) Water tank lid Capsule compartment opening lever Removable water tank Capsule compartment Steam outlets... -
Page 31: Installation
• 21 • installatiOn 1- Rinse the tank and fill it again with fresh drinking water. Preparing for use 2- Place a mug below the dispensing Remove the coffee machine from the packaging and position it spout as shown in the figure. in a suitable place. -
Page 32: Brewing Coffee
• 22 • Cup for Filter coffee or Cappuccino : dispensing spout raised and tray in the outer position. Fig.1 Fig.2 Fig.3 Glass for Frothed milk : dispensing spout 1- Place a small cup, large cup or glass underneath the coffee raised and tray in the inner position. -
Page 33: Restoring Preset Quantities
• 23 • To make a good quality cappuccino, use cold milk Espresso approx. 40ml (~5 °C / 41 °F) with a fat content of at least 1.5 %. Caffè crema approx. 125ml Filter coffee approx. 125ml Whole milk or skimmed milk may also be used depending on individual taste. -
Page 34: Cappuccino / Frothed Milk / Latte Macchiato
• 24 • caPPuccinO / frOthed MilK / 2- Insert the carafe into the machine and ensure that the milk is latte MacchiatO above the MIN level. 3- Press and hold the Cappuccino button for 3 seconds until it Warning! dispensing may be preceded by small jets flashes in brief intervals. -
Page 35: Adjusting The Amount Of Frothed Milk
• 25 • latte macchiato 7- When it has finished warming up, the machine dispenses the frothed milk directly into the glass. The machine will stop dis- Before dispensing the Latte macchiato, check that pensing when it reaches the preset quantity. The dispensing the On/Off button and beverage buttons are process can be stopped early by pressing the Frothed milk but-... -
Page 36: Rinsing The Milk Circuit
• 26 • drip tray and used capsule drawer 13- Lift the lever to eject the used capsule into the used capsule drawer. The used capsule drawer must be emptied after approximately every 14- Remove the cup, mug or glass from the grill. 8-10 coffees brewed. -
Page 37: Water Tank
• 27 • Weekly cleaning of the milk carafe 8- Once everything has been washed and dried, reinsert the used capsule The milk carafe must be cleaned weekly if used. This cleaning - in drawer. addition to the normal rinse - is to be performed after preparing any product with milk. -
Page 38: Monthly Cleaning Of The Milk Carafe
• 28 • Monthly cleaning of the milk carafe 10- Remove the dispensing spout from the fitting. In order to keep the entire circuit free of milk residue and to guarantee the best and long-lasting performance of the carafe, we advise performing a monthly cleaning cy- cle with ''Saeco Milk Circuit Cleaner'' , which is sold separately. -
Page 39: Descaling
• 29 • The machine must not be exposed to temperatures during descaling, the On/Off button (green) will lower than 0°C as the water in the circuits may freeze not operate. If the power cord is removed, the machine (even if the tank has been emptied). will continue the descaling cycle from the phase in which it was interrupted the next time it is turned on. -
Page 40: Machine Warning Lights
• 30 • Machine WarninG liGht Waste disPOsal - slow flashing Pursuant to directive 2012/19/Ue on electrical and electronic The machine is in the warm-up phase. equipment waste (Weee), and specifically annex IX: The icon of the crossed-out wheeled bin on the appliance or its packaging indicates that the product must be disposed of sepa- rately from other waste at the end of its... -
Page 41: Troubleshooting
• 31 • trOuBleshOOtinG machine actions Causes solutions The machine does not turn on. The machine is not connected to the mains supply. Connect the machine to the mains supply. Contact the authorized service centre. The machine needs a lot of time to warm The appliance is full of limescale. -
Page 42: Authorized Service Centres And Guarantee
Please note that that this guarantee does not restrict statu- the guarantee is that all claims must be accompanied by tory warranty rights. proof of purchase from Tchibo or from an authorised SAECO distribution partner. You can contact the Cafissimo service team at: E-mail: cafissimo-service@tchibo.de... - Page 47 HD8603 TC. Nr: 301239 TC. Nr: 300082 TC. Nr: 300079 TC. Nr: 301241 TC. Nr: 300084 TC. Nr: 300081 INSTRUKCJA OBSŁUGI NALEŻY UWAŻNIE PRZECZYTAĆ INSTRUKCJĘ spIs treścI WaŻne .................34 Spienione mleko ..................40 Ustawienie ilości spienionego mleka w filiżance ........41 Wskazówki dotyczące bezpieczeństwa ............
-
Page 48: Ważne
• 34 • dzenia bez nadzoru. WaŻne • Urządzenie jest wyposażone w przeciwpo- Wskazówki dotyczące bezpieczeństwa ślizgowe nóżki. Powierzchnie robocze są Ekspres jest wyposażony w urządzenia zabezpie- często wykończone farbą lub tworzywem czające. Jednakże, należy dokładnie zapoznać się sztucznym i są poddawane działaniu róż- z instrukcjami dotyczącymi bezpieczeństwa opi- nych substancji. -
Page 49: Ostrzeżenia
To urządzenie jest zgodne z europejską dyrek- • Do komory na kapsułki należy wkładać tywą 2012/19/UE w sprawie zużytego sprzętu wyłącznie kapsułki Tchibo Cafissimo. Inne elektrycznego i elektronicznego oraz z eu- przedmioty włożone do komory mogą ropejską dyrektywą 2011/65/UE w sprawie uszkodzić... -
Page 50: Przegląd Produktu
• 36 • PrZeGląd PrOduKtu Przycisk ON/OFF (zielony) Przycisk dozowania Espresso Przycisk dozowania Cappuccino (biały) (biały) Przycisk dozowania Caffè crema Przycisk dozowania Spienionego mleka (żółty) (biały) Przycisk dozowania Kawy filtrowanej Przycisk płukania obiegu mleka (niebieski) (pomarańczowy) Kontrolka ostrzegawcza (pomarańczowa) Pokrywa pojemnika na wodę Dźwignia do otwierania komory na kapsułkę... -
Page 51: Przygotowanie Do Użytkowania
• 37 • PrZyGOtOWanie dO użytKOWania 1- Przepłukać pojemnik i napełnić go świeżą wodą pitną. czynności wstępne 2- Pod dozownikiem kawy ustawić fili- Wyjąć ekspres do kawy z opakowania i ustawić w odpowiednim żankę, zgodnie z rysunkiem. miejscu. Pierwsze włączenie 3- Wcisnąć... -
Page 52: Przyrządzanie Kawy
• 38 • Kubek do kawy filtrowanej lub cap- puccino : dozownik wysoko a tacka w pozycji zewnętrznej. rys. 1 rys. 2 rys. 3 Szklanka do spienionego mleka 1- Filiżankę, kubek lub szklankę należy ustawić pod dozownikiem dozownik wysoko a tacka w pozycji we- kawy jak podano w sekcji “Ustawienie wysokości dozowania”. -
Page 53: Przywrócenie Ustawień Domyślnych
• 39 • Używać zimnego mleka (~5°C/41°F) o zawartości Espresso około 40 ml tłuszczu wynoszącej przynajmniej 1,5% w celu uzy- Caffè crema około 125 ml Kawa filtrowana około 125 ml skania dobrej jakości cappuccino. można użyć pełnego oraz odtłuszczonego mleka, w zależności od preferencji. Ilość... -
Page 54: Cappuccino / Spienione Mleko / Latte Macchiato
• 40 • caPPuccinO / sPieniOne MleKO / 2- Włożyć dzbanek do urządzenia i upewnić się, że poziom mleka latte MacchiatO jest wyższy niż MIN. 3- Przycisnąć i przytrzymać przycisk Cappuccino przez 3 se- Uwaga! na początku mogą wystąpić krótkie wytryski kundy, dopóki nie zacznie szybko migać... -
Page 55: Ustawienie Ilości Spienionego Mleka W Filiżance
• 41 • latte macchiato 6- Przycisk Spienione mleko miga; urządzenie się nagrzewa. Przed przyrządzeniem Latte macchiato należy spraw- 7- Po nagrzaniu się urządzenie dozuje spienione mleko bezpośred- dzić, czy przycisk On/Off i przyciski napojów nio do szklanki. Urządzenie kończy przyrządzanie po osiągnięciu świecą... -
Page 56: Płukanie Obiegu Mleka
• 42 • tacka ociekowa i pojemnik na zużyte kapsułki 13- Podnieść dźwignię, aby wyrzucić zużytą kapsułkę do odpowied- niego pojemnika na zużyte kapsułki. Po około 8-10 cyklach przyrządzania kawy należy opróżnić pojemnik 14- Zdjąć filiżankę, kubek lub szklankę z kratki. na zużyte kapsułki. -
Page 57: Pojemnik Na Wodę
• 43 • cotygodniowe czyszczenie dzbanka na mleko 8- Gdy całość została umyta i wysuszona, ponownie włożyć pojemnik na zużyte Jeśli używa się dzbanka na mleko, należy go czyścić co tydzień. To kapsułki. czyszczenie powinno być wykonywane poza normalnym płukaniem wymaganym po dozowaniu każdego produktu z mlekiem. -
Page 58: Comiesięczne Czyszczenie Dzbanka Na Mleko
• 44 • comiesięczne czyszczenie dzbanka na mleko 10- wyjąć dozownik z łącznika; Aby cały obieg mleka utrzymać w czystości i zapewnić doskonałe działanie dzbanka wraz z upływem czasu, zaleca się przepro- wadzić cykl czyszczenia co miesiąc stosując środek o nazwie “Saeco Milk Circuit Cle- aner”... -
Page 59: Odkamienianie
• 45 • 14- Wyjąć i umyć dzbanek na mleko zgodnie z opisem w sekcji “Coty- 9- Rozpoczęcie procesu urządzenie wskazuje za pomocą kontrolki godniowe czyszczenie dzbanka na mleko”. (pomarańczowa) świecącej się światłem ciągłym; również przycisk Espresso (biały) świeci się wskazując pierwszą fazę odkamieniania. -
Page 60: Sygnały Urządzenia
• 46 • syGnały urZądZenia utyliZacja - Powolne miganie Zgodnie z dyrektywą 2012/19/Ue w sprawie zużytego sprzętu Urządzenie się nagrzewa. elektrycznego i elektronicznego (Weee), w szczególności załącznikiem IX: Symbol przekreślonego kosza na śmieci na urządzeniu lub na opakowaniu oznacza, że po upływie okresu użytkowania ten produkt powinien być... -
Page 61: Rozwiązywanie Problemów
• 47 • rOZWiąZyWanie PrOBleMóW Problemy Przyczyny rozwiązania Urządzenie się nie włącza. Urządzenie nie jest przyłączone do sieci elektrycz- Przyłączyć urządzenie do sieci elektrycznej. nej. Skontaktować się z Linią Obsługi Klienta Cafissimo. Urządzenie nagrzewa się bardzo długo. Urządzenie zawiera dużo kamienia. Odkamienić... -
Page 62: Centra Serwisowe I Gwarancja
Warunkiem uznania rękojmi. gwarancji jest przedłożenie dowodu zakupu produktu w Linia Obsługi Klienta Tchibo lub u autoryzowanego partnera handlowego SAECO. W przypadku stwierdzenia jakichkolwiek wad produktu, prosimy najpierw o kontakt z naszą Linią Obsługi Klienta Polska Cafissimo. - Page 63 serVICe-sCHeCK Bitte diesen Scheck in Blockschrift ausfüllen und mit dem Artikel einsenden. (Die Produktnummer Ihrer Cafissimo finden Sie im Gerät. Nehmen artikelnummer: Sie den Kapselbehälter heraus, um die Nummer zu sehen.) (bitte ausfüllen) Name Liegt kein Garantiefall vor: (bitte ankreuzen) Straße, Nr.
- Page 64 serVICe FOrm Please fill in the form in block capitals and forward it together with the product. Product (You can find your Cafissimo machine’s product number inside number: the machine. You have to take the capsule container out in order (please fill in) to see it.) Name...
- Page 65 KUPOn serWIsOWY Prosimy wypełnić kupon drukowanymi literami i dołączyć go do produktu. numer (Numer produktu urządzenia Cafissimo można znaleźć wewnątrz artykułu: urządzenia. W tym celu należy wyjąć pojemnik na zużyte kapsułki.) (prosimy wypełnić) Imię i nazwisko Jeżeli usterka nie jest objęta gwarancją: (prosimy zakreślić) Ulica, numer...
Need help?
Do you have a question about the Cafissimo LATTE HD8603 and is the answer not in the manual?
Questions and answers