
Related Manuals for TurboChef 2020


Summary of Contents for TurboChef 2020
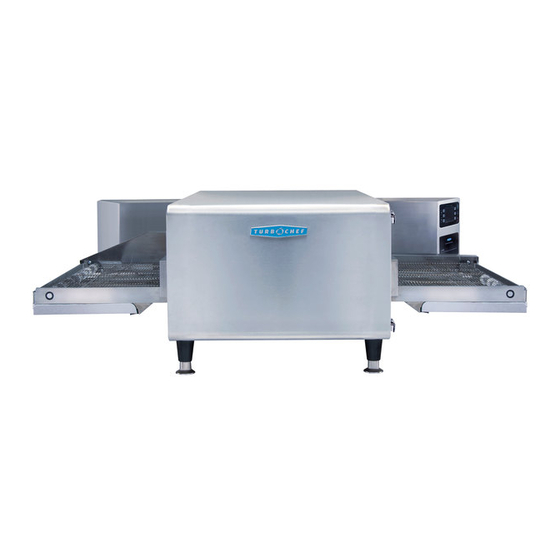
- Page 1 Accelerating the World of Cooking Service Manual 2 0 2 0 F O R T H E T U R B O C H E F H I G H C O N V E Y O R O V E N ©...
- Page 3 For further information, call 800.90TURBO +1 214.379.6000...
- Page 4 The information contained in this manual is important for the proper installation, use, maintenance, and repair of this oven. Follow these procedures and instructions to help ensure satisfactory baking results and years of trouble-free service. Errors – descriptive, typographic, or pictorial – are subject to correction. Specifications are subject to change without notice.
-
Page 5: Table Of Contents
Table of Contents Safety Information Important Safety Information – Please Read First General Safety Information Reducing Fire Risk Preventing Oven Damage Grounding Instructions Power Cord Replacement Specifications and installation Dimensions Electrical Specifications Packaging Certifications Oven Construction Installation Instructions Delivery and Initial Inspection Lifting the Oven Oven Location and Placement Stacking Ovens... - Page 6 Erasing Oven Settings Viewing the Serial Number Oven Systems The Control System Control Board Display EMI Filter Fuses High-Limit Thermostat Keypad Power Supply - 24VDC Relays, K6 (Heaters) and K7 (Conveyor Direction) Relay, Solid State - K5/K4 Heaters Smart Card Reader Speaker Thermostats - 120ºF (Close on Rise) Wire Harness...
-
Page 7: General Safety Information
Important Safety Information – Please Read First Improper installation, adjustment, alteration, service, or maintenance of this equipment can cause property damage, injury, or death. Thoroughly read the installation, operating, and maintenance instructions before installing or servicing this equipment. Strictly adhere to the following safety information to reduce the risk of: Damage to the oven Damage to property near the oven... -
Page 8: Safety Information
S A F E T Y I N F O R MAT I O N Preventing Oven Damage When servicing this appliance, do not tear insulation to get to components. Rather, find the edge of the insulation and remove the tape that holds it in place. Clean the oven daily. -
Page 9: Specifications And Installation
Specifications and Installation... -
Page 11: Dimensions
8.5” (216 mm) 35.7” (907 mm) Figure 1: Oven Dimensions - Side 60.1” (1527 mm) with extensions Figure 2: Oven Dimensions - Top 48.3” (1227 mm) 13.0” (330 mm) Figure 3: Oven Dimensions - Front (Single) 13.0” (330 mm) 30.0” (762 mm) 13.0”... -
Page 12: Packaging
- Cool to touch covers and panels - Stainless steel interior - 20-inch-wide cook chamber Installation Instructions The TurboChef HhC 2020 Conveyor Oven is designed and certified for safe operation when installed in accordance with local and/or national codes. It is the owner and/or installer's responsibility to comply with any codes that may exist. -
Page 13: Stacking Ovens
WARNING: DO NOT use this appliance with out the legs installed. When stacking, the legs must be installed on the bottom oven only. Stacking Ovens WARNING: Make sure all HhC 2020 ovens are unplugged before stacking. WARNING: DO NOT stack ovens more than 3 high. -
Page 14: Installation Near Open Heat Source
S P E C I F I C AT I O N S A N D I N S TA L L AT I O N Installation Near Open Heat Source See Figure 7. When placing a TurboChef oven near an open heat source, strictly adhere to the following: - If the oven is being placed near a grill or stove, a divider must exist between the oven and the... -
Page 15: Cleaning - Daily And Weekly
Cleaning - Daily and Weekly... -
Page 17: Daily Cleaning Instructions
Daily Cleaning Instructions = Wash, rinse, sanitize. (Use only TurboChef- approved cleaner, part number 103180). WARNING: Always disconnect power before cleaning or servicing the oven. WARNING: DO NOT attempt to clean the oven until it has cooled (screen reads “Oven Off ”). WARNING: DO NOT use a water jet when cleaning the oven. -
Page 18: Weekly Cleaning Instructions
C L E A N I N G Weekly Cleaning Instructions = Wash, rinse, sanitize. (Use only TurboChef-approved cleaner, part number 103180). WARNING: Always disconnect power before cleaning or servicing the oven. WARNING: DO NOT attempt to clean the oven until it has cooled (screen reads “Oven Off ”). WARNING: DO NOT use a water jet when cleaning the oven. - Page 19 Step 3: Remove Inner Oven Components Step 4: Clean Oven Components Replace lters if damaged or torn.
- Page 20 C L E A N I N G Step 5: Replace Oven Components Step 5: Reinstall Oven Components Latch Step 6: Verify Chain Tension Acceptable - Chain (A) is tight and easily clears crumb tray holder (B) Call service to have link removed - Chain (A) is loose and risks contact with crumb tray holder (B) Step 7: Ready the Oven for Use See detail below.
-
Page 21: Standard Oven Operation
Standard Oven Operation... -
Page 23: Oven Controls
Figure 8: Oven Controls Oven Controls Figure 8. 1. Display The display shows current oven operation and/or user programming information. 2. Soft Keys Six soft keys are on the oven controls, three on the left (L1, L2, L3, where L1 = top) and three on the right (R1, R2, R3, where R1 = top). -
Page 24: Cooking A Product
S TA N DA R D O V E N O P E R AT I O N BREAKFAST DINNER OVEN OFF LUNCH DESSERT BREAKFAST DINNER 5:00 2:00 3:20 4:00 BELT SPEED 2:00 2:30 3:00 2:45 LUNCH DESSERT BREAKFAST TOP AIR 60 % WARMUP BELT F 5:00... - Page 25 Mode 3: Warming Mode during which the oven warms to the preset cooking temperature defined by the cooking profile that was selected. Happens When... - A selection is made from 2, and the oven’s MODE temperature at the beginning of warmup was not within (less than) 25°F (14°C) of the oven’s set temperature.
-
Page 26: Editing A Cooking Profile
S TA N DA R D O V E N O P E R AT I O N Editing a Cooking Profile To edit a cooking profile, the oven must be in the , and the full edit or flex option COOKING MODE must be enabled for each option you want to edit. -
Page 27: Adjusting The Belt Speed
Adjusting the Belt Speed PROFILE 1 TOP AIR 80 % The High h Conveyor Oven can accommodate BELT R either one or two conveyor belts. The oven will 10:00 automatically detect the number of conveyor belts installed and display the option to change the speed of each conveyor belt independently. - Page 28 S TA N DA R D O V E N O P E R AT I O N This page intentionally left blank.
-
Page 29: Oven Modes
Oven Modes... -
Page 31: Config Mode
Config Mode (Figure 12) serves four main CONFIG MODE purposes: 1. To access the smart card screen. 2. To access the fault count screen. 3. To access the SETUP MODE 4. To access the (service use only). TEST MODE To access the , press the up key from CONFIG MODE OVEN OFF MODE... -
Page 32: Changing The Display Temperature
O V E N M O D E S Changing the Display Temperature The oven can display the temperature in either Celsius or Fahrenheit units. To change the display temperature, press L1 in Edit Modes Select Screen The edit modes select screen (Figure 19) allows the user to switch between full edit, rigid, and flex for profile name, belt speed, temperature, and % air. -
Page 33: Test Mode
L1 to access the heat control screen (Figure 24). NOTE: This mode is intended for setting gas pressures on other TurboChef conveyor ovens. Even though the HhC 2020 is electric, this mode can be used to energize the heaters to verify proper operation and readings. -
Page 34: Accessing The Belt Control Screen
O V E N M O D E S Accessing the Belt Control Screen From screen 1 (Figure 21, page 17), TEST MODE press L2 to access the belt control screen (Figure 25). Use this mode to verify the belts work correctly. -
Page 35: Entering A New Serial Number
Bottom Display Line The bottom display line shows enabled inputs and outputs on the control board. The numbers 1-10 indicate the different bottom display line, which are explained below. NOTE: A “-” or “_” displayed on the bottom display line denotes values that are in the off mode or closed. -
Page 36: Initiating A Burn-In Test
O V E N M O D E S Initiating a Burn-In Test NOTE: Burn-in tests are for manufacturing use only. DO NOT initiate a burn-in test unless expressly instructed by TurboChef. To initiate a burn-in test, Press L2 (Figure 22, page 17) on screen 2 of the The burn-in test (Figure 28) runs the oven for 45 minutes to ensure correct oven operation. -
Page 37: Oven Systems
Oven Systems... -
Page 39: The Control System
The Control System This section contains information about the following components: - Control Board - Display - EMI Filter - Fuses - High-limit Thermostat - Keypad - Power Supply, 24VDC - Relay (K6 - Heaters) - Relay (K7 - Conveyor Direction) - Relay, Solid State - RTD - Smart Card Reader... -
Page 40: Relay, Solid State - K5/K4 Heaters
O V E N S YS T E M S Testing Procedure 1. Disconnect line voltage to the unit. 2. Take a resistance reading of the coil. 3. If coil resistance is correct (585 W): a) Apply line voltage to the unit. b) Check for 24 VDC at the coil of the relay when the unit is calling for heat. -
Page 41: The Conveyor System
The control board uses these pulses to determine the output DC voltage to the CMSC. Single-belt HhC 2020 ovens contain one gear drive. Dual-belt ovens contains two gear drives. Testing Procedure 1. Disconnect line voltage from the unit. -
Page 42: The Convection System
O V E N S YS T E M S Accessing Parameters WARNING: DO NOT perform this procedure unless instructed by TurboChef. Changing the parameters to other than those preset by TurboChef can damage critical oven components. NOTE: “Motor Rated Speed” (07) is RPM of motor before gearbox, not after. -
Page 43: Troubleshooting
Troubleshooting... -
Page 45: Overview Of Troubleshooting
Overview of Troubleshooting This section contains information on the following: - Fault code descriptions - Fault code troubleshooting - Non-fault code troubleshooting Fault Code Descriptions Fault codes are logged in a fault counter (page 15) for troubleshooting. Upon completing the service call and restoring successful operation of the oven, the technician should clear all faults (see page 20). - Page 46 T R O U B L E S H O OT I N G Fault Code and Description When Active F1: Blower Failure F2: Low Temp During Cook F4: Emergency Stop F5: CC Over Temp F6: EC Over Temp F7: RTD Failure F8: High Limit Tripped F9: Belt Fault Figure 35: Fault Code Table...
-
Page 47: Fault Code Troubleshooting
Fault Code Troubleshooting From , you can test separate oven components to help diagnose an issue. To access TEST MODE , see page 17. MODE Open the Right Open Left End Bell. End Bell. Is a fault code Is a fault code present on the present on the BMSC? - Page 48 T R O U B L E S H O OT I N G Blower Motor Troubleshooting NOTE: Continued from page 27. 1. Verify motor spins freely. - Motor seized: Unplug oven and correct obstruction or replace motor. - Motor spins freely: Verify motor windings (see Figure 36, page 27). 2.
- Page 49 Troubleshooting: F2: LOW COOK TEMP Restart the oven, access the both the top and bottom blowers. Are the status indi- cators at location 6, 7, 8, and 9 present (pages 18-19)? Troubleshoot the Are the nozzles and plenums blowers (pages correctly installed? 27-28).
- Page 50 T R O U B L E S H O OT I N G Is an F1 fault present? Troubleshoot F1 fault (pages 27-28). Troubleshooting: F5: CC OVER TEMP Is anything obstructing regular airflow into the cook chamber? Place the oven in TEST and test the heaters MODE...
- Page 51 Troubleshooting: F6: EC OVER TEMP Are the air filters on the back of the oven clean? Is the oven hot? Open the left and right end bells. Are the cooling fans running? Check for -Dirt or debris in the cooling fan blades. -A heat source near the filter.
- Page 52 T R O U B L E S H O OT I N G Replace the RTD (page A-8). Reset and determine why it tripped - over temp, blower failure, etc. Check if the high limit probe or RTD is damaged or defec- tive, replace if needed (page A-8).
- Page 53 F9: BELT FAULT (Total Belt Run Failure) Remove obstruction or replace/repair the conveyor and restart the oven. Is the F9 fault code still present? Open the right end bell (also open the left end bell if split belt conveyor). Is the wiring correct from the conveyor motor Correct wiring (pages to the conveyor motor controller to the...
-
Page 54: Non-Fault Code Troubleshooting
T R O U B L E S H O OT I N G Non-Fault Code Troubleshooting This section provides troubleshooting tips for issues that may occur independently of an oven fault. Does the oven have room to ventilate (not tightly enclosed by other appliances or fixtures)? Is the air filter dirty and/or... - Page 55 Are there any fault Is the food item in the codes present correct starting state (page 25)? (e.g., frozen, fresh, etc.)? Troubleshoot the fault(s) using the steps on pages 27-33. Are the conveyor motors, CMSCs, blowers, BMSCs, and heaters working correctly (pages 23-24)? Is the wire harness properly connected (pages 37-40)? Is the food item being prepared correctly...
- Page 56 T R O U B L E S H O OT I N G Is wiring from the control board to the display (including the ribbon cable) OK? Is 5 VDC present on pin 1 of the J3 connector? (page 39) Replace the display and ribbon cable.
-
Page 57: Schematics
Schematics... - Page 59 (CON-7002) (HHC-6630-2) (HHC-4120) (NGC-3023) (HHC-6517-2) (HHC-6630-2) (HHC-4120) (102075) (TC3-0433) (NGC-3005) BACK HCT-4161 208 VAC FRONT HCT-4162 208 VAC...
-
Page 60: Pinout
208 VAC (101279) B-17 (RED) C-21 (WHT) A32 A22 A12 (NGC-3005) B32 B22 B12 SIGNATURE DATE DRAWN TITLE CHECKED SCHEMATIC, HHC-2020 6/4/08 JKPIII VFD DISPLAY, ENGINEER 3PH, WYE, 380-415 VAC, 60 HZ/50 PRODUCTION GENERAL SIZE CODE IDENT NO DRAWING NO DASH... -
Page 62: Cmsc Parameters
S C H E MAT I C S CMSC PARAMETERS... -
Page 63: Appendix A - Replacing Oven Components
Appendix - Replacing Oven Components... - Page 65 Replacing Oven Components WARNING: Before removing or replacing any oven component, thoroughly read the safety instructions found at the front of this manual and Oven Systems (pages 21-24). Adhere to all precautions and warnings outlined in these sections, as failure to do so could result in serious injury or death.
- Page 66 A- 2 A P P E N D I X - R E P L AC I N G O V E N CO M P O N E N TS Part Details... Item Heater Cover Jetplate Keypad Plenum Power Cord Power Cord Retainer Power Supply Power Supply Bracket...
- Page 67 A- 3 This page intentionally left blank.
-
Page 68: Replacing Items - Outside Of End Bells
A- 4 A P P E N D I X - R E P L AC I N G O V E N CO M P O N E N TS Replacing Items - Outside of End Bells WARNING: Before removing or replacing any oven component, thoroughly read the safety instructions found at the front of this manual and Oven Systems (pages 21-24). - Page 69 Item Part Number Air Filter HCT-4067 Back Panel HCT-4105 Chain, Conveyor HCT-4143 Chainguard, Left HCT-4038 Chainguard, Right HCT-4041 Channel HCT-4076 Conveyor, Single HCT-4140 Conveyor, Split Belt 50/50 HCT-4096 Conveyor, Split Belt 70/30 HCT-4115 Cooling Fan TC3-0433 Crumb Tray HCT-4045 Eyelid HCT-4028 Finger Guard 100086...
-
Page 70: Replacing Items - Left End Bell
A- 6 A P P E N D I X - R E P L AC I N G O V E N CO M P O N E N TS Replacing Items - Left End Bell WARNING: Before removing or replacing any oven component, thoroughly read the safety instructions found at the front of this manual and Oven Systems (pages 21-24). -
Page 71: Blower Motor Controller
Item Part Number Blower Motor Assembly HCT-4205 Blower Motor Controller 100443 Blower Wheel 104107 Conveyor Controller HHC-6630-2 Conveyor Motor HCT-4120 Distribution Block HCT-4141 EMI Filter 100539 Fuse, 20 Amp, Class CC 100599 Fuse Block 103548 Heat Slinger 102708 Relay, Mechanical, K6 101279 Relay, Solid State, K4/K5 NGC-3005... -
Page 72: Replacing Items - Right End Bell
A- 8 A P P E N D I X - R E P L AC I N G O V E N CO M P O N E N TS Replacing Items - Right End Bell WARNING: Before removing or replacing any oven component, thoroughly read the safety instructions found at the front of this manual and Oven Systems (pages 21-24). - Page 73 Item Part Number Blower Motor Assembly HCT-4205 Blower Motor Controller 100443 Cable, Display, Power, 2-Pin 100193 Cable, Display, Ribbon 100184 Cable, Smart Card Reader 100182 Control Board CON-7002 Conveyor Controller 103581 Conveyor Motor HCT-4120 Display, VFD NGC-3023 EMI Filter 100539 Power Supply 101211 Power Supply Bracket...
- Page 76 For service or information: W I T H I N N O RT H A M E R I C A C A L L Customer Service at 800.90 O U T S I D E N O RT H A M E R I C A C A L L +1 214-379-6000 or Your Authorized Distributor Accelerating the World of Cooking Part Number: HCT-4202/Revision B/July 2008...
Need help?
Do you have a question about the 2020 and is the answer not in the manual?
Questions and answers