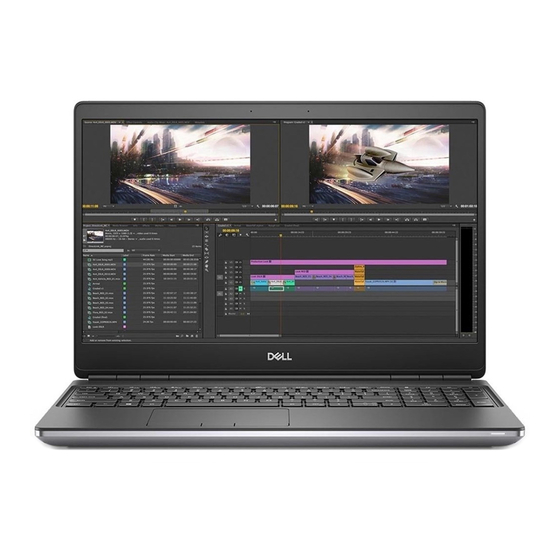
Dell Precision 7550 Setup And Specifications Manual
Hide thumbs
Also See for Precision 7550:
- Service manual (102 pages) ,
- Connection manual (10 pages) ,
- Quick start manual (18 pages)

Related Manuals for Dell Precision 7550


Summary of Contents for Dell Precision 7550
- Page 1 Precision 7550 Setup and specifications guide Regulatory Model: P93F Regulatory Type: P93F001 May 2020 Rev. A00...
- Page 2 A WARNING indicates a potential for property damage, personal injury, or death. © 2020 Dell Inc. or its subsidiaries. All rights reserved. Dell, EMC, and other trademarks are trademarks of Dell Inc. or its subsidiaries. Other trademarks may be trademarks of their respective owners.
-
Page 3: Table Of Contents
Contents 1 Set up your computer........................5 2 Chassis overview..........................7 Display view.................................... 7 Right view....................................9 Left view....................................10 Palmrest view..................................11 Back view....................................12 Bottom view..................................13 Keyboard shortcuts................................13 3 Technical specifications......................15 Processors.................................... 15 Chipset....................................15 Operating system................................. 16 Memory....................................16 Storage.................................... - Page 4 Updating BIOS on systems with BitLocker enabled....................42 Updating your system BIOS using a USB flash drive....................43 System and setup password.............................. 43 Assigning a system setup password..........................44 Deleting or changing an existing system setup password..................44 6 Getting help..........................45 Contacting Dell..................................45 Contents...
-
Page 5: Set Up Your Computer
Steps 1. Connect the power cable. 2. Press the power button. 3. Finish Windows system setup. Follow the on-screen instructions to complete the setup. When setting up, Dell recommends that you: • Connect to a network for Windows updates. NOTE: If connecting to a secured wireless network, enter the password for the wireless network access when prompted. - Page 6 If connected to the internet, sign-in with or create a Microsoft account. If not connected to the internet, create an offline account. • On the Support and Protection screen, enter your contact details. 4. Locate and use Dell apps from the Windows Start menu—Recommended. Table 1. Locate Dell apps Dell apps...
-
Page 7: Chassis Overview
Chassis overview Topics: • Display view • Right view • Left view • Palmrest view • Back view • Bottom view • Keyboard shortcuts Display view Display view with RGB camera 1. Microphone 2. Camera 3. Camera LED 4. Microphone 5. - Page 8 Display view with IR camera 1. Microphone 2. IR camera sensor 3. Camera 4. Camera LED 5. Microphone 6. Proximity sensor 7. Display 8. Battery status light Chassis overview...
-
Page 9: Right View
Right view 1. SD card reader 2. Headset/Microphone port 3. USB 3.2 Gen 1 Type-A port 4. USB 3.2 Gen 1 Type-A port with PowerShare 5. Wedge-shaped lock slot Chassis overview... -
Page 10: Left View
Left view 1. USB 3.2 Gen 2 Type-C Thunderbolt 3 port 2. USB 3.2 Gen 2 Type-C Thunderbolt 3 port 3. Smart card-reader (optional) Chassis overview... -
Page 11: Palmrest View
Palmrest view 1. Camera shutter 2. Power button with optional fingerprint reader 3. Touchpad Chassis overview... -
Page 12: Back View
Back view 1. Mini DisplayPort 1.4 2. HDMI 2.0 port 3. Network port 4. Power adapter port Chassis overview... -
Page 13: Bottom View
Bottom view 1. Service tag label 2. Fan vent Keyboard shortcuts NOTE: Keyboard characters may differ depending on the keyboard language configuration. Keys that are used for shortcuts remain the same across all language configurations. Table 2. List of keyboard shortcut keys Hot keys Function Fn+ESC - Fn Lock... - Page 14 Table 2. List of keyboard shortcut keys(continued) Hot keys Function Fn+F6—Scroll lock Used as Scroll Lock key. Fn+F8 – LCD and Projector display Determines video output to LCD and external Video devices when attached and displays present. Fn+F9 – Search Mimics the Windows key + F keystroke to open Windows Search dialog box.
-
Page 15: Technical Specifications
Technical specifications Processors Table 3. Processors Processors Wattage Core Threa Speed Cache Integrated graphics count count 10th Generation 45 W 2.60 GHz to 4.60 8 MB Intel UHD Graphics 630 Intel Core i5-10400H, vPro 10th Generation 45 W 2.60 GHz to 5.0 12 MB Intel UHD Graphics 630 Intel Core... -
Page 16: Operating System
Operating system • Windows 10 Home (64-bit) • Windows 10 Professional (64-bit) • Windows 10 Enterprise (64-bit) • Windows 10 Pro Education (64-bit) • Windows 10 Pro China (64-bit) • Windows 10 Pro for Workstations (64-bit) • RHEL 8.3 • Ubuntu 18.04 SP1 Memory Table 5. -
Page 17: Storage
Table 5. Memory specifications(continued) Description Values • 16 GB, 1 x 16 GB, DDR4, 3200 MHz SuperSpeed, Non-ECC, SODIMM • 16 GB, 2 x 8 GB, DDR4, 3200 MHz SuperSpeed, Non-ECC, SODIMM • 32 GB, 4 x 8 GB, DDR4, 3200 MHz SuperSpeed, Non-ECC, SODIMM Storage Your computer supports the following configurations:... -
Page 18: Graphics And Video Controller
8 GB GDDR6 NVIDIA Quadro RTX5000 mDP/HDMI/Type-C 16 GB GDDR6 Media-card reader The following table lists the media cards supported by your Precision 7550. Table 10. Media-card reader specifications Description Values Media-card type 1 SD card Media-cards supported •... - Page 19 Table 11. Ethernet specifications(continued) Description Values Transfer rate 10/100/1000 Mbps Wireless LAN module Table 12. Wireless LAN module specifications Description Values Model number Intel Wi-Fi 6 AX201 Transfer rate Up to 2400 Mbps Frequency bands supported 2.4 GHz/5 GHz Wireless standards •...
-
Page 20: Ports And Connectors
Ports and connectors Table 14. Ports and connectors Description Values External: Network 1 RJ-45 port 10/100/1000 Mbps • 1 USB 3.2 Gen 1 Type-A port • 1 USB 3.2 Gen 1 Type-A port with PowerShare • 2 USB 3.2 Gen 2 Type-C Thunderbolt 3 ports Audio 1 Universal audio Jack Video... -
Page 21: Battery
Table 15. Power adapter specifications(continued) Description Values Rated output voltage 19.50 VDC Temperature range: Operating 0°C to 40°C (32°F to 104°F) Storage -40°C to 70°C (-40°F to 158°F) Battery Table 16. Battery specifications Description Values Type 6-cell, 68 WHr, Lithium-ion, 6-cell, 95 WHr, Lithium-ion, 6-cell, 95 WHr, Lithium-ion LcL ExpressChargeBoost... -
Page 22: Dimensions And Weight
Table 16. Battery specifications(continued) Description Values Standard Charge/ Standard Charge/ Predominately AC User Predominately AC User Charge Method Charge Method • 0 - 15°C maximum allowable • 0 - 15°C maximum allowable charge time from 0 to 100% charge time from 0 to 100% RSOC is 4 hours RSOC is 4 hours •... -
Page 23: Touchpad
Dimensions: Horizontal 3.92 inches (99.50 mm ) Vertical 80 mm (3.15 in.) Fingerprint reader The following table lists the fingerprint-reader specifications of your Precision 7550. Table 20. Fingerprint reader on power button specifications Description Values Fingerprint-reader sensor technology Capacitive Fingerprint-reader sensor resolution... -
Page 24: Display
Table 21. Fingerprint reader on palmrest specifications(continued) Description Values Fingerprint-reader sensor resolution 508 dpi Fingerprint-reader sensor pixel size Display The following table lists the display specifications of your Precision 7550. Table 22. Display specifications Description Option one Option two Option three Option four... -
Page 25: Camera
74.9 degrees Infrared camera 70 degrees Security Table 24. Security Security options Precision 7550 Trusted Platform Module (TPM) 2.0 Discreet TPM 2.0 IC FIPS-140-2 Certified / TCG Certified, TCG Certificatication for TPM (Trusted Computing Group) Firmware TPM Supported Chassis lock slot and loop support... -
Page 26: Service And Support
Authentication with FIPS 140-2 Level 3 Certification • Optional Face IR camera (Windows Hello compliant) with Proximity Sensor Service and support NOTE: For more details on Dell Service Plans, see https://www.dell.com/learn/us/en/19/services/warranty-support- services. Table 25. Warranty Warranty 3 Years Hardware Service with Onsite/In-Home Service After Remote Diagnosis... - Page 27 Table 27. Computer environment(continued) Description Operating Storage Vibration (maximum) 0.66 GRMS 1.30 GRMS Shock (maximum) 110 G† 160 G† Altitude (maximum) -15.2 m to 3048 m (4.64 ft to 5518.4 ft) -15.2 m to 10668 m (4.64 ft to 19234.4 ft) * Measured using a random vibration spectrum that simulates user environment.
-
Page 28: Software
Downloading Windows drivers Steps 1. Turn on the notebook. 2. Go to Dell.com/support. 3. Click Product Support, enter the Service Tag of your notebook, and then click Submit. NOTE: If you do not have the Service Tag, use the auto detect feature or manually browse for your notebook model. -
Page 29: System Setup
Boot menu Press <F12> when the Dell logo appears to initiate a one-time boot menu with a list of the valid boot devices for the system. Diagnostics and BIOS Setup options are also included in this menu. The devices listed on the boot menu depend on the bootable devices in the system. -
Page 30: Boot Sequence
Boot Sequence Boot sequence enables you to bypass the System Setup–defined boot device order and boot directly to a specific device (for example: optical drive or hard drive). During the Power-on Self-Test (POST), when the Dell logo appears, you can: •... -
Page 31: Boot Configuration
Table 28. Overview Option Description ○ AC Adapter • Processor Information ○ Processor Type ○ Maximum Clock Speed ○ Minimum Clock Speed ○ Current Clock Speed ○ Core Count ○ Processor ID ○ Processor L2 Cache ○ Processor L3 Cache ○... -
Page 32: Integrated Devices
Table 29. Boot configuration(continued) Option Description NOTE: The system has to be in UEFI boot mode to enable Enable Secure Boot. Secure Boot Mode Changes to the Secure Boot operation mode modifies the behavior of Secure Boot to allow evaluation of UEFI driver signatures. The options are: •... -
Page 33: Storage
Storage Table 31. Storage options Option Description SATA Operation Allows you to configure the operating mode of the integrated SATA hard drive controller. The options are: • Disabled • AHCI • RAID On—By default, the RAID On option is enabled. NOTE: SATA is configured to support RAID mode. -
Page 34: Power Management
Table 33. Connection(continued) Option Description • Disabled • Enabled • Enabled with PXE - This option is enabled by default. Wireless Device Enable Allows you to enable or disable the internal wireless devices. The options are: • WLAN • Bluetooth Both the options are enabled by default. -
Page 35: Security
Support By default, the option Enable USB Wake Support is disabled. Wake on Dell USB- Allows you to connect a Dell USB-C Dock to wake the system from standby C Dock mode. By default, the option Wake on Dell USB-C Dock is enabled. -
Page 36: Password
Table 35. Security(continued) Option Description The options are: • Disabled • Enabled • Software Control—This option is enabled by default. SMM Security Mitigation Allows you to enable or disable additional UEFI SMM Security Mitigation protection. SMM Security Mitigation - By default, this option is enabled. Data Wipe on Next Boot Allows BIOS to queue up data wipe cycle for storage devices connected to the motherboard on the next reboot. -
Page 37: Update And Recovery
Table 36. Security(continued) Option Description • Enter the new password: Press Enter once you enter the new password and again press Enter to confirm the new password. Password Configuration Allows you to configure a password. Upper Case Letter When enabled, this field reinforces password must contain at least one upper capital letter. -
Page 38: System Management
BIOSConnect - By default, this option is enabled. Dell Auto OS Recovery The Auto OS Recovery threshold setup options control the automatic flow for SupportAssist System Threshold Resolution Console and for Dell OS Recovery Tool. The options are: • •... -
Page 39: Keyboard
Keyboard Table 39. Keyboard Option Description Numlock Enable Allows you to enable or disable Numlock function when the system boots. Enable Numlock This option is enabled by default. Fn Lock Options Allows you to change the function key settings. Fn Lock Mode This option is enabled by default. -
Page 40: Pre-Boot Behavior
Pre-boot behavior Table 40. Pre-boot behavior Option Description Adapter Warnings This option displays warning messages during boot when adapters with little power capacity are detected. • Enable Adapter Warnings—enabled by default Warnings and Errors This option causes the boot process to only pause when warnings and errors are detected rather than stop, prompt, and wait for user input. -
Page 41: Performance
Performance Table 42. Performance Option Description Multi Core Support This field specifies whether the process has one or all cores enabled. The default value is set to maximum number of cores. • All Cores— This option is enabled by default. •... -
Page 42: Updating The Bios In Windows
If the recovery key is not known, this can result in data loss or an unnecessary operating system reinstall. For more information about this subject, see Knowledge Article: Updating the BIOS on Dell Systems With BitLocker Enabled... -
Page 43: Updating Your System Bios Using A Usb Flash Drive
3. Insert the USB flash drive into the system that requires the BIOS update. 4. Restart the system and press F12 when the Dell splash logo appears to display the One Time Boot Menu. 5. Using arrow keys, select USB Storage Device and click Enter. -
Page 44: Assigning A System Setup Password
NOTE: System and setup password feature is disabled. Assigning a system setup password Prerequisites You can assign a new System or Admin Password only when the status is in Not Set. About this task To enter the system setup, press F2 immediately after a power-on or reboot. Steps 1. -
Page 45: Getting Help
About this task Dell provides several online and telephone-based support and service options. Availability varies by country and product, and some services may not be available in your area. To contact Dell for sales, technical support, or customer service issues: Steps 1.
Need help?
Do you have a question about the Precision 7550 and is the answer not in the manual?
Questions and answers